
Related Manuals for Check Point L-71


Summary of Contents for Check Point L-71
- Page 1 19 May 2020 CHECK POINT 1400 APPLIANCES CENTRALLY MANAGED R77.20.85 Models: L-71, L-71W, L-71WD, L-72, L-72W, L-72P Administration Guide...
- Page 2 Check Point. While every precaution has been taken in the preparation of this book, Check Point assumes no responsibility for errors or omissions. This publication and features described herein are subject to change without notice.
-
Page 3: Important Information
We recommend that you install the most recent software release to stay up-to-date with the latest functional improvements, stability fixes, security enhancements and protection against new and evolving attacks. Certifications For third party independent certification of Check Point products, see the Check Point Certifications page https://www.checkpoint.com/products-solutions/certified-check-point-solutions/. Check Point R77.20.85 For more about this release, see the R77.20.85 home page... -
Page 4: Table Of Contents
Contents Important Information ...................... 3 Check Point 1400 Appliance Overview ................7 Installation ........................8 Setting Up the Check Point Appliance ................8 Connecting the Cables ....................8 About the PoE ........................ 9 Deployment Types......................9 Predefining a Centrally Managed Deployment ............9 Small-scale Deployment Installation ................ - Page 5 Sample Configuration File ..................41 Preparing the Configuration Files ................41 Deploying the Configuration File - Initial Configuration ..........41 Deploying the Configuration File - Existing Configuration ........... 42 Viewing Configuration Logs ..................43 Troubleshooting Configuration Files ................43 Using the set property Command ................44 Appliance Configuration ....................
- Page 6 Viewing VPN Tunnels ....................112 Viewing Active Connections ..................113 Viewing Monitoring Data..................113 Viewing Reports ...................... 113 Using System Tools ....................113 SNMP ........................114 Advanced Configuration ....................115 Dynamic Routing ....................... 115 Upgrade Using a USB Drive ..................116 Upgrade Using an SD Card ..................
-
Page 7: Check Point 1400 Appliance Overview
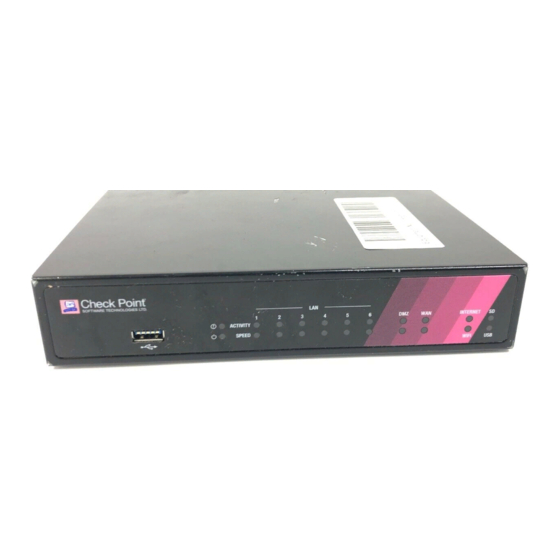
CHAPT ER 1 Check Point 1400 Appliance Overview Check Point 1400 appliances support the Check Point Software Blade architecture and provide independent, modular and centrally managed security building blocks. You can quickly enable and configure the Software Blades to meet your specific security needs. -
Page 8: Installation
..............Setting Up the Check Point Appliance 1. Remove the Check Point Appliance from the shipping carton and place it on a tabletop. 2. Identity the network interface marked as LAN1. This interface is preconfigured with the IP address 192.168.1.1. -
Page 9: About The Poe
For both deployment types, you must configure objects and other elements in SmartDashboard and in SmartProvisioning. Predefining a Centrally Managed Deployment To manage the Check Point Appliance in a centrally managed deployment, you must install a Security Management Server and SmartConsole clients that operate with the Check Point Appliance. -
Page 10: Small-Scale Deployment Installation
The Check Point Security Gateway Creation window opens. 3. Select Wizard Mode. The wizard opens to General Properties. 4. Enter a name for the Check Point Appliance object and select the hardware type for the hardware platform. Check Point 1400 Appliances Centrally Managed Administration Guide R77.20.85... - Page 11 1. Select Activate and configure software blades later. 2. Click Next. To configure blades now: 1. Select Activate and configure software blades now. 2. Select the check boxes next to the blades you want to activate and configure. Check Point 1400 Appliances Centrally Managed Administration Guide R77.20.85...
- Page 12 IPSec VPN - Make sure that the VPN community has been predefined. If it is a star community, the Check Point Appliance is added as a satellite gateway. Select a VPN community that the Gateway participates in from the Participate in a site to site community list.
-
Page 13: Defining A Gateway Cluster Object
Installation Defining a Gateway Cluster Object A Check Point Appliance Security Gateway is a group of 2 members. Each represents a separate Check Point Appliance which has High Availability software installed. ClusterXL is the Check Point clustering solution. Third party OPSEC Certified clustering products are not supported. - Page 14 To create a cluster for two new Check Point Appliance gateways: 1. Log in to SmartDashboard with your Security Management credentials. 2. From the Network Objects tree, right click Check Point and select Security Cluster > Small Office Appliance. The Check Point Security Gateway Cluster Creation dialog box opens.
- Page 15 15. Click Finish or select Edit Cluster in Advanced mode to further configure the cluster. Cluster Interface Configuration In the Cluster Interface Configuration window, you define if a network interface on the Check Point Appliance is part of the security gateway cluster. This window shows for each network interface that was configured in the Check Point Appliance.
- Page 16 Note - The procedures require some downtime. Terms used: • GW - the existing Check Point Appliance gateway object that has already established trust and has an installed policy. • Cluster - the new Check Point Appliance cluster object that you create.
-
Page 17: Creating The Security Policy
You can use security zone objects to create a generic Security Policy and reduce the amount of rules necessary in the Rule Base. This Security Policy can be applied to numerous Check Point Appliance gateways. Resolution of the security zone is done by the actual association on the Check Point Appliance gateway object in SmartDashboard. - Page 18 3. Install policy. To associate a security zone object with an interface on the gateway object: 1. In SmartDashboard, from the Network Objects tree, double-click a Check Point Appliance gateway object. 2. From Topology, select the applicable interface and click Edit.
- Page 19 Policy Installation Status (on page 19). At the end of the Install Policy process, the policy status for a Check Point Appliance that is not yet set up is "waiting for first connection." This implies that trusted communication is not yet established between the Security Management Server and the Check Point Appliance.
- Page 20 Policy installation succeeded. Succeeded Policy installation succeeded but there are verification warnings. Waiting for first connection A Check Point Appliance object is configured, but the gateway is not connected to the Security Management Server (initial trust is not established). •...
-
Page 21: Setting Server Ip Behind A 3Rd Party Nat Device
IP address. You can configure this from the First Time Configuration Wizard - Security Management Server Connection page (select Always use this IP address and enter the IP address) or from the WebUI Home > Security Management page. Check Point 1400 Appliances Centrally Managed Administration Guide R77.20.85... -
Page 22: Large-Scale Deployment Installation
Use a USB drive to quickly configure multiple appliances without the First Time Configuration Wizard. For more details, see Deploying from a USB Drive. 5. Manage the appliance settings in SmartProvisioning. Check Point 1400 Appliances Centrally Managed Administration Guide R77.20.85... -
Page 23: Defining A Smartlsm Gateway Profile For A Large-Scale Deployment
To define a single SmartLSM profile Check Point Appliance: 1. Log in to SmartDashboard with your Security Management credentials. 2. Open the Security Policy that you want to enforce on the Check Point Appliance SmartLSM Security Gateways. 3. From the Network Objects tree, right-click Check Point and select SmartLSM Profile > Small Office Appliance Gateway. -
Page 24: Deploying With Smartprovisioning
Installation To create a SmartLSM Cluster profile: 1. In SmartDashboard, from Network Objects, right-click Check Point > SmartLSM profile > Small Office Appliance Cluster. 2. In General Properties, enter a Name for the profile (for example, ClusterProfile1). 3. Select the Cluster Members tab and click Add to add the two cluster members to the profile. -
Page 25: Installing A Security Policy
Policy Installation Status (on page 19). At the end of the Install Policy process, the policy status for a Check Point Appliance that is not yet set up is "waiting for first connection." This implies that trusted communication is not yet established between the Security Management Server and the Check Point Appliance. - Page 26 Policy installation succeeded. Succeeded Policy installation succeeded but there are verification warnings. Waiting for first connection A Check Point Appliance object is configured, but the gateway is not connected to the Security Management Server (initial trust is not established). •...
- Page 27 From the status bar - Click Failed or Pending. The contents of the Policy Installation Status • window are shown filtered according to the link clicked. • From notification balloons - Click See Details in the balloon. Check Point 1400 Appliances Centrally Managed Administration Guide R77.20.85...
-
Page 28: Smartprovisioning
2. Enter an optional Comment that identifies the SmartLSM Security Gateway. 3. Click Next. More Information 1. In SmartLSM gateway, select the firmware version of the installed Check Point Appliance. 2. In Security Profile, select the relevant SmartLSM gateway profile that the SmartLSM Security Gateway is mapped to. -
Page 29: Communication Properties
VPN Properties 1. Select how to create a VPN certificate: • For a CA certificate from the Internal Check Point CA, select I wish to create a VPN Certificate from the Internal CA. • For a CA certificate from a third party (for example, if your organization already has certificates from an external CA for other devices), clear this checkbox and request the certificate from the appropriate CA server. -
Page 30: Finish
3. Click Next. Cluster Properties 1. In Version, select the firmware version for the Check Point Appliance. 2. In Security Profile, select the SmartLSM Cluster Profile that was created in SmartDashboard (in the example ClusterProfile1). 3. In Enable Provisioning, select this checkbox to enable this gateway to be managed with provisioning configurations. -
Page 31: Cluster Names
VPN Properties 1. Select how to create a VPN certificate: • For a CA certificate from the Internal Check Point CA, select I wish to create a VPN Certificate from the Internal CA. • For a CA certificate from a third party (for example, if your organization already has certificates from an external CA for other devices), clear this checkbox and request the certificate from the appropriate CA server. -
Page 32: Defining Smartlsm Gateways Using Lsm Cli
SmartProvisioning Profile to manage multiple gateways. For more information about provisioning SmartProvisioning Administration Guide profiles and creating them, see the These device settings are unique to the Check Point Appliance. They can be defined directly on the device or through the profile. Their tabs are: •... - Page 33 6. In Default SmartLSM Profile after installation, select the new SmartLSM profile of the Security Gateway (the Security Gateway version must match its SmartLSM profile's version as defined in SmartDashboard for correct policy behavior). The Security Gateway replaces its Check Point 1400 Appliances Centrally Managed Administration Guide R77.20.85...
-
Page 34: Configuring Radius
You can configure the RADIUS server (Remote Authentication Dial In User Service) that provides authentication, authorization, and accounting for the Check Point Appliance gateways. When you configure RADIUS in the Provisioning Profile, you can configure it for all gateways that reference this profile. -
Page 35: Configuring Hotspot
For more information about override profile settings, see Configuring Profile Settings (on page 36). 5. Select RADIUS is activated on device to enable RADIUS on the Check Point Appliance. 6. Click Add to add RADIUS servers that were defined in SmartDashboard, select a RADIUS server from the list and click OK. -
Page 36: Configuring A Configuration Script
Denied - Each gateway takes the settings from the profile, with no option to override the profile settings. • Mandatory - Each gateway is managed without a Provisioning Profile. 6. Click OK. Check Point 1400 Appliances Centrally Managed Administration Guide R77.20.85... - Page 37 Define a New Host List (in the Gateway window) that overrides the Provisioning Profile on this gateway Warning - If you select Use the following settings and do not enter values for a specified topic, the current settings on the device are deleted. Check Point 1400 Appliances Centrally Managed Administration Guide R77.20.85...
-
Page 38: First Time Deployment Options
If no DHCP service is available, you must run the First Time Configuration Wizard, configure the Internet Connection settings, and then fetch the settings from the Zero Touch server. Check Point 1400 Appliances Centrally Managed Administration Guide R77.20.85... - Page 39 After the gateway downloads and successfully applies the settings, it does not connect to the Zero Touch server again. For more information on how to use Zero Touch, see sk116375 Check Point SMB Zero http://supportcontent.checkpoint.com/solutions?id=sk116375 and the Touch User Guide http://downloads.checkpoint.com/dc/download.htm?ID=53585. Check Point 1400 Appliances Centrally Managed Administration Guide R77.20.85...
-
Page 40: Deploying From A Usb Drive Or Sd Card
Using the set property Command ................ You can deploy the Check Point Appliance configuration files from a USB drive or SD card and quickly configure many appliances without using the First Time Configuration Wizard. The configuration file lets you configure more settings and parameters than are available in the First Time Configuration Wizard. -
Page 41: Sample Configuration File
Deploying the Configuration File - Initial Configuration This section describes how to deploy a configuration file on a USB drive to the Check Point Appliance. You must configure and format the file correctly before you deploy it. You can insert the USB drive in the front or rear USB port. -
Page 42: Deploying The Configuration File - Existing Configuration
To deploy the configuration file from a USB drive for the initial configuration: 1. Insert the USB drive into a Check Point Appliance. • Check Point Appliance is OFF - Turn on the appliance. The Power LED comes on and is green. •... -
Page 43: Viewing Configuration Logs
USB drive. Use the set property USB_auto_configuration (on page 44) command when you run a configuration file script on a configured appliance. 1. The USB drive with the configuration file is inserted into a USB port on the Check Point Appliance. -
Page 44: Using The Set Property Command
Autoconfiguration CLI script failed, clish return code = 1 Using the set property Command The set property CLI command controls how the Check Point Appliance runs configuration scripts from a USB drive. These commands do not change how the First Time Configuration Wizard in the Web UI configures the appliance. -
Page 45: Appliance Configuration
The Check Point Appliance uses a web application to configure the appliance. Getting Started After you use the First Time Configuration Wizard (see the Check Point Appliance Guide ), when you connect to the appliance with a browser (with the appliance’s IP or, if the appliance is used as a DNS proxy or DHCP server, to "my.firewall"), it redirects the web page to a... -
Page 46: The Home Tab
The Home > System page shows an overview of the Check Point Appliance. The Check Point Appliance requires only minimal user input of basic configuration elements, such as IP addresses, routing information, and blade configuration. The initial configuration of the Check Point Appliance can be done through a First Time Configuration Wizard. -
Page 47: Setting The Management Mode
To set the management type: Select one of the options: • Locally - To manage the Check Point Appliance using the local web application (WebUI). Click Apply and then Yes when asked to confirm. • Centrally - To manage the Check Point Appliance using the Security Management Server. - Page 48 • Initiate trusted communication securely by using a one-time password - The one-time password is used to authenticate communication between the Check Point Appliance and the Security Management Server in a secure manner. Enter a one-time password and confirm it. This password is only used to establish the initial trust.
-
Page 49: Managing Licenses
Check Point User Center with its credentials to pull the license information and activate the appliance. In most cases, you must first register the appliance in your Check Point User Center account or create one if you don't already have one. A User Center account is necessary to receive support and updates. -
Page 50: Viewing The Site Map
Filter - Filter the list by servers, active devices, or known devices. • Details - Select a row in the list and click Details to show additional properties of the device. Check Point 1400 Appliances Centrally Managed Administration Guide R77.20.85... -
Page 51: Viewing Monitoring Data
• Top Bandwidth Consuming - Shows statistics for the top bandwidth consuming application, category, site, and user in percentages and the amount of traffic (MB or GB). Check Point 1400 Appliances Centrally Managed Administration Guide R77.20.85... - Page 52 Device Info - Shows Security Gateway information. • Links to pages that can be useful for monitoring and troubleshooting purposes. Note - This page is available from the Home and Logs & Monitoring tabs. Check Point 1400 Appliances Centrally Managed Administration Guide R77.20.85...
-
Page 53: Viewing Reports
Click the applicable time frame link at the top of the page (Monthly, Weekly, Daily or Hourly). The line below the links shows the selected report and its time frame. To refresh the data shown, click Generate. Check Point 1400 Appliances Centrally Managed Administration Guide R77.20.85... -
Page 54: Using System Tools
Display DSL Statistics (DSL models only) • Generate a CPInfo file. • Ping or trace an IP address. • Perform a DNS lookup. • Capture packets. • Download the console-USB driver Check Point 1400 Appliances Centrally Managed Administration Guide R77.20.85... - Page 55 3. Click Download File to view or save the capture file. You can activate packet capture and go to other WebUI application pages while the packet capture runs in the background. However, the packet capture stops automatically if the WebUI session Check Point 1400 Appliances Centrally Managed Administration Guide R77.20.85...
-
Page 56: Managing The Device
This section describes how to set up and manage your Check Point Appliance. Configuring Internet Connectivity The Device > Internet page shows how the Check Point Appliance connects to the Internet. You can configure a single Internet connection or multiple connections in High Availability or Load Balancing configurations. - Page 57 Fill in the fields that are shown for the connection type. Note - You cannot use these characters when you enter a password or shared secret: { } [ ] ` ~ | ' " # + \ Check Point 1400 Appliances Centrally Managed Administration Guide R77.20.85...
- Page 58 A single IPoE connection or multiple PPPoE connections can be established over one VLAN tagged DSL interface carrying PTM traffic. • A single DHCP or Static IP connection can be established over a USB interface. Check Point 1400 Appliances Centrally Managed Administration Guide R77.20.85...
- Page 59 MTU of all the network devices between your gateway and the packet destination. For static and DHCP mode, set MTU to 1500 or lower. For PPPoE connections, set MTU to 1492 or lower. Check Point 1400 Appliances Centrally Managed Administration Guide R77.20.85...
- Page 60 2. Select an internet connection and click Edit. The Edit Internet Connection window opens. 3. Click Advanced > NAT Settings. 4. Select Do not hide internal networks behind this internet connection. 5. Click Apply. Check Point 1400 Appliances Centrally Managed Administration Guide R77.20.85...
-
Page 61: Configuring The Wireless Network
1430/1450 appliances only: The wireless client search options depend on the frequency that the appliance is set to. The Check Point Appliance can be configured to only one frequency at a time and is set to 2.4 GHz by default. If you change the radio settings to 802.11 ac or 802.11 ac/n, the frequency automatically changes to 5 GHz. - Page 62 • IP address Note - 1400 appliances support both IPv4 and IPv6 addresses. Subnet mask - for IPv4 addresses • Prefix length - for IPv6 addresses • Check Point 1400 Appliances Centrally Managed Administration Guide R77.20.85...
- Page 63 Auto - This uses the DNS configuration of the appliance as configured in the Device > DNS and Device > Internet pages. Use the following IP addresses - Enter the IP addresses for the First DNS server, Second • DNS server, and Third DNS server. Check Point 1400 Appliances Centrally Managed Administration Guide R77.20.85...
-
Page 64: Configuring The Local Network
The Device > Local Network page lets you set and enable the local network connections, switches, bridge or wireless network (on wireless devices only). Note - 1400 appliances support both IPv4 and IPv6 addresses. The Network table shows all available network connections. Check Point 1400 Appliances Centrally Managed Administration Guide R77.20.85... - Page 65 For each network, the table on this page shows you: • Name - Name of the network, interfaces that participate (if there are multiple interfaces), and a description (optional) • Local IP Address • Subnet Mask • MAC Address Check Point 1400 Appliances Centrally Managed Administration Guide R77.20.85...
- Page 66 • DHCPv6 Server - Same as the DHCPv4. You can reserve an IP address for a specified host. • DHCPv6 Server Relay - Same as in IPv4. • Disabled (Static) Check Point 1400 Appliances Centrally Managed Administration Guide R77.20.85...
- Page 67 To configure monitor mode in CLI: 1. To define a port for Monitor Mode: <portName> > set interface monitor-mode 2. To configure Monitor Mode Automatic Learning, disable user-defined networks: > set monitor-mode-configuration use-defined-networks false Check Point 1400 Appliances Centrally Managed Administration Guide R77.20.85...
- Page 68 • MTU size - Configure the Maximum Transmission Unit size for an interface. Note that in the Check Point Appliance, the value is global for all physical LAN and DMZ ports. Check Point 1400 Appliances Centrally Managed Administration Guide R77.20.85...
- Page 69 Route Based VPN tunnel. The Route Based VPN tunnel works as a point-to-point connection between two peer Security Gateways in a VPN community. Each peer Security Gateway has one VTI that connects to the tunnel. Check Point 1400 Appliances Centrally Managed Administration Guide R77.20.85...
- Page 70 IP addresses by defining network objects in the Users & Objects > Network Objects page. Reserving specific IP addresses requires the MAC address of the device. • Relay - Enter the DHCP server IP address. • Disabled Check Point 1400 Appliances Centrally Managed Administration Guide R77.20.85...
- Page 71 Select one of these options: • Use this gateway's IP address as the default gateway • Use the following IP address - Enter an IP address to use as the default gateway. Check Point 1400 Appliances Centrally Managed Administration Guide R77.20.85...
-
Page 72: Configuring A Hotspot
In the Access section of the page, you can configure if authentication is required and allow access to all users or to a specified user group (Active Directory, RADIUS or local). Hotspot is automatically activated in the system. Check Point 1400 Appliances Centrally Managed Administration Guide R77.20.85... - Page 73 The Edit <interface> window opens. 3. Select Use Hotspot. 4. Click Apply. Any user that browses from configured interfaces is redirected to the Check Point Hotspot portal. To configure Hotspot exceptions: 1. Click Manage Exceptions. The Manage Hotspot Network Objects Exceptions window opens.
-
Page 74: Configuring The Routing Table
IPv4 only. The route rule applies only to traffic whose source matches the source IP address/network Service IPv4 only. The route rule applies only to traffic whose service matches the service IP protocol and ports or service group. Check Point 1400 Appliances Centrally Managed Administration Guide R77.20.85... - Page 75 4. In the Default Gateway section, • Click Use this gateway's IP address as the default gateway. Select Use the following IP address and enter an IP address. • 5. Click Apply. Check Point 1400 Appliances Centrally Managed Administration Guide R77.20.85...
-
Page 76: Configuring Mac Filtering
1. Go to Device > MAC Filtering > LAN MAC Filter. 2. To add a new MAC Address, click Add > New. 3. To select MAC addresses from the list of Active Devices, click Add > Select. Check Point 1400 Appliances Centrally Managed Administration Guide R77.20.85... - Page 77 The Edit window opens in the Configuration tab. 3. For Assigned to: select Separate network. 4. In the Advanced tab, select Activate 802.1x authentication. 5. Enter a time for Re-authentication frequency (in seconds). 6. Click Apply. Check Point 1400 Appliances Centrally Managed Administration Guide R77.20.85...
- Page 78 To reduce the number of logs, specify the value of the MAC Filtering settings - Log • suspension attribute in seconds. • To show all logs, set the value to “0”. Note - Traffic dropped in the WiFi driver is not logged. Check Point 1400 Appliances Centrally Managed Administration Guide R77.20.85...
-
Page 79: Configuring The Dns Server
The domain name can contain periods, hyphens, and alphanumeric characters. 4. Click Apply. Configuring the Proxy Server In the Device > Proxy page, you can configure a proxy server to use to connect to the Check Point update and license servers. To configure a proxy server: 1. -
Page 80: Backup, Restore, Upgrade, And Other System Operations
Click Check now. To automatically upgrade your appliance firmware when Cloud Services is not configured: 1. Click Configure automatic upgrades. The Automatic Firmware Upgrades window opens. 2. Click Perform firmware upgrades automatically. Check Point 1400 Appliances Centrally Managed Administration Guide R77.20.85... - Page 81 You can add Comments about the specific backup file created. 4. Click Save Backup. The File Download dialog box appears. The file name format is <current software version>-<YY-Month-day>-<HH_MM_Seconds>.zip 5. Click Save and select a location. Check Point 1400 Appliances Centrally Managed Administration Guide R77.20.85...
- Page 82 Follow the instructions in each page of the Software Upgrade Wizard. During the wizard click Cancel to quit the wizard. Welcome Click the Check Point Download Center link to download an upgrade package as directed. If you already downloaded the file, you can skip this step. Upload Software Click Browse to select the upgrade package file.
- Page 83 Monthly - Select day of month and time of day. Note - If a month doesn't include the selected day, the backup is executed on the last day of the month. 7. Click Apply. Check Point 1400 Appliances Centrally Managed Administration Guide R77.20.85...
-
Page 84: Configuring Local And Remote System Administrators
3. Enter a Backup server path. 4. Enter a username and password. 5. Click Apply. Configuring Local and Remote System Administrators The Device > Administrators page lists the Check Point Appliance administrators and lets you: • Create new local administrators •... - Page 85 6. To enforce password complexity on administrators, click the checkbox and enter the number of days for the password to expire. 7. Click Apply. Note - This page is available from the Device and Users & Objects tabs. Check Point 1400 Appliances Centrally Managed Administration Guide R77.20.85...
- Page 86 Configuring a RADIUS Server for non-local Check Point Appliance users: Non-local users can be defined on a RADIUS server and not in the Check Point Appliance. When a non-local user logs in to the appliance, the RADIUS server authenticates the user and assigns the applicable permissions.
- Page 87 CP-Gaia-SuperUser-Access integer CheckPoint 2. Add to /etc/freeradius/dictionary the line: “$INCLUDE dictionary.checkpoint” 3. Add this Check Point Vendor-Specific Attribute to users in your RADIUS server user configuration file: <role> CP-Gaia-User-Role = <role> Where is the name of the administrator role that is defined in the WebUI.
-
Page 88: Configuring Administrator Access
To log in as a Super User: A user with super user permissions can use the Check Point Appliance shell to do system-level operations, including working with the file system. 1. Connect to the Check Point Appliance platform using an SSH client or serial console client. - Page 89 Internet to specific IP addresses only. 2. Change the WEB Port (HTTPS) and/or SSH port if necessary. 3. Click Apply. An administrator can access the Check Point Appliance using any IP address through the allowed interface sources.
-
Page 90: Managing Device Details
Important - If the gateway's Internet connection is assigned an IP address dynamically and the identifier option in SmartDashboard is set to Gateway name, the Appliance Name must be identical to the Check Point Appliance name defined for the Check Point Appliance object in SmartDashboard. -
Page 91: Configuring Ddns And Access Services
3. Make sure Reinitialize internal certificates is selected. When you enable this feature or change settings, you must reinitialize the internal certificates for them to be valid for the new DNS. Check Point 1400 Appliances Centrally Managed Administration Guide R77.20.85... -
Page 92: Using System Tools
1. Click Register. The Reach My Device window opens. 2. For Host Name, use the default host name or enter a name for this Check Point Appliance to enable remote access. 3. If the host name was already defined, select Register with an existing homename and enter the Validation token of the gateway. -
Page 93: Managing Installed Certificates
The Security Gateway is not part of a Security Cluster. To define it as a cluster member, define a Security Cluster object in your Security Management Server and install a security policy. Note - A cluster in bridge in Active/Standby mode is supported. Check Point 1400 Appliances Centrally Managed Administration Guide R77.20.85... -
Page 94: Configuring Advanced Settings
Appliance Configuration Configuring Advanced Settings The Device > Advanced Settings page is for advanced administrators or Check Point support. You can configure values for multiple advanced settings for the various blades. Important - Changing these advanced settings without fully understanding them can be harmful to the stability, security, and performance of this appliance. - Page 95 Two appliances, one in active mode and the other in passive mode, can allow a client to remotely connect to a console connected to the appliance in passive mode over the internet using a telnet connection. Check Point 1400 Appliances Centrally Managed Administration Guide R77.20.85...
-
Page 96: Managing Users And Objects
3. Click Edit. The User Management window opens. 4. Click the checkbox for Automatically delete expired local users. 5. Click Apply. Expired local users are automatically deleted every 24 hours (after midnight). Check Point 1400 Appliances Centrally Managed Administration Guide R77.20.85... -
Page 97: Identity Awareness
Firewall • URL Filtering and Application Control • Anti-Bot Configuring Local and Remote System Administrators The Device > Administrators page lists the Check Point Appliance administrators and lets you: • Create new local administrators • Configure the session timeout •... - Page 98 • Super Admin • Read only • Networking Admin 7. To define groups, click Use specific RADIUS groups only and enter the RADIUS groups separated by a comma. 8. Click Apply. Check Point 1400 Appliances Centrally Managed Administration Guide R77.20.85...
- Page 99 Configuring a RADIUS Server for non-local Check Point Appliance users: Non-local users can be defined on a RADIUS server and not in the Check Point Appliance. When a non-local user logs in to the appliance, the RADIUS server authenticates the user and assigns the applicable permissions.
- Page 100 Appliance Configuration 4. Add this Check Point Vendor-Specific Attribute to users in your RADIUS server user configuration file: <role> CP-Gaia-User-Role = <role> Where allowed values are: Administrator Role Value Super Admin adminRole Read only monitorrole Networking Admin networkingrole To configure a...
- Page 101 To log in as a Super User: A user with super user permissions can use the Check Point Appliance shell to do system-level operations, including working with the file system. 1. Connect to the Check Point Appliance platform using an SSH client or serial console client.
-
Page 102: Managing Authentication Servers
Port - The port number through which the RADIUS server communicates with clients. The default is 1812. • Shared secret - The secret between the RADIUS server and the Check Point Appliance. Show - Displays the shared secret. •... - Page 103 To filter for a specified service: 1. In the Type to filter box, enter the service name or part of it. 2. As you enter text, the list is filtered and shows matching results. Check Point 1400 Appliances Centrally Managed Administration Guide R77.20.85...
-
Page 104: Managing Service Groups
To filter for a specified service group: 1. In the Type to filter box, enter the service group name or part of it. 2. As you enter text, the list is filtered and shows matching results. Check Point 1400 Appliances Centrally Managed Administration Guide R77.20.85... -
Page 105: Managing Network Objects
Exclude from DHCP service - The internal DHCP service does not distribute the configured IP range to anyone. 6. Click Apply. To create a Network type network object: 1. Click New. The New Network Object window opens. 2. In Type, select Network. Check Point 1400 Appliances Centrally Managed Administration Guide R77.20.85... -
Page 106: Managing Url Lists
The Users & Objects > URLs Lists page lets you override central management's URL filtering policy in your local Check Point Appliance. Use this feature to define URL blacklists and whitelists exceptions to the global policy, whose content can be edited per gateway. Before you use this feature, the system administrator of the Security Management Server that centrally manages this gateway must complete prerequisite steps. - Page 107 Appliance Configuration Steps for the system administrator of this Check Point Appliance: 1. On this page, set Local URLs Lists Management to ON. 2. Add URLs/IP addresses or regular expressions to the predefined URLs lists (the custom applications defined in Security Management Server).
-
Page 108: Logs And Monitoring
When you insert an SD card, it mounts automatically and then local logs are saved to it. Before you eject an SD card, make sure to unmount it. Select Options > Eject SD card safely. Check Point 1400 Appliances Centrally Managed Administration Guide R77.20.85... -
Page 109: Viewing System Logs
This is an effort to keep syslogs persistent across boot, but not 100% guaranteed. To refresh the system logs list: Click Refresh. The list is refreshed. To clear the log list: 1. Click Clear Logs. 2. Click OK in the confirmation message. Check Point 1400 Appliances Centrally Managed Administration Guide R77.20.85... -
Page 110: Configuring External Log Servers
Edit. To delete the external syslog server: 1. Select the syslog server. 2. Click Delete. The server is deleted. Managing Active Devices See Managing Active Devices (on page 50). Check Point 1400 Appliances Centrally Managed Administration Guide R77.20.85... -
Page 111: Viewing Infected Devices
Servers are defined as server objects in the system from the Access Policy > Servers page. • Possibly infected only - Shows only devices or servers classified as possibly infected. Check Point 1400 Appliances Centrally Managed Administration Guide R77.20.85... -
Page 112: Viewing Vpn Tunnels
From Host name or IP address of the tunnel’s source gateway. Site Name Name of the VPN site name. Peer Address Host name or IP address of the tunnel’s destination gateway. Check Point 1400 Appliances Centrally Managed Administration Guide R77.20.85... -
Page 113: Viewing Active Connections
Click the Refresh link. Viewing Monitoring Data See Viewing Monitoring Data (on page 51). Viewing Reports See Viewing Reports (on page 53). Using System Tools See Using System Tools (on page 54). Check Point 1400 Appliances Centrally Managed Administration Guide R77.20.85... -
Page 114: Snmp
2. Select the Enable trap option to enable the trap or clear it to disable the trap. 3. If the trap contains a value, you can edit the threshold value when necessary. 4. Click Apply. Check Point 1400 Appliances Centrally Managed Administration Guide R77.20.85... -
Page 115: Advanced Configuration
Gaia Advanced Routing Administration Guide See the for more information. Note - The save config and route map commands are not supported. Check Point 1400 Appliances Centrally Managed Administration Guide R77.20.85... -
Page 116: Upgrade Using A Usb Drive
Installing a new firmware image from a USB drive Check Point releases new firmware images every so often. You can reburn the appliance using the image file and a USB drive. Note that you can also upgrade through the WebUI. If the new image supports it, you do not lose your previous settings. -
Page 117: Upgrade Using An Sd Card
(u-boot*.bin files or fwl*.gz files). 3. Insert the SD card into the SD card slot on the Check Point Appliance. If the operation does not succeed, this may be because the SD card slot does not recognize all devices. -
Page 118: Boot Loader
MAC address in this format: You can create multiple configuration files for Check Point Appliance gateways. The gateways run both files or only one of them. First the autoconf.clish configuration file is loaded. If there is a configuration file with the same MAC address as the gateway, that file is loaded second. -
Page 119: Upgrade Using Boot Loader
3. You are asked if you want to manually load the image from a TFTP server, or if you want to use automatic mode with a bootp server. 4. If you select manual mode, you are asked to fill in the IP of the Check Point Appliance, the IP of the TFTP server, and the image name. -
Page 120: Restoring Factory Defaults
As part of a troubleshooting process, you can restore the Check Point Appliance to its factory default settings if necessary. You can restore a Check Point Appliance to the factory default image with the WebUI, Boot Loader, or a button on the back panel. - Page 121 To disable the reset to default: Use this CLI command: >set additional-hw-settings reset-timeout 0 To enable the reset to default: Use this CLI command: >set additional-hw-settings reset-timeout 12 Check Point 1400 Appliances Centrally Managed Administration Guide R77.20.85...
-
Page 123: Index
Deploying with SmartProvisioning • 24 Boot Loader • 118 Deployment Types • 9 Dynamic Routing • 115 Check Point 1400 Appliance Overview • 7 Cluster Interface Configuration • 15 Finish • 30, 31 Cluster Names • 31 First Time Deployment Options • 38 Cluster Properties •... - Page 124 Sample Configuration Log with Error • 44 Setting Server IP Behind a 3rd Party NAT Device • 21 Setting the Management Mode • 47 Setting Up the Check Point Appliance • 8 Small-scale Deployment Installation • 10 Small-scale Deployment Workflow • 10 SmartProvisioning • 28 SNMP •...
Need help?
Do you have a question about the L-71 and is the answer not in the manual?
Questions and answers