Advertisement
Measurement and Calibration
For better accuracy, frequent calibration of the meter is recommended. In
addition, the instrument must be recalibrated:
• When high accuracy is required.
• At least once a month.
Measurement
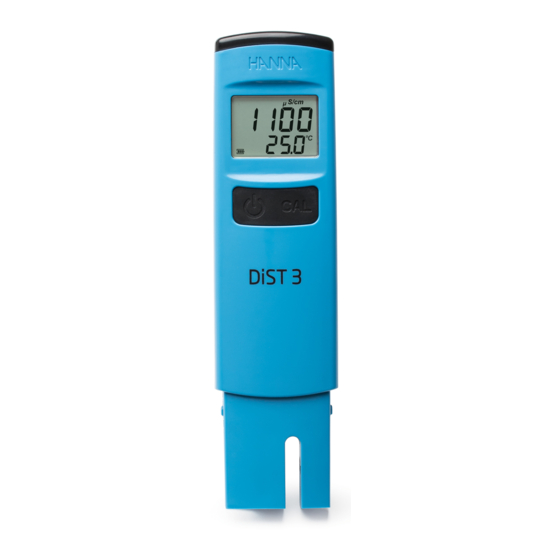
Press the ON/OFF button to turn the meter ON. Place the probe to the
desired solution. The conductivity value, automatically compensated for
temperature, will be shown on the LCD.
The measured temperature will be shown on the secondary LCD.
Note: Before taking any measurement make sure the meter has been
calibrated.
Calibration Procedure
• Press CAL button to enter calibration mode from measurement mode.
• The meter will enter the calibration mode, displaying "µS/cm 1413 USE"
with CAL tag blinking.
1. Pour 2" (5 cm) of standard solution into a container.
2. Place the probe in calibration solution. The probe tip should be centered
in the solution and submersed 1.18" (3 cm). The meter will automatically
recognize the solution.
3. If the solution is not recognized or is out of the accepted range "---- Err"
is displayed.
4. If the calibration solution is recognized "REC" is displayed until the
reading is stable and the calibration is accepted.
• After acceptance, the "Stor" message is displayed and meter returns to
measurement mode.
Clear Calibration
Place meter in calibration mode. Press ON/OFF and "Clr" is displayed. The
meter will now be at default calibration.
Error messages
During user calibration, if the reading is out of the accepted range, the meter
will display "---- Err".i.e. 2000 µS/cm blinking means the limit of the
measured value is out of range. If the measured temperature is higher than
50.0 ºC or lower than 0.0 ºC, the 50.0 ºC or 0.0 ºC temperature value will blink
on the LCD in measure mode.
Care and Maintenance
To obtain the highest accuracy for measurements
it is important to follow these tips:
• Calibration is only as good as the solution being used. The calibration
solution values change over time. Fresh solution should be used for each
calibration.
• The probe should be rinsed with purified water each time before placing
in calibration solution or sample to be tested.
Battery Replacement
The meter features a low battery indicator. When the battery is running low (under
10%), the battery indicator will blink on the LCD. When the battery is discharged
"dEAd bAtt" will be displayed on the LCD for 2 seconds and the meter
will turn off.
To change the CR2032 Li-ion battery, turn the battery cover located on the
back of the meter counterclockwise to unlock. Remove cover and replace with
new battery + side facing up.
Note: Batteries should only be replaced in a safe area using the
battery type specified in this instruction manual. Old batteries should
be disposed in accordance with local regulations.
Recommendations for Users
Before using Hanna Instruments products, make sure that they are entirely
suitable for your specific application and for the environment in which they
are used. Any variation introduced by the user to the supplied equipment
may degrade the instrument's performance. For yours and the instrument's
safety do not use or store the instrument in hazardous environments.
Accessories
Solutions
Code
Description
1413 µS/cm calibration solution,
HI70031P
20 mL sachets (25 pcs.)
1413 µS/cm calibration solution,
HI7031M
230 mL bottle
1413 µS/cm calibration solution,
HI7031L
500 mL bottle
Warranty
These meters are warranted for a period of one year against defects in
workmanship and materials when used for their intended purpose and
maintained according to instructions. Probes are warranted for a period
of six months. This warranty is limited to repair or replacement free of
charge. Damage due to accidents, misuse, tampering or lack of prescribed
maintenance is not covered. If service is required, contact your local Hanna
Instruments Office. If under warranty, report the model number, date of
purchase, serial number and the nature of the problem. If the repair is not
covered by the warranty, you will be notified of the charges incurred. If the
instrument is to be returned to Hanna Instruments, first obtain a Returned
Goods Authorization (RGA) number from the Technical Service department
and then send it with shipping costs prepaid. When shipping any instrument,
make sure it is properly packaged for complete protection.
IST98303N 07/18
INSTRUCTION MANUAL
DiST 3
HI98303
EC Tester
Advertisement
Table of Contents

Related Manuals for Hanna Instruments DiST 3


Summary of Contents for Hanna Instruments DiST 3
- Page 1 1.18” (3 cm). The meter will automatically back of the meter counterclockwise to unlock. Remove cover and replace with instrument is to be returned to Hanna Instruments, first obtain a Returned recognize the solution. new battery + side facing up.
- Page 2 Operational Guide Thank You To turn the meter ON and check the battery status Thank you for choosing a Hanna Instruments product. Please read 0 to 2000 µS/cm Range Press the ON/OFF button to turn the meter on. At start-up, all the LCD this instruction manual carefully before using the instrument.
Need help?
Do you have a question about the DiST 3 and is the answer not in the manual?
Questions and answers