
Related Manuals for McIntosh MX100


Summary of Contents for McIntosh MX100
- Page 1 McIntosh Laboratory, Inc. 2 Chambers Street Binghamton, New York 13903-2699 Phone: 607-723-3512 www.mcintoshlabs.com MX100 A/V Processor Owner’s Manual...
-
Page 2: Thank You From All Of Us At Mcintosh
Thank you from all of us at McIntosh Make a Note With the MX100 A/V Processor, you have invested in a For future reference, you can jot down your serial precision instrument that will provide you with many years number and purchase information here. -
Page 3: Table Of Contents
Table of Contents Speakers- Setup Menu ........18 List of Figures Amp Assign ............ 18 Thank you from all of us at McIntosh ......2 Figure 01– MX100 Dimensions ......6 Speaker Configuration ........19 Make a Note ..............2 Figure 02–... -
Page 4: Safety First
Safety First Important Safety Information is supplied in a separate document “Important Additional Operation Information Guide”... -
Page 5: Trademark And License Information
U.S. patents and other intellectual protected technology that is protected by U.S. patents property rights of Rovi Corporation. Reverse and other intellectual property rights. The MX100 engineering and disassembly are prohibited. uses the following technologies: Trademark Logo... -
Page 6: What Is In The Box
75 WATTS MX100 A/V PROCESSOR McINTOSH LABORATORY, INC., BINGHAMTON, NY The MX100 can be placed upright on a table or HANDCRAFTED IN USA WITH US AND IMPORTED PARTS " " shelf, standing on its four feet. It also can be custom 33.7cm... -
Page 7: Making The Cuts
Making the Cuts Rack Mounting To rack mount the MX100, the two included Side Here are the dimensions for the cutouts needed for Rack Mount Brackets should be installed. Follow custom installation. A ventilation opening is essential these instructions for each side: for any installation with the four feet removed. -
Page 8: The Front Panel
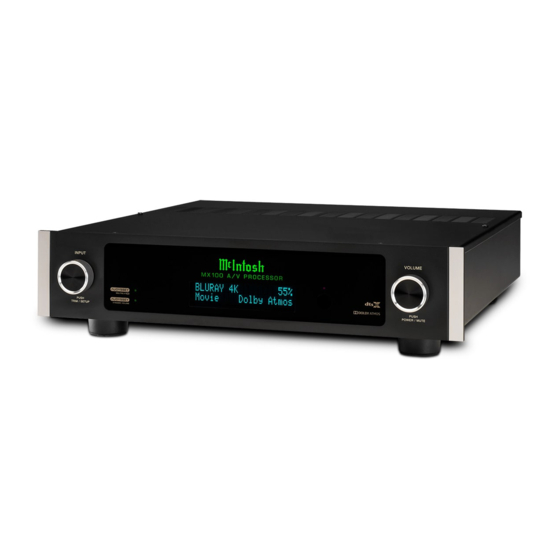
Mute on and off. Push and hold the Knob to Power Off. Push the Right Knob to Power On when the MX100 is off, The MX100’s glass and metal Front Panel provides • Turn clockwise or counterclockwise to scroll two control knobs and an informational display. -
Page 9: Connections On The Back
The network connector is located Two coaxial digital audio Inputs menu. on the top rear of the MX100 to the left of the Two Toslink optical Inputs The MX100 supports eARC. eARC allows for even CAUTION label. It is labeled NET. -
Page 10: 5.1 Connection Diagram
SETUP MIC DATA OUT 120V 50 60Hz BALANCED OUTPUTS 75 WATTS MX100 A/V PROCESSOR McINTOSH LABORATORY, INC., BINGHAMTON, NY HANDCRAFTED IN USA WITH US AND IMPORTED PARTS Powered Subwoofer (partial view) CAUTION RISK OF ELECTRIC SHOCK POWER DO NOT OPEN... -
Page 11: Rs232
The two Coaxial Inputs are labeled: If using an external IR receiver for the MAIN • COAX 1 Data In ZONE in the same room as the MX100, you may (DB9-pin2) • COAX 2 wish to disable the front IR sensor, which also... -
Page 12: Power Control (Trigger) Outputs
MX100 is very flexible in its setup to adapt to many Figure 12– Power Control (trigger) mini plug To use the browser method, you will need the IP of these configurations. -
Page 13: Entering Setup
In this manual, submenus are denoted in the style: Setup>SPEAKERS>Floor Layout which means from the Setup menu choose the SPEAKERS submenu then choose Floor Layout. Entering Setup To enter Setup mode using the Vacuum Fluorescent Display (VFD): • Press and hold the Left Knob for Two seconds and then release (A short push of the Left Knob will bring up Trim settings. -
Page 14: Setup From A Browser
12dB. network as your MX100. Enter the IP address for be set. Volume Limit can be set to Off (the default) Bass Sync the MX100 (see “Determining the IP Address”... -
Page 15: Figure 16- Audyssey ® In Audio Menu
Dolby encoded. It will use DTS Neural:X to send stream will be sent to the configured speakers per MultEQ XT32 optimizes the frequency response audio to all configured speakers if a DTS encoded the input file stream with no post processing. of your speakers. -
Page 16: Video Setup Menu
HDMI input, while in standby mode, the MX100 Make sure CEC is enabled on all devices you wish •... -
Page 17: Inputs Setup Menu
Video, the MX100 will enter Sleep mode when Setting Result OPT 1 the TV is turned off and the MX100’s input is set to Show Selected Input will appear as an OPT 2 an HDMI input. Set to Off, the TV’s power will not... -
Page 18: Speakers- Setup Menu
Speaker Type Amp Assign The Speakers setup menu is where you tell the should remain consistent from MX100 outputs MX100 what the rest of the world looks like. The to amplifier connections and the speakers Setting Options basic speaker structure of your system should be themselves. -
Page 19: Speaker Configuration
Atmos Enabled speaker instead of Setup>Speakers>Speaker Config the Output to “Small” speakers and is outputted to the Front speaker. Here is where you tell the MX100 what type of the subwoofer or front speakers. Surround Place the Surround Dolby speakers are connected. The available speaker You can choose Individual or All. -
Page 20: Speaker Distances
You may do this if you want to sent to the Subwoofer. The LPF setting does not manually setting Test Tones will replace Audyssey have a static IP Address for the MX100. The default apply to content sent from the LFE channel to the settings. - Page 21 Remote Control. The default for RCLock is Off. For Each Trigger can be set to: If you wish to store to a USB drive in the MX100’s more information see “Wired IR Inputs” on page Independent allows each individual Input to •...
-
Page 22: Remote Control Buttons
These additional commands can be accessed using an Setup optional McIntosh HR093 Service Remote Control. A list of these commands as well as Pronto Hex Codes can be found in the MX100 Pronto Hex Codes SETUP document located in the Download section of the Trim PRESET MX100 product information at mcintoshlabs.com. -
Page 23: Audyssey
• Make the room as quiet as possible. Background sound technology built into the MX100. The acoustic noise can disrupt the room measurements. Close characteristics of the connected speakers and listening windows and turn off the power on electronic... -
Page 24: Begin Audyssey
Assign and the Microphone set up and in the Focus position: • After the series of tones end and the • Go to the Audyssey menu in the MX100 word “calibrating” disappears, move the Browser interface Setup>Audyssey. Select Microphone to a new Calibration position no “Next” (see Figure 23) more than two feet (60cm) from the previous •... -
Page 25: Error Messages
Figure 26– Audyssey measurements complete Figure 27– Saving Audyssey calibration • When data is 100% analysed, select “Next” Note: Do not change the speaker connections or subwoofer volume after Audyssey Setup. If these • The next two screens will report on your ®... -
Page 26: Figure 28- Audyssey Error Table
An error message is displayed if Audyssey Setup could not be completed due to speaker placement, the ® measurement environment, etc. If an error message is displayed, check the relevant items and perform the necessary measures. (See Figure 28) Be sure to turn off the power before checking speaker connections. Examples Error Details Corrective Measures... -
Page 27: The Trim Menu
The Trim Menu Trim Menu Using Knobs The Trim menu can be entered using the Left Knob or the Remote Control. To enter the Trim Menu, press and release the Left The Trim Menu allows you to make and store Trim Menu Using the Remote Knob. -
Page 28: Supported Hdmi Signals
Remote Control) • 4K 60/50/30/25/24Hz • Rotate the Left Knob until MODE is displayed The MX100 can play the following audio formats via (or press the Down Arrow on the silver ring of HDMI: the Remote Control) • Press and release the Left Knob (Press and 2-channel Linear 2-channel, 32 kHz –... -
Page 29: Packing The Mx100
Packing the MX100 When shipping the MX100, it is highly recommended that the unit be packed as it was originally shipped to avoid damage. Failure to properly pack the unit will MICROPHONE likely result in damage. (The front panel is made of... -
Page 30: Audio Specifications
High Level: 96dB below rated output (A-Weighted) 240 Volts, 50/60Hz at 30 watts Standby, less than 0.5 watt Rated Output Voltage Note: Refer to the rear panel of the MX100 for the 5V Balanced Outputs correct voltage. Output Impedance Overall Dimensions 330 Ohms Width is 17-1/2 inches (44.5cm) - Page 32 The continuous improvement of its products is the policy of McIntosh Laboratory Incorporated who reserve the right to improve design without notice. Printed in the U.S.A. McIntosh Part No. 24109800...
Need help?
Do you have a question about the MX100 and is the answer not in the manual?
Questions and answers
I have wired the MX 100 according to instructions and it plays fine. Trying to do a 'set-up' to fine tune things using a web browser. Entered speaker size/locations and pressed check tone for each speaker, which always plays from right front speaker not the others. Will get help from my dealer and don't really expect you to know without seeing the equipment but (just in case you have any suggestions) thought I would ask.
The McIntosh MX100 plays the check tone through the selected speaker type in the Levels dropdown box when Test Tone is set to On. If the right front speaker is selected, the tone will only play from that speaker.
This answer is automatically generated