Table of Contents
Advertisement
Advertisement
Table of Contents

Related Manuals for Iseevy H.265 HEVC

Summary of Contents for Iseevy H.265 HEVC
- Page 1 H.265 HEVC/H.264 AVC/MJPGE Video/Audio Encoder User Manual (V2.1.3)
-
Page 2: Table Of Contents
Content 1, Overview ....................3 2, Interfaces ....................3 3, Connections ....................4 4. Web Login ....................5 4.1 WINDOWS OS Computer ..............5 4.2 MAC OS Computer ................7 4.3 Login Device Web ................. 8 5, Status Display .................... 8 6, Preview Stream .................. -
Page 3: 1, Overview
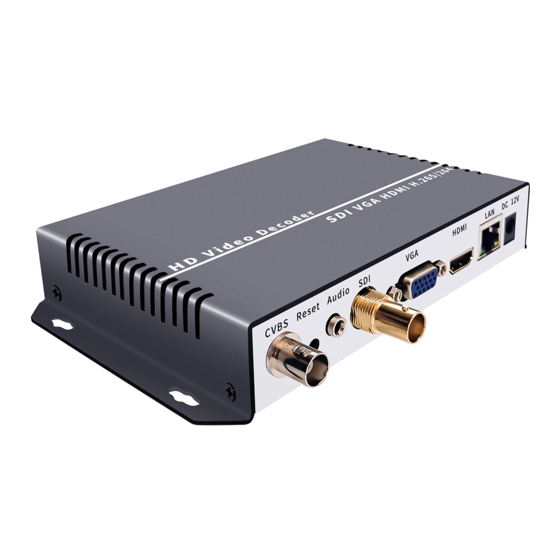
1, Overview H.265/H.264/MJPEG HDMI/SDI/VGA/CVBS Encoder is a professional HD audio&video encoding device with powerful functionality. It supports HDMI/SDI/VGA/CVBS (optional) signal 4K/1080P/D1 (optional) input, then generates H.265/H.264/MJPGE profiles network video streams with RTMP/RTMPS/SRT/RTSP/UDP/HTTP/SRT/FLV/HLS/TS/Multicast/Unicast/ ONVIF protocols and AAC/MP3 format Audio. Its high integration and cost-effective design make this device widely applied in IPTV, live stream, broadcast, video conference, remote education, network video record etc. -
Page 4: 3, Connections
HDMI+Loopout 4K+USB/TF Record CVBS+ Wired VGA+Loopout+WiFi HDMI+Loopout+WiFi VGA+Loopout 8 channel HDMI 4 channel HDMI 16 channel HDMI 3, Connections... -
Page 5: Web Login
4. Web Login If you can’t open the encoder login web interface by http://192.168.1.168 directly, you can modify your computer IP address, make it in the same network segment with encoder. Note: the following instructions is just for that modify your computer IP address to make sure you can login the encoder web. - Page 6 Select “Internet Protocol Version 4 (TCP/IPv4)”, click “Properties” IP address: 192.168.1.90 Subnet Mask: 255.255.255.0 Router: 192.168.1.1...
-
Page 7: Mac Os Computer
4.2 MAC OS Computer Step 1: Connected the device with computer directly by a Network Cabe Step 2: Setup your computer's local network settings as followings: Enter “System Preferences”---select “Network” Configure IPv4: Manually IP address: 192.168.1.90 Subnet Mask: 255.255.255.0 Router: 192.168.1.1... -
Page 8: Login Device Web
4.3 Login Device Web Open IE browser and enter the IP address: http://192.168.1.168. Default user name: admin. Default password: admin. 5, Status Display Through the “Status” interface, we can check the “Input Size”, “Collected Video Frames”, “Lost Video Frames” “Audio Sample Rate” “Collected Audio Frames” to confirm the input source connection if fine. -
Page 9: 6, Preview Stream
6, Preview Stream 6.1 Preview by Browser Visit the device Status interface, click the “Preview” button, it will play the... -
Page 10: Preview By Vlc Player
video&audio stream directly in browser. 6.2 Preview by VLC Player Download and install “VLC media player” in your computer. Click “Media”---“Open Network Stream”, then fill the stream network URL (get it from device status interface), click “Play”. Default URLs: TS URL: http://192.168.1.168/0.ts HLS URL: http://192.168.1.168/0.m3u8 FLV URL: http://192.168.1.168/0.flv RTSP URL: rtsp://192.168.1.168/0... -
Page 11: Network Setting
7. Network Setting 7.1 Wired Network Setting Click “System”—“Network” to enter wired network setting interface. DHCP: keep disable. IP: modify it in the same network segment with your router, default is 192.168.1.168. (For example: if your router IP address is 192.168.0.1, you need to modify it to 192.168.0.168) Netmask: Device network mask, default is 255.255.255.0 Gateway: modify it same with your router IP address, default is 192.168.1.1... -
Page 12: Wifi Network Setting
DNS2: keep 8.8.4.4 or modify it same with your router IP 7.2 WiFi Network Setting (This part guide only for WiFi encoders) 7.2.1 AP Mode AP mode is for computer/mobile quickly connect the device to configure the settings by WiFi. Reset the Device, it will auto restore the AP mode. -
Page 13: Wifi Mode
7.2.2 WiFi Mode WiFi Mode is for connect device with WiFi network by WiFi WiFi Mode: select “WIFI”, then click “apply” button. Enter “Reboot” interface, click “reboot” button. WiFi Essid: fill the WiFi network name. WiFi password: fill the WiFi network password. WiFi DHCP: enable it, then click “Apply”... -
Page 14: Network Setting
7.3 4G Network Setting (This part guide only for 4G encoders) Operations: 1, Confirm your 4G sim card can visit Internet and play video. 2, Plug the 4G sim card into the device sim card slot, connect the antennas. 3, Power on the device. 4, Enter 4G web interface. -
Page 15: Main Stream Encoding Setting
8. Main Stream Encoding Setting 8.1 Video Encoding Setting Encoding Type: H.264 or H.265 or Mjpeg Encode level: baseline profile / main profile / high profile Encoding frame rate: 5-60 frames(it can output 60P When Input is 60P too) Bitrate control: VBR(quality priority) and CBR(bandwidth Priority) GOP: 30 (Key frame interval) Encoding size: 1920x1080,1680x1050,1280x720,1024x576,850x480,720x576,720x540,720x... -
Page 16: Protocol Setting
8.2 Protocol Setting UTP protocol(Private) ,default address http://192.168.1.168/0.utp HTTP protocol, default address http://192.168.1.168/0.ts HLS protocol, default address http://192.168.1.168/0.m3u8 FLV protocol, default address http://192.168.1.168/0.flv RTSP protocol, default address rtsp://192.168.1.168/0 RTMP pull stream address, default address rtmp://192.168.1.168/live/0 RTMP push stream address: rtmp://ip:port/xxx/xxx or rtmp://user:pass@ip:port/xxx/xxx RTMP default port: 1935 Multicast protocol, default address UDP://@238.0.0.1:1234 Unicast protocol, default address:... -
Page 17: Osd Setting
9 OSD Setting Zone 1-4,you can enable max to 4 image or txt (Text, support English/number Character) (Image, support 24bit BMP file ,less than 500KB,transparency color is R:241 G:241 B:241) X: the left and right positions displayed by 0-1920 text. Y: the up and down positions displayed by 0-1080 text. -
Page 18: Instructions For Live On Youtube
10. Instructions for Live on Youtube 1.Open live streaming page on Youtube 2.Create a live stream channel 3.Copy rtmp address from Youtube. The whole address(Stream URL+ Stream Key) is rtmp://a.rtmp.youtube.com/live2/hrbg-47km-1xmy-wa1b-8ayh “/” is necessary... - Page 19 4. Paste the whole RTMP address in “RTMP/RTSP PUSH URL” of the device web, select “Enable”. click “Apply”, then click “reboot” on reboot interface. 5. Youtube request audio must be available, so please confirm your input source has audio at the same time. Setup “Sampling Rate”...
-
Page 20: Instructions For Live On Facebook
7, Check the Network settings carefully, refer to “7. Network Setting” 11. Instructions for Live on Facebook 1.Open live streaming page on Facebook, https://www.facebook.com/live/create... - Page 21 2. Copy rtmps address from Facebook. The whole address(Server URL+ Stream Key) is rtmps://live-api- s.facebook.com:443/rtmp/258387818300838?s_bl=1&s_ps=1&s_psm=1& s_sw=0&s_vt=api-s&a=AbyGvwNHMbbNFZ8k “/” is necessary 3, Paste the whole RTMPS address in “RTMP/RTSP PUSH URL” of the device web, select “Enable”. click “Apply”, then click “reboot” on reboot interface. 4, Cos Facebook do not support H.265 encoding video, please select the stream encoding type to H.264...
-
Page 22: Audio Encoding Settings
5, Check the Network settings carefully, refer to “7. Network Setting” 12. Audio Encoding Settings Audio Bit Rate: 48K, 64K, 96K, 128K, 160K, 192K and 256K Audio Type: AAC,AAC+,MP3, MP2,AC3,G711A,G711U Audio Sampling Rate: 44100,48000 13. System Settings 13.1 User name and password change... - Page 23 13.2 Software upgrade Note: Please contact Manufacturer to get the right firmware file for updating, if updated error firmware file, the device will be broken. 13.3 Device reset and initialization default settings Hardware Reset Operations: Power on the device, press the “RST” button on the front panel and hold on about 20 seconds.
-
Page 24: Trouble Shootings
14. Trouble Shootings 1, Why I can not open the encoder IP a: Please hardware reset the device, power on the device, press the “RST” button on the front panel and hold on about 20 seconds. Then check “4. Web Login” operations on Page 4 2, Why can not live stream successfully? a: Please check “10. - Page 25 Thank you for using our products!
Need help?
Do you have a question about the H.265 HEVC and is the answer not in the manual?
Questions and answers