
Related Manuals for Beko CEG6302D


Summary of Contents for Beko CEG6302D
- Page 1 Fully Automatic Espresso Machine User Manual CEG6302D EN - FR 01M-8819213200-2020-01...
- Page 2 Please read this user manual first! Dear Customer, Thank you for prefering a Beko product. We hope that you get the best results from your product which has been manufactured with high quality and state- of-the-art technology. Therefore, please read this entire user manual and all other accompanying documents carefully before using the product and keep it as a reference for future use.
- Page 3 CONTENTS ENGLISH 5-29 FRANÇAIS 30-57 Fully Automatic Coffee Maker / User Manual 3 / EN...
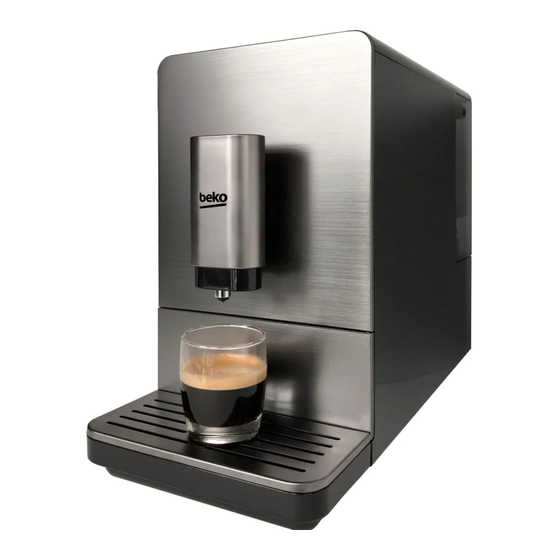
- Page 4 Technical data 1. Coffee Beans Container Cover 2. Coffee Bean Container Power supply: 3. Control Panel 220-240 V~, 50-60 Hz 4. Adjustable coffee spout Power: 1350 W 5. Coffee Grounds Container Technical and design modifications 6. Internal Drip Tray reserved. 7.
-
Page 5: Important Instructions For Safety And Environment
1 Important instructions for safety and environment This section includes the safety instructions that will help providing protection against personal in- jury and material loss risks. Failure to follow these instructions invalidates the granted warranty. 1.1 Danger of electric current Danger to life by electric current! Contact with live wires or components could lead to serious injury or even death! -
Page 6: Danger Of Burning Or Scalding
1 Important instructions for safety and environment 1.2 Danger of burning or scalding Parts of the coffee machine can become very hot during operation! Dispensed drinks and escaping steam are very hot! Observe the following safety precautions to avoid burning/scalding yourself and/or others: Do not touch either of the metal sleeves on both •... - Page 7 1 Important instructions for safety and environment Inspect the coffee machine for visible signs of • damage before use. Do not use a damaged cof- fee machine. Contact an authorised service. If the connecting cable is damaged, it should • only be replaced by a service agent recom- mended by the manufacturer in order to prevent any danger! Please contact the manufacturer or...
- Page 8 1 Important instructions for safety and environment Defective parts may only be replaced with origi- • nal spare parts. Only original spare parts guar- antee that the safety requirements are met. This appliance can be used by children from • the age of 8 up as well as by persons with re- duced physical, sensory or mental abilities or with lacking experience and/or knowledge, if...
- Page 9 1 Important instructions for safety and environment - by clients in hotels, motels and other residen- tial type environments, - bed and breakfast type environments. Protect the coffee machine against the effects • of weather such as rain, frost and direct sun- light.
- Page 10 1 Important instructions for safety and environment The appliance can only be used to prepare cof- • fee. Children should be super vised to ensure that • they do not play with the appliance. Unplug the appliance before each cleaning and •...
-
Page 11: Intended Use
1.4 Intended use • bend the power cord The fully automatic coffee ma- chine Beko is intended for use in and do not rub it on homes and similar applications, for sharp edges in order to instance in staff kitchens, shops, offices and similar areas or by cus- prevent any damage. -
Page 12: Compliance With The Weee Directive And Disposing Of The Waste Product
1 Important instructions for safety and environment user manual, use for other than the WARNING: Observe intended purpose, unprofessional the procedures repairs, unauthorised modifica- described in this tions or use of non-approved spare user manual. parts. No claims of any kind will be ac- 1.6 Compliance with cepted for damage or injury result- ing from use of the coffee machine... -
Page 13: Compliance With Rohs Directive
1 Important instructions for safety and environment in recovering and recycling of old appliance. Appropriate disposal of used appliance helps prevent po- tential negative consequences for the environment and human health. 1.7 Compliance with RoHS Directive The product you have purchased complies with EU RoHS Directive (2011/65/EU). -
Page 14: Control Panel
2 Display 2.1 Control Panel Flashing: Low water level/ Water tank missing Lack of bean Lights up stably: coffee grounds container is full Flashing: Internal Drip Tray/coffee grounds container is missing Lights up stably: Brewer is missing/ installed improperly Flashing: Service door is opened / installed improperly Lights up stably: Requires to do descaling Flashing: Descaling is under process Empty System Function is running... -
Page 15: Installation
3 Preparation 3.1 Installation Remove any protective films, stickers and any other packing material on the appliance. 150mm 150mm 150mm 150mm 150mm Choose a safe and stable sur- Insert the external drip tray. Unwind and straighten the po- face with an easily reachable Make sure it is inserted cor- wer cord and insert the plug power supply and allow mini-... -
Page 16: Filing The Water Tank
3 Preparation 3.2 Filing the water tank About the protect program: If the water tank is not fully placed into the machine, a protection mode will be activated in 15 seconds during brewing process. Hot water button will lights on control panel. 1. - Page 17 3 Preparation WARNING: Never fill the water tank with warm, hot, sparkling water or any other liquid which might damage the water tank and the machine. Place the water tank back by Close the water tank by using using the lid as the handle. the lid.
-
Page 18: Operation
4 Operation 4.1 Grinding Adjustment You can adjust the grinder to suit the roast of your coffee by turning ad- juster knob in the bean container: When the grinder is grinding the coffee bean when it is ma- king the coffee, you can turn the adjust knob to do the ad- justment. - Page 19 4 Operation 4.2 Filing the bean container When is flashing, the appliance needs to be filled with coffee bean. Remove the bean contai- Slowly pour in the coffee be- Place the container lid back. ner lid. ans. WARNING: Fill the coffee bean container only with coffee beans.
- Page 20 4 Operation 4.3 Making Your Coffee Switch on the appliance by Place a cup under the coffee The espresso button being pressing the power on/off but- spout and adjust the height of pressed will light on and the ton. The appliance is then in the spout the fit the cup.
-
Page 21: Hot Water
4 Operation 4.4 Adjustiing The Volume Of Your Coffee/Hot Water You can memorize your desired volume of coffee for both strong espresso and mild espresso and also the hot water from 25ml to 250ml. bipp! When making your coffee (eit- When the volume of coffee her strong espresso or mild meets your desired volume,... -
Page 22: Mode Selection
4 Operation 4.6 Mode Selection The machine has two different setting: default setting, ECO mode and speed mode. In ECO mode, the appliance helps to save more energy. In speed mode, the user can make their coffee faster than in default setting. ECO Mode Speed Mode Default Setting... - Page 23 4 Operation Hot water button Strong espresso Mild espresso button button In Default Setting Flashing Flashing Lights On 3. Press the hot water button for ECO mode, strong espresso button for speed mode and mild espresso button for default setting. Two Beep sound will be heard indicates that the mode is being selected.
-
Page 24: Cleaning Of The Appliance
5 Cleaning 5.1 Cleaning of the appliance 1. Disconnect the power cord from the mains supply outlet. 2. Pour away all the water in the internal and external drip tray 3. Use a damped cloth or non-scratching cleaner to clean the water stains on the appliance. -
Page 25: Self-Cleaning
5 Cleaning Pull down the service door and Press the release knob. Remove the brewer. Wash the remove it. brewer with fresh water. Dry the brewer afterwards. When lights up stably, it indicates that the brewer is missing / installed improperly. When is flashing, it indicates that the service door is missing/installed improperly. - Page 26 5 Cleaning 3. Plug in the appliance. 4. Place a sufficient large container under the coffee spout. 5. In standby condition, press and hold and strong espresso button for 5 seconds. A beep sound will be heard with and strong espresso button will be flashing.
-
Page 27: Manual Rinsing
5 Cleaning 3. Remove the water tank from the appliance. will light up stably indicates that the empty system is under process. You can press before removing the water tank to resume back to the standby condition. 4. When the empty system function is completed, the appliance will switch off automatically. -
Page 28: Troubleshooting
6 Troubleshooting Problem Cause Solution The appliance does not appliance Plug in and press the work. connected to the mains. switch. Check the cable and the Plug No or delayed response in Appliance under Unplug appliance. several trials of pressing on electromagnetic Restart after few minutes function key on the panel... - Page 29 6 Troubleshooting Problem Cause Solution Coffee is delivered too Coffee powder too fine Adjust the coffee fineness slowly or a drop at a time. which block the water to to bigger dot during grinder come out. operation. Lack of bean indicator Internal coffee powder...
- Page 30 Veuillez d’abord lire ce manuel d’utilisation ! Chère cliente, cher client, Nous vous remercions d’avoir porté votre choix sur un produit BEKO. Nous espérons que ce produit vous apportera entière satisfaction. Tous nos produits sont fabriqués dans une usine moderne et ont fait l’objet d’un contrôle de qualité minutieux.
-
Page 31: Données Techniques
Données techniques 1. Couvercle du réservoir à grains Alimentation électrique : 2. Réservoir à grains 220-240 V~, 50-60 Hz 3. Panneau de commande Puissance : 1 350 W 4. Bec verseur café (hauteur Sous réserve de modification tech- réglable) nique ou conceptuelle. 5. -
Page 32: Instructions Importantes En Matière De Sécurité Et D'environnement
1 Instructions importantes en matière de sécurité et d’environnement Ce chapitre contient les instructions de sécurité qui vous aideront à éviter les risques de blessures corporelles ou de dégâts matériels. Le non-res- pect de ces instructions entrainera l’annulation de toute garantie. 1.1 Danger lié... -
Page 33: Consignes De Sécurité Fondamentales
1 Instructions importantes en matière de sécurité et d’environnement Danger lorsque le broyeur est en rotation ! Avant • de nettoyer le réservoir à grains, débrancher l’appareil de la prise secteur. 1.2 Risque de brûlures Des pièces de l’appareil peuvent être très chaudes lors du fonctionnement ! Respectez les consignes de sécurité... - Page 34 1 Instructions importantes en matière de sécurité et d’environnement Ne jouez jamais avec le matériel d'emballage. • Risque de suffocation. Gardez tous les matériaux d'emballage hors de portée des enfants. Avant utilisation, vérifiez que l’appareil ne pré- • sente pas de dommages extérieurs visibles. N’utilisez pas un appareil endommagé.
- Page 35 1 Instructions importantes en matière de sécurité et d’environnement l’un des SAV agréés par le fabricant, dans le cas contraire les dommages consécutifs ne sont plus couverts par la garantie. Les composants défectueux doivent être rem- • placés uniquement par des pièces de rechange d’origine.
- Page 36 1 Instructions importantes en matière de sécurité et d’environnement - dans des cuisinettes pour employés de maga- sins, bureaux et autres domaines profession- nels - dans des propriétés agricoles - par les clients dans les hôtels, motels et autres domaines industriels - dans des chambres d'hôte Tenir l’appareil à...
- Page 37 1 Instructions importantes en matière de sécurité et d’environnement N'utilisez l'appareil qu'après avoir installé le bac • à marc de café, le bac d'écoulement et la grille support de tasses. Débranchez toujours le câble d’alimentation en • tirant la fiche de la prise et non en tirant le câble et évitez d'avoir les mains humides.
- Page 38 1 Instructions importantes en matière de sécurité et d’environnement L'appareil n'est pas une cafetière intégrée et • n'est pas conçu pour être utilisé dans une ar- moire. La cafetière ne doit pas être placée dans une armoire lorsqu'elle est utilisée. Votre alimentation secteur doit être conforme •...
- Page 39 A v e r t i s s e m e n t : Utiliser l’appareil uni- de 8 ans. quement de façon conforme. 1.4 Utilisation conforme Avertissement: Cette appareil Beko est destiné Respecter uniquement à un usage domes- procédures décrites tique ou similaire : dans mode •...
-
Page 40: Conformité Avec La Directive Deee Et Mise Au Rebut Des Déchets
1 Instructions importantes en matière de sécurité et d’environnement ons, illustrations ou descriptions con- tacter les autorités locales ou le détaillant auprès duquel vous avez tenues dans ce mode d’emploi. acheté le produit. Chaque ménage Le fabricant ne peut être tenu respon- joue un rôle important dans la sable des dommages liés au non res- récupération et le recyclage des ap-... -
Page 41: Information Sur L'emballage
1 Instructions importantes en matière de sécurité et d’environnement 1.8 Information sur l’emballage L’emballage du produit est composé de matér- iaux recyclables, con- formément à notre régle- mentation nationale. Ne jetez pas les éléments d’emballage avec les déchets domestiques et autres déchets. -
Page 42: Panneau De Commande
2 Afficheur 2.1 Panneau de commande Clignotement : Faible niveau d’eau / Réservoir d’eau manquant Insuffisance de grains Voyant fixe : le réservoir de marc à café est plein Voyant clignotant : l’égouttoir interne / réservoir de marc à café manquant Égouttoir interne ou le récipient des mars à... - Page 43 3 Préparation 3.1 Installation Enlevez les films de protection, les autocollants et tout autre matériau d’emballage sur l’appareil. 150mm 150mm 150mm 150mm 150mm Choisissez surfa- Insérez l'égouttoir externe. As- Déroulez et redressez le câble ce sécurisée et stable avec surez-vous qu’il est correcte- d’alimentation et branchez une source d’alimentation ment inséré.
-
Page 44: Remplissage Du Réservoir D'eau
3 Préparation 3.2 Remplissage du réservoir d’eau À propos du programme de protection: Si le réservoir d’eau n’est pas entièrement placé dans la machine, un mode de protection sera activé pendant 15 minutes au cours du processus d’infusion. Le bouton d’eau chaude s’allume sur le panneau de commande. - Page 45 3 Préparation Pour éviter que l’eau ne déborde du réservoir d’eau, n’en ajoutez pas directement dans l’appareil avec un autre récipient. AVERTISSEMENT : Ne remplissez jamais le réservoir avec de l’eau chaude, tiède ou pétillante, ou tout autre liquide qui pourrait endommager le réservoir d’eau et la machine.
-
Page 46: Réglage De La Mouture
4 Fonctionnement 4.1 Réglage de la mouture Vous pouvez régler le broyeur au degré de torréfaction souhaité en tour- nant le bouton de réglage situé dans le réservoir à grains. Lorsque le broyeur moud les grains de café pendant la préparation du café, vous pouvez tourner le bouton de réglage pour ajuster votre réglage. -
Page 47: Remplissage Du Réservoir À Grains De Café
4 Fonctionnement 4.2 Remplissage du réservoir à grains de café Lorsque le symbole clignote, l’appareil doit être rempli avec des grains de café. Enlevez le couvercle du Versez lentement les grains Remettez le couvercle du réservoir à grains de café. de café. - Page 48 4 Fonctionnement 4.3 Préparation de votre café Mettez votre appareil en marc- Placez une tasse sous le bec Le bouton Expresso enfoncé he en appuyant sur le bouton verseur et réglez le bec à la s’allume et l’éclairage indique Marche/Arrêt. L’appareil bas- hauteur de la tasse.
-
Page 49: Eau Chaude
4 Fonctionnement 4.4 Réglage du volume de votre café / eau chaude Vous pouvez enregistrer le volume désiré de votre café soit pour le café espresso fort soit pour le café espresso léger. Vous pouvez également le faire pour l’eau chaude de 25 ml à 250 ml. bipp! Lors de la préparation de vot- Lorsque le volume de café... -
Page 50: Sélection Du Mode
4 Fonctionnement 4.6 Sélection du mode La machine a deux réglages différents : le réglage par défaut mode ECO et le mode rapide. En mode ECO, l’appareil permet d’économiser encore plus d’énergie. En mode rapide, l’utilisateur peut préparer son café plus rapidement que le réglage par défaut. - Page 51 4 Fonctionnement Bouton d’eau Bouton Expresso fort Bouton Expresso chaude léger En mode ECO Témoin allumé Clignotement Clignotement En mode Vitesse Clignotement Réglage par défaut Clignotement Clignotement Témoin allumé 3. Appuyez sur le bouton d’eau chaude pour le mode ECO, le bouton Expresso fort pour le mode rapide et le bouton Expresso léger pour le réglage par défaut.
-
Page 52: Nettoyage De L'appareil
5 Nettoyage 5.1 Nettoyage de l’appareil 1. Débranchez le cordon d’alimentation de la prise secteur. 2. Versez l’eau recueillie dans les égouttoirs interne et externe 3. À l’aide d’un chiffon humide ou d’un produit de nettoyage anti-rayures, nettoyez les taches sur l’appareil. AVERTISSEMENT : N’utilisez jamais des produits abrasifs, du vinaigre ou des détartrants qui ne sont pas inclus dans le car- ton pour nettoyer l’appareil. - Page 53 5 Nettoyage Appuyez et tirez le volet de Appuyez sur la poignée de Enlevez l'infuseur, lavez le service afin de l'enlever. déverrouillage. avec de l'eau puis séchez le. Lorsque le symbole s’allume de manière fixe, il indique que l'infuseur est manquant ou mal installé. Lorsque le symbole clignote, il indique que le volet de service est manquante ou mal installée.
- Page 54 5 Nettoyage 3. Brancher l’appareil. 4. Placer un récipient suffisamment grand sous le bec verseur du café. 5. En mode Veille, appuyez sur le bouton et maintenez-le enfoncé et sur le bouton Expresso fort pendant 5 secondes. Un bip sonore retentit avec et le bouton Expresso fort clignote.
- Page 55 5 Nettoyage 1. En mode Veille, appuyez simultanément sur le bouton et sur le bouton Expresso doux et maintenez-les enfoncés pendant 5 secondes. va alors clignoter. 3. Démontez le réservoir d’eau de l’appareil. le témoin émet une lumière stable pour indiquer que l’exécution du système vide est en cours.
-
Page 56: Dépannage
6 Dépannage Problème Cause Solution L’appareil ne fonctionne L’appareil n’est pas branché Branchez et tournez le pas. au secteur. commutateur. Vérifiez le câble et la fiche Aucune réaction ou réaction L’appareil soumis Débranchez l’appareil. retardée après avoir appuyé à interférences Redémarrez après quelques plusieurs fois sur la touche électromagnétiques... - Page 57 6 Dépannage Problème Cause Solution Le café sort trop lentement La moulure du café est trop Réglez la finesse du café ou bien goutte à goutte. fine. pour obtenir de grosses pastilles pendant fonctionnement du broyeur. Le témoin d’absence de La sortie de poudre de café...