Table of Contents
Advertisement
Quick Links
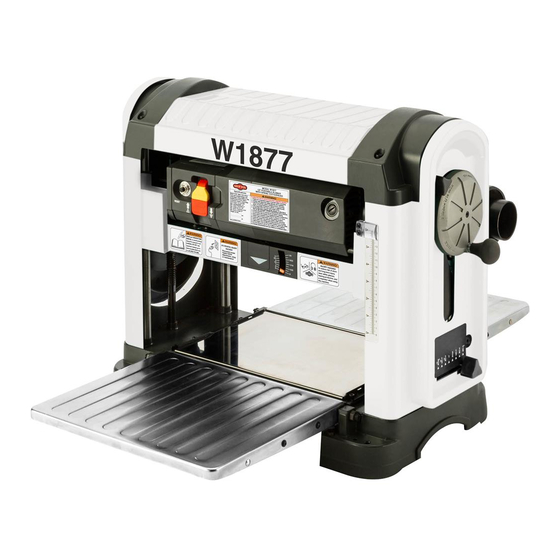
MODEL W1877
13" PORTABLE PLANER
/SPIRAL CUTTERHEAD
W
OWNER'S MANUAL
(FOR MODELS MANUFACTURED
SINCE
7/20)
Phone: (360) 734-3482 • Online Technical Support: techsupport@woodstockint.com
COPYRIGHT © SEPTEMBER, 2020 BY WOODSTOCK INTERNATIONAL, INC.
WARNING: NO PORTION OF THIS MANUAL MAY BE REPRODUCED IN ANY SHAPE OR FORM WITHOUT
THE WRITTEN APPROVAL OF WOODSTOCK INTERNATIONAL, INC.
262149
V1.09.20
#21226MN Printed in Taiwan
Advertisement
Table of Contents

Related Manuals for Woodstock Shop Fox W1877


Summary of Contents for Woodstock Shop Fox W1877
- Page 1 MODEL W1877 13" PORTABLE PLANER /SPIRAL CUTTERHEAD OWNER'S MANUAL (FOR MODELS MANUFACTURED SINCE 7/20) Phone: (360) 734-3482 • Online Technical Support: techsupport@woodstockint.com COPYRIGHT © SEPTEMBER, 2020 BY WOODSTOCK INTERNATIONAL, INC. WARNING: NO PORTION OF THIS MANUAL MAY BE REPRODUCED IN ANY SHAPE OR FORM WITHOUT THE WRITTEN APPROVAL OF WOODSTOCK INTERNATIONAL, INC. 262149 V1.09.20 #21226MN Printed in Taiwan...
- Page 2 This manual provides critical safety instructions on the proper setup, operation, maintenance, and service of this machine/tool. Save this document, refer to it often, and use it to instruct other operators. Failure to read, understand and follow the instructions in this manual may result in fire or serious personal injury—including amputation, electrocution, or death.
-
Page 3: Table Of Contents
Contents INTRODUCTION........2 ACCESSORIES........29 Woodstock Technical Support ....2 Planer Accessories ......29 Machine Specifications ......3 MAINTENANCE........31 Controls & Components ......6 Schedule ......... 31 Internal Components ......7 Cleaning & Protecting ......31 SAFETY..........8 Lubrication ........31 Standard Machinery Safety Instructions .. -
Page 4: Introduction
Woodstock International, Inc. is committed to customer satisfaction. Our intent with this manual is to include the basic information for safety, setup, operation, maintenance, and service of this product. -
Page 5: Machine Specifications
Model W1877 (For Machines Mfd. Since 7/20) Machine Specifications MODEL W1877 13" PORTABLE PLANER WITH SPIRALSTYLE CUTTERHEAD Product Dimensions Weight......................84 lbs. Width (side‐to‐side) x Depth (front‐to‐back) x Height........30 x 34 x 20 in. Footprint (Length x Width)................. 22 x 13‐1/2 in. Shipping Dimensions Type...................... - Page 6 Model W1877 (For Machines Mfd. Since 7/20) Main Specifications Main Specifications Planer Size....................13 in. Max. Cut Width................... 13 in. Min. Stock Length..................8 in. Min. Stock Thickness................... 1/8 in. Max. Stock Thickness..................6 in. Number of Cuts Per Inch..................32 Number of Cuts Per Minute..............
- Page 7 Model W1877 (For Machines Mfd. Since 7/20) Identification Become familiar with the names and locations of the controls and features shown below to better understand the instructions in this manual. Cutterhead Cutterhead Lock Lever Elevation Handwheel Circuit Breaker Reset Button ON/OFF Switch Dust Port...
-
Page 8: Controls & Components
Model W1877 (For Machines Mfd. Since 7/20) Controls.&.Components Refer to Figures.1–2.and the following descriptions to become familiar with the basic controls and components of this machine. Understanding these items and how they work will help you understand the rest of the manual and stay safe when operating this machine. -
Page 9: Internal Components
Model W1877 (For Machines Mfd. Since 7/20) Internal.Components Front Rear Workpiece Figure.3. Workpiece path and major planing components (side cutaway view). A.. Infeed.Roller: Rotates with the direction C.. Outfeed.Roller: Rotates with the direction of feed to pull the workpiece toward the of feed to pull the workpiece through the cutterhead. -
Page 10: Safety
Model W1877 (For Machines Mfd. Since 7/20) SAFETY SAFETY For.Your.Own.Safety, Read.Manual.Before.Operating.Machine The. purpose. of. safety. symbols. is. to. attract. your. attention. to. possible. hazardous. conditions.. This. manual.uses.a.series.of.symbols.and.signal.words.intended.to.convey.the.level.of.importance.of.the. safety.messages..The.progression.of.symbols.is.described.below..Remember.that.safety.messages.by. themselves. do. not. eliminate. danger. and. are. not. a. substitute. for. proper. accident. prevention. mea- sures—this.responsibility.is.ultimately.up.to.the.operator! Indicates.an.imminently.hazardous.situation.which,.if.not.avoided,. - Page 11 INTENDED.USAGE..Only use machine for its keep machine in good working condition. A intended purpose—never make modifications machine that is improperly maintained could without prior approval from Woodstock malfunction, leading to serious personal injury International. Modifying machine or using or death.
-
Page 12: Additional Safety For Planers
Model W1877 (For Machines Mfd. Since 7/20) Additional.Safety.for.Planers Amputation,.serious.cuts,.entanglement,.or.death.can.occur.from.contact.with.rotating.cutterhead. or. other. moving. parts!. Flying. chips. can. cause. eye. injuries. or. blindness.. Workpieces. or. knives. thrown.by.cutterhead.can.strike.nearby.operator.or.bystanders.with.deadly.force..To.reduce.risk. of.these.hazards,.operator.and.bystanders.MUST.completely.heed.hazards.and.warnings.below. KICKBACK..Know how to reduce the risk of PLANING.CORRECT.MATERIAL..Only plane kickback and kickback-related injuries. natural wood stock with this planer. DO NOT “Kickback”... -
Page 13: Electrical
Model W1877 (For Machines Mfd. Since 7/20) ELECTRICAL Electrical Circuit.Requirements This machine must be connected to the correct size and type of power supply circuit, or fire or electrical damage may occur. Read through this section to determine if an The machine must be properly set up adequate power supply circuit is available. -
Page 14: Grounding Requirements
Model W1877 (For Machines Mfd. Since 7/20) Grounding.Requirements This machine MUST be grounded. In the event of certain types of malfunctions or breakdowns, grounding provides a path of least resistance for electric current to travel—in The machine must be properly set up order to reduce the risk of electric shock. -
Page 15: Setup
Model W1877 (For Machines Mfd. Since 7/20) SETUP Unpacking This machine has been carefully packaged for safe This machine presents transportation. If you notice the machine has been serious injury hazards damaged during shipping, please contact your authorized to untrained users. Read Shop Fox dealer immediately. -
Page 16: Hardware Recognition Chart
Model W1877 (For Machines Mfd. Since 7/20) Hardware.Recognition.Chart USE THIS CHART TO IDENTIFY HARDWARE DURING THE INVENTORY/ASSEMBLY ⁄ " ⁄ " ⁄ " PROCESS. ⁄ " ⁄ " ⁄ " ⁄ " ⁄ " ⁄ " ⁄ " ⁄ " 10mm 12mm ⁄... -
Page 17: Machine Placement
Model W1877 (For Machines Mfd. Since 7/20) Machine.Placement = Electrical Connection Workbench.Load Refer to the Machine.Specifications for the weight and footprint specifications of your machine. Some workbenches may require additional reinforcement to support the weight of the machine and workpiece materials. 34"... -
Page 18: Bench Mounting
Model W1877 (For Machines Mfd. Since 7/20) Bench.Mounting Number.of.Mounting.Holes........4 Diameter.of.Mounting.Hardware.Needed....⁄ " Bolt The base of this machine has mounting holes that allow it to be fastened to a workbench or other mounting surface to prevent it from moving during operation and causing Flat Washer accidental injury or damage. -
Page 19: Assembly
Model W1877 (For Machines Mfd. Since 7/20) Assembly Before beginning the assembly process, refer to Items. Needed.for.Setup and gather everything you need. Knobs Ensure all parts have been properly cleaned of any heavy-duty rust-preventative applied at the factory (if applicable). Be sure to complete all steps in the assembly procedure prior to performing the Test.Run.or connecting the machine to power. -
Page 20: Dust Collection
Model W1877 (For Machines Mfd. Since 7/20) Dust.Collection Recommended.CFM.at.Dust.Port:....400.CFM Do not confuse this CFM recommendation with the rating of the dust collector. To determine the CFM at the dust port, you must consider these variables: (1) CFM rating of the dust collector, (2) hose type and length between the dust collector and the machine, (3) number of branches or wyes, and (4) amount of other open lines throughout... -
Page 21: Test Run
Model W1877 (For Machines Mfd. Since 7/20) Test.Run Once assembly is complete, test run the machine to ensure it is properly connected to power and safety components are functioning properly. Serious. injury. or. death. can. result. from. using. this. machine. BEFORE. If you find an unusual problem during the test run, understanding. -
Page 22: Operations
Model W1877 (For Machines Mfd. Since 7/20) OPERATIONS Operation.Overview The purpose of this overview is to provide the novice machine operator with a basic understanding of how the machine is used during operation, so the machine controls/components discussed later in this manual are easier to understand. -
Page 23: Workpiece Inspection
Model W1877 (For Machines Mfd. Since 7/20) Workpiece.Inspection Wood.Types Some workpieces are not safe to use or may The species of wood, as well as its condition, require modification before they are. Before. greatly affects the depth of cut the planer can cutting,.inspect.all.workpieces.for.the. -
Page 24: Planing Tips
Model W1877 (For Machines Mfd. Since 7/20) Planing.Tips Cutting.Problems • Inspect your workpiece for twisting or Below is a list of wood characteristics you cupping, and surface one face on a jointer may encounter when planing. The following if necessary before planing workpiece. descriptions of defects will give you some possible answers to problems you may encounter •... - Page 25 Model W1877 (For Machines Mfd. Since 7/20) Chip.Marks.or.Indentations Pitch.&.Glue.Buildup. Problem:.Chip indentation or chip bruising is the Problem:.Glue/resin buildup on the rollers and result of wood chips not being ejected from the cutterhead will cause overheating by decreasing machine. Instead they are carried around the cutting sharpness while increasing drag in the cutterhead, deposited on the planed surface and feed mechanism.
-
Page 26: Setting Depth Of Cut
Model W1877 (For Machines Mfd. Since 7/20) Setting.Depth.of.Cut Cutterhead.Movement.per.Handwheel.Revolution One Full Revolution ......... ⁄ " Material.Thickness.Range Minimum–Maximum Stock Thickness ....⁄ "–6" The depth of cut on a planer means the amount of material that is removed from the top of the workpiece as ⁄... -
Page 27: Adjusting Table Alignment
Model W1877 (For Machines Mfd. Since 7/20) Depth.Stop.Lever The depth stop lever (see Figure.16) on the righthand Depth Stop side of the machine allows for pre-set cut depth for Depth Stop Lever consistent repeat planing. Workpiece thickness is Scale indicated by the line on the depth stop lever pointing to the height scale. -
Page 28: Feeding Workpiece
Model W1877 (For Machines Mfd. Since 7/20) Feeding.Workpiece. The feed rate on this planer is automatically set at 26 FPM. Infeed and outfeed rollers move the workpiece Outfeed through the planer while keeping it firmly against the table and providing a consistent rate of movement. Infeed To.feed.workpiece.into.planer,.do.these.steps: 1. -
Page 29: Rotating/Replacing Cutterhead Inserts
Model W1877 (For Machines Mfd. Since 7/20) Rotating/Replacing. Cutterhead.Inserts To. reduce. risk. of. shock. or. The. inserts. are. very. sharp. and. can. accidental. startup,. always. quickly. cut. your. hands.. ALWAYS. use. disconnect. machine. from. power. caution.and.heavy.leather.gloves.when. before.adjustments,.maintenance,. handling.these.parts.to.reduce.the.risk. or.service. of.personal.injury. The spiral-style cutterhead is equipped with indexable inserts that can each be rotated to reveal one of two cutting edges. - Page 30 Model W1877 (For Machines Mfd. Since 7/20) 6. Slide 4mm hex wrench through righthand side panel Cutterhead and insert in cutterhead shaft (see Figure 22). Use Pulley wrench to rotate cutterhead as necessary during remaining steps. 7.. Remove Torx screw and insert, then clean all dust and debris from parts and cutterhead.
-
Page 31: Accessories
Dealer. If you do not have a dealer in your area, these products are also available through online dealers. Please call or e-mail Woodstock International Inc. Customer Service to get a current listing of dealers at: 1-800-840-8420 or at sales@woodstockint.com. - Page 32 Model W1877 (For Machines Mfd. Since 7/20) W1844—Wall-Mount.Dust.Collector.w/Cannister.Filter Nothing beats the convenience of this wall-mounted Dust Collector and the efficiency of the large surface area, pleated filter with internal paddle brushes. Whenever efficiency is being diminished due to dust cake, just a couple of turns of the handle rotates the paddle brushes against the inside of the filter to drop the fine dust cake into the plastic collection bag.
-
Page 33: Maintenance
Model W1877 (For Machines Mfd. Since 7/20) MAINTENANCE Cleaning.&.Protecting Vacuum excess wood chips and sawdust, and MAKE.SURE.that.your.machine. wipe off the remaining dust with a dry cloth. is.unplugged.during.all.main- If any resin has built up, use a resin-dissolving tenance. procedures!. If. this. cleaner to remove it. - Page 34 Model W1877 (For Machines Mfd. Since 7/20) Elevation.Leadscrews.&.Columns Grease Type ........Dry Coating Lube Frequency ..........Monthly To.lubricate.elevation.leadscrews.&.columns,.do.these. steps: 1. DISCONNECT MACHINE FROM POWER! Leadscrews 2. Lower headstock fully and remove side panels to expose leadscrews and columns (see Figure 24). 3.
-
Page 35: Cleaning Infeed & Outfeed Rollers
Model W1877 (For Machines Mfd. Since 7/20) Cleaning.Infeed.&. Outfeed.Rollers Saw dust and workpiece grime can accumulate on the infeed and outfeed rollers, creating inconsistent pressure on the workpiece as it is fed through the cutterhead. To.remove.sawdust.from.feed.rollers,.do.these.steps: 1. DISCONNECT MACHINE FROM POWER! 2. -
Page 36: Cleaning Feed Roller Brackets
Model W1877 (For Machines Mfd. Since 7/20) Cleaning.Feed.Roller. Brackets The feed rollers rotate in bushing blocks that are spring loaded. The feed rollers ride up on the board so that the roller pressure is maintained. If chips or sawdust build up between the bracket and bushing block (see Figure. -
Page 37: Tensioning/Replacing Drive Belt
Model W1877 (For Machines Mfd. Since 7/20) Tensioning/Replacing. Drive.Belt The drive belt transfers power from the motor to the cutterhead, and to the infeed and outfeed rollers. To ensure efficient transfer of power to these systems, make After. approximately. 16. hours. of. sure the belt is always properly tensioned and in good operation,. -
Page 38: Service
If you require additional machine service not included in this section, please contact Woodstock International Technical Support at (360) 734-3482 or send e-mail to: techsupport@woodstockint.com. MAKE. SURE. that. your. machine. is. -
Page 39: Adjusting Cutterhead/Table Parallelism
Model W1877 (For Machines Mfd. Since 7/20) Adjusting.Cutterhead/ Table.Parallelism The cutterhead/table parallelism has been correctly set at the factory. However, it can be re-adjusted for accuracy if the cutterhead assembly shifts over time. Items.Needed. Hex Wrench 5mm ..........1 Open-End Wrench 12mm........1 Socket Wrench w/17mm Socket ......1 ⁄... -
Page 40: Adjusting Cutterhead Lock Tension
Model W1877 (For Machines Mfd. Since 7/20) Adjusting.Cutterhead. Lock.Tension The cutterhead lock lever can be adjusted to increase or decrease the amount of clamping force on the cutterhead, leadscrews, and columns. When engaged, the cutterhead lock lever should be fairly easy to set in the locked position, and it should keep the headstock stationary during operations. -
Page 41: Calibrating Depth Stop Lever
Model W1877 (For Machines Mfd. Since 7/20) Calibrating. Depth.Stop.Lever The settings on the depth stop lever indicator are pre-set by the factory to match the corresponding measurements on the elevation scale. Over time, the lever may need to be adjusted to maintain accuracy. To ensure accurate depth of cut, always follow the directions in Calibrating. -
Page 42: Replacing Motor Brushes
Model W1877 (For Machines Mfd. Since 7/20) Replacing.Motor.Brushes The motor on the W1877 is equipped with two long-life carbon brushes—one on the front and one on the back of the motor. The brush life is affected by motor loads and usage. -
Page 43: Troubleshooting
Model W1877 (For Machines Mfd. Since 7/20) Troubleshooting The following troubleshooting tables cover common problems that may occur with this machine. If you need replacement parts or additional troubleshooting help, contact our Technical Support. Note: Before contacting Tech Support, find the machine serial number and manufacture date, and if available, your original purchase receipt. - Page 44 Model W1877 (For Machines Mfd. Since 7/20) Machine.Operation PROBLEM POSSIBLE.CAUSE CORRECTIVE.ACTION Excessive snipe 1. Feed rollers set too high. 1. Lower feed rollers. (gouge in end 2. Extension tables (or aftermarket support 2. Adjust rear extension table screws to align exten- of board that is tables) not aligned with main table.
-
Page 45: Electrical Safety Instructions
Model W1877 (For Machines Mfd. Since 7/20) Electrical.Safety.Instructions These pages are current at the time of printing. However, in the spirit of improvement, we may make changes to the electrical systems of future machines. Compare the manufacture date of your machine to the one stated in this manual, and study this section carefully. -
Page 46: Wiring Diagram
Model W1877 (For Machines Mfd. Since 7/20) Wiring.Diagram Neutral 120 VAC Read Page 43 STOP 5-15 Plug Before Wiring Ground PADDLE SWITCH BOX 2 HP Motor PADDLE SWITCH COVER Circuit Paddle Switch Breaker KEDU HY18-20 Sang Mao 20A 20A 250V Ground Ground Figure.38. -
Page 47: Parts
Model W1877 (For Machines Mfd. Since 7/20) PARTS Main 32-1 32-2 32-4 32-3 32-5 121 122 79 6 144 145 -45-... - Page 48 Model W1877 (For Machines Mfd. Since 7/20) Main.Parts.List PART # DESCRIPTION PART # DESCRIPTION X1877001 CAP SCREW M6-1 X 20 X1877082 FLAT WASHER 8MM X1877002 LEFT CAP X1877085 DEPTH-OF-CUT INDICATOR X1877003 LENGTH SCALE X1877086 PHLP HD SCR M3-.5 X 16 X1877004 TOP COVER X1877087...
- Page 49 Model W1877 (For Machines Mfd. Since 7/20) Main.Parts.List.(Cont.) REF PART # DESCRIPTION REF PART # DESCRIPTION X1877137 STEEL BALL 10MM X1877170 CIRCUIT BREAKER SANGMAO 20A X1877138 STEP BLOCK X1877173 PADDLE SWITCH KEDU HY18-20 20A X1877140 HEX BOLT M6-1 X 25 X1877174 POWER CORD 14G 3W 72"...
-
Page 50: Labels & Cosmetics
Model W1877 (For Machines Mfd. Since 7/20) Labels.&.Cosmetics PART # DESCRIPTION PART # DESCRIPTION X1877201 MACHINE ID LABEL X1877206 DISCONNECT POWER LABEL X1877202 MODEL NUMBER LABEL X1877207 INJURY/HAZARD LABEL X1877203 UP/DOWN/LOCK LABEL X1877208 READ MANUAL LABEL X1877204 ELECTRICITY LABEL X1877209 TOUCH-UP PAINT, SHOP FOX WHITE X1877205 EYE/EAR/LUNG LABEL... -
Page 51: Warranty
Woodstock International, Inc. will repair, replace, or arrange for a dealer refund, at its expense and option, the Shop Fox machine or machine part proven to be defective for its designed and intended...
Need help?
Do you have a question about the Shop Fox W1877 and is the answer not in the manual?
Questions and answers