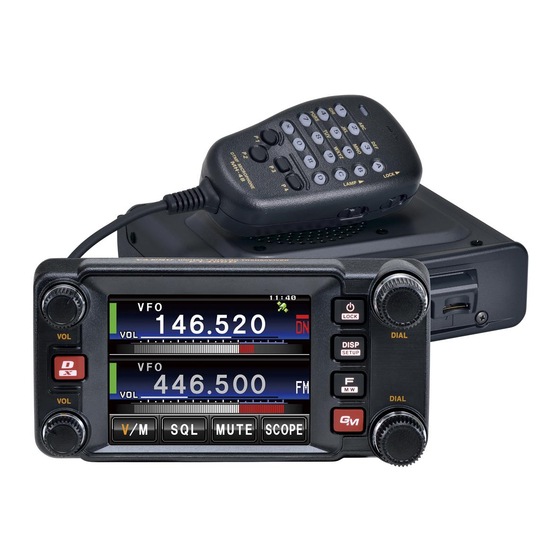
Yaesu FTM-400DR Firmware Update Instruction Manual
Hide thumbs
Also See for FTM-400DR:
- Operating manual (219 pages) ,
- Instruction manual (97 pages) ,
- Firmware update instruction manual (16 pages)
Summary of Contents for Yaesu FTM-400DR
- Page 1 FTM-400DR/DE Main Firmware Update Instruction Manual (This firmware is not compatible with the FTM-400XDR/XDE) YAESU MUSEN CO., LTD.
- Page 2 Co., Ltd. Currently there are three different destination versions USA, AUS and EXP (including EU and CHN) of the FTM-400DR/DE. You must check which version radio you have and use the correct update software. The destination is marked on the box serial number label.
- Page 3 Install / Uninstall Procedure Installation procedure 1. Download and unzip (extract) the update program. 2. When decompressed, the folder will automatically open. Click on the Yaesu icon in the folder to execute the update program. Uninstall procedure Delete the folder opened by the update program.
- Page 4 Writing incorrect firmware to the transceiver may cause abnormal operation or failure. (b) Set the COM Port Set the COM Port number to the Port used in connecting the PC and FTM-400DR/DE. The port number can be verified by accessing the Windows PC device manager.
- Page 5 Press the Update button to display the above screen. The procedures required to prepare the transceiver to receive the firmware update are listed, carry out the respective tasks as follows: Disconnect the power cable Turn OFF the power supply, and then disconnect the FTM-400DR/DE power cable from the 13.8 Volt DC cable.
- Page 6 Remove Top Cover Remove the four screws on the top and four screws at the sides of the main body to release the top cover. When removing the cover, be careful not to sever the speaker cable, as the wires are very short.
- Page 7 Flip the program switch Change the program switch at the front left of the circuit board to the BOOT position.
- Page 8 Connect the data cable to the FTM-400DR/DE. Connect the serial data cable to the data jack at the rear of the FTM-400DR/DE. Connect the opposite end of the data cable to the USB port or the COM port of the PC. (Photo shows the...
- Page 9 Power supply connection Connect the power cable to the FTM-400DR/DE main body and apply 13.8 V. Do not attempt to turn on the FTM-400DR/DE transceiver. When the above preparations are completed, click the OK button to begin the firmware transfer.
- Page 10 CAUTION! Do not switch off the power supply to the PC or transceiver during the update. The transceiver may not function normally if the firmware transfer is interrupted during the upgrade. When the following pop-up screen is displayed, upon completion of the update, press the OK button.
- Page 11 Reassemble the FTM-400DR/DE for Normal Operations When the updating is completed, the above screen, listing the reassembly procedure will appear. Please perform the respective tasks as follows. Disconnect the power cable Disconnect the power cable from the FTM-400DR/DE main body.
- Page 12 Disconnect the data cable Disconnect the serial data cable from the data terminal at the back. Change the program switch Do not forget to change the program switch at the front left of the circuit board back to the NOR side. (The transceiver will not work if the switch is not returned to the operating mode.)
- Page 13 Attach the Top Cover If the speaker cable has been disconnected, reconnect it to the jack on the main board.
- Page 14 Attach the top cover with the four screws on the top and four screws at the sides of the main body. Power supply connection Connect the power cable to the FTM-400DR/DE main body and apply 13.8 V.
- Page 15 Check the Version No. 1. Press and hold [POWER] key for over 2 seconds to turn the transceiver ON. 2. Press and hold [DISP (SETUP)] key for over 1 second. The set-up menu will be displayed.
- Page 16 3. Touch [RESET/CLONE] SETUP MENU DISPLAY TX/RX MEMORY SIGNALING SCAN W RES CONFIG DATA APRS SD CARD OPTION RESET/ BACK CALLSIGN BACK CLONE 4. Check the Version No. displayed at the top of the screen. If the MAIN Version No. has been updated, the firmware update was successfully completed. (PANEL Version No.
- Page 17 Factory reset 1. Touch [FACTORY RESET] VERSION RESET/CLONE MAIN :2.x PANEL:1.x FACTORY RESET 〉 〉 PRESET 〉 RECALL PRESET MEM CH RESET 〉 BACK BACK 2. When the below screen appears, press [OK?] to execute the factory reset. VERSION RESET/CLONE MAIN :2.x...
- Page 18 1705-D...


Need help?
Do you have a question about the FTM-400DR and is the answer not in the manual?
Questions and answers