Table of Contents
Advertisement
Advertisement
Table of Contents

Summary of Contents for Worx Landroid RadioLink WA0864
- Page 1 Owner’s manual Original instruction WR153E WR155E WA0864 WA0864...
-
Page 2: Table Of Contents
Table of contents TABLE OF CONTENTS Welcome p. 03 Contact information Safety first p. 05 Important safety instructions Get familiar with p. 07 What’s in the box p. 08 How works Getting started p. 09 Installation Quick reference p. 24 Troubleshooting p. -
Page 3: Welcome
Welcome Thank you for purchasing a Worx Landroid RadioLink. We’re here to help: Support www.worx-europe.com/support Landroid Owner’s Site https://account.worxlandroid.com/login... -
Page 4: Safety First
Safety first IMPORTANT SAFETY INSTRUCTIONS RadioLink Gateway and Node - General Safety Warnings WARNING: Read all safety warnings and all instructions. Failure to follow the warnings and instructions may result in electric shock, fire and/or serious injury. Carefully read the instructions for the safe operation of the machine. Save all warnings and instructions for future reference. - Page 5 Safety first AC adapter - General Safety Warnings WARNING: Read all safety warnings and all instructions. Failure to follow the warnings and instructions may result in electric shock, fire and/or serious injury. Save all warnings and instructions for future reference. This appliance can be used by children aged from 8 years and above and people with reduced physical, sensory or mental capabilities or lack of experience and knowledge if they have been given supervision or instruction concerning use of the appliance in a safe way and understand the hazards involved.
- Page 6 Safety first MAINTAIN External power supply WITH CARE Remove the plug from the socket before carrying out any adjustment, servicing or maintenance. Your requires no additional lubrication or maintenance. Never use water or chemical External power supply cleaners to clean. Wipe clean with a dry cloth. Always store your External power supply in a dry place.
-
Page 7: Get Familiar With
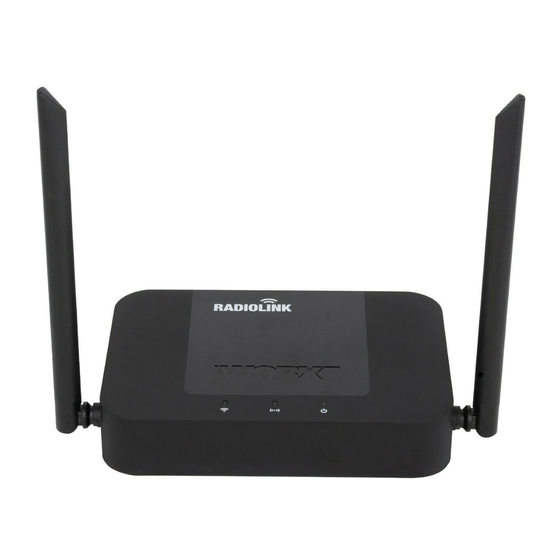
Get familiar with WHAT’S IN THE BOX AC Adapter RadioLink Gateway RadioLink Module Cable Ethernet cable... -
Page 8: 08 How Works
Get familiar with HOW IT WORKS The RadioLink option offers constant online connectivity. Regular domestic Wi-Fi networks typically only cover a fraction of the entire garden—RadioLink instead establishes a radio con- nectivity that extends it from your Wi-Fi router, regardless of walls, obstacles or interferences. -
Page 9: Getting Started
Before proceeding with the installation please make sure your Landroid’s firmware is updated to the last version. For more information on firmware upgrade please refer to the “Maintenance” section of the Landroid-o-pedia (https://support.worx-europe.com). RadioLink comes in two parts and is plug and play. Please follow the steps below depending on Landroid models you own. - Page 10 Getting started 7. Connect the RadioLink Gateway (B) to your router, even if it does 8. Plug the AC adaptor (A) into the main plug and connect it to the not have Wi-Fi, by just connecting the ethernet cable (E) RadioLink Gateway (B) by using the cable (D).
- Page 11 15. After a couple of minutes all 3 lights will turn solid green. 16. The RadioLink icon is now active.Touch it to see the status. If Please check the trouble shooting section for the different LED the Status shows “error” contact our support team at https://support.worx-europe.com colors and their meaning.
- Page 12 Getting started Landroid M 500 (WR141E) START 2. Open Landroid’s hood 1. Turn off Landroid CLICK! 3. Remove the cover using a screwdriver 4. Connect RadioLink module to the Landroid’s connector till you hear a click and insert it into the slot 6.
- Page 13 Getting started 7. Connect the RadioLink Gateway (B) to your router, even if it 8. Plug the AC adaptor (A) into the main plug and connect it to the does not have Wi-Fi, by just connecting the ethernet cable (E) RadioLink Gateway (B) by using the cable (D 9.
- Page 14 15. After a couple of minutes all 3 lights will turn solid green. 16. The RadioLink icon is now active.Touch it to see the status. Please check the trouble shooting section for the different LED If the Status shows “error” contact our support team colors and their meaning. at https://support.worx-europe.com...
- Page 15 Getting started Landroid M 700 (WR1421E) Landroid M 1000 (WR143E) Power OFF Goodbye START 2. Open Landroid’s hood 1. Turn off Landroid CLICK! 4. Connect RadioLink module to the Landroid’s connector till you 3. Remove the cover using a screwdriver hear a click and insert it into the slot 5.
- Page 16 Getting started 7. Connect the RadioLink Gateway (B) to your router, even if it 8. Plug the AC adaptor (A) into the main plug and connect it to the does not have Wi-Fi, by just connecting the ethernet cable (E) RadioLink Gateway (B) by using the cable (D).
- Page 17 16. After a couple of minutes all 3 lights will turn solid green. Please check the trouble shooting section for the different LED colors and their meaning. 17. The RadioLink icon is now active.Touch it to see the status. If the Status shows “error” contact our support team at https://support.worx-europe.com...
- Page 18 Getting started Landroid L 1000 (WR147E) Power OFF Goodbye START START 1. Turn off Landroid 2. Turn Landroid upside down CLICK! 3. Remove the cover using a screwdriver 4. Connect RadioLink module to the Landroid’s connector till you hear a click and insert it into the slot 5.
- Page 19 Getting started 7. Connect the RadioLink Gateway (B) to your router, even if it 8. Plug the AC adaptor (A) into the main plug and connect it to the does not have Wi-Fi, by just connecting the ethernet cable (E) RadioLink Gateway (B) by using the cable (D).
- Page 20 15. After a couple of minutes all 3 lights will turn solid green. 16. The RadioLink icon is now active.Touch it to see the status. Please check the trouble shooting section for the different LED If the Status shows “error” contact our support team at https://support.worx-europe.com colors and their meaning.
- Page 21 Getting started Landroid L 1500 (WR153E) Landroid L 2000 (WR155E) Power OFF Goodbye START 2. Turn Landroid upside down 1. Turn off Landroid CLICK! 3. Remove the cover using a screwdriver 4. Connect RadioLink module to the Landroid’s connector till you hear a click and insert it into the slot 5.
- Page 22 Getting started 7. Connect the RadioLink Gateway (B) to your router, even if it 8. Plug the AC adaptor (A) into the main plug and connect it to the does not have Wi-Fi, by just , connecting the ethernet cable (E) RadioLink Gateway (B) by using the cable (D).
- Page 23 16. After a couple of minutes all 3 lights will turn solid green. Please check the trouble shooting section for the different LED colors and their meaning. 17. The RadioLink icon is now active.Touch it to see the status. If the Status shows “error” contact our support team at https://support.worx-europe.com...
-
Page 24: Quick Reference
Quick reference Troubleshooting Symptom Cause Action lost connection or “missing” Check internet connection with solid red connection provider Power solid blue booting Nothing to do light is: blink purple transmitting data Nothing to do solid green successfully connected Nothing to do connected with ethernet cable / solid green successful connection to the LAN... - Page 25 Quick reference Technical data for AC adapter Rated input data 100-240V~50/60Hz 0.2A Input AC frequency 50 Hz/60Hz Output voltage 5.0V Output current 1.0 A Output power 5.0 W The average efficiency is larger than 73.62% which is at 115Vac/60Hz and Average active efficiency 230Vac/50Hz with 100%, 75%, 50%, 25% rated load This result complies with the DOE VI.
-
Page 26: Declaration Of Conformity
Quick reference Declaration of Conformity Positec Germany GmbH Grüner Weg 10, 50825 Cologne, Germany Declare that the product Description Radio Link Type WA0864 Function Wifi signal conversion amplification Complies with the following Directives: 2014/53/EU, 2011/65/EU & (EU)2015/863 Standards conform to, EN 301 489-1 V2.1.1, EN 301 489-3 V2.1.1, EN 301489-17 V3.1.1;... - Page 27 Quick reference Declaration of Conformity Positec Germany GmbH Grüner Weg 10, 50825 Cologne, Germany as the representative of Mass Power Electronic Limited in European Union Declare that the product (used with the Radio Link) Description AC Adapter Type NBS05B050100VEU Complies with the following Directives: 2014/35/EU, 2014/30/EU, 2011/65/EU &...
Need help?
Do you have a question about the Landroid RadioLink WA0864 and is the answer not in the manual?
Questions and answers
Can I connect 2 worx robot lawnmowers to the same radiolink?