Table of Contents
Advertisement
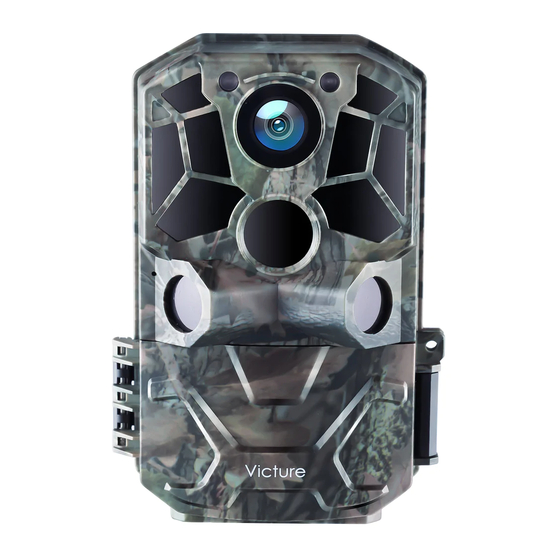
Simple version instructions of HC500
Warranty
Dear customer,
Thanks for your great support of Victure camera. This product has a 12-MONTH warranty
from the date of the purchase.
★As our valued customer, you could now send us your Order Screenshot via the following email:
hc.support@govicture.com to extend the warranty to 36 MONTHS for free!
If there is any Question or Suggestion about this product, please feel free to contact us via the
above email or WhatsApp: +86 13827808023. Our friendly customer service professionals are
always standing by to help and we would make every effort to offer you a satisfying answer!
Best Regards,
Victure Trail Camera Team
Advertisement
Table of Contents

Related Manuals for Victure HC500


Summary of Contents for Victure HC500
- Page 1 Simple version instructions of HC500 Warranty Dear customer, Thanks for your great support of Victure camera. This product has a 12-MONTH warranty from the date of the purchase. ★As our valued customer, you could now send us your Order Screenshot via the following email: hc.support@govicture.com to extend the warranty to 36 MONTHS for free!
-
Page 2: Table Of Contents
Content STEP ONE: WHAT SHOULD I PREPARE BEFORE USING? ............ 3 > Preparation before Using ....................... 3 > Install the Batteries ........................ 3 > Insert the SD Card ........................4 > Tear off the Protective Films ....................4 STEP TWO: HOW DO I SET IT? .................... -
Page 3: Step One: What Should I Prepare Before Using
STEP ONE: WHAT SHOULD I PREPARE BEFORE USING? > Preparation before Using 1. The SD card, the batteries and the external power supply are not included in the package, you need to prepare these things beforehand. 2. Tips and Recommendation: (1) For optimal performance, we recommend using a full set of eight rechargeable batteries of high-quality to maintain maximum battery life. -
Page 4: Insert The Sd Card
> Insert the SD Card 1. Turning off the read-write protection of the SD card, which located in the left of the card, so that the camera can recognize the card. 2. Please format the memory card as ‘FAT32’ on the computer and format it again on the camera before use. -
Page 5: Step Two: How Do I Set It
STEP TWO: HOW DO I SET IT? 1. Slide the Switch Button to the【SETUP】position.The camera enters test mode.The screen will light up. 2. Short press Button once You can view the pictures and videos taken by the camera. 3. Short press Button twice and enter the setting interface. -
Page 6: Menu Setting List
> Menu Setting List: Mode: The camera will only take photos under Photo mode, only take videos under Video mode, and the photo first and then the video under the Photo+Video mode. Please set the function by you need. The camera default setting is Photo. Image Size: The maximum value is 30MP and the default value is 5MP. - Page 7 PIR Sensitivity: The default setting is Medium. Please modify this as needed. E.g increase sensitivity to capture very small movements or lower the sensitivity if you are just looking for bigger animal movements. Time Lapse: Our trail camera has the ability to function as a time lapse camera. This is useful if you want to view the entire activity in a given area such as a large field or you want to observe cold blooded animals(e.g.
- Page 8 Beep Sound: When this is on, You can hear the click of the camera button and the on/off prompt. Camera Name: You can modify the camera name you want in this setting, and the camera name will be printed on the photo. It is convenient for users to identify different cameras by the camera name when multiple cameras are used at the same time.
-
Page 9: Step Threee: How Should I Mount It
STEP THREEE: HOW SHOULD I MOUNT IT? > Mounting the Camera There are two ways to mount the Victure trail camera: using the provided adjustable web belt, or the tripod socket. 1. Using the Adjustable Web Belt Push one end of the belt through the brackets on the back of the camera. Thread the end of the strap through the buckle. - Page 10 > How to make the camera more accurately capture animals? The shooting range of this product is 120° fan-shaped area right in front of the camera. The best imaging distance is 3-10 meters in front of the camera. In order to achieve the desired detection of shooting, please place the camera following below instructions: 1.
-
Page 11: Step Four: Switching On The Camera
STEP FOUR: SWITCHING ON THE CAMERA After placing the camera properly, please make sure that the power switch is in the【ON】 position (Do not leave it in the SETUP position). Once you switch the power switch to the【ON】position, the motion indicator light will blink for 5 seconds. -
Page 12: Review The Files On The Computer
> Review the Files on the Computer 1. The way to review the images on your SD card is to review the images on your computer with card reader. The pictures can be viewed on both PC and the Mac computers. Here are the steps: (1) Insert the SD card into your computer via a card reader.. -
Page 13: Attachment: Our Social Channels
ATTACHMENT: OUR SOCIAL CHANNELS > YouTube 1. Search ‘Victure TC’ on YouTube, enter into the brand page and then click the ‘PLAYLISTS’ . 2. Go through the link on the browser: http://rrd.me/ejNYF > Facebook Search: @enjoywildlifecamera...
Need help?
Do you have a question about the HC500 and is the answer not in the manual?
Questions and answers