Table of Contents
Advertisement
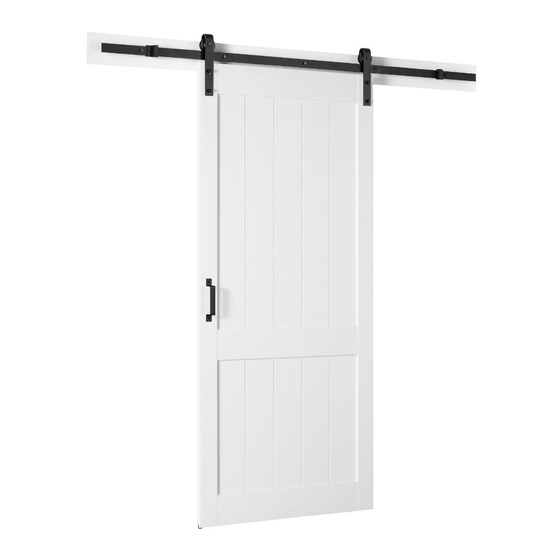
BARN DOOR
INSTALLATION MANUAL | MANUEL D'INSTALLATION | MANUAL DE INSTALACIÓN
Questions, problems, need help?
Call our customer service department at
1-866-839-2888, 9 a.m. - 5 p.m., EST, Monday - Friday
Questions, problèmes ou besoin d'aide?
Contactez notre service à la clientèle au
1-866-839-2888, du lundi au vendredi de 9h00 à 17h00 HNE.
Preguntas, problemas o necesita ayuda?
Llame a nuestro departamento de servicio al cliente al
1-866-839-2888, 9 am. – 5 pm., HDE, Lunes a Viernes.
PAGE 1
www.ovedecors.com | customerservice@ovedecors.com
Advertisement
Table of Contents

Summary of Contents for OVE BARN DOOR
- Page 1 BARN DOOR INSTALLATION MANUAL | MANUEL D’INSTALLATION | MANUAL DE INSTALACIÓN Questions, problems, need help? Call our customer service department at 1-866-839-2888, 9 a.m. - 5 p.m., EST, Monday - Friday Questions, problèmes ou besoin d’aide? Contactez notre service à la clientèle au 1-866-839-2888, du lundi au vendredi de 9h00 à...
-
Page 2: Table Of Contents
TABLE DES MATIÈRES TABLA DE CONTENIDOS TABLE OF CONTENT ........2 TABLE DES MATIÈRES ........2 TABLA DE CONTENIDOS ........2 BARN DOOR DIMENSIONS ......3 DIMENSIONS DU COUPE-FLUX ....... 3 DIMENSIONES DE LA PUERTA DEL ESTABLO ................3 PACKAGE CONTENT ........4 CONTENU DE L’EMBALLAGE ...... -
Page 3: Barn Door Dimensions
BARN DOOR DIMENSIONS DIMENSIONS DU COUPE-FLUX DIMENSIONES DE LA PUERTA DEL ESTABLO Measurements Mesures Medidas Decorative board length Longueur du panneau décoratif Longitud del tablero decorativo Support bar length Longueur de la barre de support Longitud de la barra de soporte Distance between handle holes Distance entre les trous de poignée... -
Page 4: Package Content
PACKAGE CONTENT CONTENU DE L’EMBALLAGE CONTENIDO DEL PAQUETE PAGE 4... - Page 5 PACKAGE CONTENT CONTENU DE L’EMBALLAGE CONTENIDO DEL PAQUETE PAGE 5...
-
Page 6: Part List
PART LIST LISTE DES PIÈCES LISTA DE PIEZAS PART # DESCRIPTION QUANTITY CODE # DE PIÈCE DESCRIPTION QUANTITÉ CODE PARTE # DESCRIPCIÓN CANTIDAD CÓDIO Door roller Roue de la porte 99DBD0003-JS Rodillo de la puerta Door Porte Puerta Door handle Poignée de porte 99DBD0013-JS Manija de la puerta... -
Page 7: Supplied Hardware List
SUPPLIED HARDWARE LIST QUINCAILLERIE FOURNIE CONTENIDO DE HARDWARE Spacer Lag bolt Bolt Screw Screw Entretoise Boulon de butée Boulon Espaciador Perno de retardo Perno Tornillo Tornillo ST8x90mm M10x50mm ST4x25mm ST3.5x20mm Washer Washer Screw Allen key Écrou Rondelle Rondelle Clé Allen Tuerca Arandela Arandela... -
Page 8: Preparation
PREPARATION PRÉPARATION PREPARACIÓN This instruction is drawn up for a door opening from right to left (see illustration A). For an installation for a door opening from left to right (see illustration B), use the same instructions, but switch around the panels: mirror effect. Utilisez ces instructions pour une ouverture de la porte de droite à... -
Page 9: Safety Information
• Install the barn door on a wall that is level and able to accommodate the weight of the unit, support bar and hardware (Weight 120 lbs / 54.5 • Consult local building codes and compliance standards prior to installation and ensure conformity. -
Page 10: Safety Notice
SAFETY NOTICE AVIS DE SÉCURITÉ AVISOS DE SEGURIDAD NOTICE Any modification or alteration from what is specified in this instruction manual will void any and all warranty on this product. The distributor is not responsible for any damage to the unit or personal property caused by improper installation. If you disregard instructional warnings, you will void your warranty. -
Page 11: Support Bar Installation
Any deviation from this could potentially cause failure of and/or damage to the barn door unit, surrounding items and people in the area. If the wall studs are not using the standard 16” spacing, a professional carpenter should be contacted for advice on how to proceed. -
Page 12: Soft Close Mechanism Installation
SOFT CLOSE MECHANISM INSTALLATION INSTALLATION DU MÉCANISME DE FERMETURE EN DOUCEUR INSTALACIÓN DEL MECANISMO DE CIERRE SUAVE 2.1-2.4. Install the 2 soft close mechanisms (H) onto the support bar (G) in the positions shown and fix them with the supplied bolts. 2.1-2.4. - Page 13 SOFT CLOSE MECHANISM INSTALLATION INSTALLATION DU MÉCANISME DE FERMETURE EN DOUCEUR INSTALACIÓN DEL MECANISMO DE CIERRE SUAVE 3.1-3.4. The soft close mechanism can be reset using a screwdriver. The correct installation starting position is to the outside of the bar. 3.1-3.4.
-
Page 14: Door Installation
DOOR INSTALLATION INSTALLATION DE LA PORTE INSTALACION DE LA PUERTA 4.1. Install the 2 door rollers (A) on the door (B) using bolts (CC), washers (GG) and nuts (FF). 4.2. Install the handle (C) using screws (EE). 4.1. Montez les 2 galets (A) sur la porte (B) à l’aide de boulons (CC), rondelles (GG) et écrous (FF). 4.2. - Page 15 Any deviation from this could potentially cause failure of and/or damage to the barn door unit, surrounding items and people in the area. If the wall studs are not using the standard 16”...
-
Page 16: Door Guide Installation
DOOR GUIDE INSTALLATION INSTALLATION DU GUIDE DE PORTE INSTALACIÓN DE LA GUÍA DE LA PUERTA 6.1. Place the door guide (D) at the bottom of the door (B), Slide the door (B) side to side to ensure the guide (D) is properly placed at a point that will always be under the door, then mark the position of the guide (D). -
Page 17: Soft Closing Actuator Installation
SOFT CLOSING ACTUATOR INSTALLATION INSTALLATION D’UN ACTIONNEUR DE FERMETURE EN DOUCEUR INSTALACIÓN DEL ACTUADOR DE CIERRE SUAVE 7.1-7.3. Place the soft closing actuators (I) at the top of the door (B) at the center of the soft close mechanisms (H) as shown, then fix them with screws (II), 7.4. -
Page 18: Maintenance And Care
MAINTENANCE AND CARE ENTRETIEN ET MAINTENANCE MANTENIMIENTO Y CUIDADO For the daily maintenance, use a wet cloth and a soft liquid cleaner. Never use abrasive cleaners containing some acetone, chlorine or strong bleach, scrapers, metallic brushes, nor other objects or the products which can graze or tarnish surfaces. -
Page 19: Limited Product Warranty
WARRANTY NOT VALID IN MEXICO CETTE GARANTIE N’EST PAS VALIDE AU MEXIQUE GARANTIA NO VALIDA PARA MÉXICO CONSUMER RESPONSIBILITIES RESPONSABILIDADES DEL CONSUMIDOR RESPONSABILITÉS DU CLIENT The DISTRIBUTOR’s products will remain beautiful for Los productos del DISTRIBUIDOR permanecerán Les produits du DISTRIBUTEUR garderont leur belle many years if you properly care for them.
Need help?
Do you have a question about the BARN DOOR and is the answer not in the manual?
Questions and answers