Table of Contents
Advertisement
Advertisement
Table of Contents

Related Manuals for adept technology Viper s650


Summary of Contents for adept technology Viper s650
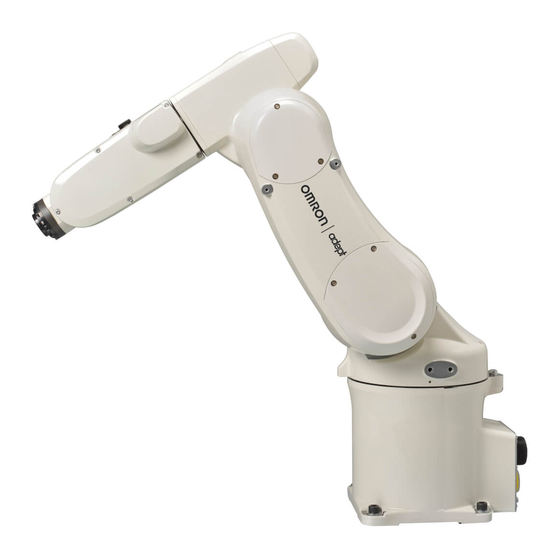
- Page 1 Adept Viper s650/s850 Robot with MB-60R User’s Guide...
- Page 3 Adept Viper s650/s850 Robot with MB-60R User’s Guide P/N: 05173-060, Rev D December 2011 5960 Inglewood Drive • Pleasanton, CA 94588 • USA • Phone 925.245.3400 • Fax 925.960.0452 Otto-Hahn-Strasse 23 • 44227 Dortmund • Germany • Phone +49.231.75.89.40 • Fax +49.231.75.89.450 Block 5000 Ang Mo Kio Avenue 5 •...
- Page 4 The information contained herein is the property of Adept Technology, Inc., and shall not be reproduced in whole or in part without prior written approval of Adept Technology, Inc. The information herein is sub- ject to change without notice and should not be construed as a commitment by Adept Technology, Inc. This manual is periodically reviewed and revised.
-
Page 5: Table Of Contents
Adept Viper s650/s850 Robots ........ - Page 6 Installing the Arm Power/Signal Cable......54 Adept Viper s650/s850 Robot with MB-60R User’s Guide, Rev C...
- Page 7 5.10 Installing User-Supplied Hardstops ........72 Adept Viper s650/s850 Robot with MB-60R User’s Guide, Rev C...
- Page 8 Index ............93 Adept Viper s650/s850 Robot with MB-60R User’s Guide, Rev C...
- Page 9 Figure 6-6. Reconnecting Dummy Connector Cap ........76 Figure 7-1. Adept Viper s650 Side Dimensions and Work Envelope ......77 Figure 7-2.
- Page 10 Figure 8-1. Adept Viper s650 Robot with IP-54/65 Option ....... .
-
Page 11: Introduction
NOTE: The descriptions and instructions in this manual apply to both the Adept Viper s650 and the Adept Viper s850, except for instances where there is a difference, as in dimension and work envelope drawings. In those cases, the information is presented for both robots. -
Page 12: Adept Smartcontroller Cx
*S/N 3562-XXXXX* CAMERA RS-232/TERM RS-422/485 SmartServo IEEE-1394 Device Net Eth 10/100 BELT ENCODER RS-232-1 RS-232-2 1 2 3 4 XDIO XUSR XSYS XMCP XDC1 XDC2 Figure 1-2. Adept SmartController CX Adept Viper s650/s850 Robot with MB-60R User’s Guide, Rev D... -
Page 13: Adept Motionblox-60R
• Digital feed-forward design, to maximizes efficiency, torque, and velocity • Integral temperature sensors and status monitoring for maximum reliability • Dual-digit diagnostics display for easy troubleshooting Figure 1-3. MotionBlox-60R (MB-60R) Adept Viper s650/s850 Robot with MB-60R User’s Guide, Rev D... -
Page 14: Dangers, Warnings, Cautions, And Notes
The Adept Viper robots are intended for use in parts assembly and material handling for payloads less than 10 kg. See “Robot Installation” on page 19 for complete information tooling and payloads. Adept Viper s650/s850 Robot with MB-60R User’s Guide, Rev D... -
Page 15: Safety Precautions
It also gives resources for more information on relevant standards. It ships with each robot manual, and is also available from the Adept Document Library. See “Adept Document Library” on page 17. Adept Viper s650/s850 Robot with MB-60R User’s Guide, Rev D... -
Page 16: Installation Overview
1. Click on the appropriate .zip file. You are prompted to Open or Save the file. 2. Click Open to open the file and display the archive contents. 3. Double-click on a .pdf file to open it. Adept Viper s650/s850 Robot with MB-60R User’s Guide, Rev D... -
Page 17: How Can I Get Help
To locate information on a specific topic, use the Document Library search engine on the ADL main page. To view a list of available product documentation, select the Document Titles option. Adept Viper s650/s850 Robot with MB-60R User’s Guide, Rev D... -
Page 19: Robot Installation
Specify this to the carrier if the robot is to be shipped. CAUTION: Before transportation, set the robot in a transport position as shown in Figure 2-1 by manually moving the second, third, and fourth axes. Adept Viper s650/s850 Robot with MB-60R User’s Guide, Rev D... -
Page 20: Environmental And Facility Requirements
• There are any shavings from metal processing or other conductive material flying about • It may be directly exposed to water, oil, or cutting chips Adept Viper s650/s850 Robot with MB-60R User’s Guide, Rev D... -
Page 21: Transporting The Robot
Failure to comply could result in the robot falling and causing either personnel injury or equipment damage. Adept Viper s650/s850 Robot with MB-60R User’s Guide, Rev D... -
Page 22: Figure 2-3. Eyebolts Label
Chapter 2 - Robot Installation Figure 2-3. Eyebolts Label Wire (Belt sling) Waste Cloth Eyebolts Robot Mounting Bolts Figure 2-4. Robot in Hoisting Sling Adept Viper s650/s850 Robot with MB-60R User’s Guide, Rev D... -
Page 23: Transport Procedure
When the robot is first unpacked, this step is not required. As shown at right, mount the eyebolts. When delivered, the robot is packed with eyebolts attached, so this step is not required Eyebolts Adept Viper s650/s850 Robot with MB-60R User’s Guide, Rev D... - Page 24 Section on page Remove the eyebolts from the robot. Caution: Before running the robot, be sure to remove the eyebolts. Otherwise, the robot arm will strike these eyebolts. Adept Viper s650/s850 Robot with MB-60R User’s Guide, Rev D...
-
Page 25: Mounting The Robot
NOTE: Be sure to use the alignment pins. It can minimize positional deviations that may be caused by the removal/installation of the robot for maintenance and reduce vibration during operation. Adept Viper s650/s850 Robot with MB-60R User’s Guide, Rev D... -
Page 26: Grounding The Robot
C N 2 2 A I R 1 A IR2 C N2 0 Grounding terminal (M5) 12 AWG or more Figure 2-6. Ground Point on Robot Adept Viper s650/s850 Robot with MB-60R User’s Guide, Rev D... -
Page 27: Description Of Connectors On Robot Interface Panel
AIR 2 - air line connector (BSPT1/4), connects directly to AIR 2 on the second (upper) arm. Grounding Terminal - protective earth ground point on the robot, see Section 2.5 on page Adept Viper s650/s850 Robot with MB-60R User’s Guide, Rev D... -
Page 28: Air Lines And Signal Wiring
Note 1: Pins #1 to #10 on CN21 and those on CN20 are connected with each other. The allowable current per line is 1 A. Table 9-5 on page 90 Note 2: Use the supplied mating connector sets for CN20 and CN21. See for information about the mating connectors on Cleanroom and IP-54/65 robots. Adept Viper s650/s850 Robot with MB-60R User’s Guide, Rev D... -
Page 29: Optional Solenoid Cable
XDIO signals out to the CN21 connector at the top of the robot. See Table 2-3 for the details of which signals are available at CN21. See the Adept SmartController User’s Guide for the electrical specifications for the signals from the XDIO connector. Adept Viper s650/s850 Robot with MB-60R User’s Guide, Rev D... -
Page 30: Solenoid Valve Specifications
Power consumption (current) 0.5 W (21 mA) Surge voltage protection circuit Zener diode Note that the robot is rated at 0.1 to 0.39 MPa, 0.49 Max (14 - 56.6 psi, 71.1 Max) Adept Viper s650/s850 Robot with MB-60R User’s Guide, Rev D... -
Page 31: External Mounting Locations On Robot
Continuous Turn on J6 It is possible to order the Adept Viper s650/s850 so that Joint 6 (J6) is programmed for continuous turn. Note that if J6 is programmed for continuous turn, it may lose its calibration. However, the other robot joints (J1 - J5) will not be affected. -
Page 32: Center Of Gravity Position Of End-Effector
Inertia moment around center of gravity 3. Rectangular parallelepiped (The axis of rotation passes through the center of gravity.) l: Moment of inertia m: Mass r: Radius b, c, : Length Adept Viper s650/s850 Robot with MB-60R User’s Guide, Rev D... -
Page 33: Figure 2-10. Moment Of Inertia Calculation Examples
((0.08 + 0.01 + 0.05) +0.05 2.30 × 10 [kgm Moment of inertia around J4 and J5 of entire end-effector: I 2.54×10 [kgm Figure 2-10. Moment of Inertia Calculation Examples Adept Viper s650/s850 Robot with MB-60R User’s Guide, Rev D... -
Page 35: Motionblox-60R
• a status panel with 2-digit alpha-numeric display to indicate operating status and fault codes Robot Connector Robot Interface (for Arm Power/Signal Panel Cable from Robot) Figure 3-1. Adept MB-60R Front View Adept Viper s650/s850 Robot with MB-60R User’s Guide, Rev D... -
Page 36: Description Of Connectors On Mb-60R Interface Panel
Section 3.4 on page 40 for connector pin allocations for inputs and outputs. That section also contains details on how to access these I/O signals via V+. (DB-26, high density, female) Adept Viper s650/s850 Robot with MB-60R User’s Guide, Rev D... -
Page 37: Mb-60R Operation
High Power Disabled Green, Fast Blink High Power Enabled Green/Red Blink Selected Configuration Node Red, Fast Blink Fault, see Table 3-2 on page 38 Solid Green or Red Initialization or Robot Fault Adept Viper s650/s850 Robot with MB-60R User’s Guide, Rev D... -
Page 38: Status Panel
NOTE: If this button is pressed while high power is on, high power will automatically shut down. For manual release of the brakes on the Adept Viper s650/s850 robot, a Brake Release connector is provided on the MB-60R for connecting a manual brake release box. See the following section for more details. -
Page 39: Brake Release Connector
Not connected Release3_N Not connected Not connected Not connected Pin 9 Pin 5 Not connected DB-9 Female 24 V Brake Connector as viewed on MB-60R Mating Connector: D-Subminiature 9-Pin Male Adept Viper s650/s850 Robot with MB-60R User’s Guide, Rev D... -
Page 40: Connecting Digital I/O To The System
12 Input signals: 1001 to 1012 8 Output signals: 0001 to 0008 XIO Connector 12 Input signals: 1097 to 1108 8 Output signals: 0097 to 0104 Figure 3-4. Connecting Digital I/O to the System Adept Viper s650/s850 Robot with MB-60R User’s Guide, Rev D... - Page 41 For sDIO modules 3 and 4 (and beyond), you must configure the signals to have the system support those modules, using the Controller Editor in the Adept ACE software. For details, see the topic V+ System Configuration in Adept ACE User’s Guide. Adept Viper s650/s850 Robot with MB-60R User’s Guide, Rev D...
-
Page 42: Using Digital I/O On Mb-60R Xio Connector
XIO 26-pin female Output 1 0097 connector on MB-60R Interface Output 2 0098 Panel Output 3 0099 Output 4 0100 Output 5 0101 Output 6 0102 Output 7 0103 Output 8 0104 Adept Viper s650/s850 Robot with MB-60R User’s Guide, Rev D... -
Page 43: Optional I/O Products
Software scan rate/response time 16 ms scan cycle/ 32 ms max response time NOTE: The input current specifications are provided for reference. Voltage sources are typically used to drive the inputs. Adept Viper s650/s850 Robot with MB-60R User’s Guide, Rev D... -
Page 44: Typical Input Wiring Example
This guarantees that the inputs will not be turned on by the leakage current from the outputs. This is useful in situations where the outputs are looped-back to the inputs for monitoring purposes. Adept Viper s650/s850 Robot with MB-60R User’s Guide, Rev D... -
Page 45: Xio Output Signals
(I = 0.5 A, Load = 1 mH) 0.7 A I 2.5 A DC short circuit current limit 4 A Peak short circuit current ovpk Adept Viper s650/s850 Robot with MB-60R User’s Guide, Rev D... -
Page 46: Typical Output Wiring Example
04465-000, and the length is 5 M (16.4 ft). Table 3-9 on page 47 for the wire chart on the cable. NOTE: This cable is not compatible with the XIO Termination Block. Figure 3-7. Optional XIO Breakout Cable Adept Viper s650/s850 Robot with MB-60R User’s Guide, Rev D... - Page 47 XIO Breakout Cable Output 2 Pink/Black Output 3 Light Blue Output 4 Light Blue/Black Output 5 Light Green Output 6 Light Green/Black Output 7 White/Red Output 8 White/Blue Shell Shield Adept Viper s650/s850 Robot with MB-60R User’s Guide, Rev D...
-
Page 48: Mb-60R Dimensions
Note: 112 mm clearance required in front of unit to remove amps from box enclosure. M4 X 7mm DP BLIND STUDS 45.7 SPCD AS SHOWN, 20X Figure 3-8. MB-60R Mounting Dimensions Adept Viper s650/s850 Robot with MB-60R User’s Guide, Rev D... -
Page 49: Mounting The Mb-60R
Use the screws from the accessories kit. 4X Ø .169 THRU ALL Ø .370 X 90°, FARSIDE ON FARSIDE .25 .25 TYP.CHAMFER 3.750 2.250 4.00 9.00 Figure 3-9. Panel-Mounting the MB-60R Adept Viper s650/s850 Robot with MB-60R User’s Guide, Rev D... -
Page 51: System Installation
Grounding User-Supplied Terminal (M5) Ground Wire Figure 4-1. System Cable Diagram for Adept SmartController Robots NOTE: See “Installing the 24 VDC Cable” on page 56 for additional system grounding information. Adept Viper s650/s850 Robot with MB-60R User’s Guide, Rev D... -
Page 52: Cables And Parts List
1. Insert the CD-ROM into the CD-ROM drive of your PC. If Autoplay is enabled, the Adept software CD-ROM menu is displayed. If Autoplay is disabled, you will need to manually start the CD-ROM. Adept Viper s650/s850 Robot with MB-60R User’s Guide, Rev D... -
Page 53: Connecting The Pc To The Smartcontroller
XSYS connector on the SmartController, and tighten the latching screws. NOTE: The IEEE 1394 and XSYS cables should be routed away from AC power and robot interconnect cables. Adept Viper s650/s850 Robot with MB-60R User’s Guide, Rev D... -
Page 54: Connecting Cables From The Mb-60R To The Robot
User-supplied 24 VDC power supply must incorporate overload protection to limit peak power to less than 300 W, or 8 A in-line fuse protection must be added to the 24 V power source. Adept Viper s650/s850 Robot with MB-60R User’s Guide, Rev D... -
Page 55: Details For 24 Vdc Mating Connector
Digi-Key P/N WM18463-ND +24 V Pin Details Molex connector crimp terminal, female, 14-18 AWG Molex P/N 43375-0001 Digi-Key P/N WM18493-ND Recommended crimping tool, Molex Hand Molex P/N 63811-0400 Crimper Digi-Key P/N WM9907-ND Adept Viper s650/s850 Robot with MB-60R User’s Guide, Rev D... -
Page 56: Procedure For Creating 24 Vdc Cable
2. Plug the mating connector end of the 24 VDC cable into the 24 VDC connector on the interface panel on the back of the MB-60R. The cable shield should be connected to the ground point on the interface panel. Adept Viper s650/s850 Robot with MB-60R User’s Guide, Rev D... -
Page 57: Connecting 200-240 Vac Power To Mb-60R
WARNING: Appropriately sized Branch Circuit Protection and Lockout / Tagout Capability must be provided in accordance with the National Electrical Code and any local codes. Adept Viper s650/s850 Robot with MB-60R User’s Guide, Rev D... -
Page 58: Specifications For Ac Power
Transient overvoltages at the point of connection to the power source shall be controlled not to exceed overvoltage Category II, i.e., not higher than the impulse voltage corresponding to the rated voltage for the basic insulation. The user-supplied Adept Viper s650/s850 Robot with MB-60R User’s Guide, Rev D... -
Page 59: Ac Power Diagrams
The AC mating connector is supplied with each system. It is shipped in the cable/accessories box. The supplied plug is internally labeled for the AC power connections (L, E, N). Adept Viper s650/s850 Robot with MB-60R User’s Guide, Rev D... -
Page 60: Procedure For Creating 200-240 Vac Cable
9. Replace the cover and tighten the screw to seal the connector. 10. Prepare the opposite end of the cable for connection to the facility AC power source. Removable Bushing Cable Earth Clamp Line Neutral Figure 4-5. AC Power Mating Connector Adept Viper s650/s850 Robot with MB-60R User’s Guide, Rev D... -
Page 61: Installing Ac Power Cable To Mb-60R
Optionally, two tapped holes are provided to attach user-supplied strain relief. Ground Point Figure 4-7. User Ground Location on MB-60R Adept Viper s650/s850 Robot with MB-60R User’s Guide, Rev D... -
Page 62: Robot-Mounted Equipment Grounding
XUSR connector on the SmartController. There is a detailed section on Emergency Stop circuits and diagrams on recommended E-Stop configurations. Adept Viper s650/s850 Robot with MB-60R User’s Guide, Rev D... -
Page 63: System Operation
NOTE: An E-Stop must be activated in order for the brake release box to work. 4. Using the axis selector switch, select the axis on which you want to release the brake. 5. Depress the Brake Release push button to release the brake. Adept Viper s650/s850 Robot with MB-60R User’s Guide, Rev D... -
Page 64: Using The Brake Release Switch On Ul Robots
NOTE: When the Status LED (Green) is on, it indicates that the circuit is enabled, when the Brake Release push button is pressed. Adept Viper s650/s850 Robot with MB-60R User’s Guide, Rev D... -
Page 65: Connecting Digital I/O To The System
IO Blox devices per robot Guide connector on MB-60R Optional sDIO Module, 32 inputs, 32 outputs per module; Adept SmartController connects to controller up to four sDIO per system User’s Guide Adept Viper s650/s850 Robot with MB-60R User’s Guide, Rev D... -
Page 66: Figure 5-3. Connecting Digital I/O To The System
1201 - 1232 (recommended Outputs 0201 - 0232 sDIO Module 4 Inputs 1233 - 1264 (recommended Outputs 0233 - 0264 IO Blox 1 Inputs 1113 - 1120 Outputs 0105 - 0112 Adept Viper s650/s850 Robot with MB-60R User’s Guide, Rev D... -
Page 67: Commissioning The System
• Verify that any end-of-arm tooling is properly installed. • Verify that all other peripheral equipment is properly installed and in a state where it is safe to turn on power to the robot system. Adept Viper s650/s850 Robot with MB-60R User’s Guide, Rev D... -
Page 68: System Cable Checks
• Double-click the Adept ACE icon on your Windows desktop or, from the Windows Start menu bar, • Select Start > Programs > Adept Technology > Adept ACE > Adept ACE. 2. On the Adept ACE Startup menu, click New SmartController Workspace. -
Page 69: Enabling High Power
Test each mushroom button, safety gate, light curtain, etc., by enabling high power and then opening the safety device. The High Power push button/light on the Front Panel should go out. Adept Viper s650/s850 Robot with MB-60R User’s Guide, Rev D... -
Page 70: Verify Robot Motions
Figure 1-1 on page 11 for a drawing of the axis identification. The yellow X-Y label can be used to indicate the X and Y axes in the World coordinate system in your workcell. Adept Viper s650/s850 Robot with MB-60R User’s Guide, Rev D... -
Page 71: Caution Label On Robot
Joint 4. When power is turned off, do not manually rotate Joint 4 more than the Joint Limits of ±190°. If Joint 4 is rotated beyond these limits, the internal wiring can be damaged. Adept Viper s650/s850 Robot with MB-60R User’s Guide, Rev D... -
Page 72: 5.10 Installing User-Supplied Hardstops
For more information, see the Adept Viper s650/s850 Hardstop Installation Guide. CAUTION: Failures caused by user-supplied hardstops are not covered by the warranty, even if the robot is under warranty. Adept Viper s650/s850 Robot with MB-60R User’s Guide, Rev D... -
Page 73: Maintenance
If the robot is turned on with 24 VDC more than half the time, then you can increase the replacement interval to seven years. If, for example, a robot is typically turned off only on weekends, the battery would need to be replaced every seven years. Adept Viper s650/s850 Robot with MB-60R User’s Guide, Rev D... -
Page 74: Battery Replacement Procedure
NOTE: Do not disconnect old backup batteries before connecting a new one to the pin from which the dummy connector cap is removed. If you do so, the encoder positional data may be lost. Adept Viper s650/s850 Robot with MB-60R User’s Guide, Rev D... -
Page 75: Figure 6-3. Connecting First New Battery
NOTE: Be sure to replace all of three batteries with new ones at one time. Otherwise, the battery service life will be reduced. Old backup battery New backup battery Figure 6-4. Connecting Second New Battery Adept Viper s650/s850 Robot with MB-60R User’s Guide, Rev D... -
Page 76: Figure 6-5. Connecting Third New Battery
9. Replace the cover on the robot. Tightening torque: Standard models - cross pan-head screw: 0.59 N·m (0.4 ft-lbf) Tightening torque: IP-54/65 models - Hex socket bolt: 2.0 N·m (1.5 ft-lbf) Adept Viper s650/s850 Robot with MB-60R User’s Guide, Rev D... -
Page 77: Technical Specifications
Technical Specifications Robot Dimensions 578.42 575.68 Point P Workable space defined by point P Figure 7-1. Adept Viper s650 Side Dimensions and Work Envelope Adept Viper s650/s850 Robot with MB-60R User’s Guide, Rev D... -
Page 78: Figure 7-2. Adept Viper S650 Top Dimensions And Work Envelope
187.7 (Note 1) Point P ±360° ±190° Note 1: On IP-54/65 and Cleanroom robots, clearance dimension for cables is 222 mm. Figure 7-2. Adept Viper s650 Top Dimensions and Work Envelope Adept Viper s650/s850 Robot with MB-60R User’s Guide, Rev D... -
Page 79: Figure 7-3. Adept Viper S850 Side Dimensions And Work Envelope
Robot Dimensions 779.88 779.88 Point P Workable space defined by point P Figure 7-3. Adept Viper s850 Side Dimensions and Work Envelope Adept Viper s650/s850 Robot with MB-60R User’s Guide, Rev D... -
Page 80: Figure 7-4. Adept Viper S850 Top Dimensions And Work Envelope
187.7 (Note 1) Point P ±360° ±190° Note 1: On IP-54/65 and Cleanroom robots, clearance dimension for cables is 222 mm. Figure 7-4. Adept Viper s850 Top Dimensions and Work Envelope Adept Viper s650/s850 Robot with MB-60R User’s Guide, Rev D... -
Page 81: Robot Flange Dimensions
ESTOP Auto Input Ch 1 XSLV1/2 Connector as viewed on MB-60R AUTO2 ESTOP Auto Input Ch 2 ESTOP_SRC ESTOP System +24 V Mating Connector: AMP/Tyco #747904-2, 9-pin D-Sub AMP/Tyco #748676-1, D-Sub Cable Clamp Adept Viper s650/s850 Robot with MB-60R User’s Guide, Rev D... -
Page 82: Specifications
User signal line 10 (for proximity sensor signals, etc.) Air source - Operating 0.1 to 3.9 MPa pressure (14.5 to 56.6 psi) Air source - Maximum 0.49 MPa (71.1 psi) allowable pressure Adept Viper s650/s850 Robot with MB-60R User’s Guide, Rev D... - Page 83 Approx. 29 kg Note 1: Position repeatability is the value at constant ambient temperature. Note 2: Only the 4x6 air tubing system may be controlled by built-in solenoid valves. Ø Adept Viper s650/s850 Robot with MB-60R User’s Guide, Rev D...
-
Page 85: Ip-54/65 Option
IP-54/65 Option Introduction The Adept Viper s650 and s850 robots can be ordered with an IP-54/65 option that is a dust-proof, splash-proof model. With the IP-54/65 option, the main body of the robot is rated IP-54, and Joints 4, 5, 6 are rated IP-65. Without this option, the robots have a rating of IP-40. -
Page 86: Installation Environment
For the IP-54/65 robot, the procedure to replace the encoder battery is the same as the standard robot, except the cover uses hex socket-head bolts instead of screws. See Figure 6-1 on page 74. Tightening torque: Hex socket bolt: 2.0 N·m (1.5 ft-lbf). Adept Viper s650/s850 Robot with MB-60R User’s Guide, Rev D... -
Page 87: Cleanroom Option
Cleanroom Option Introduction The Adept Viper s650 and s850 robots are available in Class 1 Cleanroom models. Figure 9-1. Adept Viper s850 Robot - Cleanroom Model Differences from Standard Robot Model The installation, operation, and specifications of the Cleanroom robot are the same as the standard robot, except for issues noted in this section. -
Page 88: Robot Connector Panel
(1/4” BSPT) Ground Terminal CN20 Vacuum Connection, OD Ø 32, ID Ø 25 Figure 9-2. Cleanroom Robot Connector Panel Table 9-1 on page 87 for the recommended vacuum flow rate. Adept Viper s650/s850 Robot with MB-60R User’s Guide, Rev D... -
Page 89: Air Lines And Signal Wiring
Pins A to K on CN20 and #1 to #10 on CN21 are connected with each other as shown below. The allowable current per line is 1 A. CN20 CN21 Adept Viper s650/s850 Robot with MB-60R User’s Guide, Rev D... -
Page 90: Cleanroom Cover At J6 Flange
The Cleanroom robot has a J6 Cleanroom Cover that is not present on the standard robot. Figure 9-3. Any user tooling at the flange must allow for clearance - see Figure 9-4. J6 Cleanroom Cover Figure 9-3. Adept Viper s850 J6 Cleanroom Cover Adept Viper s650/s850 Robot with MB-60R User’s Guide, Rev D... -
Page 91: Cable Clearance
For the Cleanroom robot, the procedure to replace the encoder battery is the same as the standard robot, except the cover uses hex socket-head bolts instead of screws. See Figure 6-1 on page 74. Tightening torque: Hex socket bolt: 2.0 N·m (1.5 ft-lbf). Adept Viper s650/s850 Robot with MB-60R User’s Guide, Rev D... -
Page 93: Index
MB-60R XIO digital output circuit brake release switch XIO signal designations XPANEL brakes XSLV pinouts releasing J3 for manual movement Customer Service assistance Breakout Cable, XIO Adept Viper s650/s850 Robot with MB-60R User’s Guide, Rev C... - Page 94 26, robot-mounted equipment operating requirements user-supplied 24 VDC cable optional I/O products grounding the robot overview system installation overvoltage protection hoisting sling facility How Can I Get Help? Adept Viper s650/s850 Robot with MB-60R User’s Guide, Rev C...
- Page 95 24 VDC power AC power Cleanroom robot robot performance status LED, description status panel codes, on MB-60R system cable diagram commissioning connecting digital I/O operating environment requirements, robot startup procedure Adept Viper s650/s850 Robot with MB-60R User’s Guide, Rev C...
- Page 98 5960 Inglewood Drive 5960 Inglewood Drive Pleasanton, CA 94588 Pleasanton, CA 94588 925·245·3400 P/N: 05173-060, Rev D 925·245·3400...
Need help?
Do you have a question about the Viper s650 and is the answer not in the manual?
Questions and answers