Table of Contents
Advertisement
Advertisement
Table of Contents

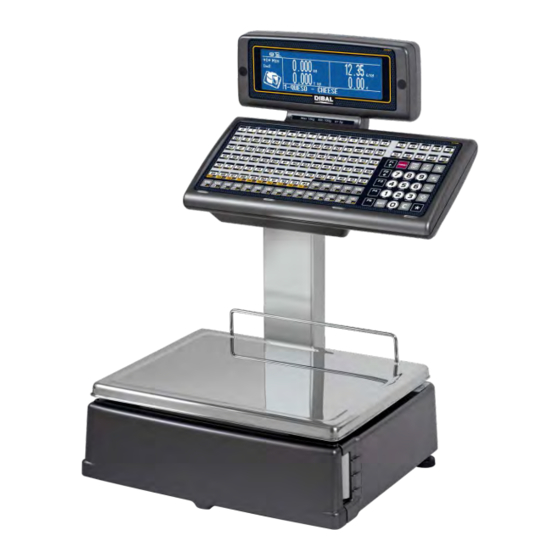
Summary of Contents for Dibal 500 Series
- Page 1 500 RANGE Ref.: 49B500XEN Rev02...
-
Page 3: Table Of Contents
CONTENTS INSTALLATION OF SCALES ......................1 SWITCHING ON ........................... 1 MENU STRUCTURE ..........................1 NORMAL WEIGHT ..........................2 RECEIPT PRINTING..........................2 OPERATION IN LABEL MODE ......................2 REGISTER / REMOVE VENDORS ..................... 2 NON-WEIGHT OPERATIONS ......................2 ZERO MANUAL ............................ 2 IN LINE DISCOUNT .......................... - Page 5 [ 3 6 7 ] EAN 13 Label [ 1 ] ARTICLES [ 3 6 8 ] EAN 128 Format [ 2 ] VENDORS [ 3 6 9 ] Scanner Sold Sales [ 2 1 ] CREATION [ 3 6 10 ] 128 Reading [ 2 2 ] DELETION [ 3 6 11 ] Substitution Letters Prepack Reading [ 2 3 ] CASH DRAWER...
- Page 6 [ 5 2 3 ] Monitoring mode [ 7 4 1 12 ] Centre Label [ 5 2 4 ] Weight number digits [ 7 4 1 13 ] Centre Receipt [ 5 3 ] OPERATIONS WITH PC [ 7 4 1 14 ] Dist Opto-Thermal Head [ 5 3 1 ] End Day with Deletion [7 4 1 15 ] Backing Paper Rewinder [ 5 3 2 ] End Day W/O Deletion...
-
Page 7: Installation Of Scales
Installation of scales Follow the instructions below to ensure correct installation and operation of the scales: Check that the mains voltage corresponds to that stated on the specifications label on the scales and that it does not fluctuate in excess of 10% of nominal voltage. Make sure that the scales can be connected to a nearby socket that is easy to access. -
Page 8: Normal Weight
Normal weight Place the product to be weighed on the platform. Enter the price using one of the following methods: • By entering the article code and pressing PLU, To do this the DIRECT PRICE must be deactivated (F4) • Press the corresponding direct key. •... -
Page 9: In Line Discount
In line discount • Effect the normal weight operation as far as the memorisation step, without actually memorising, press – and enter the PERCENTAGE discount to be applied. Check that the parameter DISCOUNT IN LINE has been set up correctly (view user manual). Review receipt Press the subtotal key ◊... -
Page 10: Forms Of Payment
Forms of payment When the receipt is to be printed, after pressing ∗, select the form of payment (PLU1,...,PLU9). Vx (x = vendor number). Create / modify a PLU Check that the scales are the MASTER. MENU 1 Enter the PLU code and press X. Fill the different fields of articles, press X to pass from one to other. -
Page 11: Date And Time
Date and time MENU 7 1 6. Use the numeric keyboard to enter the date and time. Press ∗ to save. Label printing parameters MENU 7 4 1. Select the parameter to modify, press the key F2 to scroll. Press ∗ and enter the desired value. Hold MENU until return to main screen. -
Page 12: Initialization Of Scale
Initialization of scale With this operation it is possible to delete all data from the scales except data on logos, fonts, ingredients and all customer information. MENU 5 3 4 ∗ Press the key 7 times. Backlight SHIFT −. C to change the working mode. ∗... -
Page 13: Changing Paper In The Printer
Changing paper in the printer Open the new reel of paper and remove the part containing glue. Open the cover. Remove the remains of the paper and the reel holder. Use the lever on the right of the printing head to remove pressure from the same (see drawing on the inside of the printer cover). -
Page 14: Scale With Cartridge
To replace continuous paper (ticket and label models): Remove the weighing platform by lifting it from the right as per point 1 above. Open the printer and release the paper from the head by working the lock. Remove the spent roll. - Page 15 Remove the cartridge roll to change the paper. Double body Hanging Flat Having removed the cartridge, you must open the other two levers in order to remove the old paper holder and remove the remaining cardboard. Put the new reel of labels in its place within the cartridge and slip the paper through as shown in the photograph.
-
Page 16: Declaration Of Conformity (View Link)
Declaration of conformity (view link) HTTP://WWW.DIBAL.COM/DECLARACIONESCONFORMIDAD/ The information contained in this manual can be changed by the manufacturer without prior notice Ref.: 49B500XEN Rev.02 05/01/2016...


Need help?
Do you have a question about the 500 Series and is the answer not in the manual?
Questions and answers