Table of Contents
Advertisement
Item No. 816488 SKu No. 21615012 Model NO. MWHUK-05CMN8-BCK0
Item No. 816489 SKu No. 21615017 Model NO. MWHUK-06CRN8-BCL1
Item No. 816526 SKu No. 21615020 Model NO. MWHUK-08CRN8-BCL0
Item No. 816527 SKu No. 21615018 Model NO. MWHUK-10CRN8-BCL0
Item No. 817034 SKu No. 21615014 Model NO. MWHUK-12CRN8-BCL0
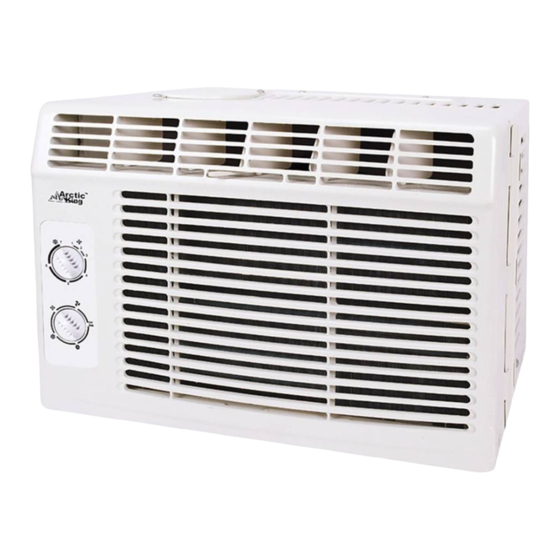
WINDOW AIR CONDITIONER
Operator's manual
Customer Service / Service à la clientèle:
Our customer service staff is available to help you. For any problem with your purchase, or to receive further
information about this product, please call our toll-free number.
SAVE THIS MANUAL
Keep this manual and the original sales invoice in a safe, dry place for future reference.
Notre personnel du service à la clientèle est disponible pour vous aider. En cas de problème avec votre achat, ou pour
obtenir plus d'informations à propos de ce produit, veuillez composer notre numéro sans frais.
CONSERVEZ CE GUIDE
Conservez ce manuel avec la facture d'origine dans un endroit sûr et sec pour référence future.
1-866-206-0888
Advertisement
Table of Contents

Related Manuals for Arctic King MWHUK-05CMN8-BCK0


Summary of Contents for Arctic King MWHUK-05CMN8-BCK0
- Page 1 Item No. 816488 SKu No. 21615012 Model NO. MWHUK-05CMN8-BCK0 Item No. 816489 SKu No. 21615017 Model NO. MWHUK-06CRN8-BCL1 Item No. 816526 SKu No. 21615020 Model NO. MWHUK-08CRN8-BCL0 Item No. 816527 SKu No. 21615018 Model NO. MWHUK-10CRN8-BCL0 Item No. 817034 SKu No. 21615014 Model NO. MWHUK-12CRN8-BCL0...
- Page 2 Table of Contents Important Safety Instructions Installation Instructions Normal Sounds Air Conditioner Features Care and Cleaning Troubleshooting Tips Remote Controller Instructions Air Conditioner Limited Warranty...
- Page 3 IMPORTANT SAFETY INSTRUCTIONS READ THIS MANUAL Inside you will find many helpful hints on how to use and maintain your air conditioner properly. Just a little preventive care on your part can save you a great deal of time and money over the life of your air conditioner. You'll find many answers to common problems in the chart of troubleshooting tips.
- Page 4 IMPORTANT SAFETY INSTRUCTIONS CAUTION When the air filter is to be Do not put a pet or house plant Ventilate the room well when removed, do not touch the metal where it will be exposed to direct used together with a stove, etc. parts of the unit.
- Page 5 IMPORTANT SAFETY INSTRUCTIONS WARNING: ( for using R290/R32 refrigerant only) -Do not use means to accelerate the defrosting process or to clean, other than those recommended by the manufacturer. -The appliance shall be stored in a room without continuously operating ignition sources (for example: open flames, an operating gas appliance) and ignition sourcesor (for example:an operating electric heater) close to the appliance.
- Page 6 IMPORTANT SAFETY INSTRUCTIONS Explanation of symbols displayed on the unit(For the unit adopts R32/R290 Refrigerant only): This symbol shows that this appliance used a flammable refrigerant. If the WARNING refrigerant is leaked and exposed to an external ignition source, there is a risk of fire. CAUTION This symbol shows that the operation manual should be read carefully.
- Page 7 IMPORTANT SAFETY INSTRUCTIONS pipe work that contains or has contained flammable refrigerant shall use any sources of ignition in such a manner that it may lead to the risk of fire or explosion. All possible ignition sources, including cigarette smoking, should be kept sufficiently far away from the site of installation, repairing, removing and disposal, during which flammable refrigerant can possibly be released to the surrounding space.
- Page 8 IMPORTANT SAFETY INSTRUCTIONS This shall include damage to cables, excessive number of connections, terminals not made to original specification, damage to seals, incorrect fitting of glands, etc. Ensure that apparatus is mounted securely. Ensure that seals or sealing materials have not degraded such that they no longer serve the purpose of preventing the ingress of flammable atmospheres.
- Page 9 IMPORTANT SAFETY INSTRUCTIONS The refrigerant charge shall be recovered into the correct recovery cylinders. The system shall be flushed with OFN to render the unit safe. This process may need to be repeated several times. Compressed air or oxygen shall not be used for this task. Flushing shall be achieved by breaking the vacuum in the system with OFN and continuing to fill until the working pressure is achieved, then venting to atmosphere, and finally pulling down to a vacuum.
- Page 10 IMPORTANT SAFETY INSTRUCTIONS the equipment are removed from site promptly and all isolation valves on the equipment are closed off. k) Recovered refrigerant shall not be charged into another refrigeration system unless it has been cleaned and checked. 15.Labelling Equipment shall be labelled stating that it has been de-commissioned and emptied of refrigerant.
- Page 11 IMPORTANT SAFETY INSTRUCTIONS WARNING NOTE: The power supply cord with this air For Your Safety Do not store or use gasoline or other flammable vapours or liquids in the vicinity conditioner contains a current detection of this or any other appliance. device designed to reduce the risk of fire.
- Page 12 INSTALLATION INSTRUCTIONS BEFORE YOU BEGIN Read these instructions completely and carefully. IMPORT ANT - Save these instructions for local inspector s use. IMPORTANT Observe all governing codes and ordinances. Note to i nstaller Be sure to leave 6000~8000Btu/h 10000~12000Btu/h 5000Btu/h Model these instructions with the consumer.
- Page 13 INSTALLATION INSTRUCTIONS C: Align the hole in the top rail with those in the top PREPARE THE WINDOW of the unit as shown in Fig. B Lower sash must open sufficiently to allow a clear Fig. B vertical opening (H). See Table 1 for correct size. Side louvers and the rear of the AC must have clear air space to allow enough airflow through the condenser for heat removal.
- Page 14 INSTALLATION INSTRUCTIONS B. Slide the free end "Ⅰ" section of the panel directly SECURE THE ACCORDION PANELS into the cabinet as shown in Fig. 2. Slide the panel A. Keeping a firm grip on the air conditioner, carefully down. Be sure to leave enough space to slip the place the unit into the window opening so the bottom top and bottom of the frame into the rails on the of the air conditioner frame is against the window...
- Page 15 INSTALLATION INSTRUCTIONS Step 2. Mark a line on the provided R1 insulation DRIVE LOCKING SCREWS panel according to a length 1/8'' (3mm) less than the measured width in step 1, then cut the R1 insulation A: For wooden windows: panel along the line. Drive 1/ 2 (12.7 mm) locking screws through the frame lock and into the sill (Fig.8A).
- Page 16 INSTALLATION INSTRUCTIONS INSTALL WEATHER STRIPPING (only If AC is Blocked by Stor m Window be applicable to ENERGY STAR models ) Add wood as shown in Fig.11, or remove storm In order to minimize air leaks between the room air window before air conditioner is installed.
- Page 17 NORMAL SOUNDS The unit , or incorrect installation. fan. the condenser the evaporator High Pitched Chatter High efficiency compressors may have a high pitched chatter Vibration during the cooling cycle. Unit may vibrate and make noise because of poor wall or window construction or incorrect installation.
- Page 18 AIR CONDITIONER FEATURES WARNING To begin operating the air conditioner, follow these steps: To reduce the risk of fire, electric shock, or injury to 1. Set the thermostat to the highest number (coldest or persons, read the IMPORTANT SAFETY cooler setting). INSTRUCTIONS before operating this appliance.
- Page 19 AIR CONDITIONER FEATURES MANUAL CONTROL OPERATING INSTRUCTIONS Before you begin, thoroughly familiarize yourself with the control panel as shown below and all its functions, then follow the symbol for the functions you desire. The controls featured in this manual are representative of many available models.
- Page 20 AIR CONDITIONER FEATURES ELECTRONIC CONTROL OPERATING INSTRUCTIONS Before you begin, thoroughly familiarize yourself with the control panel as shown below and all its functions, then follow the symbol for the functions you desire. The unit can be controlled by the unit controls alone or with the remote.
- Page 21 AIR CONDITIONER FEATURES DISPLAYS: TO SELECT THE OPERATING MODE: Displays To choose operating mode, press Mode button. Each time you press the button, a mode is selected in a sequence that goes from Auto, Cool, Dry and Fan. The indicator light beside will be illuminated and remained on once the mode is selected.
- Page 22 CARE AND CLEANING Air Filter Cleaning CAUTION Clean your air conditioner occasionally to keep it looking new. Be sure to unplug the unit before cleaning to prevent shock or fire hazards. Air Filter Cleaning The air filter should be checked at least once a month to see if cleaning is necessary.
- Page 23 TROUBLESHOOTING TIPS TROUBLESHOOTING Before calling for service, review this list. It may save your time and expense. This list includes common occurrences that are not the result of defective workmanship or materials in this appliance. Problem Solution Wall plug disconnected. Push plug firmly into wall outlet. Air conditioner does not start.
- Page 24 TROUBLESHOOTING TIPS Problem Solution Dirty air filter-- air restricted. Clean air filter. Refer to Care and Cleaning section. Air conditioner cooling, but room Temperature is set too high. Set temperature to a lowercase setting. is too warm-- NO Air directional louvers positioned improperly. Position louvers for better air distribution. ice forming on cooling coil behind Front of units is blocked by drapes, blinds, furniture, etc.
- Page 25 Remote Controller Instructions Handling the remote controller Location of the remote controller. Use the remote controller within a distance of 16 feet (5 m) from the appliance, pointing it towards the receiver. Reception is confirmed by a beep. CAUTIONS The air conditioner will not operate if curtains, doors or other materials block the signals from the remote controller to the indoor unit.
- Page 26 Remote Controller Instructions WARNING 1. Battery must be disposed of properly. Do not short circuit or dispose of in the fire. 2. Keep batteries out of the reach of children. 3. Batteries must not be ingested. 4. Non-rechargeable batteries are not to be recharged. 5.
- Page 27 Remote Controller Instructions NOTE: Function buttons MODE button Press this button to select the ON/OFF button desired operation mode from AUTO, COOL, DRY, HEAT Operation starts when this button (Cooling & heating models is pressed and stops when the button is pressed again. only) and FAN.
- Page 28 Remote Controller Instructions add space automatically between modes cannot...
- Page 29 Remote Controller Instructions add space cannot...
- Page 30 Remote Controller Instructions...
- Page 31 Remote Controller Instructions...
- Page 32 Remote Controller Instructions starts.
- Page 33 Remote Controller Instructions All functions described in these instructions apply to the different models available; if your model doesn't have a specific function, pressing the corresponding button will have no effect.
- Page 34 Air Conditioner Limited Warranty These products have been made to quality standards and are guaranteed for domestic use against manufacturing faults for a period of 5 years from the date of purchase. One (1) year full warranty from original purchase date and limited 2nd through 5th year sealed system warranty if used for normal trade purposes.
Need help?
Do you have a question about the MWHUK-05CMN8-BCK0 and is the answer not in the manual?
Questions and answers