Table of Contents
Advertisement
Quick Links
for Meteobot® Mini / Micro / Nano
Thank you for buying a Meteobot® weather station!
This user manual contains instructions for installation, correct operation
and de-installation of Meteobot® weather stations.
Please read the instructions carefully before you begin – the product warranty depends on
Meteobot® Mini / Micro / Nano. User Manual
USER MANUAL
the correct installation and operation.
December 17
Version 1.1
Prointegra Ltd.
Bulgaria, Varna 9009
2, Todor Penev str.
+359 884 833 780
tech@meteobot.com
www.meteobot.com
th
, 2020
Page 1 / 22
Advertisement
Table of Contents

Related Manuals for Meteobot Mini

Summary of Contents for Meteobot Mini
- Page 1 Please read the instructions carefully before you begin – the product warranty depends on the correct installation and operation. December 17 , 2020 Version 1.1 Prointegra Ltd. Bulgaria, Varna 9009 2, Todor Penev str. +359 884 833 780 tech@meteobot.com www.meteobot.com Meteobot® Mini / Micro / Nano. User Manual Page 1 / 22...
-
Page 2: Table Of Contents
The weather station does not send data .................... 19 Missing or incorrect sensor data ......................20 Technical specification ..........................21 Protecting the environment ........................22 11.1 Disposal .............................. 22 11.2 Battery information ..........................22 Meteobot® Mini / Micro / Nano. User Manual Page 2 / 22... -
Page 3: Preparation
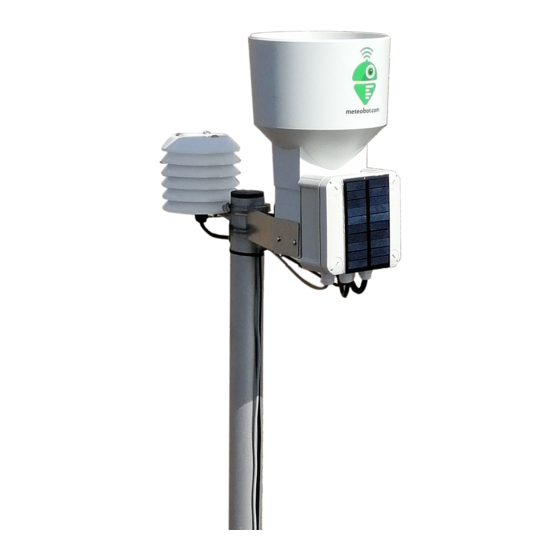
Air temperature, panel, electronic board relative humidity and with a built-in GPS barometric pressure tracking device and sensor rechargeable battery Soil temperature sensor Soil volumetric water content sensor(s) Meteobot® Mini / Micro / Nano. User Manual Page 3 / 22... -
Page 4: General Overview
1.2 General Overview Meteobot® Mini Meteobot® Micro Meteobot® Nano Meteobot® Mini / Micro / Nano. User Manual Page 4 / 22... -
Page 5: Before You Start The Installation
Operating temperature: -40 °C ÷ +105 °C; o Option to send and receive SMS text messages; o Data: 10 MB / month; o Minimum size of one data transmission session: 1 kB. Meteobot® Mini / Micro / Nano. User Manual Page 5 / 22... -
Page 6: Where To Place The Weather Station
2.4 Solar panel • Should be facing South; • Should be lit by the sun during the whole day (should not be in a shadow). Meteobot® Mini / Micro / Nano. User Manual Page 6 / 22... -
Page 7: Installation
2 cm wide and 9 cm long (corresponding to the dimensions of the sensor); o At a depth, where you would like to measure the volumetric water content; Meteobot® Mini / Micro / Nano. User Manual Page 7 / 22... -
Page 8: Sim Card
• Push the sensor in the slit gently; • IMPORTANT: Do not thrust the sensor in the ground by force; • If your Meteobot® comes with several volumetric water content sensors, repeat the procedure for each of them; • IMPORTANT: The sensor should fit tightly in the soil. If there are air or stones around it, the measurements will be wrong;... -
Page 9: Battery
• Fasten the electronic board to the box with the bolts. 3.8 Solar panel • Connect the plug of the solar panel to the corresponding plug on the electronic board. Meteobot® Mini / Micro / Nano. User Manual Page 9 / 22... -
Page 10: Receiving Data From The Weather Station
4 Receiving data from the weather station In order to start receiving data from your weather station, you need to install the Meteobot® app on your mobile device (smartphone or tablet). If you already have installed the Meteobot® app, go on to the next section: “Registering the weather station”. - Page 11 • Fill in the sensor configuration data (number, type, depth, etc.) This ends the weather station registration and you can see data from your Meteobot®. Depending on the configuration, you may need to wait for maximum one hour until you receive the first data.
-
Page 12: Data Transfer Frequency
The transmission interval can be from 10 minutes up to 8 hours. If you would like a different interval, send a request to the Meteobot® technical support team to tech@meteobot.com. IMPORTANT: The more frequently the station sends data, the bigger the power consumption is. -
Page 13: Gps Security And Tracking
There is a built-in GPS tracking device in the electronic board. With it you receive information about the exact location of the weather station. If the station is shaken, it sends an alarm signal to the Meteobot® mobile app. Right afterwards the GPS tracker starts showing the exact location of the weather station on the map. -
Page 14: Diagnostics
• If the weather station cannot connect to the GSM network, it restarts (LEDs (4) and (5) glow for several seconds, (3) goes out), after which the process repeats. Meteobot® Mini / Micro / Nano. User Manual Page 14 / 22... -
Page 15: No Connection To The Server
• The weather station tries to connect to the server three times. If it does not succeed, it tries again after 10 minutes (or after another time interval – depending on the setting); • If you encounter this situation, please contact the Meteobot® support team at tech@meteobot.com. Meteobot® Mini / Micro / Nano. User Manual... -
Page 16: Maintenance
When the battery is fully charged, the green LED (2) will glow. If the battery level continues to fall down quickly, please contact the Meteobot® support team at tech@meteobot.com, so that we increase the data transmission interval. (The more often the weather station sends data, the more power it requires.) If this does not solve the... -
Page 17: Uninstallation And Replacement
• IMPORTANT: To take a sensor out of the ground, dig it out. Do NOT pull it by the cable; • Put the cable of the new sensor in the box through the cable gland and tighten the cable gland; Meteobot® Mini / Micro / Nano. User Manual Page 17 / 22... -
Page 18: Cable Connection Scheme
• Plug in the solar panel connector; • Close the lid, making sure it fits tightly to the box. • Bind the slack cables to the pole with cable ties. 8.5 Cable connection scheme Meteobot® Mini / Micro / Nano. User Manual Page 18 / 22... -
Page 19: Troubleshooting
No GSM coverage Move the weather station to a location with GSM coverage OR install a SIM card from a mobile operator, who has GSM coverage in the area Meteobot® Mini / Micro / Nano. User Manual Page 19 / 22... -
Page 20: Missing Or Incorrect Sensor Data
The sensor is damaged or broken Replace the sensor The sensor has been replaced, but the Disassemble the weather station and problem remains send the box with the electronic circuit board for service Meteobot® Mini / Micro / Nano. User Manual Page 20 / 22... -
Page 21: Technical Specification
Solar panel 0,1 V 0 - 6 V ± 0,1 V Operating temperature: -20 ÷ +55 °C Rechargeable battery Operating voltage: 3.5 V – 4.2 V Capacity: 2900 mAh Meteobot® Mini / Micro / Nano. User Manual Page 21 / 22... -
Page 22: Protecting The Environment
Never expose the battery to temperature above +55°C. In case the battery has to be replaced, treat the waste battery according to the guidelines in the Disposal section. Meteobot® Mini / Micro / Nano. User Manual Page 22 / 22...
Need help?
Do you have a question about the Mini and is the answer not in the manual?
Questions and answers