Table of Contents
Advertisement
Advertisement
Table of Contents

Related Manuals for Medion E66519


Summary of Contents for Medion E66519
- Page 1 User Manual CLOCK RADIO WITH WIRELESS CHARGING E66519...
-
Page 2: Table Of Contents
Contents Overview ..............4 Device parts .............6 About these operating instructions .......9 Proper use ..............13 Safety information ..........14 Package contents ..........26 Getting started ............27 Settings ..............28 Volume ..............29 Radio ..............30 Using the alarm ............. 32 Dimmer ..............39 Troubleshooting ............40 Cleaning .............. -
Page 3: Overview
SLEEP SNOOZE/DIMMER... - Page 4 DC 9V FM ANT.
-
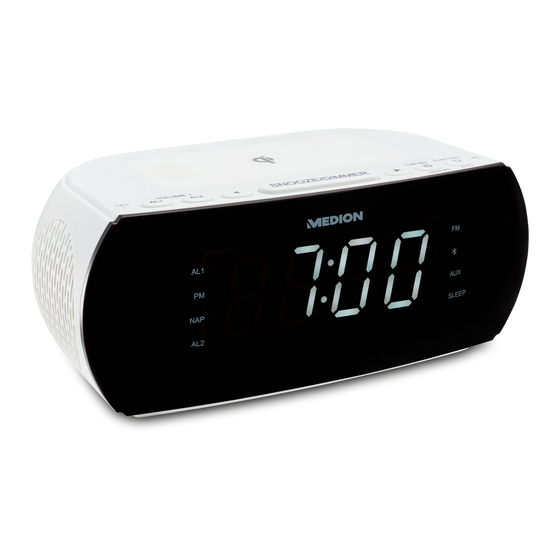
Page 5: Device Parts
Device parts Charging pad for wireless FM – FM operating mode charging of a smartphone BT – BT operating mode – Frequency selection/ time/previous track AUX – AUX operating mode AL2 – Set/call up alarm 2 SLEEP – Sleep timer activated AL1 –... - Page 6 Contents Contents Overview............... 4 Device parts ............6 About these operating instructions..... 9 Key to symbols ............9 Proper use ............13 Safety information ..........14 Operating safety ............. 14 Power supply ............17 Mains adapter ............18 Batteries ..............19 Installation location ..........21 Environmental conditions ........24 Repairs ..............24 Legal requirements ..........25...
- Page 7 Contents Adjusting the aerial ..........30 Switching the radio on/off ........30 Tuning the stations ..........30 Station search ............30 Storing and selecting stations ......31 Using the alarm ...........32 Setting the alarm ............32 Activating/deactivating the alarm .......33 Stopping the alarm / activating the snooze function ..............33 Using the sleep timer ..........34 Timer alarm .............35...
-
Page 8: About These Operating Instructions
About these operating instructions About these operating instructions Thank you for choosing our product. We hope you enjoy using this device. Read the safety instructions and all other in- structions carefully before using the device for the fi rst time. Note the warnings on the device and in the oper- ating instructions. - Page 9 About these operating instructions WARNING! This keyword denotes a medium-risk hazard situation which can result in death or a serious injury if it is not avoided. CAUTION! This keyword denotes a low-risk hazard situation which can result in moderate or minor injuries if it is not avoided.
- Page 10 About these operating instructions Comply with the notes in the operating instructions. Protection class II Electrical devices in protection class II are devices that have double and/or reinforced insulation throughout, and do not have the option of connecting a protective earth. The housing of an electrical device in protection class II, with surrounding insulating material, may either form all of the additional or...
- Page 11 About these operating instructions Tested safety Products that feature this symbol meet the requirements of the German Prod- uct Safety Act. Symbol for direct current Symbol for AC current Energy effi ciency level V Energy effi ciency levels are used to describe the effi...
-
Page 12: Proper Use
Proper use Proper use Your device can be used in a range of ways: • Time display • Alarm and timer function ® • Audio playback via Bluetooth • Wireless charging of a compatible smartphone The device is only intended for private use and not for industrial/commercial use. -
Page 13: Safety Information
Safety information Safety information Operating safety • The device must be checked before use. A damaged or defective device may not be used. • This device may be used by children over the age of 8 and by persons with limited physical, sensory or mental abil- ities or by those without experience and knowledge, if they are supervised... - Page 14 Safety information • The LED lamp is an integral component and cannot be replaced. The light source in this lamp may only be replaced by the manufacturer, a service technician commissioned by the manufacturer or a similarly qualifi ed person. DANGER! Risk of choking and suffocation! Packaging fi...
- Page 15 Safety information • Do not use the device in potentially explosive atmospheres. This includes petrol stations, fuel storage areas and areas where solvents are processed. This device must also not be used in areas with particle-laden air (for example fl our or wood dust).
-
Page 16: Power Supply
Safety information Power supply DANGER! Risk of electric shock! Even when the device is switched off, some components are live. − In order to disconnect the power to your device or to completely isolate the de- vice from voltage sources remove the mains adapter from the socket. -
Page 17: Mains Adapter
Safety information • Do not place any objects on the cables as they may be damaged. Mains adapter • Use only the mains adapter supplied. • If the housing of the mains adapter or the power cable is damaged, the mains adapter must be disposed of and re- placed with a new mains adapter of the same type. -
Page 18: Batteries
Safety information • In an emergency, for example, if you see smoke coming out of the mains adapter, or if it makes unusual noises, remove the connection cable from the device. • The device uses a small amount of elec- tricity, even when it is switched off. - Page 19 Safety information swallowed or secreted in any part of the body. • Stop using the product if the battery compartment does not close properly, and keep it out of reach of children. • Before inserting the batteries, check that the contacts in the device and on the batteries are clean and, if necessary, clean them.
-
Page 20: Installation Location
Safety information Do not expose the device to sources of intense heat. • Never short-circuit batteries. • Never throw batteries into a fi re and never dismantle batteries. • Remove fl at batteries immediately from the device! There is an increased risk of leakage. - Page 21 Safety information • Avoid exposing the device and the pow- er pack to water droplets or spray and do not place any liquid-fi lled containers (vases or similar) on or next to the device or the power pack. Liquids penetrating the device may impair the electrical safety of the product.
- Page 22 Safety information • Position the cables so that no-one can tread on them or trip over them. • The slots and openings on the device are for ventilation purposes. Do not cover these openings (risk of overheating, fi re hazard)! Make sure that there is enough clear- ance between the device and any sur- rounding furniture or walls.
-
Page 23: Environmental Conditions
Safety information Environmental conditions The device may only be used and stored in accordance with the environmental conditions specifi ed in the tech- nical data. DANGER! Risk of electric shock! Major changes in temperature or fl uctu- ations in humidity can cause moisture to build up within the device due to conden- sation –... -
Page 24: Legal Requirements
Safety information • Repairs to your device should only be carried out by qualifi ed specialists. • If a repair must be carried out, please contact only our authorised service partners. Legal requirements The reception frequency range specifi ed in the technical data represents the technical possibilities of the device. -
Page 25: Package Contents
Package contents Package contents DANGER! Risk of choking and suffocation! Packaging fi lm can be swallowed or used improperly, creating a risk of choking and suffocation. − Keep packaging material such as plastic fi lm or plastic bags away from children. −... -
Page 26: Getting Started
Getting started Getting started • Place the device on a sturdy, level surface. Some aggressive varnishes can corrode the rubber feet on the device. If necessary, place the device on a suitable underlay. Inserting/replacing backup batteries If you disconnect the device from the mains, you can in- sert two AA batteries (not included in package contents) to enable the time to continue to run in the background and to retain all settings. -
Page 27: Settings
Settings Connecting the mains adapter Connect the mains adapter. − To do this, place the connection cable plug in the socket DC 9V and the mains adapter into a properly installed 230V ~ 50 Hz earthed power socket which is accessible at all times. Settings Selecting the operating mode −... -
Page 28: Volume
Volume − Use or to select the 24-hour or 12-hour time format. − Then press SET to confi rm the selection. − Use or to select the day of the week. The fol- lowing apply: Monday: d1, Tuesday: d2, etc. −... -
Page 29: Radio
Radio Radio Adjusting the aerial A wire aerial has already been connected to the device for radio reception. Fully unwind the aerial and arrange it for optimum reception. Switching the radio on/off You can receive analogue FM radio signal with this device. -
Page 30: Storing And Selecting Stations
Radio Storing and selecting stations The radio has 20 memory slots where you can save your favourite stations. To perform the functions described below, fi rst switch on the radio. Automatic storage − Press and hold the FUNCTION button until automatic storage starts. -
Page 31: Using The Alarm
Using the alarm Using the alarm You can set two alarm times. Each alarm can wake you using the radio or an alarm sound. In addition, each alarm can be set to sound on certain weekdays or daily. Setting the alarm −... -
Page 32: Activating/Deactivating The Alarm
Using the alarm display. Press the AL1 or AL2 button to confi rm the setting. − Use the or button to select whether the alarm should use an alarm tone or a radio station. During this process, buz (alarm tone) or rad (radio) is shown on the display. -
Page 33: Using The Sleep Timer
Using the alarm Using the sleep timer If you select the sleep timer function, the device switch- es off automatically after a defi ned period of up to 120 minutes. − Press the SNOOZE button once or several times and select the duration of the sleep timer (120, 90, 60, 30, 15, 10, 5 minutes). -
Page 34: Timer Alarm
Using the alarm Timer alarm You can set a timer alarm to start in up to 120 minutes. The timer alarm always triggers an alarm tone. − Press the SNOOZE button while the radio, Blue- tooth, or AUX modes are turned off . The LED next to NAP fl... -
Page 35: Bluetooth Mode
Using the alarm Bluetooth mode You can use Bluetooth to play tracks wirelessly from external devices such as MP3 players or mobile phones with Bluetooth on this clock radio. In addition, depend- ing on the end device, phone calls can be made via the clock radio using the built-in microphone −... -
Page 36: Control
Using the alarm Known external devices, which have already been paired once, will be connected again automatically in the future. It is not necessary to pair the devices again. To reconnect, simply activate Bluetooth mode on both devices. Control You can control how tracks are played, the volume and a range of special functions on your external device and on the clock radio. -
Page 37: Connecting An External Playback Device
Using the alarm Connecting an external playback device You can use the AUX jack to connect an external play- back device (for example a CD player or MP3 player). − Switch the clock radio to standby mode. − Switch off your external device. −... -
Page 38: Dimmer
Dimmer Dimmer The device features three brightness settings. − Press and hold the DIMMER button repeat- edly to run through three dimmer levels. Charging smartphones The device features two options for charging a smartphone: You will fi nd a USB port on the rear of the device. This can be used to charge USB devices with the aid of a USB cable. -
Page 39: Troubleshooting
Troubleshooting NOTICE! Risk of damage to the device! During wireless charging, do not place any object on the charging pad other than the device being charged. Troubleshooting If a fault occurs, fi rst see whether you can resolve the problem yourself. You might fi nd this overview useful. CAUTION! Risk of injury! Opening the device can cause injuries. - Page 40 Troubleshooting Fault Possible cause/action No function If the device has been disrupted by a thunderstorm, a static charge or another external factor, follow this procedure to resolve the problem: Disconnect the mains adapter and then plug it in again. No sound Has the volume been set too low? Poor/no radio Choose another location, if neces-...
-
Page 41: Cleaning
Cleaning Always pull the mains adapter out from the socket be- fore cleaning the device. Only use a dry, soft cloth to clean the device. Do not use chemical solutions or cleaning products because these may damage the device’s surface and/or inscriptions. Storing the device when not in use If you do not intend to use the device over a longer pe- riod of time, store it in a cool, dry place and make sure... - Page 42 Disposal DEVICE All old appliances marked with the symbol illustrated must not be disposed of in normal household waste. If you can no longer use your electrical device, dispose of it in accordance with the legal provisions applicable in your country. This involves separating the materials in the device for the purpose of recycling and minimising the environmental impact.
-
Page 43: Technical Specifi Cations
Technical specifi cations Technical specifi cations Mains adapter Manufacturer DongGuang Becky Electronics Tech Co., Ltd Model BQ30A-0903000-S Input voltage AC 100–240 V ~ 50/60 Hz, max. 800 mA Output voltage DC 9 V Protection class Device Output power 1 watt RMS Power consumption in <... - Page 44 Technical specifi cations USB port Output voltage / 2x DC 5 V 1 A, current charging function only Wireless Charging Frequency range 110K ~ 205KHz Maximum fi eld 2mm to 7mm for charging strength distance Environmental conditions Temperatures In operation: 0 °C to +35 °C Humidity In operation: 20 ~ 80% (non-condensing)
-
Page 45: Service Information
• You can also contact our Service team via our hot- line or by post. Opening times Hotline number Mon – Fri: 1300 884 987 08:30AM to 06:00PM EST Service address MEDION Australia Pty Ltd. Chatswood, NSW 2067 Australia... - Page 46 Service information You can download this and many oth- er sets of operating instructions from our service portal at www.medion.com/au/contact.php. You will also fi nd drivers and other software for a wide range of devices there. You can also scan the QR code on the...
-
Page 47: Legal Notice
Mechanical, electronic and any other forms of reproduc- tion are prohibited without the written permission of the manufacturer. Copyright is owned by the distributing company: MEDION AG Am Zehnthof 77 45307 Essen Germany Please note that you cannot use the address above for returns. - Page 48 Made in China DISTRIBUTED BY: ALDI STORES 1 SARGENTS ROAD MINCHINBURY NSW 2770 WWW.ALDI.COM.AU AFTER SALES SUPPORT 10691 1300 884 987 YEAR www.medion.com.au WARRANTY MODEL: MD 44119 08/2019...
Need help?
Do you have a question about the E66519 and is the answer not in the manual?
Questions and answers