Table of Contents
Advertisement
Advertisement
Table of Contents

Related Manuals for Schlumbohm EndoPilot 2


Summary of Contents for Schlumbohm EndoPilot 2
- Page 1 EndoPilot² User manual Schlumbohm...
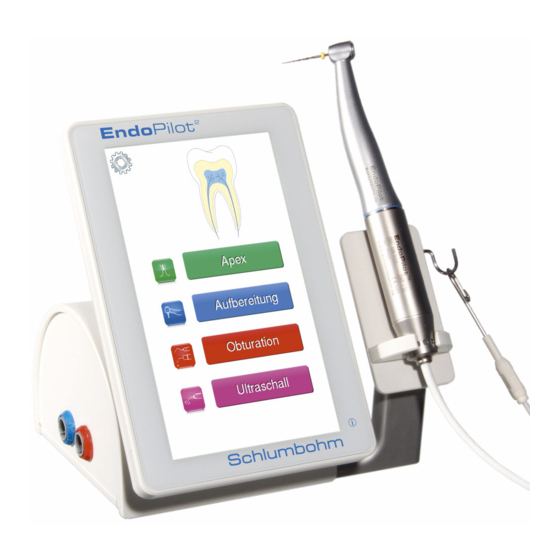
- Page 2 Pilot² Illustration 1 Control unit Basic device Right side of the device Rear side with microSD card Left side of the device - 2 -...
- Page 3 Pilot² Illustration 2 Illustration 3 Illustration 4 Illustration 4e contact wire, housing, spring, threaded bush, knob, contact You can dismantle the patented file clamp (4e) for reprocessing (cleaning, disinfection and sterilization). A universal key for ultrasonic-tools can be used as a tool for assembly (with a wrench size of 3.2 mm).
- Page 4 Pilot² Illustration 5 Illustration 6 Illustration 7 Illustration 8 Illustration 9 Ill.10 Ill.11 Illustration 12 12d 12b Illustration 13 Illustration 14 Illustration 15a Illustration 15b - 4 -...
- Page 5 Pilot² Description of the single parts ill. Ref. No. Designation EndoPilot² Control unit with a touch screen, including 5 110 2011 connecting sockets and a microSD slot (1a to 1f) Power supply with primary plug, 2 models available 109 2322 Input: 100 –...
- Page 6 Pilot² ill. Ref. No. Designation Accessories from original manufacturer: Obtura Spartan / Young innovations BackFill Needles 20 ga (5 pcs) (Order-no.110 1044) 823-620 Obtura Spartan BackFill Needles 23 ga (5 pcs) (Order-no.110 1045) 823-623 Obtura Spartan BackFill Needles 25 ga (5 pcs) (Order-no.110 1046) 823-635 Obtura Spartan...
- Page 7 Pilot² Ultrasonic module* Illustration 16 EndoPilot² with ultrasonic module Description of the single parts ill. Ref. No Designation 110 3201 Ultrasonic module with 1 connecting socket (15a) Ultrasonic handpiece with Satelec ® compatible screw thread X12282 Type: Acteon Satelec Suprasson (Order-no.
- Page 8 Pilot² cable guide for motor-, apex- and ultrasonic-cable (a locking clamp keeps the cables in place) Illustration 16a Ultrasonic module Bottom compartment with the connection for the ultrasonic cable Illustration 17 Illustration 18 Illustration 19 Rinsing sleeve (for cleaning) Illustration 20 lllustration 21 - 8 -...
- Page 9 ® industry market for 50 years. These many years of experience, as well as excellent contacts to specialists, nationally and internationally, allow Schlumbohm ® to design outstanding devices that enable both the patient and the dentist to achieve an optimal treatment result.
-
Page 10: Table Of Contents
Pilot² Table of contents ......................... Page 1.1. Symbols used ........................... 11 1.2. Intended use ..........................13 1.3. Device Description ........................13 1.3.1. Apex locator ........................ 13 1.3.2. Motor ........................... 13 1.3.3. DownPack hand-piece with heating tip ................ 13 1.3.4. BackFill gun ......................... 13 1.3.5. -
Page 11: Symbols Used
Pilot² 1. Notes 1.1. Symbols used Symbol Title, Description / Explanatory Text, Standard / Reference No. of Symbol The product complies with the requirements of EU Regulations / No. of notified body Caution Indicates the need for the user to consult the instructions for use for important cautionary information such as warnings and precautions that cannot, for a variety of reasons, be presented on the medical device itself. - Page 12 Pilot² Description of the symbols used. Ingress protection code Protection against particles with 2.5 mm diameter and dripping water IP31 complying with IEC 60601-1 IEC 60601-1: 2005+Cor.:2006+Cor.:2007+A1:2012 / Ref. Table D3 / 2 Catalogue Number Indicates catalogue number, part number of device ISO 15223-1:2016 / Ref.
-
Page 13: Intended Use
Pilot² Description of the symbols used. Prescription Use Only Caution: Federal (U.S.) law restricts this device to sale by or on the order of a physician. No standard; designated by FDA per 21 CFR 801.109(b)(1) Temperature Limit ndicates the temperature limits to which the medical device can be safely exposed. for storage (on package) or use (on device) ISO 15223-1:2016 / Ref. -
Page 14: General Precautions
• • Do not combine the device with other devices, such as endo devices from other manufacturers. Do not modify the product’s characteristics in any way. Schlumbohm ® declines any • and all responsibility in the event of device modification. - Page 15 Pilot² Do not expose the device to direct or indirect heat sources. • The device may not be used in an environment with free oxygen, explosive or • inflammable gases or flammable liquids. The EndoPilot² should not be installed near devices emitting electromagnetic •...
-
Page 16: First Steps
Pilot² Ensure that the file clamp of the apex cable has been put together correctly after • preparation and that the contact has been screwed-in tightly. • *Ultrasonic module: Do not use any deformed or worn instruments. At first, always choose a very low ultrasonic power output and only increase the energy when necessary. -
Page 17: Holders For The Handpieces
Pilot² The ambient temperature must be within the prescribed limits. • (See chapter 16). Avoid heating up to above 60°C in any case! The device must not be installed near free oxygen, flammable gas mixtures or • liquids (e.g. in operating theatre or emergency areas). The EndoPilot²... -
Page 18: Touch Display
Pilot² 2.4. Touch display Remove the transport protective film before use. All functions of the EndoPilot² are called up using the convenient touch display. The touch display allows intuitive and self-explanatory operation. Operate the touch display with a light touch of the finger. Operation is of course possible when wearing gloves. -
Page 19: Charging, Switching-On, Standby Mode, Switching-Off
Pilot² 2.6. Charging, switching-on, standby mode, switching-off Make sure to fully charge the device before first use. (The device can only be charged or switched on with the inserted microSD card.) When charging, please ensure that the device has not been heated by sunlight. Charging is interrupted at a device temperature above 40°C. -
Page 20: Filling Technique - Downpack (D-Pack)
The menu offers a variety of setting options. All parameters such as speed, torque and operating mode etc. may be changed individually. Parameters that deviate from the instrument manufacturer’s specifications may lead to file breakage and other damage. Schlumbohm ® is not liable for damage caused by operating the device in a way that deviates from the instrument manufacturer’s specifications. -
Page 21: Filling Technique - Backfill
Pilot² 2.9. Filling technique - BackFill Connect the BackFill gun (12) with the cable to the red socket (1f) of the device. The nut for BackFill needle (9) must be tightened with the wrench (13) to avoid leakage of gutta-percha at the thread. -
Page 22: Manual Apex Length Determination
Pilot² 3. - 6. Functions Start menu Setup button (see chapter 7) 3. Manual apex length determination 4. Motor system for NiTi files 5. BackFill gun DownPack handpiece 6. Ultrasonic function Battery status display 3. Manual apex length determination In this menu you can pre-probe the canal manually, i.e. with a file guided by the hand. -
Page 23: Tips For Length Determination
Pilot² You can configure the settings in this Setup menu: For example, you can set different sounds and the volume. Caution: If you allow the file to touch the lip clip, this will cause a short circuit. With this short circuit you can test the correct operation of the display and apex locator. -
Page 24: Motor System
Pilot² 4. Motor system 4.1. Favorites When you access the Preparation menu, the Favorites menu will appear. The device has a large file database. The values of many file systems are already stored in this database. Use the F i l e s y s t e m s button to reach the Selection menu (see 4.2). -
Page 25: Preparation
Pilot² 4.3. Preparation After selecting the file system and the desired file, the Endomotor is started up using the foot switch in the Preparation menu. The selected file appears in the upper line. The speed and torque values of the file are indicated below. In addition to the currently selected file, further files are shown. -
Page 26: Setup Motor
Pilot² 4.5. Setup motor The settings that apply to the entire preparation are chosen under this menu. It is possible to individually change the selected file’s parameters. Select the F i l e d a t a . The File setup opens (see below). -
Page 27: Reciprocal Function
Pilot² 4.5.2. Reciprocal function General: An Endo instrument is set into a cyclic right-left movement with the reciprocal technique. The user rhythmically pulls the instrument out of the canal to remove chips. The advantage of this technique is the significant saving of time. Settings: Under the F i l e s y s t e m s... -
Page 28: Apex Functions During Motor Operation
Pilot² 4.5.3. Apex functions during motor operation You can select the settings that apply to the preparation under the A p e x S e t u p menu. (See also section chapter 3) You can set various sounds and the apex signal’s volume. Here, you define how the motor reacts when reaching the apex position. -
Page 29: Calibrate
Pilot² You can select a total of two modes of operation: 1. Apex function 0.5 seconds/ 1 second/ 2 seconds. A p e x s t o p The position or propulsion of the file in the root canal is displayed on the symbolized apex during preparation and the manual probing. -
Page 30: Obturation
Pilot² 5. Obturation 5.1 Setting the DownPack temperature 5.2. Setting the BackFill temperature The temperatures shown are only examples Here, the remaining run time of the BackFill gun is displayed. 5.1. DownPack In this menu, you can select the temperature of the heating tip. The temperature column is set to the desired temperature (touch display). -
Page 31: Ultrasonic Function
Pilot² 6. Ultrasonic function* 6.2 Setting of the ultrasonic power output Select the power by pushing the bar graph 6.4 Ultrasonic instrument selection Press the name of the tool to enter the tool-library 6.4 Setting of the run time Select the run time directly at the clock With the motor button you will return to the last used file system 6.1. -
Page 32: Setting The Ultrasonic Power Output
Pilot² Check the ultrasonic handpiece for damage before use and especially after each disinfection and sterilization. If there is any evidence of cracks, do not use the ultrasonic handpiece again. There is a risk of electric shock. Use a cofferdam with each treatment. This prevents the inhalation or ingestion of small parts. Do not leave the device unattended. -
Page 33: Software Release And Updates
Pilot² 7. - 11. Setup functions 7. Software release and updates You can find the device data and software release here. Updates can be made using the microSD card. 8. Brightness / Volume Setting the brightness Setting the volume 9. Setting the language Here, you can choose the language 10. -
Page 34: Maintenance, Transport And Disposal
Pilot² 12. - 18. Attachments 12. Maintenance, transport and disposal 12.1. Periodical tests The national legislative authority requires the operator of certain electrical, medical equipment, in some countries, to perform regular tests. In Germany the national legislative authority requires the operator of certain electrical, medical devices, in §11 of the “Medizin Produkte Betreiber Verordnung”... -
Page 35: Maintenance
Pilot² 12.2. Maintenance You can find detailed information on the processing of individual components in chapter 18 (Cleaning, disinfection and sterilization) of the mentioned preparation instructions. It is imperative that you follow the following instructions: - Check the connection cable and plug connections every 6 months. - If the wireless foot switch is not used for a long time, the batteries must be removed. -
Page 36: Disposal
Pilot² 12.4. Disposal Dispose of any waste and used disposables properly. National regulations must be observed. The device is a high-quality medical product with a long service life. At the end of its product life cycle, the device must be disposed of correctly. Observe country-specific disposal regulations. -
Page 37: Troubleshooting
Pilot² 13. Troubleshooting If the EndoPilot² does not seem to work properly, it does not necessarily have to be a device malfunction! Please check the device first with the help of the following table to exclude any handling errors or disturbances (such as special anatomical peculiarities during the apex measurement). - Page 38 Contact the service team defective If the problem cannot be solved, please contact your dealer or Schlumbohm directly for advice. If the device switches itself off, this may indicate a malfunction. Please contact the manufacturer. Avoid mechanical damage. Do not open the device yourself.
-
Page 39: Error Messages
Application errors exclude a warranty. Schlumbohm ® does not warrant for wear and contamination of the handpieces and contra- angle. Schlumbohm ® does not warrant for glass breakage on the display or damage to the battery. Schlumbohm declines all responsibility for any damage caused by unsupervised device ®... -
Page 40: Technical Data
Pilot² 16. Technical Data EndoPilot² Type: Power supply Input: 100 - 240 V/AC (50-60 Hz) Output: 12 V DC / 1.5 A Power supply unit for medical devices according to: IEC 60601-1 and IEC 60601-1-2 (Only use the original EndoPilot² power supply unit) Charge the device regularly, at least every 6 months Electrical protection class: Bluetooth transmission:... -
Page 41: Emc Manufacturer's Declaration
Pilot² 17. EMC manufacturer's declaration Medical electrical equipment needs special precautions regarding EMC and needs to be installed and put into service according to EMC instructions contained in the accompanying documents. Portable and mobile RF communications equipment can affect medical electrical equipment. Warning notice The use of accessories, transducers and cables other than those specified, with the exception of transducers and cables sold by the manufacturer of the equipment or system... - Page 42 Pilot² Guidelines and manufacturer’s declaration Electromagnetic emissions The EndoPilot² device is intended for use in an environment specified below. The customer or user of the device should ensure that it is operated in such an environment. Emissions test Compliance Electromagnetic environment - guidance RF emissions Group 1 The EndoPilot²-Device uses RF energy only for...
- Page 43 Pilot² Voltage dips, short >95% dip / 0.5 cycles >95% dip / 0.5; 1 cycle Mains power quality should interruptions and voltage dip in U / 0.5 cycles dip in U / 0.5; 1 cycle that typical variations on power supply commercial hospital input lines...
-
Page 44: Cleaning, Disinfection Sterilization (Processing)
610 2205 # A6. Ultrasonic hand-piece: See document Satelec / ACTEON: At www.satelec.com/documents http://satelecsupport.com/Documentation/STERILIZATION/STERILIZE.pdf or: http://www.endopilot.de/edp2/6102243v00.pdf 610 2243 Manufacturer: Schlumbohm Phone: 011-49-4324 - 8929 - 0 GmbH & Co. KG Klein Floyen 8-10 Fax: 011-49-4324 - 8929 - 29 D-24616 Brokstedt post@schlumbohm.de...
Need help?
Do you have a question about the EndoPilot 2 and is the answer not in the manual?
Questions and answers