Advertisement
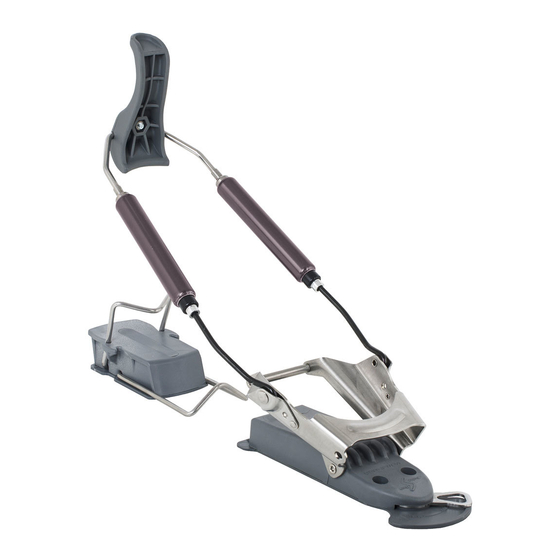
Switchback Binding Instructions
PART No. 608-110 (STD), 608-115 (WMN), 608-130 (X2)
Voilé recommends an authorized dealer for all binding mounts. Mounting instructions are
written for shop technicians that have technical expertise in mounting telemark bindings.
Hardwire Hook Installation:
The Hardware heel assebly is pre-installed on your Switchback binding. The following informa-
tion is provided if you remove and re-install the Hardware Heel assembly.
Important! When installing the Hardwire heel assembly, the hooks must be installed from the
top. If installed from the bottom, the assembly may fall off during transport. (SEE FIGURE 1)
To remove the assembly with the binding mounted to a ski, disengage the locking mechanism
on the toe-plate by switching from ski to tour mode. This will provide enough clearance to
remove the Hardwire rods and heel assembly from the toe-plate.
To re-assemble, with the toe-plate in tour mode, install the outside rod/hook first (there is a
small arrow cut out on the left and right asymmetric toe-plates), then squeeze the rods togeth-
er and install the inside hook/rod.
Sizing:
Correct adjustment of the heel lever will provide an audible snap
when the lever is engaged. With most boots, when the lever is not
engaged it should rest roughly 1/4"/6mm back from the boot heel.
To adjust the length of the heel assembly, simply spin the catridges
evenly clockwise to tighten and counterclockwise to loosen. When
the rods are at their maximum length the threads will appear.
Threads should never be exposed! (SEE RIGHT) At their minimum
length the rod will bottom out on the back of the spring cartridge
and begin pushing out the silver colored spring rod. At this point you
cannot make the heel assembly length any shorter.
Checking the forward pressure:
After you initially fit your boots, it is necessary to check the forward
pressure of the heelpiece. Release the heel lever from the boot.
Note a scribed mark at the edge of the plastic collar on the spring
cartridge. (SEE FIGURE 2) Now engage the heel lever and check the
distance from the mark to the back collar. the distance should be at
least 1/8" or 4mm and no more than 1/4" or 6mm to ensure optimal
flex and heel retention. (SEE FIGURE 3) The forward pressure may
need to be readjusted after your initial ski runs.
Switchback/X2
Telemark Touring Bindings
YES
NO
FIGURE 2
PARTS LIST
2
Completely Assembled
Switchback Bindings
4
Riser Plugs
2
Dual LP Climbing Heels
2
Dual LP 2mm Spacers
2
100mm Climbing Wires
(Men's)
2
80mm Climbing Wires
(Women's)
2
65mm Climbing Wires
12
3/4"(19mm) Mounting
Screws
4
Flat washers for heel pad
screws
2
Dual LP Slot Plugs
1
Paper mounting template
WOMENS
SWITCHBACK
HARDWIRE
MONDO POINT
SHORT
23 - 25.5
SOLE LENGTH
256mm-310mm
Boot sizes are only a general guidline and size
may vary between boot manufacturer.
SWITCHBACK & X2
MENS
HARDWIRE
MONDO POINT
SHORT
24 - 26.5
SOLE LENGTH
273mm-322mm
STANDARD
27 - 31
SOLE LENGTH
305mm-350mm
Boot sizes are only a general guidline and size
may vary between boot manufacturer.
FIGURE 1
FIGURE 3
Advertisement
Table of Contents

Related Manuals for VOILE Switchback


Summary of Contents for VOILE Switchback
- Page 1 Paper mounting template Hardwire Hook Installation: The Hardware heel assebly is pre-installed on your Switchback binding. The following informa- WOMENS SWITCHBACK tion is provided if you remove and re-install the Hardware Heel assembly.
- Page 2 GUIDELINES AND RECOMMENDATIONS FOR MOUNTING. FIGURE 4 Check screw length to prevent “dimpling” the base, grind screws if necessary. Following manufacturers guidelines, mount the Switchback riser to the ski using either wood glue or epoxy in each screw hole. Dual LP Heel Pad Mounting: Making sure to use the longest wire in the front position, first, install the two climbing wires to the Dual LP in the down position.
Need help?
Do you have a question about the Switchback and is the answer not in the manual?
Questions and answers