
Related Manuals for Huawei SUN2000-(3KTL-12KTL)-M0


Summary of Contents for Huawei SUN2000-(3KTL-12KTL)-M0
- Page 1 SUN2000-(3KTL-12KTL)-M0 Quick Guide Issue: 02 Part Number: 31509649 Date: 2018-12-30 HUAWEI TECHNOLOGIES CO., LTD.
- Page 2 5. Use insulating tools when installing the device. For personal safety, wear proper personal protective equipment (PPE). 6. Huawei shall not be liable for any consequences caused by the violation of the storage, transportation, installation, and operation regulations specified in this document and the user manual.
-
Page 3: Installing The Device
Installing the Device Installation Requirements Tilt and Space Dimensions... -
Page 4: Installing The Sun2000
Installing the SUN2000 When drilling holes, avoid the water pipes and power cables buried in the wall. 1. Install the mounting bracket. • M6x60 expansion bolts are delivered with the SUN2000. If the length and amount of the bolts do not meet installation requirements, prepare M6 stainless steel expansion bolts by yourself. •... -
Page 5: Electrical Connections
Electrical Connections Preparing for Installation • Connect cables in accordance with the local installation laws and regulations . • Before connecting cables, ensure that the DC switch on the SUN2000 and all the switches connecting to the SUN2000 are set to OFF position. Otherwise, the high voltage of the SUN2000 may result in electric shocks. -
Page 6: Installing The Ac Output Power Cable
Installing the AC Output Power Cable Ensure that the protection layer of the AC output power cable is inside the connector, the core wires are totally inserted into the cable hole, and the cable is connected securely. Failing to do so may cause device malfunction or damage. - Page 7 Four-core cable (L1, L2, L3, and N) Click Five-core cable (L1, L2, L3, N and PE) Click 2. Connect the AC connector to the AC output port. AC output port (AC)
-
Page 8: Installing Dc Input Power Cables
3. Check the route of the AC output power cable. Installing DC Input Power Cables 1. Use the Amphenol Helios H4 PV connectors supplied with the SUN2000. If the PV connectors are lost or damaged, purchase the connectors of the same model. The device damage caused by incompatible PV connectors is not covered under any warranty. - Page 9 Positive connector Positive metal contact Negative Click connector Negative metal contact Ensure that the cable cannot be pulled out after being crimped. Ensure that the cables are correctly connected. (The DC voltage of a multimeter should not be less than 1100 V). Ensure that the locking nut is secured.
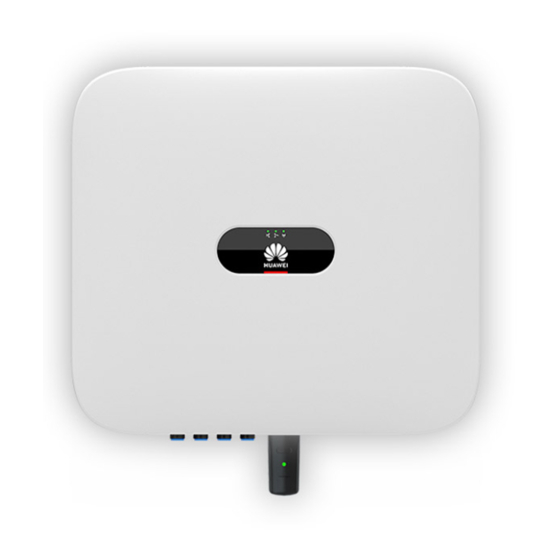
- Page 10 (Optional) Installing the WLAN Smart Dongle NOTE The WLAN Smart Dongle is delivered with the SUN2000. Smart Dongle port (GPRS/4G/WLAN) LED indicator Operation LED Indicator Remarks Description Color Status Installing Normal The Dongle is not secured or is the Dongle not powered on.
- Page 11 (Optional) Installing the Signal Cable Communication Port Pin Definition • Not all SUN2000 models are delivered with the signal cable connector. • When laying out the signal cable, separate it from the power cable and keep it away from strong interference sources to avoid strong communication interference.
- Page 12 The Smart Power Sensor is optional. The recommended Smart Power Sensor model is DTSU666-H (purchased from Huawei). • A maximum of five SUN2000-(3KTL-12KTL)-M0 inverters can be cascaded. When cascading the inverters, the RS485 cable can only be connected to 485A1 and 485B1. •...
- Page 13 (Optional) Installing the RS485 Communications Cable If two or more SUN2000s are cascaded, install RS485 communications cables. 1. Connect the signal cable to the signal cable connector. 2. Connect the signal cable connector to the Communication port. Communication port (COM)
- Page 14 (Optional) Installing the Smart Power Sensor Signal Cable 1. Connect the signal cable to the signal cable connector. 2. Connect the signal cable connector to the Communication port. Communication port (COM)
- Page 15 (Optional) Installing the Grid Scheduling Dry Contact Signal Cable 1. Connect the signal cable to the signal cable connector. 2. Connect the signal cable connector to the Communication port. Communication port (COM)
-
Page 16: Verifying Installation
Verifying Installation Acceptance Criteria The SUN2000 is installed correctly and securely. Cables are routed properly as required by the customer. The communications expansion module is installed correctly and securely. Cable ties are evenly distributed and no burr exists. The PE cable is connected correctly, securely, and reliably. The DC switch and all the switches connected to the SUN2000 are set to the OFF position. - Page 17 4. Observe the LED indicators to check the SUN2000 operating status. Category Status (Blinking at Long Meaning Intervals: On for 1s and then Off for 1s; Blinking at Short Intervals: On for 0.2s and then Off for 0.2s) Running indicator The SUN2000 is operating in grid-tied Steady green Steady green...
-
Page 18: Quick Setting
Quick Setting Search for "FusionSolar" from the following app stores or scan the corresponding QR code on the right, download the installation package, and install the FusionSoalr app by following the instructions. • Google Play (Android) • App Store (iOS) Android •... - Page 19 WLAN WLAN The initial password is Changeme. WLAN WLAN WLAN The initial password is 00000a.
- Page 20 Creating a New PV Plant Connecting the Phone to the Internet (iOS is used as an example.) • • If there is an available WLAN If there is not, disable WLAN and use Mobile network, use it. Data. WLAN WLAN WLAN WLAN (Optional) Installer Account Registration...
- Page 21 Creating a New PV Plant Internet connection required. Check network settings. Creating a New Account for User Internet connection required. Check network settings. Scan the QR code on the right to obtain the operation guide for quick settings and creating a new PV plant.
-
Page 22: Customer Service Contact
Customer Service Contact Customer Service Contact Region Country Phone Service Support Email France Germany Spain Europe Italy eu_inverter_support@huawei.com 0080033888888 Netherlands Other countries Australia au_inverter_support@huawei.com 1800046639 Turkey tr_inverter_support@huawei.com 0080021686868 Malaysia /1800220036 (+66) 26542662 (charged by apsupport@huawei.com Asia local call) Pacific Thailand... - Page 23 Huawei Technologies Co., Ltd. Huawei Industrial Base, Bantian, Longgang, Shenzhen 518129, People's Republic of China solar.huawei.com...