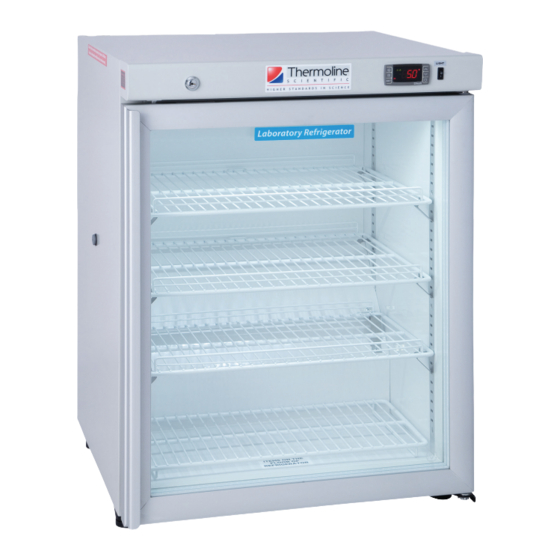
Summary of Contents for Thermoline Scientific TELR 130
- Page 1 LABORATORY REFRIGERATOR INSTRUCTION MANUAL FOR MODELS: TELR 130/145/200/440/740 TLR 520/750/950/1150 Fitted with Dixell XR70 Controller REVISION 19/4/2018 (1.5) Copyright 2018 Thermoline Scientifi c Equipment Pty Ltd...
- Page 2 PRE USE CHECKLIST Read this manual All packaging removed Ensure correct ventilation distances (Refer to Page 5) Unit on level ground Appliance Tested/Tagged as per site guidelines BMS Connected (if fi tted) Data logger placed in cabinet (if being used) Unit powered on and doors not opened for at least 8 hours.
-
Page 3: Table Of Contents
INTRODUCTION Thank you for choosing a Laboratory Refrigerator from Thermoline Scientifi c. This manual covers the operation, cleaning, & maintenance instructions for this equipment. Incorrect operation or use can cause harm or damage to the equipment and it’s contents, therefore it is very important that you read, understand, and implement the instructions, to ensure reliable operation. -
Page 4: Unpacking
UNPACKING Remove the equipment from the packing material and check for damage. Notify the detail of any damage to your supplier or to Thermoline Scientifi c without delay. Retain the packing materials until the equipment has been thoroughly tested. Inventory: •... -
Page 5: Location & Installation
All TELR/TLR Refrigerators require ventilation around them. 100mm (10cm) on each side and the back is re- quired. See diagrams below showing correct placement and ventilation distances. TLR 520, 750, 950, 1150 TELR 130, 145 TELR 200, 440, 740 Do not store items on top of the fridge as this will also aff ect ventilation! -
Page 6: Operation
OPERATION 1: Locate the cabinet as previously described, and plug the mains lead into the power supply but do not turn the power on just yet. 2: The cabinet is supplied with the shelves fi xed in place. Adjust the shelf positions to suit your storage needs by moving the support clips provided. -
Page 7: Loading
CONNECTION OF ALARMS As previously mentioned, this cabinet is fi tted with a 3-pin socket on the cabinet to allow for connection to a building moni- toring system (BMS), or to a phone dialer. A plug is also supplied separately to connect the socket to your wiring. The alarm contacts have no voltage present, but we recommend that the wiring is connected by a suitably qualifi ed technician (electri- cian or similar). -
Page 8: Optional Chart Recorder
TEMPERATURE LOGGING The digital temperature control has a feature that allows the operator to log or record the maximum and minimum tempera- tures attained by the cabinet over a period of time. These logged temperatures can be reset on a daily basis by simply pressing the buttons on the face of the instrument as follows: Press and release the “UP”... -
Page 9: Cleaning & Maintainance
CLEANING & MAINTENANCE General cleaning: The interior, exterior, and door gasket can be cleaned as often as required using a soft cloth and soapy water. Never use abra- sive cleaners or scouring pads as these will scratch the surface and may result in corrosion. Never use caustic type cleaning agents. -
Page 10: Troubleshooting
TROUBLESHOOTING PROBLEM POSSIBLE CAUSE ACTION Cabinet not working: Loss of power. Check that the mains lead is plugged in. No display. Check that the power point is No fans or working. refrigeration Cabinet temperature Condenser blocked. Clean condenser. too high. Poor ventilation around Refer to section on location &... -
Page 11: Servicing
SERVICING General Servicing: General inspection of the refrigerator should be made at regular periodic intervals depending on a range of factors. Generally every 6 months the following tasks should be performed: - Inspect and clean condenser - Check door gasket for damage including splits, tears or areas where it isn’t sealing to the refrigerator frame when the door is closed. -
Page 12: Wiring Diagrams
WIRING DIAGRAMS Copyright 2018 Thermoline Scientifi c Equipment Pty Ltd... - Page 13 Copyright 2018 Thermoline Scientifi c Equipment Pty Ltd...
- Page 14 Copyright 2018 Thermoline Scientifi c Equipment Pty Ltd...
-
Page 15: Warranty
WARRANTY Have the following information available when you contact the service department: • Model number and serial number. This is generally found on the exterior of the cabinet in the form of a stick-on label. • The company name, address, contact name, contact phone number. •...


Need help?
Do you have a question about the TELR 130 and is the answer not in the manual?
Questions and answers