Table of Contents
Advertisement
Advertisement
Table of Contents

Related Manuals for Breville VCF126


Summary of Contents for Breville VCF126
- Page 1 Barista Max Espresso Machine With Integrated Grinder VCF126...
- Page 2 PRECAUTIONS • Do not immerse the SAFETY PRECAUTIONS FOR appliance or power cord YOUR BREVILLE ESPRESSO and plug in water or any MACHINE other liquid. Wash the • Read carefully and save all following 10 parts in warm the instructions provided water with a mild detergent;...
- Page 3 Breville Breville is very safety Website or contact Breville conscious when designing Consumer Care - details are and manufacturing consumer on the back page.
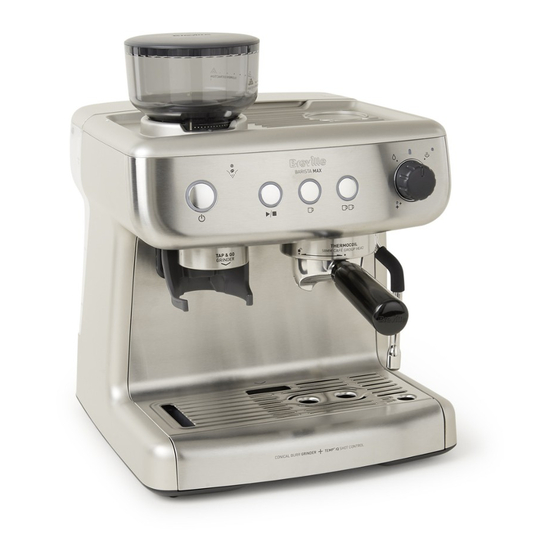
- Page 4 FEATURES OF YOUR BREVILLE BARISTA MAX 58mm Tamper 18 16 460mL Milk Jug Steam Wand Dual Wall 58mm Single Wall Filter Baskets Tip Pin Filter Basket One Cup Two Cup Cleaning Disc Cleaning Brush Cleaning Pin...
- Page 5 FEATURES OF YOUR BREVILLE BARISTA MAX A. Removable Bean Hopper G. Non-slip Feet The removable 250g capacity Bean The non-slip silicone feet ensure that Hopper features 30 easily adjustable Grind the Barista Max remains stable on the Settings. Turn the Hopper from coarse to benchtop during use.
- Page 6 FEATURES OF YOUR BREVILLE BARISTA MAX GRINDER BARISTA MAX MANUAL SHOT CLEAN TAP & GO GRINDER N. Removable Top Burr ONE CUP Button Easily removable by lifting the Burr Pours 1 shot of espresso - 30mL handles when cleaning. (For more then automatically stops.
- Page 7 MORE DETAILS ABOUT YOUR BREVILLE BARISTA MAX Temp° IQ Shot Control™ Tap&Go™ Integrated Grinder Optimum temperature The Temp° IQ Shot Control™ is an Easy on-demand grinding exclusive technology developed by Breville experience for your Barista Max. This 3 way system •...
-
Page 8: Before First Use Of The Barista Max
BEFORE FIRST USE OF THE BARISTA MAX Step 1. Remove Packaging Step 5. Insert Parts into the Grinder - Ensure all packaging has been removed. • Removable Top Burr Important: Remove the red plug found at - Using the two handles insert the Top the base of the Water Reservoir. - Page 9 & dry before making your first coffee. - If water is not flowing from the Group Head or Steam Wand, repeat Step 7. - If water is still not running through, contact Breville Customer Care. Details are on the back page.
-
Page 10: Barista Max Coffee Making Guide
BARISTA MAX COFFEE MAKING GUIDE 1. Check Water & Beans 2. Start Up 1 Min READY Heat Up 2.8 L Press ON/OFF BUTTON, LIGHT ON/OFF, EXTRACTION BUTTONS Barista Tip: For best pulses = heating up. GRINDER & DIAL LIGHTS all fully illuminated espresso results, use fi... - Page 11 BARISTA MAX COFFEE MAKING GUIDE 6. Fill Coffee Grinds 7. Tamp TAMP FORCE PUSH 10-15Kg DOWN SLIDE IN FROM ABOVE Group Handle Insert Group Push down Group - One Cup = 13-15g coffee grinds. will sit fl at, Handle into Handle to grind - Two Cup = 20-22g coffee grinds.
- Page 12 BARISTA MAX COFFEE MAKING GUIDE 13. Prep Milk Jug 14. Before Texturing Milk PAUSE 4°C Barista Tip: For best milk FILL texturing results, ensure steam has fi rst heated up (STEAM LIGHT fully ON). You will hear the Pump start. Turn DIAL to STEAM LIGHT is Some water...
- Page 13 BARISTA MAX COFFEE MAKING GUIDE 18. Purge & Clean Steam Wand RETURN Barista Tip: To keep optimum Steam Wand performance, always purge & clean the Steam Wand after texturing milk. Turn DIAL to HOT Wipe Steam Milky water will Return DIAL WATER for 1-2 Wand &...
-
Page 14: Tips For Grinding & Tamping
Barista Tip: These are available for purchase from After adjusting the Grind Setting it is Breville. Details are on the back page. important to purge (for 1-2 sec) a small 4. Grind Dosage & Tamp Force amount of coffee grinds from the Grinder. - Page 15 TIPS FOR PERFECT ESPRESSO EXTRACTION The way the espresso pours will tell you from the coffee grinds have been everything. extracted. This creates a sour tasting espresso. 1. Extraction Time • Over Extraction Extraction time is a good indicator of the There may be no pour, or it may be quality of the pour.
-
Page 16: Tips For Milk Texturing
• Gurgling - Tip not deep enough, raise Jug. A larger capacity Milk Jug is available for • Smooth Hissing - Just right for latte. purchase from Breville. Details are on the • Screeching - Tip too deep, lower Jug. back page. - Page 17 60-65°C Almond 55-65°C 55-60°C Coconut 65-70°C 12. The Finishing Touches Note: Above recommendations might vary from one milk brand to another and Pour from the Milk Jug into your cup in one depending on your taste preference. steady motion. www.breville.co.uk...
-
Page 18: Coffee Styles To Try
COFFEE STYLES TO TRY Espresso (Short Black) Espresso is a concentrated, full bodied coffee with a stable layer of crema on top. An espresso is the foundation of all café coffee. • Espresso glass (90mL) • Single or double shot of espresso (30mL-60mL) Ristretto A ristretto is an extremely short espresso, distinguished by its intense flavour, aftertaste and its thin crema on top. - Page 19 COFFEE STYLES TO TRY Flat White An espresso with textured milk & a thin layer of textured foam milk on top. The wider cup will create the slim layer of foam, the signature of the flat white. • Wide cup (190mL) •...
-
Page 20: Customisable - Shot Volumes
CUSTOMISABLE - SHOT VOLUMES The Barista Max features Auto Shot Customise - One Cup Shot Volume Volumetric Control. Insert One Cup Filter Basket into the It extracts just the right amount of Group Handle. espresso then automatically stops. Fill with coffee grinds then tamp. - Pours 1 shot of espresso = 30mL ONE CUP... - Page 21 CUSTOMISABLE - SHOT VOLUMES Customise - Two Cup Shot Volume Customise - Manual Shot Volume Insert Two Cup Filter Basket into the Insert your desired Filter Basket into Group Handle. the Group Handle. Fill with coffee grinds then tamp. Fill with coffee grinds then tamp. TWO CUP ONE CUP TWO CUP...
-
Page 22: Customisable - Extraction Temperature
CUSTOMISABLE - EXTRACTION TEMPERATURE The Thermoblock heats water so that • Adjusting Extraction Temperature espresso extracts at 92°C. For the best The combination of EXTRACTION tasting espresso, balancing bitterness and LIGHTS illuminated signals the acidity. temperature selected. The default setting is: You can adjust the water temperature used - 92°C = ONE CUP LIGHT illuminated. -
Page 23: Customisable - Extraction Pre-Infusion Profile
CUSTOMISABLE - EXTRACTION PRE-INFUSION PROFILE You can select from three Pre-infusion • Selecting Pre-infusion Profiles Profiles to cater for personal preferences. The EXTRACTION LIGHT illuminated signals the Pre-infusion Profile selected. - Gentle Pre-infusion: Small defined The default setting is: amounts of water are introduced into - Gentle = BUTTON. -
Page 24: Care & Cleaning - Espresso Machine
CARE & CLEANING - ESPRESSO MACHINE The espresso making process involves Cleaning Drip Tray & Grind Bin extracting oils out of coffee grinds. Deposits • When Required of grinds & oils build up over time, affecting Empty if the red Water Level Indicator the taste of the coffee &... - Page 25 Cleaning Cycle will start. when fully turned to the centre position. PRESS & HOLD TOGETHER 4 SEC Note: Contact Breville should you think that the Group Head Seal needs replacing. Do not attempt to change the Silicone Seal without first consulting Breville.
- Page 26 • Steam Wand Remains Blocked: - Unscrew the Steam Wand Tip and soak overnight in the Milk Jug with warm water & one Breville Cleaning Tablet. - Place Filter Basket into Group Handle (without coffee grinds) and insert into UNSCREW Group Head.
-
Page 27: Care & Cleaning - Grinder
CARE & CLEANING - GRINDER Conical Burrs are used to grind coffee 2.REMOVE beans to a suitable size for espresso extraction. Deposits of grinds & oils build up over time, affecting the taste of the espresso 1.TURN & operation of the integrated Grinder. Cleaning Grinding Cradle &... - Page 28 CARE & CLEANING - GRINDER Cleaning & Unblocking Grinder Burrs, - Remove the Group Handle and dispose of the waste grinds as these Collar, Grind Chamber and Outlet will be too coarse for espresso coffee. • 1-2 Months - Remove the Bean Hopper from If the Grinder is used frequently the Grinder Collar and store any (everyday), the Burrs need to be cleaned...
- Page 29 - Ensure the dot on the Top Cover Burr may need adjusting. aligns with the dot on the Grinder Contact Breville (details are on the back Collar. page) should you think that the Bottom Burr - Using the two handles insert the Top needs adjustment.
-
Page 30: Descaling Cycle - Espresso Machine
DESCALING CYCLE - ESPRESSO MACHINE After continued use, your Espresso • Place Containers Machine may develop a build-up of mineral - Place a 1 Litre container under Group deposits and therefore require occasional Head and another 1 Litre container descaling. under the Steam Wand. - Page 31 DESCALING CYCLE - ESPRESSO MACHINE • Fill Water Reservoir Note: The LIGHT will continue to flash until completion of the Descaling Cycle. - Fill the Water Reservoir to the '1 Litre' Important: If Descaling Step 1 is not line with cold water from the tap and started within 1 minute of entering the insert into position.
- Page 32 Group Handle before using in the Group Head. Group Head Silicone Seal is See Care & Cleaning, page 25. damaged or worn. Contact Breville Customer Care. Espresso Coffee grind is too fine. Change to a coarser Grind Setting. squirts or Too many coffee grinds used.
- Page 33 TROUBLESHOOTING GUIDE - ESPRESSO MACHINE Problem Possible Cause What To Do No espresso No water in the Water Fill reservoir with water. Prime water pours Reservoir. through the Group Head, press the ONE CUP BUTTON. Allow water to run through. Coffee grind is too fine.
- Page 34 TROUBLESHOOTING GUIDE - ESPRESSO MACHINE Problem Possible Cause What To Do Spent (used) A little water will remain on Rest Group Handle on the Drip coffee cake is top of the used coffee cake. Tray for 5 sec to allow the water to dissipate before disposing cake.
- Page 35 TROUBLESHOOTING GUIDE - ESPRESSO MACHINE Problem Possible Cause What To Do Milky coffee is Milk may not be heated Ensure that milk is heated properly too cold enough. during texturing, but be sure not to heat too much and boil the milk. See Tip for Milk Texturing, pages 16-17.
-
Page 36: Off Button
TROUBLESHOOTING GUIDE - GRINDER Problem Possible Cause What To Do Optimum Grind New Burrs are bedding in. Turn the Bean Hopper clockwise Setting is This is normal for the first in small increments to a finer Grind producing an few uses. Setting to keep an optimum espresso under extracted extraction. - Page 37 TROUBLESHOOTING GUIDE - GRINDER Problem Possible Cause What To Do Espresso is Not enough coffee grinds Fill with more coffee grinds. under extracted used. even with a fine Beans are too old. Use freshly roasted beans. Old coffee coffee grind beans, no matter the Grind Setting, will have a fast extraction and will produce an under extracted tasting espresso.
-
Page 38: Accessories Available For Purchase
Contact Breville Customer care on: 0800 525 089 58mm Filter Baskets Single Wall Dual Wall One Cup Two Cup One Cup Two Cup VCF130 VCF131 VCF128 VCF129 Visit Breville website to see full Espresso Machine range & accessories available. www.breville.co.uk... -
Page 39: Replacement Parts
REPLACEMENT PARTS ELECTRICAL SAFETY For additional or replacement parts, please This appliance must be earthed. visit www.breville.co.uk or call us on If the plug is not suitable for the socket 0161 621 6900. outlets in your home, it can be removed and replaced by a plug of the correct type. -
Page 40: After Sales Service
AFTER SALES SERVICE GUARANTEE These appliances are built to the very Please keep your receipt as this will highest of standards. There are no user be required for any claims under this serviceable parts. Follow these steps if the guarantee. unit fails to operate: This appliance is guaranteed for 1 year •... - Page 41 Faults that occur through, improper use, damage, abuse, use with incorrect voltage, acts of nature, events beyond the control of JCS (Europe), repair or alteration by a person other than a person authorised by JCS (Europe) or failure to follow instructions for use are not covered by this guarantee.
- Page 42 Telephone: 0161 621 6900 For Customer Service details, please see the website. www.breville.co.uk © 2019 Jarden Consumer Solutions (Europe) Limited All rights reserved. Imported and distributed by Jarden Consumer Solutions (Europe) Limited, 5400 Lakeside, Cheadle Royal Business Park, Cheadle, SK8 3GQ, United Kingdom.
Need help?
Do you have a question about the VCF126 and is the answer not in the manual?
Questions and answers