Table of Contents
Advertisement
Advertisement
Table of Contents

Related Manuals for Phanteks EVOLV SHIFT 2


Summary of Contents for Phanteks EVOLV SHIFT 2
- Page 1 SHIFT 2 SHIFT 2 air U S E R M A N U A L V 1 . 0...
- Page 3 Thank you f o r c h o o s i n g...
-
Page 4: Table Of Contents
SHIFT 2 SHIFT 2 TABLE OF CONTENTS SHIFT 2 air 1. WHAT ’S INS IDE? Introduction Specifications Exploded View Accessories 2. CHO OSE YOU R SE TUP Getting started Installing the bottom fan Installing the Power Supply Installing cooling Installing the Motherboard Installing the GPU Installing drives Connecting Front I/O... -
Page 5: Introduction
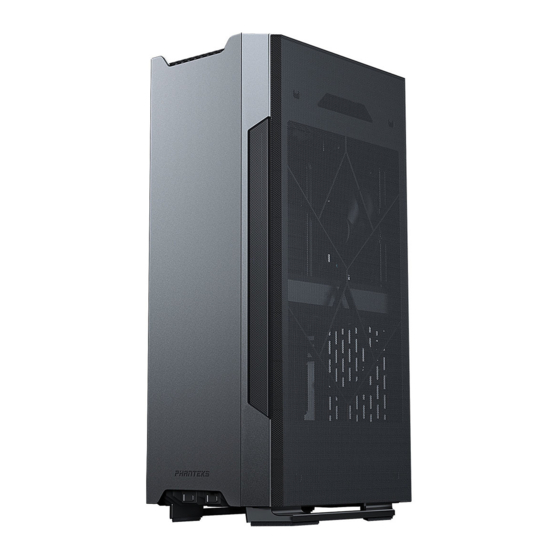
Welcome to Phanteks! The Evolv Shift 2 (air) builds on the unique form factor of the original Evolv Shift and brings a compact chassis that packs plenty of power and is extremely space efficient with its small footprint. The Evolv Shift 2 (air) will look impressive anywhere with the tempered glass or mesh fabric panels on both sides. -
Page 6: Specifications
PCI slots 2x (2.9 slot) 30mm thickness with SFX-L Internal 3.5” Internal 2.5” 4x (2 included) SUPPORT 120 MM 140MM Contact (International) support@phanteks.com Contact (America) support@phanteksusa.com Rear 2x (1x included) Warranty 5 Years, see page 27 Bottom RADIATOR 120 MM Rear *Depends on model. -
Page 7: Exploded View
SHIFT 2 EXPLOADED VIEW SHIFT 2 air 1. Chassis 2. Front Panel 3. Rear Panel 4. Left Side Panel 5. Right Side Panel 6. Top Grill 7. Bottom Grill 8. GPU Bracket 9. Dual SSD Bracket 10. Bottom Dust Filter... -
Page 8: Accessories
* Shift 2 Air comes with non D-RGB version non D-RGB version D-RGB version ACC ES SORY BAG AN D TOO LBOX Accessory bag Toolbox Fan screw M3x5 mm PSU screw Silver Thumb Motherboard / Screw SSD screw 6x Zip Tie 150mm Phanteks Logo Badge... -
Page 9: Getting Started
O F T H E I N S TA L L AT I O N P R O C E S S PREPARATIONS • The Evolv Shift 2 case is designed to support installation in a standing position. • Don’t turn on the power to your system until installation is complete. - Page 10 SHIFT 2 GETTING STARTED SHIFT 2 air P R E S S T H E T O P G R I L L T O O P E N I T LOOSE N: LO O S E N A L L T H U M B S C R E W S S L I D E T H E PA N E L S U P TA K E T H E PA N E L S O U T To remove or mount the rear panel the top grill must...
-
Page 11: Installing The Bottom Fan
SHIFT 2 INSTALLING THE BOTTOM FAN SHIFT 2 air If you want to install a bottom fan we recommend to do it first before proceeding R EQU IRE S: with the installation process. L AY T H E E V O LV S H I F T 2 O N I T S S I D E P U L L O F F T H E B OT T O M G R I L L I N S TA L L T H E FA N W I T H 4 X FA N S C R E W S P R E - R O U T E T H E FA N C A B L E O U T S I D E T H E C H A S S I S... -
Page 12: Installing The Power Supply
SHIFT 2 INSTALLING POWER SUPPLY SHIFT 2 air The SFX power supply fan can be faced towards the side panel or the inside of the chassis. For the Shift 2 with REQU IRE S: tempered glass side panels we recommend facing the inside of the chassis. P L AC E T H E S F X P S U O N I T S P O S I T I O N S E C U R E T H E S F X P S U W I T H 4 X P S U S C R E W S CO N N E C T T H E P O W E R E X T E N S I O N CO R D T O T H E P S U... - Page 13 SHIFT 2 INSTALLING POWER SUPPLY SHIFT 2 air After plugging in all needed power cables to the PSU, the power cables can be pre-routed to make the installation process of other components easier. C P U C A B L E Route the CPU Cable through the grommet and the rear cut-out, outside the chassis.
-
Page 14: Installing Cooling
SHIFT 2 INSTALLING COOLING SHIFT 2 air It is recommended to install all cooling case fans and/or AIO cooler in the chassis at this stage. R EQU IRE S: M O U N T T H E FA N W I T H 4 FA N S C R E W S REAR , top lo c at ion 1 4 0 1 2 0... - Page 15 SHIFT 2 INSTALLING COOLING SHIFT 2 air An 120 AIO cooler can be installed in the lower rear fan position. M O U N T T H E FA N A N D R A D I AT O R O N T H E LO W E R R E A R FA N P O S I T I O N F O L LO W T H E I N S TA L L AT I O N...
-
Page 16: Installing The Motherboard
SHIFT 2 INSTALLING THE MOTHERBOARD SHIFT 2 air Install the mini-ITX motherboard with 4x motherboard screws. R EQU IRE S: Wait until the end to connect all cables for easier installation of all the components. -
Page 17: Installing The Gpu
SHIFT 2 INSTALLING THE GPU SHIFT 2 air Remove the GPU Bracket and riser cable before mounting the GPU. U N S C R E W T H E S I LV E R T H U M B S C R E W U N S C R E W T H E 2 X S C R E W S H O L D I N G T H E B R AC K E T... - Page 18 SHIFT 2 INSTALLING THE GPU SHIFT 2 air Install the GPU on the GPU bracket first before placing it in the chassis. The GPU bracket is configured to REQU IRE S: face the GPU cooler towards the side panel out of the box. If you prefer to face the GPU cooler towards the motherboard, please move the stand-off as shown in step 3.
- Page 19 SHIFT 2 INSTALLING THE GPU SHIFT 2 air Place the GPU Bracket with GPU in the chassis. RE QUIRE S: R O U T E T H E R I S E R C A B L E T O T H E M OT H E R B O A R D S I D E P O S I T I O N T H E G P U B R AC K E T T O I T S P O S I T I O N M O U N T T H E G P U B R AC K E T W I T H 2 X S C R E W S S E C U R E T H E G P U B R AC K E T W I T H...
-
Page 20: Installing Drives
SHIFT 2 INSTALLING DRIVES SHIFT 2 air 2. 5” S S D IN S TA LL AT I O N R EQU IRE S: Two 2.5’’ SSD drives can be installed in the Dual SSD Bracket. Orientation of the drives is important for easy cable management, so please follow the following steps for correct installation. - Page 21 SHIFT 2 INSTALLING DRIVES SHIFT 2 air 3. 5 ” HD D I NS TA LL AT I O N A 3.5” HDD can be installed using the rubber grommets that are pre-installed on the chassis. U N S C R E W T H E 4 R U B B E R G R O M M E T S M O U N T T H E 4 R U B B E R G R O M M E T S O N T H E B OT T O M O F T H E H D D D R I V E H DD...
-
Page 22: Connecting Front I/O
TO P OW E R SU PP LY D -RG B M o de D -RGB POWER L ED / CONTRO LLER SATA C ABLE Power TO D -RGB P RODU C TS PHANTEKS D -RGB TH IRD PART Y D -RGB... -
Page 23: Cable Management (Internal Ext)
SHIFT 2 CABLE MANAGEMENT SHIFT 2 air At this stage all cables can be connected to the system components. For easier cable management we recommend to connect all small cables first and power cables last. S M A L L C A B L E S Connect all small cables to the motherboards;... - Page 24 SHIFT 2 CABLE MANAGEMENT SHIFT 2 air G P U C A B L E Route the GPU Cable(s) under the Dual SSD Bracket to the cable cut-out toward the GPU. S ATA / M O L E X C A B L E S 7.
-
Page 25: Lighting Control
SHIFT 2 LIGHTING CONTROL SHIFT 2 air The Digital-RGB lighting can be easily controlled with the 2 buttons on the top of the chassis. D -RG B M ODE B UT TON* D -RG B COLOUR BUT TON * CONNECT MORE D-RGB PRODUCTS To DIGITAL-RGB Products SYNC TO M OT HE RB OARD To D-RGB Motherboard (optional) -
Page 26: Dust Filters
SHIFT 2 air The Evolv Shift 2 is equipped with a bottom and top dust filter. The bottom dust filter is removable for easy cleaning (2). The top dust filter is built into the top panel (1). The front and rear panel have metal ultra-fine mesh parts that also act as dust filters (3 & 4). We recommend to clean these filters every month to keep your cooling performance optimized. -
Page 27: Optional Upgrades
1 40 S K ( D -R G B ) PW M FA N 1 20 SK (D -RG B) P WM FA N PH-F140SK_BBK_PWM / PH-F140SK_DRGB_PWM PH-F120SK_BBK_PWM / PH-F120SK_DRGB_PWM The Phanteks SK PWM fans deliver The Phanteks SK PWM fans deliver optimized and enhanced static pressure optimized and enhanced static pressure for better cooling performance. -
Page 28: Contact Us
SHIFT 2 air As a Phanteks customer, you are priority number one. We have a dedicated team of employees across the globe working hard every day to make sure we deliver the superior experience you deserve. We are here for you. If you have a question or a concern about our products, we have numerous ways you can reach us. -
Page 29: Warranty
WARRANTY SHIFT 2 air PHANTEKS warrants its products to be free from defects in material and workmanship during the warranty period; when given normal, proper and intended usage. If a product proves to be defective in material or workmanship during the warranty period, PHANTEKS will, at its sole option, repair or replace the product with same product or similar product.
Need help?
Do you have a question about the EVOLV SHIFT 2 and is the answer not in the manual?
Questions and answers