
Related Manuals for Dateq SPL6

Summary of Contents for Dateq SPL6
- Page 1 SPL6 Multiband limiter & Sound level recorder Manual SPL 6 POWER DETECT REDUCE OVERLOAD SANCTION STATUS RESET ADVANCEDAUDIO LEVEL RECORDER CONTROL SPL5_040825_V1.0EN...
- Page 2 SPL5_040825_V1.0EN...
- Page 3 DATEQ SPL6 Manual Safety instructions Safety instructions 1. All safety instructions, warnings and operating instructions must be read first. 2. All warnings on the equipment must be heeded. 3. The operating instructions must be followed. 4. Keep the operating instructions for future reference.
-
Page 4: Table Of Contents
Index Safety instructions..........3 Limiter configuration........21 Introduction............5 Mode............21 Installation............6 Limiter settings........21 Connections...........6 Certification date........21 Signaling connector; .........7 Microphone settings........21 External display; ........8 Sanction settings........21 Microphone input........8 Multiband.............22 Audio inputs..........8 Multiband Limiter........22 Audio outputs..........8 10 band parametric Equalizer....22 External attenuator........9 Time slots............23 Signaling...........9 Bypass calender........23 Operation............10... -
Page 5: Introduction
ADVAN C ED AUD IO LEVEL REC O RD ER C O N T ROL The SPL6 is an advanced audio level limiter that stores the sound level samples for at least twelve months. The sound level samples can be viewed using the internal web pages or externally stored through automatic email. -
Page 6: Installation
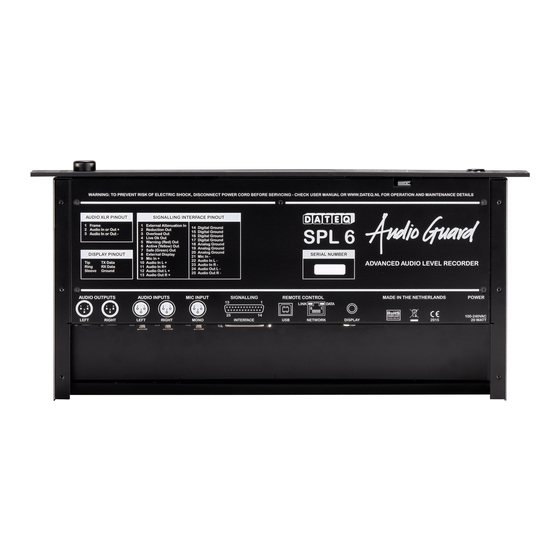
Connections The SPL6 is equipped with balanced audio in,- and outputs. This type of connection guarantees a solid sound quality, even when long audio cables are used. After the limiter is installed the audio connectors are covered to prevent later adjustments. -
Page 7: Signaling Connector
DATEQ SPL6 manual Network installation Signaling connector; DB-25 female Function In/ output 1 External attenuator 2 Reduction signal Out; 15V/ 5mA max. 3 Overload signal Out; 15V/ 5mA max. 4 Live OK signal Out; 15V/ 5mA max. 5 Warning signal Out;... -
Page 8: External Display
Installation DATEQ SPL6 manual External display; Jack 3-pens female Function Description SL Ground Data ground Tip Data TX Data send Ring Data RX Data receive Table 7: External display connections Microphone input Connect the supplied measuring microphone here. The wiring of the microphone can be lengthened with standard microphone cable. -
Page 9: External Attenuator
These indicators can be placed near the disc-jockey, or the live band, to give them an impression of the sound pressure level. External VU unit This is the data connection with the optional SPL-D2 MK display. The external display can also directly be connected to the SPL6. For this a stereo 6.3mm jack cable is required. -
Page 10: Operation
3. Status LED's: DETECT LED the SPL6 detected audio signal on the line input (-24dB or more), • REDUCE LED shows the audio level is above the set maximum. The SPL6 reduces the • output level, OVERLOAD LED shows an overloaded signal present at the line or microphone input (12dB •... -
Page 11: Technical Specifications
DATEQ SPL6 Manual Technical specifications Technical specifications Inputs Mic (Measurement microphone)......XLR-3 female. Use only the original DCM-5 microphone Line (left and right)...........XLR-3 female. Electronically balanced. Maximum input level.......+18dBu Input impedance........50kOhm Commom-mode rejection.......>86dB Outputs Line (left and right)...........XLR-3 male. Electronically balanced. - Page 13 SPL6 Multiband limiter & Sound level recorder Configuration...
- Page 14 Notes...
- Page 15 Index Safety instructions..........3 Limiter configuration.........21 Introduction.............5 Mode............21 Installation...............6 Limiter settings..........21 Connections............6 Certification date..........21 Signaling connector; ........7 Microphone settings........21 External display; ...........8 Sanction settings.........21 Microphone input...........8 Multiband............22 Audio inputs...........8 Multiband Limiter.........22 Audio outputs..........8 10 band parametric Equalizer......22 External attenuator........9 Time slots............23 Signaling............9 Bypass calender..........23 Operation..............10...
-
Page 16: Introduction Configuration
ADVAN C ED AUD IO LEVEL REC O RD ER C O N T ROL The SPL6 is an advanced audio level limiter that stores the sound level samples for at least twelve months. The sound level samples can be viewed using the internal web pages or externally stored through automatic email. -
Page 17: Installation
Due to security risks Microsoft Internet Explorer is not supported. Configuration In this chapter the configuration and system settings for the SPL6 are explained. These settings normally are made once on installation. All made settings can be stored in a backup file for later use or restoring the original settings after changing. - Page 18 Open the router configuration page • Select the 'NAT setup' page • Select 'Port redirection' • Now set the IP address for the SPL6, the external port number and the local port number. • The following ports are used: Http: port 80 FTP:...
-
Page 19: Configuration License
SPL limiter and settings need to be changed, you need to contact your local distributor or installer. The closest supplier can be found at the Dateq selling points part of the website: www.dateq.nl. An installer license is linked and registered to the installing company and can not be transferred to third parties. -
Page 20: Automatic Installation
Automatic installation Through the automatic installation process the basic sound level settings for the SPL6 can be made. On starting the installation the different popup windows will guide the installation. Make sure popup blockers in your browser are disabled before starting. -
Page 21: Limiter Configuration
DATEQ SPL6 configuration manual Configuration Limiter configuration The manual configuration of sound level parameters. Mode Live Limiter and recorder • Line Limiter and recorder • In Live mode the limiter will reduce the output level on microphone measurement. The microphone actively influences the output level. -
Page 22: Multiband
Configuration DATEQ SPL6 Configuration manual Multiband Here the settings for the multiband (octave) limiter and parametric equalizer are made. All settings are immediately active. Multiband Limiter The multiband limiter will act as an octave limiter before the complete audio level is reduced. Set the maximum allowed band reduction and enable the limiter to activate it. -
Page 23: Time Slots
DATEQ SPL6 configuration manual Configuration Time slots The time slots allow different dB values during the week. Three slot's a day are available. The slot reduces the maximum allowed value by the selected amount of dB. Settings become active after storing. -
Page 24: Display
Configuration DATEQ SPL6 Configuration manual Display The front panel display allows to view different values. Large: dB(A) (standard) • dB(C) • Leq-1 • Leq-2 • dB peak • Small: dB(A) • dB(C) (standard) • Leq-1 • Leq-2 • dB Peak •... -
Page 25: Logging
DATEQ SPL6 configuration manual Configuration Logging The SPL6 records all measured values into PDF and CSV file format. An independent file is generated for each day. Select the values that need to be implemented. By default all values are available. -
Page 26: Remote Access
DATEQ SPL6 Configuration manual Remote access By default the SPL6 can only be reached within the local LAN network. The SPL6 automatically recognizes whether it is contacted through the local LAN or through the Internet. To enable remote internet control and readout, 'Allow internet access' must be enabled. -
Page 27: Owner Information
DATEQ SPL6 configuration manual Configuration Owner information The SPL6 will display the owner information in several reports and logging. To ensure the information is correctly displayed, it must be filled in as complete as possible. System settings Below the SPL6 device settings are made. -
Page 28: Firmware
After updating the SPL6 will automatically restore all previous settings. !! Important Never switch off the SPL6 during the update process! This can damage the SPL6 beyond repair. User settings All user settings can be stored to a backup file on your computer. -
Page 29: Logging
DATEQ SPL6 configuration manual Configuration Logging The SPL6 is equipped with an advanced logging and recording system. This system stores all system events, sound samples and optional records overload sound samples into it's memory. All system logging can automatically be send by email or remotely be stored through FTP. -
Page 30: Event Log
Configuration DATEQ SPL6 Configuration manual Event log The event log shows all system events from the selected date. All system events can be saved on your computer and exported to PDF file format. Upload history The upload history shows all historic system and limiter settings changes. It allows to view when which installer made what limiter changes. -
Page 31: Sound Sample Data
DATEQ SPL6 configuration manual Configuration Sound sample data The SPL6 stores all selected sound sample data into the internal memory. Sound sample data can be read back for at least 12 months. Select a date and time window to view the recorded samples. - Page 32 Configuration DATEQ SPL6 Configuration manual...
- Page 33 DATEQ SPL6 configuration manual Configuration...
- Page 34 Configuration DATEQ SPL6 Configuration manual Product support For questions about the SPL series limiters, accessories or other products contact Dateq at: Dateq Audio Technologies B.V. De Paal 37 Phone: (036) 54 72 222 1351 JG Almere E-mail: info@dateq.nl The Netherlands Internet: www.dateq.nl...
Need help?
Do you have a question about the SPL6 and is the answer not in the manual?
Questions and answers