Table of Contents
Advertisement
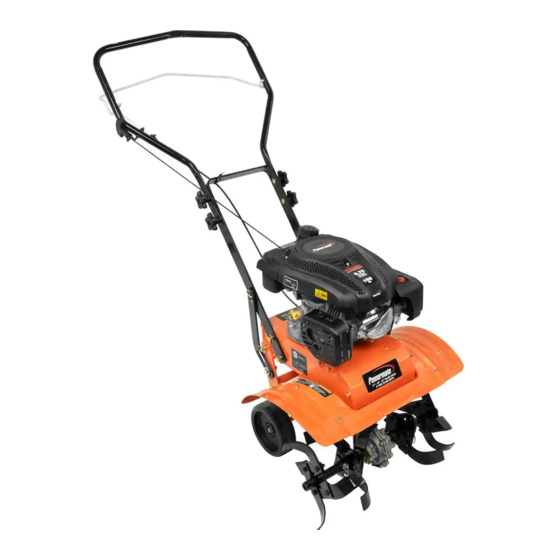
Operator's Manual
FRONT TINE
ROTARY TILLER
Look inside for:
Safety Definitions . . . . . . . . . . . . . . . . . . . . . . . . . . . . . . . 2-3
Important Safety Information . . . . . . . . . . . . . . . . . . . . . . 3-5
Product Specifications . . . . . . . . . . . . . . . . . . . . . . . . . . . . 6
Parts & Features . . . . . . . . . . . . . . . . . . . . . . . . . . . . . . . . 6
Safety Decals . . . . . . . . . . . . . . . . . . . . . . . . . . . . . . . . . . . 7
Assembly . . . . . . . . . . . . . . . . . . . . . . . . . . . . . . . . . . . . .8-10
Engine Preparation . . . . . . . . . . . . . . . . . . . . . . . . . . . . . . .11
Operation . . . . . . . . . . . . . . . . . . . . . . . . . . . . . . . . . . . . 12-15
Maintenance . . . . . . . . . . . . . . . . . . . . . . . . . . . . . . . . . . 16-18
Technical Service . . . . . . . . . . . . . . . . . . . . . . . . . . . . . . 18
Troubleshooting . . . . . . . . . . . . . . . . . . . . . . . . . . . . . . . 19
Warranty . . . . . . . . . . . . . . . . . . . . . . . . . . . . . . . . . . . . . . 20
Record the following for future reference:
Mfg. Date Code:___________
Date of Purchase:_____________ Attach a copy of your sales receipt.
Consumer Toll Free Number: 1-800-737-2112
Refer to the website for electronic manual and parts book.
www.powermateoutdoor.com
IMPORTANT:
Thank you for purchasing this Powermate® Tiller .
This manual provides complete instructions for safely operating and maintaining your Tiller . Read and save these instructions . Refer
to this manual each time before using your Tiller .
WARNING
CONTAINS LEAD . May be harmful if eaten or chewed . May generate dust containing lead . Wash hands after use . Keep out of reach of
children .
WARNING
This product can expose you to chemicals including lead, which is known to the State of California to cause cancer and birth defects or
other reproductive harm . For more information go to www .P65Warnings .ca .gov .
If you have a question or problem...
CALL TOLL FREE: 1-800-737-2112
KEEP THIS MANUAL FOR FUTURE REFERENCE
07/11/2018
Page
Printed in China
Model No. PFTT142.1
A203399
Advertisement
Table of Contents

Related Manuals for Powermate PFTT142.1

![Tiller Powermate P-RTT-196MD-[E] Operator's Manual](https://static-data2.manualslib.com/product-images/7a9/134189/60x60/powermate-p-rtt-196md-e-tiller.jpg)


Summary of Contents for Powermate PFTT142.1
-
Page 1: Table Of Contents
IMPORTANT: Thank you for purchasing this Powermate® Tiller . This manual provides complete instructions for safely operating and maintaining your Tiller . Read and save these instructions . Refer to this manual each time before using your Tiller . -
Page 2: Safety Definitions
Safety Definitions • Save these instructions Safety Alert Symbols The following symbols are used on the product and in this manual to alert the operator of potential safety hazards . Read them carefully, and understand their meaning . DANGER Indicates an imminently hazardous situation which, if not avoided, will result in death or serious injury . WARNING Indicates a potentially hazardous situation which, if not avoided, could result in death or serious injury . -
Page 3: Important Safety Information
Safety Definitions • Save these instructions Control and Operating Symbols (Continued) Ignition Switch: Move switch position to start/stop engine . Place free hand on handle bar before pulling recoil starter handle with other hand . Important Safety Information • Save all instructions Responsibility of Operator 1 . - Page 4 Important Safety Information (Continued) • Save all instructions Operation Safety • Always wear work gloves and sturdy footwear such as leather work shoes or short boots . These will protect ankles and shins from small sticks, splinters, and other flying debris, and improve traction . •...
- Page 5 Important Safety Information (Continued) • Save all instructions Repair, Maintenance, and Adjustment Safety • After striking a foreign object, stop the engine . Remove the wire from the spark plug and keep the wire away from the plug to prevent accidental starting . Thoroughly inspect the tiller for any damage . If damaged, have the equipment repaired by a trained technician before restarting and operating .
-
Page 6: Product Specifications
Product Specifications • Save all instructions Unit Weight . . . . . . . . . . . . . . . . . . . . . . . . . . . .89 lb (40 kg) Engine Displacement . -
Page 7: Safety Decals
Safety Decals • Save all instructions This tiller has been designed and manufactured to provide you with the safety and reliability you would expect from an industry leader in outdoor power equipment manufacturing . Although reading this manual and the safety instructions it contains will provide you with the necessary basic knowledge to operate this equipment safely and effectively, we have placed several safety labels on the tiller to remind you of this... -
Page 8: Assembly
Assembly If you need assistance or find any parts missing, • Save all instructions CALL TOLL FREE: 1-800-737-2112. The following components will be found in the carton . Read and follow the assembly instructions . Do not discard Quantities shown in ( ) . any parts or materials until the unit is assembled . - Page 9 Assembly (Continued) • Save all instructions Assembly Instructions (Continued) Install the tines (See Figure 3) Sharp edge of tine should face down to the ground . 1 . Slide the tines onto the tine axle . Install the internal tines first .
- Page 10 Assembly (Continued) • Save all instructions Attach upper handle (See Figure 6,7) 1 . Slide the upper handle down over the lower handle and align the holes . Orient upper handle so clutch lever is below handle . 2 . Insert the saddle bolts into the holes as shown and secure with flat washers and handle knobs.
-
Page 11: Engine Preparation
Engine Preparation • Save all instructions Engine Oil NOTICE Engine shipped without oil . Failure to add oil will result in serious engine damage . SAE 10W-30 A bottle of engine oil is included with your tiller . Refer to the chart on the right for alternative oil types to use at different temperatures . -
Page 12: Operation
Operation • Save all instructions Pre-Start Inspection 1 . Make sure all safety guards are in place and all nuts and IMPORTANT: Engine is shipped from factory without oil. You bolts are secure . must add engine oil before starting engine. 2 . - Page 13 Operation (Continued) • Save all instructions Stop the Engine 1 . Press ON/OFF switch to OFF position . Figure 14 Operating Speed This tiller is equipped with a fixed throttle that is set for optimum tilling performance . Shutting Down To stop the engine at any time, release the clutch lever and press ON/OFF switch to OFF position .
- Page 14 Operation (Continued) • Save all instructions Tilling 1 . Adjust the drag bar to desired tilling depth . DANGER WARNING IMPORTANT: Practice operating the controls and tiller with tines Lower the drag bar one hole at a time testing tiller out of ground before beginning to till.
- Page 15 Operation (Continued) • Save all instructions Adjustments WARNING Do not adjust tilling depth unless clutch lever is released and engine is turned off . Wheel adjust links (See Figure 18 & 18B) Use the upper hole in the adjustable wheel links for shallow to medium tilling depths .
-
Page 16: Maintenance
Maintenance • Save all instructions Maintenance Schedule WARNING Before performing any maintenance, turn engine off and remove the wire from the spark plug to prevent accidental starting and serious injury . IMPORTANT: The warranty on this tiller does not cover items that have been subjected to operator abuse or negligence. To receive full value from the warranty, the operator must maintain the tiller as instructed in this manual, and only use genuine replacement parts. - Page 17 Maintenance (Continued) • Save all instructions Servicing the Tiller The following information will help you make the necessary 2 . Remove spark plug wire and secure from spark plug . checks and perform the procedures required to follow the 3 . Remove the front belt cover . normal care recommendations made for your tiller unit .
-
Page 18: Technical Service
Maintenance (Continued) • Save all instructions How to Prepare for Storage distribute oil . Pull recoil handle slowly until resistance is WARNING felt . This will close the cylinder valves . Never store the tiller indoors with fuel in the fuel tank . WARNING Never store in an enclosed, poorly ventilated area where DO NOT attach spark plug wire to spark plug when... -
Page 19: Troubleshooting
Troubleshooting • Save all instructions PROBLEM POSSIBLE CAUSE(S) SOLUTION(S) Engine difficult to start 1 . Out of fuel 1 . Add fresh fuel 2 . Engine Switch Off 2 . Turn engine switch on 3 . Engine is not primed 3 . -
Page 20: Warranty
Warranty • Save all instructions Powermate® ROTARY TILLER Limited Warranty Always specify model number when contacting the factory . We reserve the right to amend these specifications at any time without notice . The only warranty applicable is our standard written warranty .
Need help?
Do you have a question about the PFTT142.1 and is the answer not in the manual?
Questions and answers
Tiller starts but won't stay running
The Powermate PFTT142.1 tiller may start but not stay running due to several possible issues:
1. Fuel Problems: Use only fresh unleaded gasoline with an octane rating of 87 or higher. Gasoline with more than 10% ethanol can cause engine issues. Old or contaminated fuel can also prevent the engine from running properly.
2. Fuel Additive: A fuel stabilizer is recommended to counteract ethanol effects and prolong gasoline shelf life. Without it, fuel degradation may cause poor engine performance.
3. Spark Plug Issues: The spark plug wire must be securely attached, and the spark plug must be tightened properly. A loose or faulty spark plug can cause the engine to stall.
4. Fuel Leaks or Loose Hoses: Check for oil or fuel leaks and ensure fuel hoses are tight. Leaks or loose hoses can interrupt fuel supply to the engine.
If any of these conditions are present, the engine may start but fail to keep running.
This answer is automatically generated