
Related Manuals for Bedfont Smokerlyzer Series


Summary of Contents for Bedfont Smokerlyzer Series
- Page 1 Range Smokerlyzer ® For use with piCO , piCO and Micro babyTM User manual Our family, innovating health, for yours.
-
Page 2: Important Information/Reminders
WARNING: Under no circumstances should the instrument be immersed or splashed with liquid. WARNING: Breath tests must only be carried out with Bedfont® accessories. Failure to do so may cause incorrect readings. -
Page 3: Table Of Contents
Contents Important Information/Reminders ..................... 1 Introduction ............................3 Definitions ............................3 Compliance ............................3 Intended Use ............................3 Contraindications ..........................3 Instrument Layout..........................4 User Interface ............................. 5 User Interface ............................. 6 User Interface ............................. 6 Taking a breath test ..........................7 Taking a breath test –... -
Page 4: Introduction
Introduction baby The User Manual provides instructions on how to operate the Micro ™, piCO™, and piCO ™ Smokerlyzer® monitors and their accessories. It contains relevant information about the monitors, their uses and their care, including step-by-step instructions with screens and illustrations. baby The piCO™... -
Page 5: Instrument Layout
Instrument Layout... -
Page 6: User Interface
1. Power button 7. Exhaust port 2. USB port (for use with COdata ™ 8. Manufacturer label software) 9. Exhaust port 3. Display 4. D-piece™ aperture 5. Battery compartment clip 6. Battery compartment User Interface Micro ™ Smokerlyzer® Home Screen 1. -
Page 7: User Interface
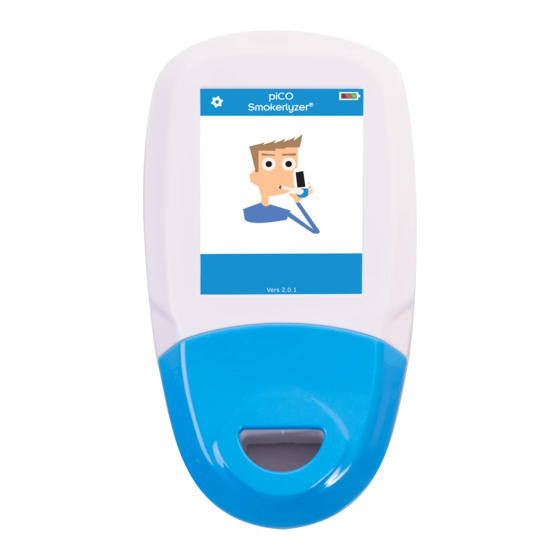
User Interface piCO™ Smokerlyzer® Home Screen 1. Test log 2. Change PIN number 3. Enable/disable PIN use User Interface baby piCO ™ Smokerlyzer® Home Screen 1. Battery status 2. Maternity breath test 3. Settings... -
Page 8: Taking A Breath Test
Taking a breath test Attach a breath sampling D-piece™ and new SteriBreath™ mouthpiece. Turn on the monitor by pressing the power button once. Press the breath test icon on screen, either the male or female symbol. Inhale and hold breath for the pre-set 15 second countdown. - Page 9 Press the home button at any time to cancel the breath test. A beep will sound during the last three seconds of the countdown. Blow slowly into mouthpiece, aiming to empty lungs completely.
- Page 10 The ppm and equivalent %COHb and/or %FCOHb levels will rise and hold onscreen. baby On the piCO™ and piCO ™, when the test is finished, the volume and home icons will appear at the bottom of the screen. On the Micro ™, when the test is finished, the volume, home and save icons will appear at...
-
Page 11: Taking A Breath Test - Micro ™ Only
Remove the D-piece™ between tests to purge sensor with fresh air. To switch off, press and hold the power button for 3 seconds, unit will also power off after 2 minutes of inactivity to save power. Taking a breath test – Micro ™... - Page 12 Inhale and hold breath for the pre-set 15 second countdown. Press the home button at any time to cancel the breath test. A beep will sound during the last three seconds of the countdown.
- Page 13 Blow slowly into mouthpiece, aiming to empty lungs completely. The ppm and equivalent %COHb and %FCOHb levels will rise and hold onscreen. When the test is finished, the volume, home and save icons will appear at the bottom of the screen.
- Page 14 If a high reading has been recorded, the monitor can be muted by pressing the volume icon. To repeat breath test, press the home icon once to return to the home screen and repeat steps 3-8. To save the reading, press the save icon and select the relevant patient profile.
-
Page 15: Conducting An Ambient Test - Micro ™ Only
Bedfont® does not recommend that the environmental test alone is used as a measure of passive smoking as the very high dispersiveness of CO at the levels involved with smoking can lead to false negative... -
Page 16: Patient Profiles - Micro ™ Only
Patient Profiles – Micro ™ only All patient profiles saved on the device will be listed here. To view patient information, press the relevant patient profile block. If ‘start breath test’ is selected from this screen, the breath test will be automatically saved to the profile. -
Page 17: Reviewing History - Micro ™ Only
To access the patient’s breath test results history, press the graph icon. This will then bring up the patient’s testing history. To delete a patient profile, press the delete icon. To confirm, press the delete icon again. Reviewing history – Micro ™... -
Page 18: Changing Date And Time - Micro ™ Only
Bedfont® does not recommend that the environmental test alone is used as a measure of passive smoking as the very high dispersiveness of CO at the levels involved with smoking can lead to false negative readings. Changing date and time – Micro ™... -
Page 19: Changing Breath Holding Time - Micro ™ Only
Select either d-m-y or m-d-y for the date format and 12h or 24h for the time format. Dates and times are then adjusted by selecting the number needing changed and pressing the up or down arrow icons to increase and decrease. Press the save icon to save the new settings. - Page 20 Press the breath holding time icon. Use the arrows to adjust the breath holding time. Press the save icon to save changes.
-
Page 21: Changing Breath Testing Thresholds
Changing breath testing thresholds Traffic light Description Reading (ppm) baby colour piCO™ & piCO ™ Micro ™ Green Non-smoker Amber Borderline 1 Red Smoker – low 10-15 7-10 addicted This table shows the pre-set breath testing thresholds. 2 Red Smoker – 16-25 11-15 moderately... - Page 22 To change the breath test thresholds, press the traffic light icon. Once adjusted, press the save icon.
-
Page 23: Maintenance Reminders
Maintenance Reminders Change D-piece™ reminder The D-piece™ requires changing every 30 days. This reminder is displayed at switch on. Sensor change reminder This reminder is displayed at switch on when the sensor is nearing its change date. After 60 days of this reminder being displayed, the ‘red date’... -
Page 24: Maintenance
This can be ignored by pressing the home icon until the date at which the sensor should be changed arrives, at this point the ‘change sensor’ symbol will be shown. Change sensor if trained to do so by an approved Bedfont® engineer or send to Bedfont® or the local representative. -
Page 25: Calibration
Calibration The Smokerlyzer® monitors must be calibrated within 17-25°C. If it is too cold to calibrate (<17°C) a blue thermometer will be shown onscreen. Move the Smokerlyzer® to a warmer area and try again later. If it is too hot to calibrate (>25°C) a red thermometer will be shown onscreen. - Page 26 Try again later once the unit has warmed up – if this problem persists please contact Bedfont® or the local supplier. If the temperature of the monitor is too high to calibrate, the red thermometer will be shown.
- Page 27 1. Ensure the fine control valve is in the off position. 2. Screw the fine control valve and flow indicator assembly to the gas can. This is best done by screwing the gas can into the valve. 3. Screw the fine control valve and flow indicator assembly to the gas can.
- Page 28 8. If the final displayed value is less than 15ppm or higher than 25ppm, stop the test and perform a calibration or send back to Bedfont® for a free of charge calibration, following the instructions.
- Page 29 – if the problem persists see ‘troubleshooting’ or call the local supplier of Bedfont® products. Return to the home screen by pressing the home icon.
-
Page 30: Technical Specification
Technical Specification baby piCO™ piCO ™ Micro ™ Concentration range 0-150ppm 0-150ppm 0-500ppm Display Full colour touchscreen Detection principle Electrochemical sensor Repeatability ≤±5% Accuracy ≤±2ppm/5%* Power 3 x AA (LR6 or equivalent) – up to 1000 minutes 1 x CR2032 Lithium coin cell response time <30 seconds Operating temperature... -
Page 31: Buttons
Connect the other end to the USB port on the PC. Before starting the software, ensure that the Smokerlyzer® product is connected to the PC and switched on. Double click the COdata ™ icon on the PC to start the programme. Refer to the supplied documentation for how to operate COdata ™. - Page 32 Inhale Home Change traffic light Hold breath cut-off levels Change breath- Countdown timer hold time Exhale Mute ppm reading %COHb reading Show %FCOHb reading Br a %FCOHb reading ™ Ambient CO reading Home Ca l o Change D-piece™ Change traffic light cut-off levels...
- Page 33 Save Change breath- hold time History Mute Next step Low temperature High temperature Countdown to sensor change Change sensor Calibrate device Attach flow mete to gas canister Attach calibration adaptor to D- piece™ Attached D-piece™ to monitor and turn on gas flow Unit calibrating...
-
Page 34: Troubleshooting
Calibration successful Calibration failed Retry calibration Firmware version N/A = Not Available on this device Troubleshooting The unit fails to turn on If the unit fails to turn on properly, check if the low or empty battery symbols are shown or replace the batteries. Ensure that the batteries are inserted the correct way around, matching the symbols moulded into the plastic. - Page 35 Alternatively, check the function using Bedfont® check gas or send back to Bedfont®. The check gas required is Bedfont® 20ppm carbon monoxide in air, procedure below.
- Page 36 If the final displayed value is less than 15ppm or higher than 25ppm, stop the test and perform a calibration or send back to Bedfont® for a free of charge calibration, following the instructions.
-
Page 37: Warranty
(excluding batteries) to be free of defects in materials and workmanship for a period of five years from the date of shipment. Bedfont’s sole obligation under this warranty is limited to repairing or replacing, at its choice, any item covered under this warranty when such an item is returned, intact and prepaid, to Bedfont®... -
Page 38: Responsible Manufacturer And Contacts
Responsible Manufacturer and Contacts Bedfont Scientific Ltd. Station Yard, Station Road, www.bedfont.com Harrietsham, ask@bedfont.com Maidstone, Kent, 0044 1622 851122 ME17 1JA United Kingdom... - Page 40 Email: ask@bedfont.com Web: www.bedfont.com © Bedfont® Scientific Limited 2020 Issue 6 - September 2020, Part No: LAB679 Bedfont® Scientific Limited reserves the right to change or update this literature without prior notice. Registered in: England and Wales. Registered No: 1289798...
Need help?
Do you have a question about the Smokerlyzer Series and is the answer not in the manual?
Questions and answers