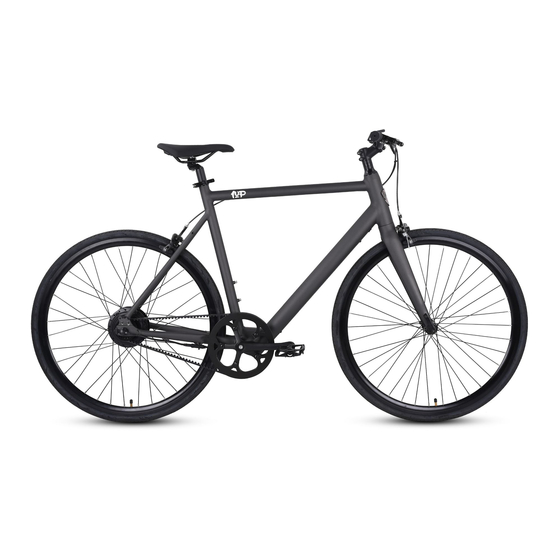
Summary of Contents for Ride1up Roadster V2
- Page 1 E-bike Owner’s Manual Model: Roadster V2 For the most up to date documents, bike models, additional information, instructional videos, and more, visit us at Ride1UP.com...
- Page 2 Ride1UP Roadster v2 Series Owner’s Manual Thank you for purchasing a Ride1UP e-bike! This manual contains important safety, performance & maintenance information. Please take a moment to read the manual and review our instructions before you start riding & keep the manual for the future reference.
-
Page 3: Table Of Contents
Model: Roadster v2 Table of Contents 1. Safety Notes Personal Safety 1.1) E-bike Safety 1.2) Electrical Safety 1.3) Brake Safety 1.4) Maintenance 1.5) Additional Warnings 1.6) Notable Bike Parts 1.7) 2. What’s in the Box? 3. Installation Steps: Assembling Your Bike 3.1) -
Page 4: Safety Notes
1.3 Electrical Safety: Only use the charger supplied by Ride1UP. Do not store the bike or battery plugged into a wall outlet. Unplug the battery before leaving the bike alone. Never modify the charger in any way. The charger has been designed for a specific voltage, always check that the outlet’s voltage is the same as that stated on the rating... -
Page 5: Brake Safety
It is your obligation to check all applicable laws for bicycle rules governing: operation, equipment, use and appropriate places for operation. Do not exceed local speed restrictions. For the most up to date documents, bike models, additional information, instructional videos, and more visit us at Ride1UP.com... - Page 6 Be sure to follow all requirements of airlines and air couriers regarding lithium batteries if you take your e-bike with you during air travel, or if you ship your e-bike by air courier. 1.7 Notable Bike Parts: For the most up to date documents, bike models, additional information, instructional videos, and more visit us at Ride1UP.com...
-
Page 7: What's In The Box
Figure 1: Bike frame, bike box, saddle, additional box of parts (Figure 2), front wheel, axle skewer, and handlebars, all zip tied together and padded. Figure 2: Saddle and separate box with: pedals, charger, and toolkit. For the most up to date documents, bike models, additional information, instructional videos, and more visit us at Ride1UP.com... -
Page 8: Installation Steps: Assembling Your Bike
When securing the stem handlebar clamp, tighten each bolt in a cross pattern. The gap at each bolt should be the same size. Please check your stem for Torque ratings and refer to section 3.5. For the most up to date documents, bike models, additional information, instructional videos, and more visit us at Ride1UP.com... - Page 9 The seat post angle is adjustable. Ensure the bolt is correctly torqued. If left loose or over- tightened, the seat post bolt could snap causing serious injury and/or death. For the most up to date documents, bike models, additional information, instructional videos, and more visit us at Ride1UP.com...
- Page 10 Saddle Clamp Bolt: 16nm (unless otherwise marked on part) Handlebar Clamp: 8-9nm (unless otherwise marked on stem - tighten evenly in a cross pattern) For the most up to date documents, bike models, additional information, instructional videos, and more visit us at Ride1UP.com...
-
Page 11: Spoke Tension
Also, it must not be covered. If you ever see a spark while charging your battery. Please inspect the charging port of the battery and the tip of the charger. Please contact Support@Ride1UP.com and share pictures. Follow these steps when charging battery: Step 1. - Page 12 Recommended storage temperatures are 50°-77°F and will provide the best performance out of the battery. Storage should be done in a dry area. For the most up to date documents, bike models, additional information, instructional videos, and more visit us at Ride1UP.com...
-
Page 13: Display Instructions
5. Display Instructions 5.1 General Operation: (for more information, download the entire LCD manual at ride1up.com/bike/support) • Switching the e-bike System On/Off: to switch on/off the e-bike system, hold the orange button for 2 seconds. • It is best practice for safety, to only turn on your electric bike once you have lifted your leg over the bike and are straddling the frame. -
Page 14: Error Code Troubleshooting
Compare the code with this list below and how to resolve: For the most up to date documents, bike models, additional information, instructional videos, and more visit us at Ride1UP.com... -
Page 15: Warranty Information
After the first 30-days Ride1UP will ship replacement parts of defective items within one year at no charge. The owner will be responsible for labor. Warranty parts will be shipped within the U.S. only at our cost. It will be necessary to send an email with a photo/and or as appropriate to support@ride1up.com... - Page 16 Ride 1up reserves the right to make judgment determinations of proper use based on the evidence provided and may require additional photos and or videos of the item or issue in question. For the most up to date documents, bike models, additional information, instructional videos, and more visit us at Ride1UP.com...


Need help?
Do you have a question about the Roadster V2 and is the answer not in the manual?
Questions and answers