Table of Contents
Advertisement
Quick Links
Advertisement
Table of Contents

Related Manuals for Art HeadAmp 6 Pro


Summary of Contents for Art HeadAmp 6 Pro
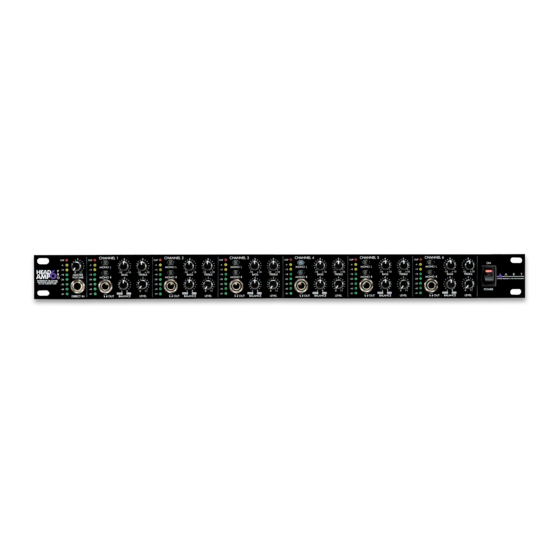
- Page 1 HeadAmp 6 Pro 6 CHANNEL HEADPHONE AMPLIFIER SYSTEM USER’S GUIDE...
-
Page 3: Important Safety Instructions – Read First
IMPORTANT SAFETY INSTRUCTIONS – READ FIRST This symbol, wherever it appears, This symbol, wherever it appears, alerts alerts you to the presence of uninsulated you to important operating and maintenance dangerous voltage inside the enclosure. Voltage instructions in the accompanying literature. that may be sufficient to constitute a risk of shock. -
Page 4: Table Of Contents
Rear Panel... 7 Balanced Main Inputs ... 8 Balanced Main Thru ... 8 Stereo Headphone Outputs... 8 Stereo Aux Inputs ... 8 HEADAMP 6 PRO OPERATION ...9 APPLICATIONS...10 WARRANTY INFORMATION ...12 SERVICE ...13 HEADAMP 6 PRO SPECIFICATIONS ...14 List of Figures FIGURE 1 - Master Input and Channel One...6... -
Page 5: Analog Audio Connections
AC Power Hookup The HeadAmp 6 Pro has an internal power supply. Only connect the unit to mains power of the type marked on the rear panel. The power source must provide a good ground connection, and the ground pin on the mains plug should never be defeated. -
Page 6: Figure 1 - Master Input And Channel One
CONTROLS and JACKS Front Panel FIGURE 1 - Master Input and Channel One Direct In Jack The 1/4-inch TRS (Tip, Ring, Sleeve) jack on the front panel provides a stereo unbalanced input which when used will override the rear panel balanced inputs. This input is useful for when you want to temporarily insert a different main input signal from what is connected to the rear inputs, or simply make an unbalanced TRS style connection to another headphone output source. -
Page 7: Figure 2 - Rear Panel Inputs
Bass Control This control can be used to boost or cut the low frequencies in each respective channel. The bass response is flat when the control is set to the 12 o’clock position. Treble Control This control can be used to boost or cut the high frequencies in each respective channel. The treble response is flat when the control is set to the 12 o’clock position. -
Page 8: Figure 3 - Rear Panel Headphone Outputs And Aux Inputs
SPL output. Even an 8 Ohm headphone (if you can find one since they are rare) can be driven to full SPL output by the HeadAmp 6 Pro if it has a high enough sensitivity, regardless of the fact that the output voltage swing will be limited due to the overload protection circuitry. -
Page 9: Headamp 6 Pro Operation
HEADPHONE OUTPUT jacks (or both) using stereo 1/4-inch TRS plugs. If using the HeadAmp 6 Pro Auxiliary Mixer function, connect the stereo signals that are to be mixed into individual output channels to the appropriate rear panel STEREO AUX INPUT jacks using a stereo 1/4-inch TRS plug. -
Page 10: Figure 4 - Headphone Distribution Application
APPLICATIONS FIGURE 4 - Headphone Distribution Application... -
Page 11: Figure 5 - "More Me" Foldback Application
FIGURE 5 - “More Me” Foldback Application... -
Page 12: Warranty Information
WARRANTY INFORMATION Limited Warranty: Applied Research and Technology will provide warranty and service for this unit in accordance with the following warrants: Applied Research and Technology, (A R T) warrants to the original purchaser that this product and the components thereof will be free from defects in workmanship and materials for a period of three years from the date of purchase. -
Page 13: Service
2) If you believe the ART unit is at fault, go to www.artproaudio.com. You may contact Customer Service for more assistance, or directly request a Return Authorization for service in the “resources”... -
Page 14: Headamp 6 Pro Specifications
Ref: 0 dBu = 0.775VAC RMS ART maintains a policy of constant product improvement. ART reserves the right to make changes in design or make additions to or improvements upon this product without any obligation to install the same on products previously manufactured. - Page 16 www.artproaudio.com E-mail: support@artproaudio.com © 2008 Applied Research & Technology 806-5004-101...
Need help?
Do you have a question about the HeadAmp 6 Pro and is the answer not in the manual?
Questions and answers