Table of Contents
Advertisement
Available languages
Available languages
COMPACT COMPONENT SYSEM
SYSTEME DE COMPOSANTS COMPACT
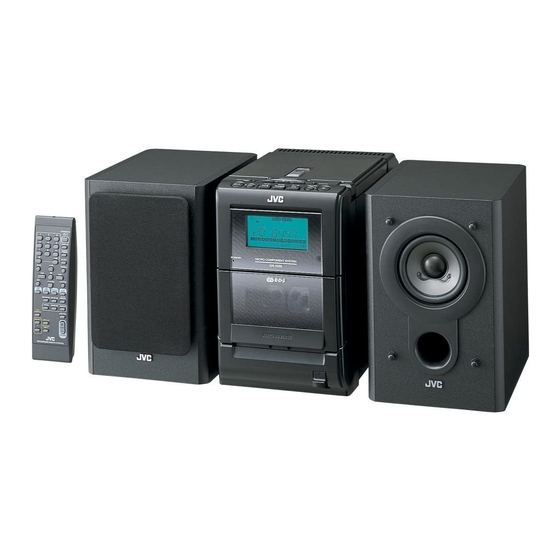
FS-H35
FS-H30
COVER_FS-H30[C]fff.pm6
— Consists of CA-FSH35 and SP-UXH35
— Consists of CA-FSH30 and SP-UXH30
COMPACT COMPONENT SYSTEM
INSTRUCTIONS
MANUEL D'INSTRUCTIONS
1
For Customer Use:
Enter below the Model No. and Serial No.
which are located either on the rear, bot-
tom or side of the cabinet. Retain this
information for future reference.
Model No.
Serial No.
GVT0101-002C
03.3.3, 2:26 PM
[C]
Advertisement
Chapters
Table of Contents

Related Manuals for JVC FS-H35


Summary of Contents for JVC FS-H35
- Page 1 COMPACT COMPONENT SYSEM SYSTEME DE COMPOSANTS COMPACT FS-H35 — Consists of CA-FSH35 and SP-UXH35 FS-H30 — Consists of CA-FSH30 and SP-UXH30 COMPACT COMPONENT SYSTEM INSTRUCTIONS For Customer Use: MANUEL D’INSTRUCTIONS Enter below the Model No. and Serial No. which are located either on the rear, bot- tom or side of the cabinet.
- Page 2 Warnings, Cautions and Others Mises en garde, précautions et indications diverses CAUTION— (standby/on) button! CAUTION Disconnect the mains plug to shut the power off completely (all lamps and indications go off). The (standby/on) RISK OF ELECTRIC SHOCK DO NOT OPEN button in any position does not disconnect the mains line.
- Page 3 Note to CATV system installer: For Canada/pour le Canada This reminder is provided to call the CATV system CAUTION: TO PREVENT ELECTRIC SHOCK, installer’s attention to Section 820-40 of the NEC MATCH WIDE BLADE OF PLUG TO WIDE SLOT, which provides guidelines for proper grounding and, FULLY INSERT.
- Page 4 Introduction We would like to thank you for purchasing one of our JVC products. Before operating this unit, read this manual carefully and thoroughly to obtain the best possible performance from your unit, and retain this manual for future reference.
-
Page 5: Table Of Contents
Contents Location of the Buttons ..........3 Main Unit ................3 Remote Control ..............5 Getting Started ............. 6 Supplied Accessories ............6 Connecting Antennas ............6 Connecting Speakers ............7 Connecting Other Equipment ..........8 Putting the Batteries into the Remote Control ....9 Common Operations .......... -
Page 6: Location Of The Buttons
Location of the Buttons Become familiar with the buttons on your unit. Main Unit Top view P H O N E S COMPACT DIGITAL AUDIO TIMER/SNOOZE OPEN MULTI CONTROL ONE TOUCH AHB PRO ¢ VOLUME BAND TAPE TUNER Front view STANDBY COMPACT COMPONENT SYSTEM EN01-13_FS-H30[C]f.pm6... - Page 7 Continued Display window BASS SLEEP SNOOZE REC ON STEREO CLOCK MONO 1 2 3 4 5 6 7 8 9 10 11 12 13 14 15 PROGRAM RANDOM OVER See the pages in parentheses for details. Main unit Display window 1 PHONES jack (11) 1 Tape operation indicators •...
-
Page 8: Remote Control
Remote Control See the pages in parentheses for details. 1 Number buttons 2 BASS button (11) 3 Multi control buttons UP, 4 (reverse skip), 7 (stop), ¢ STANDBY/ON • (forward skip), and DOWN 4 SET button (13) 5 Source buttons DISPLAY •... -
Page 9: Getting Started
Getting Started Continued Supplied Accessories To connect an outdoor FM antenna Before connecting the antenna, disconnect the supplied FM antenna. Make sure that you have all the following items. The number in parentheses indicates the quantity of each piece supplied. Outdoor FM antenna •... -
Page 10: Connecting Speakers
AM antenna Connecting Speakers Vinyl-covered wire (not supplied) Speaker cord Speaker cord AM loop antenna (supplied) Right speaker Left speaker Connect the AM loop antenna to the Press and hold the clamp of the AM LOOP terminals as illustrated. speaker terminal on the rear of the unit. -
Page 11: Connecting Other Equipment
Continued To remove the speaker grilles NOW you are ready to plug in the unit The speaker grilles are removable. and any other connected equipment. IMPORTANT: Be sure to check all connections to Projections be done before plugging the power cord. Holes This unit can be supplied with power through the AC IN connector (at home) or the DC IN connector (in a... - Page 12 12V 4A Car adapter DC IN (JVC model: CA-R120) R6(SUM-3)/AA(15F) Connect a car adapter to the DC IN (12 V, 4 A) connector and the cigarette lighter socket. • DO NOT connect the car adapter to the cigarette lighter socket before connecting it to the DC IN connector.
-
Page 13: Common Operations
Common Operations Continued Setting the Clock Press ¢ or 4 to adjust the minute, then press TIMER/SNOOZE. Before operating the unit any further, first set the unit’s clock. When you plug in the power cord, the CLOCK indicator and “AM 12:00” start flashing on the display. To check the clock time during play You can set the clock whether the unit is on or off. -
Page 14: Turning On The Power
Turning On the Power Adjusting the Tone (Bass/Treble) To turn on the unit, press STANDBY/ON You can adjust the bass level (low frequency range) STANDBY/ON on the unit). and the treble level (high frequency range) within a The STANDBY lamp on the unit goes off. range of –5 to +5. -
Page 15: Listening To Fm And Am Broadcasts
Listening to FM and AM Broadcasts Continued Tuning in to a Station Presetting Stations You can preset 30 FM and 15 AM stations—using Press TUNER (or BAND either automatic presetting or manual presetting. TUNER In some cases, test frequencies have been already TUNER on the unit) to select memorized for the tuner since the factory examined the the band. -
Page 16: Tuning In To A Preset Station
To preset stations manually—Manual presetting To tune in to a preset station directly using the number buttons You need to preset stations separately for the FM and AM bands. On the remote control ONLY: • There is a time limit in doing the following steps. If Pressing the number button(s) the setting is canceled before you finish, start over allows you to select the preset... -
Page 17: Playing Back Discs
Playing Back Discs Continued This unit has been designed to play back the following Close the disc cover gently. discs—CD, CD-R, and CD-RW. Press 3/8 CD. When playing a CD-R or CD-RW The unit automatically turns on and the User-edited CD-Rs (CD-Recordable) and CD-RWs first track of the disc starts playing. -
Page 18: Basic Disc Operations
Basic Disc Operations Programming the Playing Order of the Tracks—Program Play While playing a disc, you can do the following operations. You can arrange the order in which tracks play before you start playing. You can program up to 20 tracks. To stop playing for a moment During play, press 3/8 CD. -
Page 19: Playing At Random-Random Play
To skip the current track, press ¢. To check the program contents • You cannot go back to the previous You can check the program track by pressing 4. contents by pressing ¢ or 4 before or after playback. To stop playing, press 7. •... -
Page 20: Playing Back Tapes
Playing Back Tapes You can play back type I tapes. If no cassette is inserted when you press 2 3 TAPE “NO TAPE” appears on the display. Playing Back a Tape To stop playing, press 7. Press ) for cassette deck on the unit. The cassette holder opens. -
Page 21: Recording
Recording Continued IMPORTANT: Close the cassette holder gently and • It may be unlawful to record or play back check the recording direction for the copyrighted material without the consent of the tape. copyright owner. • If the tape direction is not correct, press 2 3 •... -
Page 22: Disc Direct Recording
Disc Direct Recording To record on both sides—Reverse Mode On the remote control ONLY: Everything on the disc goes onto the tape in the order it Press REV.MODE (reverse mode) REV.MODE is on the disc, or according to the order you have set in repeatedly until is lit. -
Page 23: Using The Timers
Using the Timers Continued There are four timers available—Daily Timer, Set the on-time when you want the unit Recording Timer, Snooze Timer, and Sleep Timer. to turn on. Before using the timers, you need to set the unit’s On the remote control: clock (see page 10). - Page 24 Select the timer (Daily Adjust the clock if you need. Timer or Recording Timer) • See “Setting the Clock” on page 10. DOWN with the source to play. Press STANDBY/ON STANDBY/ON On the remote control: on the unit) to turn Press UP or DOWN to...
-
Page 25: Using Snooze Timer
Using Snooze Timer Using Sleep Timer The Snooze Timer turns off the unit (standby) only for With the Sleep Timer, you can fall asleep to music. You 5 minutes while the Daily Timer is in operation. can set the Sleep Timer when the unit is turned on. •... -
Page 26: Maintenance
Maintenance To get the best performance from the unit, keep your discs, tapes, and mechanism clean. Cleaning the unit Handling discs • Stains on the unit • Remove the disc from its case Should be wiped off with a soft cloth. If the unit is by holding it at the edge while heavily stained, wipe it with a cloth soaked in water- pressing the center hole lightly. - Page 27 Handling cassette tapes To keep the best recording and playback sound quality • If the tape is loose in its cassette, take up the slack by inserting a If the heads, capstans, and pinch rollers of the cassette pencil in one of the reels and deck become dirty, the following will occur: rotating.
-
Page 28: Troubleshooting
Troubleshooting If you are having a problem with your unit, check this list for a possible solution before calling for service. If you cannot solve the problem from the hints given here, or the unit has been physically damaged, call a qualified person, such as your dealer, for service. -
Page 29: Specifications
Specifications Amplifier General Output Power: Power requirement: 20 W (10 W + 10 W) at 4 Ω (10% THD) AC IN: 120 V , 60 Hz 12 W per channel, min. RMS, driven into 4 Ω DC IN: 12 V, 4 A at from 80 Hz to 15 kHz with no more than Power consumption: 35 W (at operation) - Page 30 Introduction Nous vous remercions pour avoir acheté un de nos produits JVC. Avant d’utiliser cet appareil, lisez attentivement ce mode d’emploi afin d’obtenir les meilleures performances de l’appareil, et conservez-le à titre d’information. À propos de ce mode d’emploi Sources d’alimentation •...
- Page 31 Table des matières Emplacement des touches ........... 3 Appareil ................3 Télécommande ..............5 Pour commencer ............6 Accessoires fournis ............6 Connexion des antennes ............ 6 Connexion des enceintes ........... 7 Connexion d’un autre appareil .......... 8 Mise en place des piles dans la télécommande ....9 Fonctionnement commun ..........
-
Page 32: Emplacement Des Touches
Emplacement des touches Familiarisez-vous avec les touches de votre appareil. Appareil Vue de dessus P HONES COMPACT DIGITAL AUDIO TIMER/SNOOZE OPEN MULTI CONTROL ONE TOUCH AHB PRO ¢ VOLUME BAND TAPE TUNER Vue avant STANDBY COMPACT COMPONENT SYSTEM FR01-13_FS-H30[C]f.pm6 2/5/03, 6:09 PM... - Page 33 À suivre Fenêtre d’affichage BASS SLEEP SNOOZE REC ON STEREO CLOCK MONO 1 2 3 4 5 6 7 8 9 10 11 12 13 14 15 PROGRAM RANDOM OVER Référez-vous aux pages entre parenthèses pour plus de détails. Appareil Fenêtre d’affichage 1 Prise PHONES (11) 1 Indicateurs de fonctionnement de la platine...
-
Page 34: Télécommande
Télécommande Référez-vous aux pages entre parenthèses pour plus de détails. 1 Touches numériques 2 Touche BASS (11) 3 Touches à commandes multiples STANDBY/ON UP, 4 (saut vers l’arrière), 7 (arrêt), ¢ • (saut vers l’avant) et DOWN 4 Touche SET (13) DISPLAY 5 Touches de source CLOCK... -
Page 35: Pour Commencer
Pour commencer À suivre Accessoires fournis Pour connecter une antenne FM extérieure Avant de la connecter, déconnectez l’antenne FM fournie. Vérifiez que vous avez bien tous les accessoires suivants. Le nombre entre parenthèses indique le nombre de Antenne FM extérieure pièces fournies. -
Page 36: Connexion Des Enceintes
Antenne AM Connexion des enceintes Fil recouvert de vinyle (non fourni) Cordons d’enceinte Cordons d’enceinte Antenne cadre AM (fournie) Enceinte droite Enceinte gauche Connectez l’antenne cadre AM aux Maintenez en position ouverte le serre- prises AM LOOP comme montré sur fil de la prise d’enceinte sur le panneau l’illustration. -
Page 37: Connexion D'un Autre Appareil
À suivre Retrait des grilles des enceintes MAINTENANT, vous pouvez Les grilles des enceintes peuvent être retirées. brancher cet appareil et les appareils connectés au secteur. Projections IMPORTANT: Assurez-vous de vérifier toutes les connexions avant de brancher le cordon Trous d’alimentation. -
Page 38: Mise En Place Des Piles Dans La Télécommande
12V 4A Adaptateur pour voiture DC IN (modèle JVC: CA-R120) R6(SUM-3)/AA(15F) Connectez l’adaptateur pour voiture au connecteur DC IN (12 V, 4 A) et à la prise allume-cigares. • NE CONNECTEZ PAS l’adaptateur pour voiture à... -
Page 39: Fonctionnement Commun
Fonctionnement commun À suivre Réglage de l’horloge Appuyez sur ¢ ou 4 pour ajuster les minutes, puis appuyez sur TIMER/ Avant d’utiliser l’appareil, réglez d’abord l’horloge. SNOOZE. Quand vous branchez le cordon d’alimentation, l’indicateur CLOCK et “AM 12:00” clignotent sur l’affichage. -
Page 40: Mise Sous Tension
Mise sous tension Ajustement de la tonalité (grave/aigu) Pour mettre l’appareil sous tension, STANDBY/ON Il est possible d’ajuster le niveau des graves (plage des appuyez sur STANDBY/ON basses fréquences) et le niveau des aigus (plage des l’appareil). hautes fréquences) dans une plage de –5 à +5. Le témoin STANDBY s’éteint sur l’appareil. -
Page 41: Écoute D'émissions Fm Et Am
Écoute d’émissions FM et AM À suivre Accord d’une station Préréglage des stations Vous pouvez prérégler 30 FM et 15 stations Appuyez sur TUNER (ou TUNER AM—en utilisant soit de préréglage automatique ou de préréglage manuel. BAND TUNER sur l’appareil) Dans certains cas, des tests de fréquences ont déjà... -
Page 42: Accord D'une Station Préréglée
Pour prérégler les stations manuellement Pour accorder directement une station préréglée —Préréglage manuel en utilisant les touches numériques Vous avez besoin de prérégler les stations séparément Sur la télécommande UNIQUEMENT: pour les bandes FM et AM. Appuyer sur les touches •... -
Page 43: Lecture Des Disques
Lecture des disques À suivre Cet appareil est conçu pour reproduire les disque Refermez le couvercle doucement. suivants—CD, CD-R et CD-RW. Appuyez sur 3/8 CD. Lors de la reproduction d’un CD-R ou d’un CD-RW L’appareil se met automatiquement Les CD-R (enregistrables) et les CD-RW sous tension et la première du disque (réinscriptibles) édités par l’utilisateur peuvent être est reproduite. -
Page 44: Fonctionnement De Base De La Platine Disque
Fonctionnement de base de la platine Programmation de l’ordre de lecture des plages—Lecture programmée disque Vous pouvez changer l’ordre dans lequel les plages Pendant la lecture d’un disque, vous pouvez réaliser les sont reproduites avant de commence la lecture. Vous choses suivantes. -
Page 45: Lecture Dans Un Ordre Aléatoire-Lecture Aléatoire
Pour vérifier le contenu du programme Pour sauter la plage actuelle, appuyez sur ¢. Il est possible de vérifier le contenu • Vous ne pouvez pas retourner aux plages du programme en appuyant sur précédentes en appuyant sur 4. ¢ ou 4 avant ou après de lecture. -
Page 46: Lecture De Cassettes
Lecture de cassettes Vous pouvez reproduire des cassettes de type I. Si aucune cassette ne se trouve dans l’appareil quand vous appuyez sur 2 3 TAPE Lecture d’une cassette “NO TAPE” apparaît sur l’affichage. Appuyez sur ) pour la platine cassette Pour arrêter la lecture, appuyez sur 7. -
Page 47: Enregistrement
Enregistrement À suivre IMPORTANT: Refermez le compartiment à cassette • Il peut être illégal d’enregistrer ou de reproduire doucement et vérifiez le sens des matériaux protégés par des droits d’auteur d’enregistrement pour la cassette. sans l’autorisation du propriétaire des droits. •... -
Page 48: Enregistrement Direct De Disque
Enregistrement direct de disque Pour enregistrer les deux faces—Mode autoreverse Tout le contenu du disque est enregistré sur la cassette Sur la télécommande UNIQUEMENT: dans l’ordre du disque, ou en fonction de l’ordre réglé REV.MODE Appuyez répétitivement sur REV.MODE pour la lecture programmée. (mode autoreverse) jusqu’à... -
Page 49: Utilisation Des Minuteries
Utilisation des minuteries À suivre Il y a quatre minuteries disponibles—Minuterie Réglez l’heure à laquelle vous quotidienne, minuterie d’enregistrement, minuterie de souhaitez que l’appareil se mette sous rappel et minuterie d’arrêt. tension. Avant d’utiliser ces minuteries, vous devez régler Sur la télécommande: l’horloge intégrée à... - Page 50 Choisissez la minuterie Ajustez l’horloge si nécessaire. (minuterie quotidienne ou • Voir “Réglage de l’horloge” à la page 10. DOWN minuterie d’enregistrement) Appuyez sur STANDBY/ STANDBY/ON avec la source à reproduire. Sur la télécommande: CLOCK / TIMER Appuyez sur UP ou DOWN l’appareil) pour mettre pour choisir la minuterie, puis...
-
Page 51: Utilisation De La Minuterie De Rappel
Utilisation de la minuterie de rappel Utilisation de la minuterie d’arrêt La minuterie de rappel met l’appareil hors tension (en Avec la minuterie d’arrêt, vous pouvez vous endormir mode d’attente) seulement pendant 5 minutes quand la en musique. Vous pouvez régler la minuterie quand minuterie quotidienne est en service. -
Page 52: Entretien
Entretien Pour obtenir les meilleures performances de l’appareil, gardez vos disques et le mécanisme propres. Nettoyage de l’appareil Manipulation des disques • Taches sur l’appareil • Retirez les disques de leur boîtier Elles doivent être enlevées avec un chiffon doux. Si en les tenant par les arêtes et en l’appareil est très taché, essuyez-le avec un chiffon appuyant légèrement au centre. - Page 53 Manipulation des cassettes Pour conserver la meilleure qualité d’enregistrement ou de lecture possible • Si la bande est lâche dans la cassette, retirez le mou en insérant Si les têtes, les cabestans et les galets presseurs de la un stylo dans l’une des bobines et platine cassette deviennent sales, les choses suivantes en tournant.
-
Page 54: Guide De Dépannage
Guide de dépannage Si vous rencontrez des problèmes avec cet appareil, consultez cette liste avant d’appeler un réparateur. Si vous ne pouvez pas résoudre le problème avec les conseils donnés ci-dessous, ou si l’appareil a été endommagé physiquement, appelez une personne qualifiée, telle que votre revendeur, pour faire réparer l’appareil. Symptôme Cause Action... -
Page 55: Spécifications
Spécifications Amplificateur Général Puissance de sortie: Alimentation: 20 W (10 W + 10 W) à 4 W (10% THD) AC IN: 120 V , 60 Hz DC IN: 12 V, 4 A 12 W par canal, min. RMS, entraîné sur 4 W, de 80 Hz à... - Page 56 VICTOR COMPANY OF JAPAN, LIMITED EN, FR 0303MWMMDWJEM © 2003 VICTOR COMPANY OF JAPAN, LIMITED COVER_FS-H30[C]f.pm6 03.2.5, 5:41 PM...