Table of Contents
Advertisement
Quick Links
Advertisement
Table of Contents

Related Manuals for PRESIDIUM Synthetic Diamond Screener II


Summary of Contents for PRESIDIUM Synthetic Diamond Screener II
-
Page 1: Table Of Contents
Contents English Version I. Disclaimers, Exclusions and Limitations of Liability II. About this book III. About Presidium Synthetic Diamond Screener II & ASSURE Program IV. Technical Specifications V. Operations VI. Important Notice Before Testing 1. GETTING STARTED with your Synthetic Diamond Screener II 2. -
Page 2: Disclaimers, Exclusions And Limitations Of Liability
The Synthetic Diamond Screener II (“SDS II”) by Presidium in this handbook is provided and/or sold on an “as is” basis. Except as required by applicable law, no warranties of any kind expressed or implied, including, but not limited to, the implied warranties of merchantability and fitness for a particular purpose. -
Page 3: About This Book
II. About this Book Thank you for purchasing the Synthetic Diamond Screener II by Presidium (“SDS II” or “Device”). This handbook is designed to help you set up your device and describes all you need to know about how to use your diamond screening device accurately and take care of it, in line with its requirements. - Page 4 Each instrument is tested on the ASSURE Core Sample, a highly contaminated sample made up of 1,000 mined diamonds and 200 laboratory-grown diamonds including very challenging laboratory- grown diamonds, some of which are not yet available in the market. Types of diamonds Diamonds can be classified into two Types.
- Page 5 Type Ia colorless diamond. Created with the user in mind, the Synthetic Diamond Screener II is designed to be a lightweight, portable, sturdy and non-slip unit that can be powered by 4 1.5V AAA batteries or through its USB port that connects to either an external 100~240V power source or to the Presidium Universal Power Adaptor.
-
Page 6: Technical Specifications
IV. Technical Specifications Presidium Universal Power Adaptor Information: • Input Voltage: 100 - 240V ac • Input Frequency: 50 - 60Hz • Rating Output Current: 1.5A (7.5W) • Rating Output Voltage: 5V Power and Battery • DC 1.5V (4) x AAA alkaline batteries •... - Page 7 • Feature user-safe materials and user-friendly ergonomics that gives clear visibility of results, maximum sturdiness and grip, ease of use and portability The capabilities of the Synthetic Diamond Screener II are as follows: • Test on diamonds within a range of dimension from 1.5 mm in width and up to 5 mm in height.
- Page 8 • A 5mm metal bar to conveniently raise the test probe for successive testing on loose stones Included in your package: • Presidium Synthetic Diamond Screener II unit • Protective carrying case with interior pouch for gemstones and accessories • 5mm metal bar •...
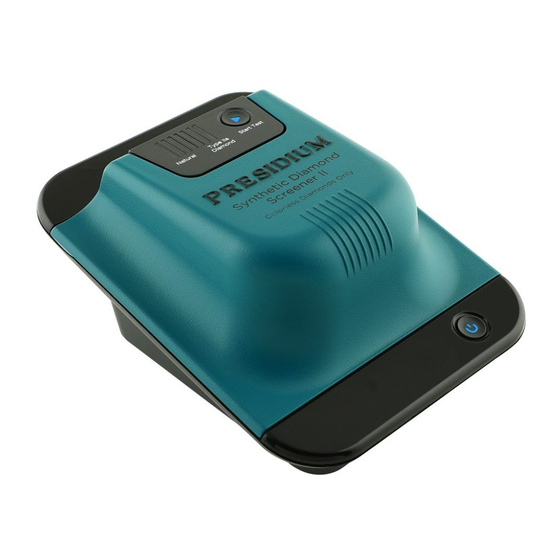
- Page 9 Fig.A Synthetic Diamond Screener II Unit Features/Functions (Fig.A) 1. Power button (On/Off and Low Battery Indicator) 2. Lid 3. Anti-slip platform with concentric markings to ensure correct placement of stone 4. A 5mm metal bar to conveniently raise the test probe for successive testing on loose stones 5.
-
Page 10: Important Notice Before Testing
• Do not paint the device. Paint can clog the moving parts and prevent proper operation. If the device is not working properly, kindly contact Presidium Customer Service at service@presidium.com.sg or: Presidium Instruments Pte Ltd Unit 7, 207 Henderson Road... -
Page 11: Getting Started With Your Synthetic Diamond Screener
Synthetic Diamond Screener II 1.1 Powering up your device The Synthetic Diamond Screener II can be powered by batteries or an external power source through the USB cable connected to the Presidium Universal Power Adaptor (both are included in the... - Page 12 You may also connect the other end of the USB cable directly to an external power source (e.g. computer, laptop, etc). It is recommended you use only the USB cable and the Presidium Universal Power Adaptor provided with your product.
- Page 13 1.2 Switching on your device To switch on your Synthetic Diamond Screener II, press and hold the Power button located at the front of the unit. A blue light will blink for approximately 4 seconds to allow the product to warm up. (Fig 1.3) Once the blue light stops blinking and remains stable, the device is ready for use.
- Page 14 1.3 Switching off your device and Power-Saving Auto-Off To switch off your Synthetic Diamond Screener II, press and hold the Power button for approximately 2 seconds until the light goes off. To ensure that your Synthetic Diamond Screener II conserves power, the unit will automatically switch off 10 minutes after the last activity.
- Page 15 It is recommended that batteries should be removed when the device is expected to be stored for an extended period of time. Batteries do not have to be removed from the unit when the Presidium Power Universal Adaptor is used through the USB cable.
-
Page 16: Performing A Test With Your Synthetic Diamond Screener
2. Performing a test with your Synthetic Diamond Screener II The Synthetic Diamond Screener II works accurately with known colorless diamonds of color D to J. You should ascertain if your stone is a diamond first, before using this device. -
Page 17: Screener
Testing is performed under the lid of the Synthetic Diamond Screener II where a testing area is marked by a hole in the center and a protruding overhead UV light source (Fig 2.2). The stone is placed covering this hole and testing begins when the lid is closed and the “Start Test”... - Page 18 2.1 For testing on loose diamond Ensure your loose diamond stone is wide enough to cover the testing area. It should be approximately 1.5 mm in width. Your diamond should also not exceed 5 mm in height to ensure that the UV wavelength transmitted by the UV light source can be accurately measured.
- Page 19 Release the lever to lower the UV light source and secure the diamond in place for testing. (Fig 2.4) Fig.2.4 Adjust the UV light source with lever to secure the diamond in place If you are testing multiple loose stones, use the metal bar provided to hold the light source in place so that you do not need to keep adjusting the lever in order to position the loose stones (Fig 2.5).
- Page 20 2.2 For mounted diamonds Ensure that the stone is set with an open-back setting, meaning you can still see a clear view and colour of the stone when you view the back of it and it is not obscured by the jewelry metal or other stones. (Fig 2.7).
- Page 21 If your mounted open-back diamond is in a ring, place the ring in the centre of the cross-hair marking Ring Guide that is embossed on the UV light source. The table of the mounted diamond should be directly facing down on the testing area. With the ring hung within the Ring Guide area, use the lever to lower the UV light source to secure the stone over the testing area (Fig 2.8) Fig.2.8 Using the Ring Guide on the UV light source...
- Page 22 2.3 Start Test The “Start Test” button located at the top right corner of the device serves as an indication when the device is ready for testing and the interior UV light source is activated to begin the identification procedure. You should only begin to use the device for testing when the “Start Test”...
- Page 23 2.4 Important Notes about Performing a test • Ensure your tested gemstone does not exceed 5 mm in height and its width covers the Photo-detector completely. The carat equivalent of this is approximately 0.02 to 10 carats. • Conduct prior supporting tests to ascertain the stone for testing is a diamond.
-
Page 24: Reading Test Results On Your Synthetic Diamond
3. Reading Test Results with your Synthetic Diamond Screener II The SDS measures the UV absorption ability of the diamond and this measurement is communicated as ‘Natural’ or ‘Type IIa Diamond’. After the “Start Test” button is pressed, the button will start to blink in blue as testing is underway. - Page 25 Blue Bar of light/Natural The first bar on the left will indicate the ‘Natural’ reading and will be lit in blue (Fig 3.2). Fig.3.2 ‘Natural’ Reading The blue light labelled ‘Natural’ indicates the UV light absorption ability of the tested diamond stone is high as there are trace elements within the stone that has absorbed the UV light, thus allowing very little UV light through to the photo-detector.
- Page 26 Red Bar of light/Type IIa Diamond The first light bar on the right will indicate ‘Type IIa Diamond’ and will be lit in red (Fig 3.3). Fig.3.3 ‘Type IIa’ Reading A ‘Type IIa Diamond’ reading means the UV light absorption ability of the tested diamond stone is low and this is due to the lack of trace elements such as nitrogen within the colorless diamond, allowing the light to pass through the diamond with little obstruction.
-
Page 27: Overview Of Buttons & Indicators On Your Synthetic Diamond Screener
4. Overview of Buttons & Indicators on your Synthetic Diamond Screener II The table below summarizes the functions and representations of the buttons and lights on the Synthetic Diamond Screener II device. Power Button Description Light Function Press and hold the... - Page 28 Start Test Button Description Light Function No stone on the Blinking red Device is unable to detect photo-detector is any stones on the photo- detected detector. Ready for testing Steady blue Device lid is closed and ready for testing with the interior UV light source switched off.
-
Page 29: Taking Care Of Your Synthetic Diamond Screener
Synthetic Diamond Screener II Equipment Maintenance The Synthetic Diamond Screener II is a product of extensive design and craftsmanship, please treat it with care. Always cover it or place it securely in its custom carrying case when the device is not in use.
Need help?
Do you have a question about the Synthetic Diamond Screener II and is the answer not in the manual?
Questions and answers