
Related Manuals for Maersk Container Industry Star Cool SCI-20

Summary of Contents for Maersk Container Industry Star Cool SCI-20
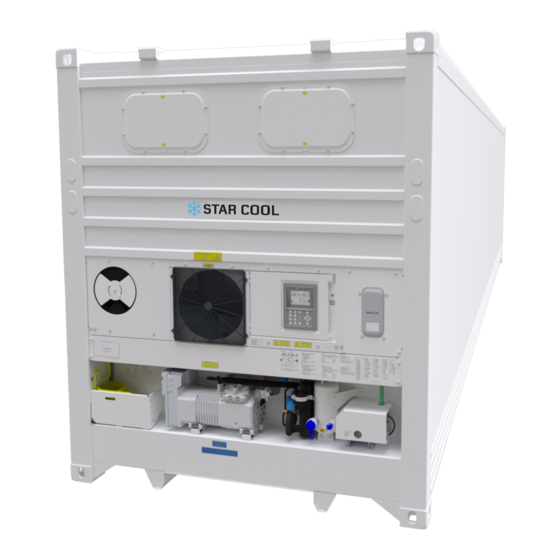
- Page 1 Operating and Service Manual Star Cool Refrigeration Unit Model SCI-20/40/CA and SCU-20/40 Version 810900E May 2021...
-
Page 2: Preface
The information herein is subject to change without notice and does not represent a commitment on any part of Maersk Container Industry AS. While the information herein is assumed to be accu- rate, Maersk Container Industry AS assumes no responsibility for any errors or omissions that may appear in this documentation. -
Page 3: Table Of Contents
2 of 116 pages 3. Contents 1. Preface ................................. 1 2. Warnings ..............................1 3. Contents............................... 2 4. Legend ................................. 6 5. General description ............................8 6. Function description ............................ 9 6.1 Start-up procedure ..........................9 6.2 Temperature control..........................9 6.3 Capacity control and limiter ........................10 6.4 Electrical control ...........................12 6.5 Expansion valve ............................12... - Page 4 3 of 116 pages 8.26 USDA socket requirements ........................24 8.27 O sensor ............................24 8.28 CO sensor ............................24 8.29 Temperature sensors, including USDA ....................25 8.30 Relative humidity sensor ........................25 8.31 CA pressure transmitter ........................25 8.32 Pressure transmitters ..........................25 8.33 Miscellaneous .............................25 9.
- Page 5 4 of 116 pages 13. Events ...............................60 14. Detailed alarm description ........................63 14.1 Alarm list ............................63 15. Star Cool unit installation dimensions .......................68 16. Location of motors, temperature sensors, humidity sensor and air exchange potentiometer ....69 17. Location of valves ............................70 18.
- Page 6 5 of 116 pages 24. General trouble shooting ..........................97 25. Emergency operation ..........................98 25.1 FC bypass ............................98 25.1.1 FC 1.0 and FC 1.1 ..........................98 25.1.2 FC 2.0 .............................98 25.2 Controller bypass ..........................99 25.2 Evaporator fan motor bypass ........................99 26. Tables ..............................100 26.1 Datalog description ...........................100 26.2 Temperature sensor - resistance table ....................102 26.3 Temperature sensor - voltage table .....................103...
-
Page 7: Legend
6 of 116 pages 4. Legend Short name Name Short name Name Alarm Action System Mcpr Compressor motor Actual Mevap Evaporator motor Automatic Cold Treatment Mevap1 Evaporator motor 1 AirEx Air exchange Mevap2 Evaporator motor 2 Danfoss pressure transmitter Maximum operating pressure Alarm Mpump Vacuum pump motor... - Page 8 7 of 116 pages Short name Name Tusda1 USDA 1 temperature Tusda2 USDA 2 temperature Tusda3 USDA 3 temperature Ubat Battery voltage DC voltage in frequency converter Voltage/frequency ratio Valve Veco Economizer valve Vexp Expansion valve Hot gas valve...
-
Page 9: General Description
8 of 116 pages 5. General description units, models SCU-40 and SCI-40 are electric powered picture frames, cooling STAR COOL and heating units operating on refrigerant R134a or R513A. The unit is designed to maintain cargo temperatures in a range from -30°C (-22°F) to +30°C (+86°F). The unit is designed to operate in ambient temperatures from -30°C (-22°F) to +50°C (+122°F). -
Page 10: Function Description
9 of 116 pages racy is ±0.25°C (±0.45°F). The unit can operate the evaporator fans in low speed and high speed. From the controller display, Normal or Economy mode can be selected under the Operation menu. In Economy mode the fans always run on low speed. In Normal mode the fan speed can run in high or low speed depending on running conditions. -
Page 11: Capacity Control And Limiter
10 of 116 pages Chill mode Defect sensor(s) Substitution sensor/Action Alarm Tsup1 (2) Tact = Tsup2 (1) 105, Tsup1 invalid Tsup1 and Tsup2 Tact = Tret + constant 105, Tsup1 invalid 108, Tsup2 invalid Tsup1, Tsup2, and Tret Tact = Tevap + constant 102, Tret invalid 105, Tsup1 invalid 108, Tsup2 invalid... - Page 12 11 of 116 pages The below figure indicates the ranges for the capacity. System Capacity Heating % -100 Capacity % Cool eco Cool PWM Heat -20% +10% -100% 100% cooling heating Cooling % If there is a limiter active on the unit then the compressor speed will be slower and the unit will op- erate with reduced capacity.
-
Page 13: Electrical Control
12 of 116 pages 6.4 Electrical control The following graphical illustration shows the accepted volt/Hz range and the set off values for the alarms AL 415, AL 418, AL 424, and AL 425. Supply frequency [Hz] Alarm 425 Unit stop (Power frequency) Fans low speed Alarm 418... -
Page 14: Dehumidification
13 of 116 pages 6.7 Dehumidification The dehumidification function dehumidifies air in the container by means of a heater. This function can only be activated if the temperature control function is active. Dehumidification is achieved by decreasing evaporator surface temperature. This is done through activation of the heater and letting the temperature control increase cooling capacity resulting in an evaporator temperature descending. -
Page 15: Evaporator Fan
14 of 116 pages 6.9 Evaporator fan The evaporator fan function ensures correct fan speed (high or low). The function is active in the automatic mode. This function has 2 modes: 1. Normal Low speed in Frozen mode or if the following three conditions are set: - Tset is more than or equal to 0°C (32°F) - No fresh air exchange - Dehumidification is turned off or humidity setpoint below 65%... -
Page 16: Alarm Action System
15 of 116 pages General information If the Tevap sensor is not OK, adaptive defrosting uses a reduced defrost interval compared to normal calculated defrost intervals. Setpoint alteration leads to a new calculated defrost interval, and defrost starts when the defrost criteria is reached. With manual defrost initiation the current defrost interval is set to default defrost interval. - Page 17 16 of 116 pages Event ID Param. 1 Param. 2 Param. 3 Param. 4 Param. 5 Tsup Supply air temperature [°C] Tret Return air temperature [°C] Tusda1 USDA 1 temperature [°C] Tusda2 USDA 2 temperature [°C] Tusda3 USDA 3 temperature [°C] Tcargo Cargo temperature [°C] Tset...
-
Page 18: Tests
17 of 116 pages Extended Log Type 3 Extended Log Type 4 Header can be retrieved by Refcon, Logman, StarView and can be viewed in Refcon, LogView and StarView. Extended Log Type 1 can only be retrieved by Logman and StarView and shown in LogView and StarView. -
Page 19: Function Test
18 of 116 pages 7.1 Function test Function test is a unit component test (non-destructive). The test is based on a GO/NO GO proce- dure. All tests must be executed without failure one by one for the function test result to be PASS. The tests can also be performed individually. -
Page 20: Full Pti
19 of 116 pages NOTE: At ambient temperature above +40°C (+104°F) and below -20°C (-4°F), the unit has to be running in normal operating mode at setpoint of 0°C (32°F) for of 10 minutes with com- pressor running before executing a function test or PTI test. The reason for this is to en- sure correct function of unit during PTI test or function test. -
Page 21: Compressor - Motor Assembly
20 of 116 pages 8.3 Compressor – motor assembly Type Semi-hermetic two-stage reciprocating 2 low stage cylinders Number of cylinders 2 high stage cylinders Speed Variable, FC controlled Model S4BCF-5.2Y / S4BCF-4.2Y Nominal power 5.5 kW / 3.8 kW Compressor oil type Reniso Triton SEZ 55 or equivalent Compressor oil quantity 1.5 L and 0.4 L in system... -
Page 22: Evaporator Fan Motor
21 of 116 pages 8.8 Evaporator fan motor Manufacturer Grundfos dahlander motor ABB dahlander motor Type Enclosed, non-vented Frame size 071B14 Shaft material Stainless steel, X20CrNi172 No. of motors Voltage 3–phases, 400/460 V AC, 50/60 Hz Nominal power 0.45/0.07 kW @ 460V/60 Hz 0.45/0.07 kW @ 460V/60 Hz Protection, Thermistors... -
Page 23: Condenser Fan Motor
22 of 116 pages 8.11 Condenser fan motor Manufacturer Grundfos dahlander motor Zhongda dahlander motor ABB dahlander motor Type Enclosed, non-vented Frame size 071B3 Shaft material Stainless steel, X20CrNi172 No. of motors Voltage 3–phases, 400/460 V AC, 50/60 Hz 0,25/0,07 kW 0,30/0,08 kW 0,30/0,08 kW Nominal power... -
Page 24: Economizer
23 of 116 pages 8.15 Economizer Type Brazed plate heat exchanger Material Stainless steel, AISI 316 L Conformity RoHS II 2011/65/EU 8.16 Refrigeration controls Expansion valves 2 solenoid valves, electronically controlled by the controller Filter drier Danfoss DML 164 with O-ring or equivalent Solenoid valve electronically controlled by the Hot gas valve controller... -
Page 25: Fusible Plug, Receiver
24 of 116 pages 8.22 Fusible plug, receiver Blow temperature 100°C (212°F) 8.23 Fuses Control circuit supply 0.4 A, tube fuse 8.24 Power plug CEE 3P+E (4 pole) 32 A Type 400/460 V, 50/60 Hz Protection degree IP67 International Electrotechnical Commission (IEC) Conformity 60309-1:1999 and 60309-2:1999 8.25 Power cable... -
Page 26: Temperature Sensors, Including Usda
25 of 116 pages 8.29 Temperature sensors, including USDA Type NTC, 10 kOhm at 25°C (77°F) 10K3A1 Operating temperature -40°C to +100°C (-40°F to +212°F) ±0.15°C, range -30°C to +100°C Accuracy (±0.5°F, range -22°F to +212°F) 8.30 Relative humidity sensor Type Moisture capacitive element Operating temperature... -
Page 27: User Interface
26 of 116 pages 9. User interface 9.1 Indicator lights Alarm indicator light In-range indicator light SLOW FLASH if there are NORMAL FLASH when active alarms controlling temperature probe QUICK FLASH if there are is inside the acceptable range Green fatal alarms Constant ON after 30 min. -
Page 28: Keypad
27 of 116 pages It is possible to obtain a datalog graph display (see “11.19 Datalog view” p. 52). 9.3 Keypad Use these keys to move menu display up/down and to change Navigation keys parameter values Leave active sub menu Cancel Cancel active parameter adjustment Move menu one line up... -
Page 29: Menu Overview
28 of 116 pages Press key to select menu display Menu keys Press again to move menu one full page down Turn on and off battery powered display operation Wake-up No display backlight will be active Show PRE TRIP INSPECTION menu (start/stop test and view results) Info Show INFORMATION menu (actual data read out) Operation... -
Page 30: Using The Cursor
29 of 116 pages 10.2 Using the cursor The parameter ID is only used for identifying each displayed line of the menu system. Pressing the arrow keys will move the highlighted cursor one menu line up or down. In the upper right corner of the display is shown the actual line number of the cursor together with the total number of lines in the current menu. -
Page 31: Operation
30 of 116 pages 11. Operation 11.1 Menu structure MAIN PAGE INFORMATION RAW SENSORS MULTI. TEMP. SETP. MULTI. TEMP. SETP. Relative humidity > Relative humidity Hour Hour > > USDA 1 temp Last defr interval USDA 2 temp AIR EXCHANGE USDA 1 temp >... -
Page 32: General Operation
31 of 116 pages 11.2 General operation The following text is a general description of operating menus and editing parameters. By pressing a menu key the menu is selected and its icon is illuminated. The lower part of the display shows parameter number, parameter value and a short information text in English. -
Page 33: Viewing Graph Of Supply And Return Temperature
32 of 116 pages 11.7 Viewing graph of supply and return temperature Press to enter graphical view (this function is a shortcut to L03 (see “11.19 Datalog view” p. 52)). To return to main page press two times. Press to toggle between stored set of temperatures: Setpoint temperature + supply air temperature, return air temperature and the other set of temperatures: USDA 1 + 2 + 3 temperatures and cargo temperature. - Page 34 33 of 116 pages 1. One alarm for PTI or function test failure. Status are also listed in the menu items T04 – T12(FT)/T19(PTI). 2. One or more alarms for a specific error during the test. Only listed in alarm list. Failures found during the tests are listed in the alarm list and the results of the separate PTI test steps are in menu items T04 to T19.
- Page 35 34 of 116 pages X06 ITI Off cycle Function: Display remaining off time of current test interval. Value: Shown as hours. X07 ITI Pass date Function: Date of last ITI pass –> checkmark set. Value: YYYY-MM-DD or N/A. T03 Function test Function: Start function test runs to verify full functionality of the unit without performance tests.
- Page 36 35 of 116 pages T10 Test result: 50 Cond fan Function: Shows the status of the test of the condenser fan. Value: “-“ if not done yet. “RUN” if still running test. “PASS” if test finished successfully. “FAIL” if the test failed.
-
Page 37: Information Menu
36 of 116 pages Value: “-“ if not done yet. “RUN” if still running test. “PASS” if test finished successfully. “FAIL” if the test failed. “ABORT” if the test was aborted by the user. See specific description for AL 850. 11.10 Information menu By pressing the Information menu is selected. - Page 38 37 of 116 pages I11 Ambient temperature Function: Shows current ambient temperature. Value: Shown in temperature scale °C or °F. Switch by pressing I12 Supply air 1 temperature Function: Shows current temperature for supply 1 sensor. Value: Shown in temperature scale °C or °F. Switch by pressing I13 Supply air 2 temperature Function: Shows current temperature for supply 2 sensor.
- Page 39 38 of 116 pages I21 Evaporator superheat Function: Shows current superheat of expansion valve. Tsuc - T0 = SH. Value: Shown in temperature scale °C or °F. Switch by pressing . Value is only user-changeable with system in the Service mode. I22 Compressor frequency Function: Shows current compressor frequency.
- Page 40 39 of 116 pages I31 Battery voltage Function: Shows current Battery voltage. Value: Shown as voltage. I32 Frequency converter temperature Function: Shows current converter temperature. Value: Shown in temperature scale °C or °F. Switch by pressing I33 Condenser fan Function: Shows current speed for condenser fan.
-
Page 41: Raw Sensors
40 of 116 pages 11.11 Raw sensors Shows the unfiltered and unsubstituted value of the sensors. When sensor is malfunctioning, the value of this sensor is substituted and marked with a ´ (e.g. 0.7’ C). By pressing the Enter key in the Information menu, raw temperature sensor values are shown in the user panel. -
Page 42: Operation Parameter Settings
41 of 116 pages Value: Shown in temperature scale °C or °F. Switch by pressing E11 Return air temp Function: Shows current temperature for return sensor. Value: Shown in temperature scale °C or °F. Switch by pressing E12 Evaporator temp Function: Show current temperature for evaporator. -
Page 43: Programs
42 of 116 pages Value: Shown as ‘Off’ or a percent value. Value can be set to Off or values from 50% to 95% in 1% increments. Default = off. O05 Datalog interval Function: Setting of interval between loggings in the datalog. Setting the datalog interval to 60 min. -
Page 44: Automatic Cold Treatment Program, Act
43 of 116 pages 11.13.1 Multiple Temperature Setpoints program, MTS MTS is a program used to automatically change setpoints at specific intervals. If only one setpoint is required, set this in the Operation menu on line O01 Setpoint. The program is terminated if the duration (hours) is set to OFF or if the last step (D06) has been completed. - Page 45 44 of 116 pages • Program status set to none • Initiated PTI • Power off more than 48 hours (168 hours prefix dependent) Termination of an active ACT can only be done by manually setting active program (P01) to none or if the unit has been powered off for more than 48 hours (168 hours prefix dependent).
-
Page 46: Bulb Mode
45 of 116 pages more than 48 hours (168 hours prefix dependent). USDA Function: The bottom line shows the temperatures of USDA sensors 1 – 3 and the cargo sensor. Value: Actual temperature measured of the sensor. -70°C indicates that the sensor is not mounted! Check alarm list to see if there should be an USDA alarm. -
Page 47: Application Settings
46 of 116 pages Value: Values: Set from -1°C to +30°C (default 10°C). H05 Fresh air setting Function: When user manually adjusts the air vent, the setting will be highlighted in the display and prompt the user to press Value: Values: Set from 0 to 225 m 11.14 Application settings 11.14.1 AV/AV+... - Page 48 47 of 116 pages be low and/or the carbon dioxide level high inside the container! Please check gas levels and flush with fresh air before entering and unloading. Exposure to low oxygen/high carbon dioxide may cause loss of consciousness and suffocation. The Star Cool CA is a controlled atmosphere application designed to prolong the shelf life of perisha- bles by regulating the internal atmosphere of the container.
-
Page 49: Manual Defrost
48 of 116 pages O07 O2 setpoint Function: setpoint. Value: Range 3 - 21%. O08 CO2 setpoint Function: setpoint. Value: Range 1 - 19.8%. O09 Active application Function: Actual application. Value: - Std (standard) - AV (automatic ventilation) - AV+ (automatic ventilation +) - CA (controlled atmosphere) O10 Manual defrost Function:... -
Page 50: Alarms
49 of 116 pages Default OFF. Select ON and hold for 3 seconds to start defrosting. 11.16 Alarms The alarm list holds all active and inactive alarms. By pressing all active alarms are shown. The full list of active/inactive alarms, fatal alarms and warnings can be accessed using the T00 menu. The icon is displayed in upper left corner of the display. -
Page 51: Service Function Settings
50 of 116 pages In case of an empty alarm list, √ + “No alarms” is shown. An active alarm is shown as Acc AAnnn, where cc is the list number from 01 to 16, and nnn is the actual alarm number. An inactive alarm is shown as Acc IAnnn, where cc is the list number from 01 to 16, and nnn is the actual alarm number. -
Page 52: Fc Self Test
51 of 116 pages Function: Manual condenser fan on/off. Note that value is only accepted if control is in the manual mode (menu item M01 is MANUAL). Value: Set to OFF, LO (low speed) or HI (high speed). M05 Compressor freq Function: Manual setting of compressor frequency. -
Page 53: Datalog View
52 of 116 pages J02 Last Run Date Function: Date of the last FC self-test. Value: YYYY-MM-DD. J03 Last Run Time Function: Time of the last FC self-test. Value: HH:MM. J04 Status Function: Displays the current status of the frequency converter self-test. Value: Not run, Try to start, Running, Start denied, Finished. -
Page 54: Time Adjust
53 of 116 pages Value: The following temperatures can be viewed: Setpoint temperature, supply air temperature, return air temperature, relative humidity%, air exchange m /h, USDA 1 + 2 + 3 temperatures and cargo temperature. When entering the menu, the newest logged temperatures are always shown. Press to toggle between stored set of temperatures: Setpoint temperature, supply air tem- perature, return air temperature, relative humidity%, air exchange and the other set of tempera-... -
Page 55: Run Time Counters
54 of 116 pages Value: Set from 0 to 59. 11.21 Run time counters R01 Unit Function: Viewing of Star Cool unit operation hours. Value: Shown as hours. R02 Compressor Function: Viewing of compressor operation hours. Value: Shown as hours. R03 Evaporator fan Function: Viewing of evaporator fan operation hours. - Page 56 55 of 116 pages F02 SW version Function: Viewing of controller software version and revision. Value: F03 FC type Function: Viewing and setting of actual FC type. Value: Set as DANFOSS or NONE for no FC mounted (see “25.1 FC bypass” p. 98). For CIM 5 units, can be set manually to FC 2.0.
-
Page 57: Starconomy
56 of 116 pages SCU-40-W-AV+ SCU-40-AV+02 SCI-20 SCI-20-W SCI-20-AV+ SCI-20-W-AV+ SCI-40 SCI-40-W SCI-40-AV+ SCI-40-W-AV+ SCI-40-CA SCI-40-W-CA SC-MCI140 SC-MCI140-WC F11 Freshair type Function: Fresh air valve type selection. Value: 35 CMH or 75 CMH. F12 Starconomy setting Function: Configure if Starconomy is available as a control mode. Configure if Starconomy is as default on or off. Value: No Starconomy, Default off, Default on. -
Page 58: Usb Menu
57 of 116 pages Value: Power meas serial no. N04 RH Function: Humidity sensor. Value: Humidity sensor serial no. N05 O2 Function: sensor. Value: sensor serial no. N06 CO2 Function: sensor. Value: sensor serial no. N07 SSC Function: Sub controller. Value: Sub controller serial no. -
Page 59: Maintenance
58 of 116 pages The use of a USB memory stick provides easy access to the unit without need of connecting any external equipment like a PC. A service technician can, using USB, upgrade container unit firmware. U01 Firmware update Function: Container unit firmware can be upgraded from a USB memory stick. -
Page 60: External Interfaces
59 of 116 pages Value: Hardware version and revision. W04 Last connected Function: Timestamp showing last time modem was connected to backend server. Value: Date annd time YY/MM/DD HH:MM. W05 Geofence ver Function: Show version of the present geofence file. Value: Version of the present geofence file. -
Page 61: Functions Overview
60 of 116 pages 12.3 Functions overview It is defined in the table below, which Star Cool functions each device and system will support. Star Cool Function LogMan LogView RefCon Service StarView Controller Display basic data Display alarm list Display controller information Change container ID Change temperature setpoint Change humidity setpoint... - Page 62 61 of 116 pages PTI step OK Step ID PTI abort Step ID Time [sec] Alarm count Manual mode select Manual mode deselect Defrost start Defrost activation DoD criteria: Defrost type: Ice model Actual defrost cause: 0: None 0: Air interval [minutes] 1: Manuel start 1-x: One of the...
- Page 63 62 of 116 pages Singlestep start Singlestep abort Step ID Seconds Alarm count Service 1 = Mpump oil changed ACT initiated Treatment Treatment Probes Used Duration [days] New setpoint: limit: XX.XX setpoint: XX.XX 1: USDA 1 XX.XX ACT started 2: USDA 2 ACT passed 4: USDA 3 8: CARGO...
- Page 64 63 of 116 pages Module added 1: RH Serial no first digit Serial no next 4 Serial no 3 digits Serial no 4 digits 2: O after S/A/P digits after ID after W 3: CO If Parameter 1 is 4: SSC MCI sensor, then: 5: SPM Par2 is...
-
Page 65: Detailed Alarm Description
64 of 116 pages 14. Detailed alarm description In the following, all alarms are listed with a display text and description. • Alarm display text is the text shown in the controller display. • An alarm can either be only logged into the datalog or both in the datalog and shown in the controller alarm list. - Page 66 65 of 116 pages Mcond over heat Condenser motor overheat Fatal alarm Mpump over heat Vacuum pump motor overheat Alarm Invalid power sup U1-2 and U1-3 and U2-3 overvoltage Fatal alarm Invalid power sup U1-2 and U1-3 and U2-3 undervoltage Fatal alarm Over current I1-2 and I1-3 and I2-3 overcurrent...
- Page 67 66 of 116 pages Hevap contactor Hevap contactors detected to be faulty (only in heating) Alarm Reduced refr. flow The flow of refrigerant in the system is reduced Alarm CA memb/hose leak Vacuum pump has stopped due to leak. Alarm Mpump vacuum loss Vacuum pump has stopped due to loss of vacuum in the system.
- Page 68 67 of 116 pages PTI Tset 5 PTI 5°C set fault Warning PTI Tset 0 PTI 0°C set fault Warning Broken valve plates Compressor mass flow indicates valve plate has become defect Warning LowRefrig/ExvBlock Compressor mass flow too low Warning Expansion valve leak Valve leaks fault Warning...
-
Page 69: Star Cool Unit Installation Dimensions
68 of 116 pages 15. Star Cool unit installation dimensions 2025 1974,7 Type: SCU 117,15 298,45 5x 298.45 (1492,25) Type: SCI... -
Page 70: Location Of Motors, Temperature Sensors, Humidity Sensor And Air Exchange Potentiometer
69 of 116 pages 16. Location of motors, temperature sensors, humidity sensor and air exchange potentiometer Short Pos Description Quantity Location Accessibility name Suction temperature sensor Tsuc Inside Through inspection hatch Evaporator temperature sensor Tevap Inside Through inspection hatch Relative humidity sensor Inside Through inspection hatch Return temperature sensor... -
Page 71: Location Of Valves
70 of 116 pages 17. Location of valves Position Description Economizer service valve Discharge service valve Evacuation valve Suction service valve Hot gas valve Evacuation valve Expansion valve, economizer Expansion valve, evaporator Liquid charging valve Manual stop valve... -
Page 72: Location Of Pressure Transmitters, High Pressure Switch And Oil Outlet Port
71 of 116 pages 18. Location of pressure transmitters, high pressure switch and oil outlet port Position Description Short name Quantity Location Discharge pressure transmitter Pdis Outside High pressure switch Outside Suction pressure transmitter Psuc Outside Oil outlet port Outside... -
Page 73: Controller Unit Illustration
72 of 116 pages 19. Controller unit illustration Position Description Controller door User panel (SUP6) Battery pack Controller module (SMC6) Modem Contactor Auxiliary contact Power measurement module (SPM6) Transformer, 105VA Main circuit breaker, 16A Fuse holder for 0.4A fuse On/Off switch Fuse, 400mA High pressure switch Pressure transmitter -0.69-9.8 Bar... -
Page 74: Location Of Av And Ca Components
73 of 116 pages 20. Locations of AV and CA components Position Description Vacuum pump Vacuum pump hose Air exchange manual CA membrane module Sensor location (O and CO Injection ports Pressure release valve Air exchange module... - Page 75 74 of 116 pages CA membrane module Oil filter Note: O-ring has to be in place Pressure transmitter sensor sensor Displayed sensors may vary from currently used models...
- Page 76 75 of 116 pages Vacuum pump Plug Terminal box Pump inlet integrated connection Pressure transmitter connection Oil inlet (charge) Pump discharge Oil filter (inside) Sight glass Temp. sensor pocket Heating element Oil outlet (drain) Tightening torques for M6 screws on vacuum pump cover shield: 6 Nm Tightening torques for plugs, heating element, and sight glass: 15 Nm...
-
Page 77: Replacements
76 of 116 pages 21. Replacements 21.1 Replacement of evaporator motor and fan Note: Turn off main power supply to the unit before replacing evaporator motor and fan. Note: Beware of sharp edges located in this area! Dismount the inspection cover and disconnect the power supply to the motor by unplugging the square connector plug on the motor connection box. -
Page 78: Replacement Of Evaporator
77 of 116 pages 21.3 Replacement of evaporator Position Description Back plate, evaporator Evaporator The replacing of evaporator is done in the following steps: 1. Evacuate refrigerant as described in this manual (see “22.1 Evacuation of refrigerant” p. 82). 2. Remove the evaporator back plate (pos. 1). 3. -
Page 79: Replacement Of Heating Elements
78 of 116 pages 21.4 Replacement of heating elements 1. Dismount the upper back panel of the unit and dismount the defective heating element. 2. Mount the new heater onto the pin bolt and click into the bracket if installed. 3. -
Page 80: Replacement Of Fc
79 of 116 pages 21.5 Replacement of FC Good Full flush Air gap " " Thermal paste Position Description Black cover, FC 2.0 Frequency converter 2.0 Cable, FC 2.0 to compressor Threaded bushing, FC mounting The procedure for replacing the FC is as follows (please ensure correct tightening torque is used throughout replacement): 1. -
Page 81: Replacement Of Compressor
Be aware that 80 of 116 pages cables might tilt 21.6 Replacement of compressor Torque according to data sheet Position Description Compressor Bracket, compressor Black cover, FC 2.0 Frequency converter 2.0 Cable, FC 2.0 to compressor The procedure for replacing the compressor is as follows. Please ensure correct tightening torque is used throughout replacement. -
Page 82: Replacement Of Compressor Valve Plate/Cylinder Head Gasket
81 of 116 pages c. Let the pressure drop to vacuum. d. Stop the compressor by pressing Off on the controller and closing discharge stop valve. e. Press wake up on the controller and read pressure in the corner of the display. Ensure it is 0 Bar. -
Page 83: Replacement Of Filter Dryer
82 of 116 pages 21.8 Replacement of filter dryer Before replacing the drying filter, the power plug to the unit has to be disconnected. The drying filter has to be changed every time the compressor is changed or if the moisture indicators indicate too much moisture in the refrigerant circuit. -
Page 84: Compressor Pump Down And Operation
83 of 116 pages 6. Open suction service valve fully. Before operating the suction service valve, loosen the gland seal by ¼ turn before you move the spindle. Once finished, tighten the gland seal and put on the protective spindle cap. 7. -
Page 85: Pump Down Of Unit
84 of 116 pages 8. If there has been no change in the vacuum, open all service valves, pos. 5, 26, and 30 (P & I diagram). Before operating the suction service valve, loosen the gland seal by ¼ turn before you move the spindle. -
Page 86: Charging Of Refrigerant
85 of 116 pages 4. Remove the electrical coils and mount permanent magnet on the two electronic expansion valves, pos. 16 and 18 (P & I diagram). 5. Open the discharge stop valve of the service gauge manifold. 6. Carefully open the hand valve of the pressurized gas bottle until the two gauges of the service gauge manifold show a pressure of 12 BarE (174 Psi). -
Page 87: Charging Of Unit Low On Charge
86 of 116 pages 22.6.2 Charging of unit low on charge If during normal stable in-range operation it is observed that the setpoint temperature cannot be maintained it might be an indication of missing refrigerant. Please observe the unit for a period of at least 6 hours to ensure a stable tendency. -
Page 88: Draining Of Oil From Compressor
87 of 116 pages 3. If the oil level is still too high, remove oil until 1/3 to 2/3 sight glass full is obtained. 4. In case the oil level is too low in the sight glass, run the unit at a setpoint above the cargo set- point for 20 minutes. -
Page 89: Soldering
88 of 116 pages Oil charge 2.9 Soldering Warning: Any soldering or de-brazing must ONLY be carried out after recovery of any excess gas/ refrigerant in the system. Also make sure to expel oxygen from system to prevent flash-ignition of hot oil. -
Page 90: Calibration Of Air Exchange Sensor
89 of 116 pages 22.10 Calibration of air exchange sensor Air exchange sensor calibration: 1. Close the air exchange cover plate. 2. In the Service menu S05 Configuration, line F06 Air exchange calibration, select START and press the Enter key 3. -
Page 91: Ca Service And Troubleshooting
90 of 116 pages 23. CA service and trouble shooting 23.1 Container venting procedure To be performed whenever entering a Star Cool CA unit/container. 1. Press for the Operation menu and select line O03. Set the Control mode to Normal. 2. - Page 92 91 of 116 pages 8. Remove the filter. Check that the filter o-ring is not left behind. If so, remove it with a hook. 9. Clean the end of the vacuum pump housing. 10. Insert the new filter (item number 818669A) with o-ring attached ensuring that it is positioned correctly in the housing with the wire bow at the top.
-
Page 93: Trouble Shooting The Vacuum System
92 of 116 pages 14. Mount the black exhaust cover with its 4 screws and tighten to 3 Nm. 15. Drain oil from the vacuum pump by removing the lower black plug next to the sight glass. If the sight glass is dirty, remove and clean it ensuring the o-ring is intact and seated correctly before tightening with a 30 mm socket to 15 Nm. -
Page 94: Replacement Of The Vacuum Pump Heating Element
93 of 116 pages level is reached. 4. Go to the Service menu and select line S01 Manual Operation. Change the value of line M01 from Auto to Manual. Go down to line M10 and change the value from Off to On. 5. -
Page 95: Curtain Track Installation
94 of 116 pages 4. Install the CA curtain according to the Operating and Service Manual. 5. Ensure the container has passed air leak test according to the Operating and Service Manual. 6. Check and secure the vacuum pump hose connection to the vacuum pump and replace if dam- aged. -
Page 96: Curtain Installation
95 of 116 pages 9. Then apply a single line of sealant about 3 mm thick to the rest of the aluminium track about a quarter of the way into the track. 10. Starting with the corners, use a rubber hammer or similar to push the clean CA curtain track fully into the aluminium track. -
Page 97: Ca+ Flushing
96 of 116 pages 6. Starting at the top center, use the tool to press the ribbon into the curtain track. 7. Make sure the flat side of the ribbon is pointing into the CA curtain track. 8. Fit the remaining ribbon by pressing and sliding the tool, removing the clips as you work your way around. - Page 98 97 of 116 pages 1. Check that a CA flushing damper is available (item no. 818251B). If the damper is not available, it is possible to use the injection ports found on some unit models. Skip to step 6 if using the injection ports.
-
Page 99: General Trouble Shooting
98 of 116 pages 24. General trouble shooting Hints for general trouble shooting. 1. Unit will not start up. Check that power is applied to the unit. Check that fuses at QS1, F1 and or F2 are not blown. Check the alarm list. Clear all alarms and the causes. The unit is wired for emergency operation but the parameter F03 FC type under S05 Configu- ration in the Service menu is not set to NONE. -
Page 100: Controller Bypass
99 of 116 pages 25.1.2 FC 2.0 1. Dismount the 2 screws and remove the black plastic cover. 2. Dismount the cables on terminals U, V, and W. Cut one of the two cables on U, V, and W. 3. Strip the 3 cut cables and mount them together in one slot of the by-pass connector (found inside the black plastic cover). -
Page 101: Tables
100 of 116 pages back from the evaporator. Close the stop valve, pos. 14 (P & I diagram) slightly. 25.3 Evaporator fan motor bypass If one of the evaporator fan motors is defective and no replacement part is available, the defective motor can be bypassed. - Page 102 101 of 116 pages Extended data: Name Value Unit Psuc pressure Suction pressure (effective) BarE Pdis pressure Discharge pressure (effective) BarE Fpower frequency Power frequency (Reserved) Upower voltage Highest power voltage of U1, U2, U3 Name Value Unit I1 current Current I1 I2 current Current I2...
-
Page 103: Temperature Sensor - Resistance Table
102 of 116 pages 26.2 Temperature sensor - resistance table Resistance Temp Resistance Temp Resistance Temp Resistance Temp Resistance Temp [Ω] [Ω] [Ω] [Ω] [Ω] [°C] [°F] [°C] [°F] [°C] [°F] [°C] [°F] [°C] [°F] 3,095,611.00 138,322.00 13,682.60 2,315.20 570.82 2,851,363.00 130,243.00 13,052.80... -
Page 104: Temperature Sensor - Voltage Table
103 of 116 pages 26.3 Temperature sensor - voltage table Temperature sensors except for reference temperature sensor. Vcc = 3 V Voltage Temp Temp Voltage Temp Temp Voltage Temp Temp [°C] [°F] [°C] [°F] [°C] [°F] 3.00 -40.0 2.03 15.8 0.85 71.6 2.98... -
Page 105: H For 35 Cmh
104 of 116 pages 26.4 Air exchange sensor table voltage - m /h for 35 CMH There is an offset of 0.2 V due to mechanical design. The air exchange must be properly calibrated before measuring. Voltage Air exchange Voltage Air exchange Voltage Air exchange... -
Page 106: Voltage - Pressure Table, Lp Transmitter (Nsk) + Dst
105 of 116 pages 26.6 Voltage – pressure table, LP transmitter (NSK) + DST Vcc = 5 V. Pressure is relative Voltage Pressure Pressure Voltage Pressure Pressure Voltage Pressure Pressure [BarE] [Psi] [BarE] [Psi] [BarE] [Psi] -0,69 -10,01 3,92 56,87 3,15 8,66 125,59... -
Page 107: Voltage - Pressure Table, Lp Transmitter (Aks)
106 of 116 pages 26.7 Voltage – pressure table, LP transmitter (AKS) Vcc = 5 V. Pressure is relative Voltage Pressure Pressure Voltage Pressure Pressure Voltage Pressure Pressure [BarE] [Psi] [BarE] [Psi] [BarE] [Psi] 0.50 -1.000 -14.50 1.85 3.388 49.14 3.20 7.775 112.77... -
Page 108: Voltage - Pressure Table, Hp Transmitter (Nsk) + Dst
107 of 116 pages 26.8 Voltage – pressure table, HP transmitter (NSK) + DST Vcc = 5 V. Pressure is relative Voltage Pressure Pressure Voltage Pressure Pressure Voltage Pressure Pressure [BarE] [Psi] [BarE] [Psi] [BarE] [Psi] 0,00 1,85 13,50 195,858 27,00 391,716 0,55... -
Page 109: Voltage - Pressure Table, Hp Transmitter (Aks)
108 of 116 pages 26.9 Voltage – pressure table, HP transmitter (AKS) Vcc = 5 V. Pressure is relative Voltage Pressure Pressure Voltage Pressure Pressure Voltage Pressure Pressure [BarE] [Psi] [BarE] [Psi] [BarE] [Psi] 0.50 0.00 0.00 1.85 10.80 156.64 3.20 21.60 313.28... -
Page 110: Pressure - Temperature Table For R134A
109 of 116 pages 26.10 Pressure - temperature table for R134a °C °F °C °F °C °F -0,5 -7.3 2,13 30.9 10,29 149.2 -0,45 -6.5 2,36 34.3 10,89 157.9 -0,38 -5.6 2,61 37.8 11,52 -0,32 -4.6 2,86 41.5 12,17 176.5 -0,25 -3.6 3,13... -
Page 111: Tightening Torques
110 of 116 pages 26.12 Tightening torques Description Type Torque [Nm] ± 5% General Hex Head Bolt + Nut, M5 Hex Head Bolt + Nut, M6 Hex Head Bolt + Nut, M8 Hex Head Bolt + Nut, M10 Hex Socket Counters. Head Bolt, M6 Hex Socket Counters. -
Page 112: Diagrams
111 of 116 pages 27. Diagrams 27.1 P & I diagram... -
Page 113: Ca Diagram
112 of 116 pages 27.2 CA function overview - two versions Inside container CA membrane Air ex valve RS 485 Pressure sensor Output Controller Vacuum pump module SMC6 Thermal circuit switch RS 485 (Only available for some models) RS 485 Controller Signals module SSC6-... -
Page 114: Overall Wiring Schematic - Cim 6.0 With Sub-Controller
28. Overall wiring schematic - CIM 6.0 with sub-controller... - Page 115 113 of 116 pages...
-
Page 116: Overall Wiring Schematic - Cim 6.1
29. Overall wiring schematic - CIM 6.1... - Page 117 114 of 116 pages...
- Page 118 30. Overall wiring schematic - CIM 6.2...
- Page 119 115 of 116 pages頁...
-
Page 120: Overall Wiring Schematic - Cim 6.2 With Sub-Controller
31. Overall wiring schematic - CIM 6.2 with sub-controller... - Page 121 116 of 116 pages...
- Page 122 Star Cool Service The app For troube shooting help, manuals, alarm codes and more, download our free Star Cool Service app by simply scanning the QR code with your smart device. See more at apps.starcool.com Training Our expert service team offer a variety of comprehensive seminars and hands- on instruction all around the world.
Need help?
Do you have a question about the Star Cool SCI-20 and is the answer not in the manual?
Questions and answers