Table of Contents
Advertisement
Advertisement
Table of Contents

Related Manuals for Nektar Aura


Summary of Contents for Nektar Aura
-
Page 1: Programming Switches 1-7, Foot Switch 1
Owner’s Manual www.nektartech.com www.nektartech.com... -
Page 2: Table Of Contents
Aura Features Minimum System Requirements Minimum System Requirements Power Connecting to a Windows/OSX Computer Downloading Firmware, Nektarine and Nektar DAW Integration for Aura Aura Functional Overview Using Aura with Nektarine Internal Mode: Load and Save Presets Load a Preset Quick-Load a Preset... -
Page 3: Declaration Of Conformity
Europe Aura has been tested to meet or exceed Emissions and Immunity requirements European Standards EN55032: 2012, EN 61000-3-3: 2013, EN 61000-3-2: 2006 + A1: 2009 & A2: 2009 and EN55024: 2010. Aura is in conformity with the provisions of EMC Directive 2014/30/EU. -
Page 4: Introduction
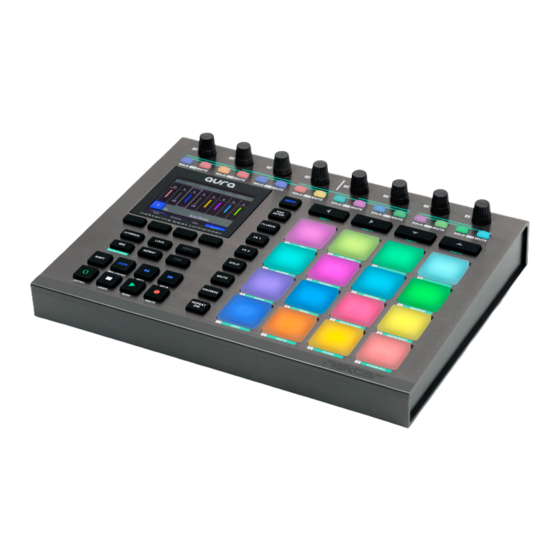
Introduction A big thank you for buying Aura - the Nektarine Beat Composer. Aura is a great pad instrument developed with beat creation in mind. It fea- tures a drum machine style step sequencer which allows you to program a pattern for every pad and trigger them at any time, in any com- bination. -
Page 5: Minimum System Requirements
Connecting to a Windows/macOS Computer Aura is USB Class Compliant. That means there is no driver to install - it just needs to be plugged in. Aura uses the built-in Class Compliant USB MIDI driver which is already Part of Windows and macOS. -
Page 6: Aura Functional Overview
Select Nektarine modes Mixer, Pad Setup, Plugin, FX1, FX2, Solo, Mute and Browse. The buttons are not in use unless Nektarine is connected. Transport Buttons Seven transport buttons used for Nektar DAW integration transport control. Can be assigned to send MIDI messages or control the Sequencer when Nektar DAW Integration is not present. [Shift] Button Shift adds alternative operation to many buttons and is referenced throughout the documentation. - Page 7 [Internal], [Lock], [Menu], [Seq], [Repeat] and [DAW] Buttons The 4 buttons [Internal], [Seq], [Repeat] and [DAW] are mode buttons. [DAW] is only available when Nektar DAW Integration is running. [Menu] is active when applicable to current mode selection and [Lock] is only used with Nektarine.
-
Page 8: Using Aura With Nektarine
Using Aura with Nektarine Aura can be used as a generic MIDI pad controller or with the included Nektarine plugin and stand-alone software. When Aura is used with Nektarine, most of the Internal mode features covered from page 9 to 13 are not needed because Nektarine handles the setup of pads and control mapping. -
Page 9: Internal Mode: Load And Save Presets
Internal Mode: Load and Save Presets Internal mode allows Aura’s pads and controls to be programmed to send MIDI messages and store the settings in any of the 16 Presets, for use with any MIDI product. Select Internal mode by pressing the [Internal] mode button. -
Page 10: Internal Mode: Factory Preset List
Internal Mode: Factory Preset List Aura’s factory Presets are examples of how the pads can be programmed for different usage. The Presets are not likely to cover all needs but could be a good starting point for your own Presets or give you an idea of how to get the most out of the pads. -
Page 11: Midi Assign: Programming Pads & Controls
MIDI Assign: Setting the Pad Note Message Aura’s pads can be programmed to send any MIDI note. You can also add expressiveness to your performance by assigning the pads’ pressure component to a continuous MIDI message, such as Pitchbend, AfterTouch or any MIDI CC. And, if you want to split the pads between several different MIDI devices or targets, you can assign each pad to a specific MIDI channel. -
Page 12: Programming The Pad Pressure Component
When a switch is selected, the MIDI Assign display looks like the table below: Range: C-2 : G8 Global, 1:16 Decimal/Hex Message Type Channel Data Entry See table1 See table1 See table1 Data 1 Data 2 Data 3 Nektar Aura Owner‘s Manual www.nektartech.com... -
Page 13: Programming Pots R1-8
Example: The message type MIDI cc is selected. Moving [R6 - MIDI cc] now adjusts the MIDI cc number and [R7-8] adjusts the Maximum and Minimum value range that the control will send. For most applications the value range will be set to the default max=127 and Min=0. www.nektartech.com Nektar Aura Owner‘s Manual... -
Page 14: Global
[R1] Aura’s controls and pads send their messages on a MIDI channel from 1 to 16. The Internal mode Presets are assigned to the Global MIDI channel, except for Presets 13 & 14. Changing the Global MIDI channel will therefore affect Presets 1-12. -
Page 15: Pad Velocity Settings
Global Pad Velocity Settings Aura does not have a traditional selection of fixed pad curves but instead provides parameters so that a curve can be more precisely tailored to different playing styles. The Global menu has 4 different Pad Curve options and as they are selected, the parameters for [R5-6] change according to the below table. -
Page 16: Repeat
Repeat Aura’s Repeat feature can be used to add a steady beat, rolls/flams to your own pad performance or allow you to create note arrays that otherwise can be difficult to play. Repeated notes are sent via MIDI. This means you can use Repeat with external MIDI equipment or record repeated notes in your DAW. -
Page 17: Trigger Sync (Beat Sync Vs Key Sync)
The ‘Key 2’ play repeats the first note from point of striking the pad but once notes are repeated, any subsequent pads will trigger repeat notes in time with the first pad held. www.nektartech.com Nektar Aura Owner‘s Manual... -
Page 18: Step Sequencer
Step Sequencer: Quick Start Guide Aura‘s Step Sequencer is intended as a scratchpad sequencer with a hands-on user interface that enables immediate changes for both composing and performing. MIDI notes can be sent to external MIDI equipment or recorded in a DAW for further editing. -
Page 19: Collection, Patterns, Parts And Steps Explained
• The currently selected Pattern number is listed in the display header. • Changing the parameters listed in Aura’s display now only affects the selected Pattern. Programming Part Parameters When a Pattern is playing, it cycles through the Parts that are activated for playback. Part 1 is the only Pattern that will be active, by default but you can program Parts regardless of whether they are playing or not. -
Page 20: Activating Parts For Playback
The display header updates to show which Steps are selected in the current Part as illustrated in the right image. • Changing the parameters listed in Aura’s display now only affects the selected Steps. To deselect the Steps, select another Step, Part or Pattern. -
Page 21: Pattern/Part/Step Edit
Aura’s Edit menu allows you to view and adjust parameters across •... -
Page 22: Changing Patter/Part/Step Parameters Back To Higher Level Settings
For example, the side effect of programming velocity on every Step in a Part is that velocity value changes at the Collection, Pattern or Part level, will not affect any of the Steps. Aura provides options to: •... -
Page 23: Step Sequencer: Collection Menu
Setting the time signature correctly becomes important when Patterns are triggered in realtime. You’ll get more predictable results if Aura’s time signature matches that of a DAW or device supplying MIDI Clock . To set the time signature, first move [R3 - Number of Beats] and select how many beats you want in a bar. -
Page 24: Rename A Collection
The 16 pads can also be used to quickly load any of the 16 Collections. • Press and hold the display button [Load], then strike a [pad 1-16] corresponding to the Collection number you want to load. Nektar Aura Owner‘s Manual www.nektartech.com... -
Page 25: Step Sequencer Functions (Pads)
Step Sequencer Functions (Pads) The [pads 1-14] are used to activate additional Aura Sequencer functionality. They only apply to the Sequencer and can not be used in any other context. • Press and hold the [Shift]+[SEQ] buttons on Aura. •... -
Page 26: Sequencer Key Combination Table
Repeat will immediately sync to MIDI Clock when it’s received. The Step Sequencer however needs to be instructed to respond to MIDI clock because you may not always want it to play when MIDI clock is received. Here is how you get Aura to play when MIDI clock is re- ceived: •... -
Page 27: Firmware Updates And Factory Restore
Firmware updates are available from the MY ACCOUNT tab on our website, following the registration of Aura (see page 5). Checking Aura’s Firmware Version Before you start the process of updating Aura’s firmware, make sure it’s necessary by comparing the version listed on our website with the version that’s already in your unit. - Page 28 Designed by Nektar Technology, Inc Made in China...
Need help?
Do you have a question about the Aura and is the answer not in the manual?
Questions and answers