Table of Contents
Advertisement
Quick Links
Advertisement
Table of Contents

Related Manuals for Ninja Foodi SP101UK


Summary of Contents for Ninja Foodi SP101UK
- Page 1 SP101UK INSTRUCTIONS 8-in-1 Mini Oven ninjakitchen.co.uk...
-
Page 2: Table Of Contents
CONTENTS for purchasing the Ninja® Foodi® Mini Oven Important Safeguards . . . . . . . . . . . . . . . . . . . . . . . . . . . . . . . . . . 2 Parts . -
Page 3: Important Safeguards
Never unplug by or becoming entangled and to reduce Ninja accessories. the oven. grasping and pulling the flexible cord. the risk of people tripping over... -
Page 4: Parts
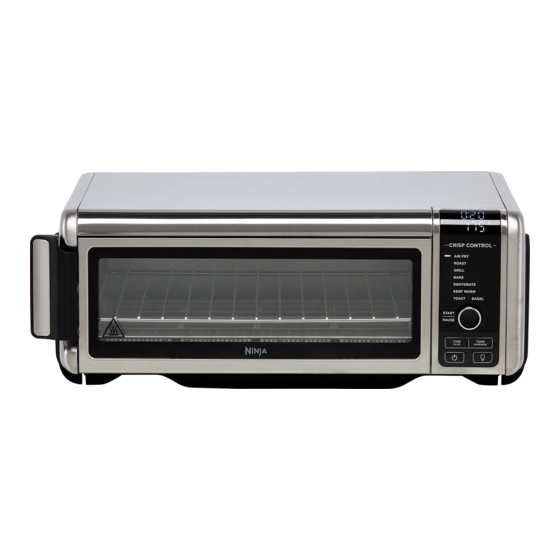
PARTS ACCESSORY PLACEMENT Main Unit (attached power cord not shown) Air Fry Basket (use in the top rail position) Oven Tray (always layer on top of the wire rack) BEFORE FIRST USE Wire Rack (keep in the bottom rail position) Remove and discard any packaging material, promotional labels and tape from the unit. -
Page 5: Using The Control Panel
USING THE CONTROL PANEL FUNCTIONS SLICE and DARK will illuminate when shows using the Toast or Bagel function. AIR FRY: Make foods that would in Time display traditionally be fried—such as chicken START/PAUSE button: Press to start Time display wings, French fries and chicken nuggets— or pause cooking. -
Page 6: Using Your Foodi® Mini Oven
USING YOUR FOODI® MINI OVEN USING THE COOKING FUNCTIONS 6 Slide the basket into the upper rails of Grill Roast the oven. If also using the oven tray, To select the function, turn the dial until To select the function, turn the dial until To turn on the unit, plug the power cord slide both into the oven at the same GRILL illuminates. -
Page 7: Bake
USING YOUR FOODI® MINI OVEN – CONT . Bake Toast Bagel 4 Place ingredients in the air fry basket and place basket in oven. Close oven door and To select the function, turn the dial until To select the function, turn the dial until To select the function, turn the dial until press START/PAUSE to begin cooking. -
Page 8: Cleaning, Maintenance & Storage
CLEANING, MAINTENANCE & STORAGE CLEANING, MAINTENANCE & STORAGE – CONT . EVERYDAY CLEANING DEEP CLEANING 6 To prolong use of accessories, FLIP-UP-AND-AWAY STORAGE hand-wash with warm, soapy water. DO NOT flip oven up when The unit should be cleaned thoroughly Unplug the unit from the socket and 7 Thoroughly dry all parts before placing after every use. -
Page 9: Power Cord Management
Our cord-management system is designed We offer a range of accessories custom ERROR MESSAGES so it will not interfere with the oven’s made for your Ninja® Foodi® Mini Oven. “CALL CUSt SrVC” followed by “Er1” – “Er7” flip-away functionality. Visit ninjakitchen.co.uk to expand your capabilities and take your cooking to the Power off the unit and call Customer Service at 0800 862 0453. - Page 10 NOTES NOTES 16 ninjakitchen.co.uk ninjakitchen.co.uk...
- Page 11 Illustrations may differ from actual product. We are constantly striving to improve our products, therefore the specifications contained herein are subject to change without notice. FOODI and NINJA are registered trademarks of SharkNinja Operating LLC. © 2020 SharkNinja Operating LLC PRINTED IN CHINA...
Need help?
Do you have a question about the Foodi SP101UK and is the answer not in the manual?
Questions and answers