Advertisement
Quick Links
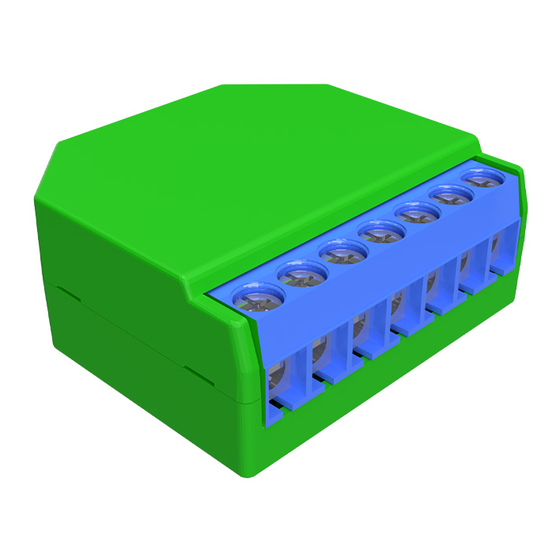
SHELLY DIMMER SMART DIMMING
SW1
SW2
L
L
L
N
O
fig. 1
SW1
SW2
L
L
L
N
O
fig. 3
Legend
• SW1 - Switch input 1 for on/off/dimming
• SW2 - Switch input 2 for on/off/dimming
• O - Output
• L - Line input (110-240V)
• N - Neutral input (Zero)
When using the device without neutral, Shelly Dimmer
⚠CAUTION!
2 requires at least 10W of power consumption, in order to operate.
If the connected light has a smaller power consumption, then Shelly
Bypass is required for the operation of the Device.
The Shelly smart WiFi dimmer by Allterco Robotics is intended to
be installed directly to your lights in order to control and dim the
light. It is intended to be mounted into a standard in-wall console,
behind the light switches or other places with limited space. Shelly
may work as a standalone device or as an accessory to a home
automation controller.
Shelly dimmer cannot be connected and operate a fan.
⚠CAUTION!
Doing so may cause damage to the unit or fan, including causing
a fire!
For multiple bulbs connected to one Dimmer 2, all
⚠CAUTION!
bulbs need to be equal in power load and technology!
Specification
• Power supply - 110-240V ±10% 50/60Hz AC
• Operational current - 0.1 - 1.1A
• Device temperature protection - 105°C
• Complies with EU standards - RE Directive 2014/53/EU, LVD
2014/35/EU, EMC 2004/108/WE, RoHS2 2011/65/UE
• Working temperature - from 0°C to 35°C
• Radio signal power - 1mW
• Radio protocol - WiFi 802.11 b/g/n
• Frequency - 2400 – 2483.5 MHz
• Operational range (depending on local construction) - up to 50 m
outdoors, up to 30 m indoors
• Dimensions (HxWxL) - 42 x 36 x 14 mm
• Electrical consumption - < 1,5 W
• Supported light types - Incandescent and halogen light sources
1-220W, Dimmable LED 50-200VA/1W – 200W, Resistive-inductive
loads ferromagnetic transformers 50-150VA
Technical Information
• Control through WiFi from a mobile phone, PC, automation sys-
tem or any other Device supporting HTTP and/or UDP protocol.
• Microprocessor management.
• Shelly may be controlled by an external button/switch.
Danger of electrocution. Mounting the Device to the
⚠CAUTION!
power grid has to be performed with caution.
Do not allow children to play with the button/switch
⚠CAUTION!
connected the Device. Keep the Devices for remote control of Shelly
(mobile phones, tablets, PCs) away from children.
Introduction to Shelly
Shelly® is a family of innovative Devices, which allow remote
EN
L
N
SW1
SW2
L
L
L
N
O
fig. 2
L
N
Bypass
SW1
SW2
L
L
L
N
O
fig. 4
control of electric appli-ances through mobile phone, PC or home
automation system. Shelly® uses WiFi to connect to the devices
controlling it. They can be in the same WiFi network or they can
use remote access (through the Internet). Shelly® may work stand-
L
alone, without being managed by a home automation controller,
N
in the local WiFi network, as well as through a cloud service, from
everywhere the User has Internet access.
Shelly® has an integrated web server, through which the User
may adjust, control and monitor the Device. Shelly® has two WiFi
modes - access Point (AP) and Client mode (CM). To operate in
Client Mode, a WiFi router must be located within the range of the
Device. Shelly® devices can communicate directly with other WiFi
devices through HTTP protocol.
An API can be provided by the Manufacturer. Shelly® devices may
be available for monitor and control even if the User is outside the
range of the local WiFi network, as long as the WiFi router is con-
nected to the Internet. The cloud function could be used, which is
L
activated through the web server of the Device or through the set-
N
tings in the Shelly Cloud mobile application.
The User can register and access Shelly Cloud, using either Android
or iOS mobile applications, or any internet browser and the web
site: https://my.Shelly.cloud/.
Installation Instructions
⚠CAUTION!
the Device should be done by a qualified person (electrician).
⚠CAUTION!
given max load!
⚠CAUTION!
instructions. Any other method could cause damage and/or injury.
⚠CAUTION!
companying documentation carefully and completely. Failure to fol-
low recommended procedures could lead to malfunction, danger to
your life or violation of the law. Allterco Robotics is not responsible
for any loss or damage in case of incorrect installation or operation
of this Device.
⚠CAUTION!
which comply with all applicable regulations. Short Circuit in the
power grid or any appliance connected to the Device may damage
the Device.
⚠RECOMMENDATION!
control electric circuits and appliances only if they comply with the
respective standards and safety norms.
⚠RECOMMENDATION!
control electric circuits and light sockets only if they comply with the
respective standards and safety norms.
⚠CAUTION!
types, the dimming functionality may not be present. However, you
will still be able to turn on and off your lights.
Declaration of conformity
Hereby, Allterco Robotics EOOD declares that the radio equipment
type Shelly Dimmer 2 is in compliance with Directive 2014/53/
EU, 2014/35/EU, 2004/108/WE, 2011/65/UE. The full text of the
EU declaration of conformity is available at the following internet
address:
https://shelly.cloud/declaration-of-conformity/
Manufacturer: Allterco Robotics EOOD
Address: Sofia, 1407, 103 Cherni vrah Blvd.
Tel.: +359 2 988 7435
E-mail:
support@shelly.cloud
Web:
http://www.shelly.cloud
Changes in the contact data are published by the Manufacturer at
the official website of the Device
The User is obliged to stay informed for any amendments of these
warranty terms before exercising his/her rights against the Man-
ufacturer.
All rights to trademarks She® and Shelly® , and other intellectu-
al rights associated with this Device belong to Allterco Robotics
EOOD.
Danger of electrocution. The mounting/installation of
Do not connect the Device to appliances exceeding the
Connect the Device only in the way shown in these
Before beginning the installation please read the ac-
Use the Device only with power grid and appliances
Тhe Device may be connected to and may
The Device may be connected to and may
If the Device is not connected to the supported light
http://www.shelly.cloud
Advertisement

Related Manuals for Shelly Dimmer 2


Summary of Contents for Shelly Dimmer 2
- Page 1 User has Internet access. Shelly® has an integrated web server, through which the User may adjust, control and monitor the Device. Shelly® has two WiFi modes - access Point (AP) and Client mode (CM). To operate in Client Mode, a WiFi router must be located within the range of the Device.
- Page 2 Device Inclusion To add a new Shelly device, install it to the power grid fol- lowing the Installation Instructions included with the Device. Step 1 INITIAL INCLUSION After the installation of Shelly following the Instalation In- Before installing/mounting the Device ensure that the grid is structions and the power is turned on, Shelly will create its powered off (turned down breakers).
- Page 3 Device Information - here you can see the device ID(Unique ID of Shelly) and device IP(the IP of Shelly in your Wi-Fi net- • WiFi Mode - Acess Point - Configure Shelly to create a Wi- work) Fi Access point.
Need help?
Do you have a question about the Dimmer 2 and is the answer not in the manual?
Questions and answers