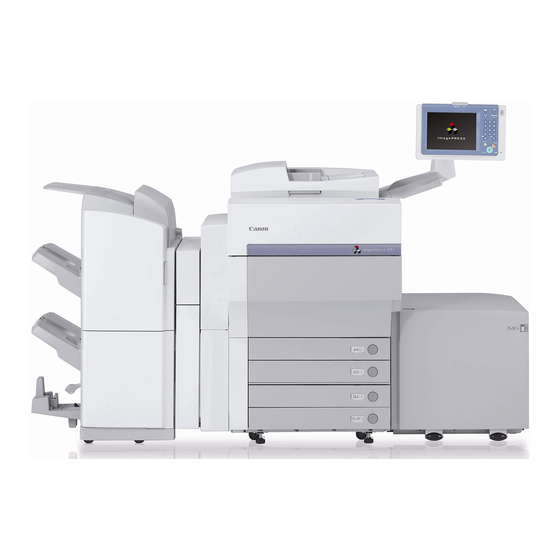
Canon imagePRESS C1+ Manual
Hide thumbs
Also See for imagePRESS C1+:
- Reference manual (622 pages) ,
- User manual (195 pages) ,
- Easy operation manual (60 pages)

Related Manuals for Canon imagePRESS C1+


Summary of Contents for Canon imagePRESS C1+
- Page 1 Coating Guide Coating Guide Please read this guide before operating this product. After you finish reading this guide, store it in a safe place for future reference.
- Page 3 imagePRESS C1+ Coating Guide...
- Page 4 Manuals for the Machine The manuals for this machine are divided as follows. Please refer to them for detailed information. * Indicates the manuals supplied with optional equipment. Depending on the system configuration and product purchased, some manuals may not be needed. Guides with this symbol are included on the accompanying Guides with this symbol are printed manuals.
- Page 5 • Job Hold Instructions Job Hold Guide* CD-ROM • Necessary Operations before Printing from Windows Printer Driver the Windows Computers and Instructions on CD-ROM Guide Printing • Windows Printer Driver Installation and Printer Driver Installation Instructions CD-ROM Guide* • Necessary Operations before Printing from Mac Printer Driver Guide the Macintosh Computers and Instructions CD-ROM...
- Page 6 Introduction to the Coating Functions Chapter 2 Coating Features Considerable effort has been made to ensure that this manual is free of inaccuracies and omissions. However, as we are constantly improving our products, if you need an exact specification, please contact Canon.
-
Page 7: Table Of Contents
Contents Preface ............vi How to Use This Manual . -
Page 8: Preface
Preface Thank you for purchasing the Canon imagePRESS C1+. Please read this manual thoroughly before operating the machine to familiarize yourself with its capabilities, and to make the most of its many functions. After reading this manual, store it in a safe place for future reference. -
Page 9: Displays Used In This Manual
Displays Used in This Manual Screen shots of the touch panel display used in this manual are those taken when the following optional equipment is attached to the imagePRESS C1+: the Color Image Reader-H1, Feeder (DADF-R1) Saddle Finisher-AA2, Punch Unit-L1, Color Universal Send Kit, and Color UFR II/PCL/PS Printer Kit. - Page 10 viii...
-
Page 11: Introduction To The Coating Functions
Introduction to the Coating Functions CHAPTER This chapter describes an introduction and the basic features of the Coating functions. Coating Functions............1-2 Coating Features Screen . -
Page 12: Coating Functions
Coating Functions The Coating functions enable you to coat the paper that already has printing on it (preprinted paper) with the clear toner. You can coat the full surface or certain section of preprinted paper. For these functions, each toner (black, cyan, magenta, or yellow) is not used, only the clear toner is used for coating. - Page 13 ■ Clear Coat Form Composition This mode enables you to coat the certain section of preprinted paper. To use the Clear Coat Form Composition mode, the image form must be stored in the machine beforehand. For details, see "Coating Certain Section of Preprinted Paper (Clear Coat Form Composition),"...
-
Page 14: Coating Features Screen
Coating Features Screen ■ Coating Features Screen The screen below, which appears when [Coating] is selected, is called the Coating Features screen. a Clear Coat Entire Page f Enter No. of Sheets Press to coat the full surface of preprinted paper. Press to specify the number of sheets per one copy you want to coat. -
Page 15: Flow Of Coating Operations
Flow of Coating Operations This section describes the flow of basic coating operations. NOTE • Before using the Coating functions, it is useful to read the following topics: - Main power and control panel power (See Chapter 1, "Before You Start Using This Machine,"... - Page 16 Load the preprinted paper into a paper source. NOTE • The illustration above shows that the preprinted paper is loaded into the paper drawer. • For instructions on loading preprinted paper, see "Loading Preprinted Paper," on p. 1-8. Select the loaded preprinted paper. NOTE For instructions on selecting preprinted paper, see "Selecting Preprinted Paper (Paper Select),"...
- Page 17 Specify the [Clear Coat Entire Page] or [Clear Coat Form Comp.] mode settings. NOTE • For instructions on the Clear Coat Entire Page mode, see "Coating Full Surface of Preprinted Paper (Clear Coat Entire Page)," on p. 2-2. • For instructions on the Clear Coat Form Composition mode, see "Coating Certain Section of Preprinted Paper (Clear Coat Form Composition),"...
-
Page 18: Loading Preprinted Paper
Loading Preprinted Paper The side of preprinted paper to be coated (coated surface) differs depending on the paper source into which you load the preprinted paper. To coat the side which has printing on it, you must load the preprinted paper with correct side up or down. Also, if you load multiple sheets of preprinted paper, be sure to check how the preprinted paper is arranged. -
Page 19: Selecting Preprinted Paper (Paper Select)
Selecting Preprinted Paper (Paper Select) IMPORTANT • When coating special types of paper, such as heavy paper or transparencies, be sure to correctly set the paper type, especially if you are using heavy paper. If the type of paper is not set correctly, it could adversely affect the quality of the image. Moreover, the fixing unit may become dirty, or the paper could jam, and a service repair may be needed. -
Page 20: Selecting Preprinted Paper Manually
Selecting Preprinted Paper Manually ➞ Load the preprinted paper Press [Paper Select]. Select the paper source for the preprinted paper. NOTE • The paper sizes/types are indicated by icons on the touch panel display, in the order in which they are loaded in the paper drawers. •... -
Page 21: Using The Stack Bypass
Using the Stack Bypass ➞ Load the preprinted paper Press [Paper Select]. Select [Stack Bypass]. NOTE If you want to select the stack bypass when a paper size/type is already selected for the current or reserved job, press [Stack Bypass Settings] to specify the desired paper size/type. - Page 22 ● If you want to select a standard paper size: ❑ ➞ Select the desired paper size press [Next]. NOTE To select an inch paper size, press [Inch-size]. ❑ ➞ Select the desired paper type press [OK]. 1-12 Selecting Preprinted Paper (Paper Select)
- Page 23 ➞ If the desired paper type is not displayed, press [Detailed Settings] select the ➞ paper type from the list press [OK]. If you are coating the back side of the paper, press [2nd Side of 2-Sided Page]. NOTE • [Transparency] can be selected only if [A4] is selected as the paper size.
- Page 24 ❑ Press [Next]. ❑ ➞ Select the desired paper type press [OK]. ➞ If the desired paper type is not displayed, press [Detailed Settings] select the ➞ paper type from the list press [OK]. If you are coating the back side of the paper, press [2nd Side of 2-Sided Page]. IMPORTANT If you select a nonstandard paper size, the Offset Collate, Staple, or 2-Sided mode cannot be specified.
-
Page 25: Specifying The Number Of Sheets/Copies (Enter No. Of Sheets/Copies)
Specifying the Number of Sheets/Copies (Enter No. of Sheets/Copies) If you are coating paper that already has printing on it (preprinted paper), there are no data to be used as original, such as copy originals or documents in an inbox. The preprinted paper itself is original and paper to be coated. -
Page 26: Collating Coated Paper (Finishing)
Collating Coated Paper (Finishing) The Finishing modes can be selected to collate the outputs in various ways, either by pages or copy sets. IMPORTANT • The Finishing modes cannot be set if transparencies, labels, or tab paper is selected. • The Finishing modes can be set only if an optional finisher is attached. - Page 27 ■ The table below shows all the finishing features that are available with each different optional unit, and the paper sizes that can be used. : Available : Unavailable Staple Hole Optional Unit Offset Saddle Punch Corner Double Stitch Copy Tray Finisher-AA1 (30 sheets), (30 sheets),...
- Page 28 ■ If the Collate Mode Is Set: The copies are automatically collated into sets arranged in page order. The coated preprinted paper is output as follows: Preprinted Paper Coating 1 Coating 2 Coating 3 Three Copies of Each Page Collated in Page Order ■...
- Page 29 • If you select [Double] (Left): Preprinted Paper Coating 1 Coating 2 Coating 3 Three Copies of Each Page Collated in Page Order • If you select [Saddle Stitch]: Preprinted Paper Coating 1 Coating 2 Coating 3 Three Copies of Each Page Collated in Page Order IMPORTANT...
- Page 30 ■ If No Finishing Mode Is Set: If the Collate and Staple modes are not set, coated preprinted paper is output as follows: Preprinted Paper Coatings ■ If the Hole Punch Mode Is Set: The machine punches two or four holes in the output. Preprinted Paper Coating ■...
-
Page 31: Page Order (Collate)
Page Order (Collate) ➞ Load the preprinted paper into a paper source press [Finishing]. NOTE For instructions on loading preprinted paper, see "Loading Preprinted Paper," on p. 1-8. Press [Collate (Page order)]. The optional Finisher-AA1 or Saddle Finisher-AA2 and Punch Unit-L1 are attached. If you want to make hole punches, press [Hole Punch]. -
Page 32: Page Order (Staple)
Page Order (Staple) IMPORTANT When coating special types of paper, such as heavy paper or transparencies, be sure to correctly set the paper type, especially if you are using heavy paper. If the type of paper is not set correctly, it could adversely affect the quality of the image. Moreover, the fixing unit may become dirty, or the paper could jam, and a service repair may be needed. - Page 33 ● If the optional Saddle Finisher-AA2 is attached: ❑ Press [Next]. ❑ Select the stapling type ([Corner], [Double], or [Saddle Stitch]). If you want to select [Corner] or [Double]: • ➞ ➞ Press [Corner] or [Double] select the stapling position press [OK].
-
Page 34: Coating Both Sides Of Preprinted Paper (2-Sided)
Coating Both Sides of Preprinted Paper (2-Sided) This mode enables you to coat both sides of a sheet of preprinted paper. You can specify the desired type of two-sided orientation, [Book Type] or [Calendar Type] for this mode. By specifying the type of two-sided orientation, the image form can be superimposed on collect position when you superimpose the image form on both sides of the preprinted paper with the Clear Coat Form Composition mode. -
Page 35: Coating Features
Coating Features CHAPTER This chapter explains how to use the Coating features. Coating Full Surface of Preprinted Paper (Clear Coat Entire Page) ....2-2 Coating Certain Section of Preprinted Paper (Clear Coat Form Composition). -
Page 36: Coating Full Surface Of Preprinted Paper (Clear Coat Entire Page)
Coating Full Surface of Preprinted Paper (Clear Coat Entire Page) The Clear Coat Entire Page mode enables you to coat the full surface of preprinted paper with the clear toner. Each toner (black, cyan, magenta, or yellow) is not used, only the clear toner is used for this mode. - Page 37 Load the preprinted paper into a paper source. NOTE For instructions on loading preprinted paper, see "Loading Preprinted Paper," on p. 1-8. Select the loaded preprinted paper. NOTE For instructions on selecting preprinted paper, see "Selecting Preprinted Paper (Paper Select)," on p. 1-9. Press [Clear Coat Entire Page].
-
Page 38: Coating Certain Section Of Preprinted Paper
Coating Certain Section of Preprinted Paper (Clear Coat Form Composition) The Clear Coat Form Composition mode enables you to superimpose a previously scanned image as a clear image, which has been stored in the hard disk of the machine (image form), on the preprinted paper. Each toner (black, cyan, magenta, or yellow) is not used, only the clear toner is used for this mode. - Page 39 NOTE • If you select paper that has no printing on it, and copy/print on it with each toner (black, cyan, magenta yellow or clear), see Chapter 4, "Special Copying and Mail Box Features," in the Copying and Mail Box Guide. •...
- Page 40 ➞ Select the image form to be superimposed over the original press [OK]. To check the images stored as forms, Press [Preview]. To print a sample of the images stored as forms, Press [Check Print]. Image forms stored in the RGB colour format are indicated with a icon.
- Page 41 Press [Done]. Press [Enter No. of Sheets] to specify the number of sheets to be coated. Press [Enter No. of Copies] to specify the number of copies to be coated. If necessary, specify the Finishing mode settings. NOTE • For instructions on the Finishing mode, see "Collating Coated Paper (Finishing)," on p.
-
Page 42: Cancelling A Job
Cancelling a Job Using the Touch Panel Display Press [Cancel] on the pop-up screen that appears while the machine is coating or waiting to coat. The coating is cancelled. Using the System Monitor Screen Press [System Monitor]. Cancelling a Job... - Page 43 ➞ ➞ Press [Print Status] [Status] select the coating job that ➞ you want to cancel press [Cancel]. You cannot select multiple jobs and cancel them all at once. Select and cancel one job. Press [Yes]. The coating job is cancelled. NOTE The cancelled job is displayed as <NG>...
-
Page 44: Reserving Jobs
Reserving Jobs You can set the machine to coat the preprinted paper even while it is printing or waiting to process a job. IMPORTANT You can not set the machine to coat the preprinted paper while the machine is coating with the Coating mode. - Page 45 Reserving Coating Jobs Press [Done] on the pop-up screen that appears while the machine is printing. NOTE Screen below is the Regular Copy Basic Features screen. Press [Coating] to display the Coating Features screen. Load the preprinted paper into a paper source. NOTE For instructions on loading preprinted paper, see "Loading Preprinted Paper,"...
-
Page 46: Using The Stack Bypass
Using the Stack Bypass Reserved printing using the stack bypass is possible only if paper is being fed from the stack bypass for the current job. The following example assumes that A3 plain paper is being fed from the stack bypass for the current job, and that you are selecting A4 plain paper to be fed from the stack bypass for a reserved job. - Page 47 Press [Done] on the pop-up screen that appears while the machine is printing. NOTE Screen below is the Regular Copy Basic Features screen. Press [Coating] to display the Coating Features screen. ➞ ➞ Set the desired coating modes Press [Paper Select] Press [Stack Bypass Settings].
- Page 48 Select the desired paper size and type. NOTE • If you select [Transparency] or [Labels], make sure that you do not specify any Finishing modes (Collate or Staple). • If Stack Bypass Standard Settings in Common Settings (from the Additional Functions screen) is set to 'On', and the paper size/type have been stored, the selected paper size/type are displayed on the screen.
- Page 49 ● If you want to select a nonstandard paper size: ❑ Press [Irreg. Size]. ❑ ➞ Press [X] (horizontal axis) enter a value. ❑ ➞ Press [Y] (vertical axis) enter a value. ❑ Press [OK]. You can also press a size key in which a paper size is registered ([S1] to [S5]), instead of entering a value.
- Page 50 NOTE If there is more than one reserved job waiting to print, only the last paper size/type specified for the reserved print job is shown on the Paper Select screen. Press [Done]. This completes the settings for reserving a print job using the stack bypass. The subsequent steps show you how to start coating and load paper into the stack bypass.
- Page 51 Select the desired paper size and type. ➞ If the following screen is displayed, adjust the width of the slide guides specify ➞ the paper size press [OK]. If the following screen is displayed, adjust the width of the slide guides to match the paper size stored in Stack Bypass Standard Settings, or set Stack Bypass Standard Settings to 'Off' in Common Settings (from the Additional Functions screen).
- Page 52 ● If you want to select a standard paper size: ❑ ➞ Select the desired paper size press [Next]. NOTE To select an inch paper size, press [Inch-size]. ❑ Select the paper type. ➞ If the desired paper type is not displayed, press [Detailed Settings] select ➞...
-
Page 53: Checking The Result Of Coating (Sample Coat)
Checking the Result of Coating (Sample Coat) Before coating multiple copies, you can coat a sample of it to check the results of coating. IMPORTANT • If an optional finisher is attached, [Sample Coat] appears only when you set to coat multiple copies in the Collate, Offset Collate or Staple mode. - Page 54 ➞ Check the sample coat select [Start Coating] or [Cancel]. ● To coat the remaining coatings: ❑ Press [Start Coating]. ● To cancel coating: ❑ Press [Cancel]. 2-20 Checking the Result of Coating (Sample Coat)
- Page 56 CANON INC. 30-2, Shimomaruko 3-chome, Ohta-ku, Tokyo 146-8501, Japan CANON U.S.A., INC. One Canon Plaza, Lake Success, NY 11042, U.S.A. CANON CANADA INC. 6390 Dixie Road Mississauga, Ontario L5T 1P7, Canada CANON EUROPA N.V. Bovenkerkerweg 59-61 1185 XB Amstelveen, The Netherlands (See http://www.canon-europe.com/ for details on your regional dealer)