Table of Contents
Advertisement
Quick Links
Advertisement
Table of Contents

Related Manuals for Lakeland 63411


Summary of Contents for Lakeland 63411
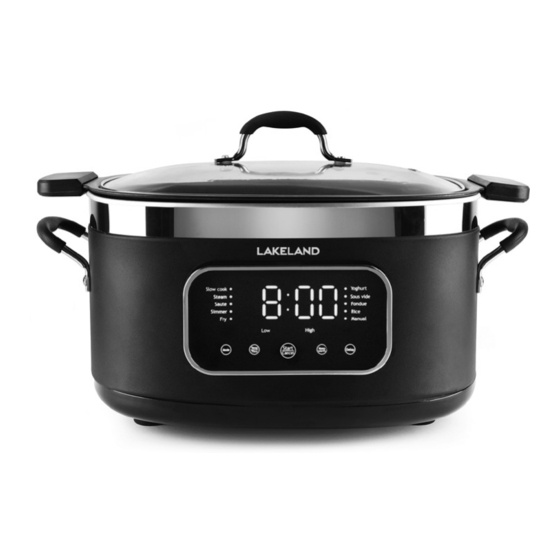
- Page 1 INSTRUCTION BOOKLET 5.5L DIGITAL SLOW AND MULTI COOKER Model: 63411...
- Page 2 The other added features are the delay start for up to 24 hours, and the keep warm function for up to 12 hours. Here at Lakeland, our award-winning family-owned business still offers the same excellent quality, value for money and exceptional customer service as when we founded the company back in the 1960s.
-
Page 3: Table Of Contents
CONTENTS Product features ......................4-5 Safety cautions ......................6-8 Using your Digital Slow and Multi Cooker for the first time ..........9 Control panel ....................... 10 Instructions for use ....................11-15 A guide to ingredients and hints and tips ..............16 Adapting your hob top recipes for slow cooking ............ -
Page 4: Product Features
PRODUCT FEATURES 1. Glass lid with handle 2. Cooking pot 3. Base unit with handles 4. Control panel 5. Cord and plug 6. Steam rack 7. Sous vide rack 8. Frying basket... - Page 5 PRODUCT FEATURES CONTROL PANEL 9 10 °C Slow cook Yoghurt Steam Sous vide Saute Fondue Simmer Rice Manual High Start Temp Keep Mode Delay warm Time Cancel 9. Timer display 10. Temperature display 11. Mode indicator 12. Decrease button 13. Mode indicator 14.
-
Page 6: Safety Cautions
In the event of damage, or if the appliance develops a fault, contact the Lakeland customer care team on 015394 88100. • Do not use this appliance if the lead is damaged. Contact Lakeland customer care team on 015394 88100. - Page 7 • Do not connect this appliance to an external timer or remote control system. • An extension cable may be used with care. The electrical rating of the cable should be at least as great as the appliance. Do not allow the cable to hang over the edge of the worktop or touch any hot surfaces.
- Page 8 WARNING – HOT SURFACES The surfaces marked with this symbol will get very hot during use. To prevent injury, DO NOT TOUCH. Let the product cool completely before touching these surfaces, and always use the handles to move the appliance or lift the lid. Take care when removing the lid, tilt it away from you to prevent being scalded by hot steam.
-
Page 9: Using Your Digital Slow And Multi Cooker For The First Time
USING YOUR DIGITAL SLOW AND MULTI COOKER FOR THE FIRST TIME • Unpack the Digital Slow and Multi Cooker, remove all of the packaging materials. • Before first use, wipe the outside of the Digital Slow and Multi Cooker with a clean, damp cloth. -
Page 10: Control Panel
CONTROL PANEL • The Digital Slow and Multi Cooker has 11 pre-set programme settings so cooking times can be adapted. Meals can be slowly simmered all day long, or can be ready in just a few hours. Over time you will develop a feel for how long your favourite recipes take. •... -
Page 11: Instructions For Use
INSTRUCTIONS FOR USE • This Digital Slow and Multi Cooker has a working capacity of 5.5 litres, to allow for bubbling and simmering. • Prepare your ingredients. Put them inside the cooking pot and add the lid. • The Digital Slow and Multi Cooker should be at least half full. •... - Page 12 All cooking times are approximate, and will vary according to your recipe and choice of ingredients. COOK ON LOW COOK ON HIGH Recipe cooking time 8 to12 hours 4 to 6 hours PLEASE NOTE: Lifting the lid of the Digital Slow and Multi Cooker during cooking results in temperature loss and adds about 25 minutes to the cooking time.
- Page 13 SIMMER FUNCTION • Place the ingredients in the cooking pot. • Press MODE button to choose Simmer function. • The temperature is preset on this function and only the time can be changed. • The default cooking time is 2 hours. To change the time, press the TEMP/TIME button and the –...
- Page 14 • After setting, press the START/CANCEL button to start the cooking. The six dots will appear and slowly flash to show that the function has started. • When the appliance has reached the end of the cooking process it will beep continuously and ‘End’...
- Page 15 • There is no time displayed during this function, as the appliance works off a moisture sensor. • The control panel display will show ON. • After setting, press the START/CANCEL button to start cooking. The six dots will appear and slowly flash to show that the function has started.
-
Page 16: A Guide To Ingredients And Hints And Tips
A GUIDE TO INGREDIENTS AND HINTS AND TIPS • To ensure even cooking, cut meat and vegetables into similar sized pieces so they cook evenly. Root vegetables often take longer to cook than meat, so they should be diced or chopped more finely. •... -
Page 17: Recipes
RECIPES PLEASE NOTE: That all spoon measurements are standard metric, so 1 tsp is 5ml and 1 tbsp is 15ml. We recommend using measuring spoons for accurate results. MEATBALLS IN TOMATO SAUCE – Serves 6 Ingredients Quantity White bread 2 slices (90g) crusts removed Milk 125ml Minced beef... - Page 18 ASIAN STYLE SALMON FILLETS – Serves 2 Ingredients Quantity Chilli Salmon fillets 2 (225-250g in total) Soy sauce 1 tbsp Sugar ½ tsp Fish sauce 1 tbsp WHAT TO DO: Deseed and finely chop the chilli. Put the fish into a vacuum bag, add the chilli, soy sauce, sugar and fish sauce. Vacuum seal the bag according to the sealer instructions.
-
Page 19: Attaching The Frying Basket Handle
ATTACHING THE FRYING BASKET HANDLE 1. Take the basket handle with the two metal prongs facing downwards. 2. Squeezing the prongs together, slot them in between the bar and back of the basket. 3. Locate the ends of the two metal prongs in the two holes. -
Page 20: Frying
FRYING WARNING: Do not heat the Fryer without putting oil in the cooking pot first. Oil must be filled to the minimum level and must not exceed the maximum level. WARNING: Do not use the Fryer under wall-mounted cupboards, which may prevent the lid fully being removed. Do not leave the Fryer unattended when it is switched on. -
Page 21: A Guide To Frying Ingredients And Cooking Times
9. Switch off at the socket and unplug the appliance. 10. Lift up the basket by the handle and hook on the edge of the cooking pot to allow the oil to drain. 11. Once the oil has drained from the basket, the basket may be lifted off. Place your cooked food on kitchen paper to soak up any excess oil, then serve. -
Page 22: Frying Hints And Tips
FRYING HINTS AND TIPS • We recommend using vegetable oil, corn oil or rapeseed oil. Always check your oil is recommended for deep frying. Do not mix different oils or new and old oil together. • Always start with clean oil. To keep your oil clean, strain out any pieces of food after use, and replace the oil completely after 10 uses, or longer than 6 months. -
Page 23: Making Home-Made Yoghurt
MAKING HOME-MADE YOGHURT Yoghurt makes yoghurt! Yoghurt is a live milk product, which can reproduce itself in warm conditions. Easy and inexpensive to make at home, all you need is some natural live yoghurt and milk to get started. GUIDE TO TIMINGS Different types of milk take different amounts of time to turn into yoghurt. -
Page 24: A Guide To Yoghurt Ingredients And Hints And Tips
A GUIDE TO YOGHURT INGREDIENTS AND HINTS AND TIPS THE STARTER • Use unflavoured plain natural yoghurt, the freshest available with a long ‘Use By’ date. The probiotics in the starter yoghurt are what helps turn the milk into yoghurt. •... - Page 25 BAKING WITH YOGHURT You can experiment using yoghurt as a healthy substitute when baking. Low-fat yoghurt (made with semi skimmed or skimmed milk) can be used to reduce or replace shortening, oil, butter or sour cream. It adds a creamy texture to your recipes. When a recipe calls for butter, replace ½...
-
Page 26: Yoghurt Serving Suggestions
YOGHURT SERVING SUGGESTIONS PLEASE NOTE that all spoon measurements are standard metric, so 1tsp is 5ml and 1 tbsp is 15ml. We recommend using measuring spoons for accurate results. Flavourings should be added after the yoghurt is made, never before. For the freshest flavours add the fruit or flavouring just before you eat the yoghurt. -
Page 27: Frequently Asked Questions
FREQUENTLY ASKED QUESTIONS Question: Why are no indicator lights illuminated? Answer: Check that there is no debris underneath the cooking pot on top of the heating plate, if so remove the debris. Replace the cooking pot. There may be damage to the heating plate or the power cable. Make sure that the appliance is properly connected to the cable, plugged in and switched on at the wall socket. -
Page 28: Care And Cleaning
CARE AND CLEANING • Unplug the Digital Slow and Multi Cooker and allow to cool completely before cleaning. • Clean thoroughly before using for the first use and after every use. • Check the parts for wear or damage after every few uses. •... -
Page 29: Technical Information
EU Directives: 2014/35/EU (Low Voltage Directive) and 2014/30/EU (EMC Directive). RECYCLING YOUR ELECTRICALS Along with many other high street retailers, Lakeland has joined a scheme whereby customers can take their unwanted electrical products to recycling points set up around the country. - Page 32 Lakeland Alexandra Buildings, Windermere, Cumbria, UK LA23 1BQ Tel: +44(0)15394 88100 lakeland.co.uk...
Need help?
Do you have a question about the 63411 and is the answer not in the manual?
Questions and answers