Advertisement
What's the Difference Between Blink XT and
XT2
There are a few subtle differences between the Blink XT and XT2 camera. We will cover those
differences in this article.
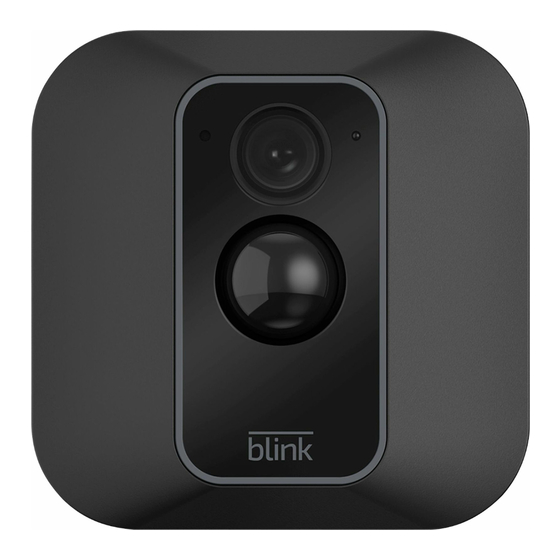
First and most important is the speaker in the bottom. You'll see 15 small holes on the bottom of
the camera. This is where the sound comes out when you're talking to someone you see on
camera. This speaker is what enables the XT2 to have two-way audio.
The next difference is on the front of the camera. The blink logo on the bottom and the outline of
the center plastic is a light shade of grey on the new XT2.
Advertisement
Table of Contents

Related Manuals for Blink XT2


Summary of Contents for Blink XT2
- Page 1 This speaker is what enables the XT2 to have two-way audio. The next difference is on the front of the camera. The blink logo on the bottom and the outline of the center plastic is a light shade of grey on the new XT2.
- Page 2 The last and most noticeable difference, is on the back of the camera. You will see a XT2 logo on the cameras back battery cover.
- Page 3 This article will show you how to mount your new Blink XT2 camera. Your Blink XT2 comes with a camera mount, mount riser, and two screws in the box. If you would like to order more, you may do so at amazon.com.
- Page 4 Once the mount (and optional mount riser) is securely in place, you will snap the camera onto the mount. The circle portion of the mount will connect to the center circle on the back of the XT2 camera.
- Page 5 Once mounted, you can rotate the camera on the mount itself to get the perfect viewing angle. When positioning your camera, remember the best motion detection occurs when a subject walks across the field of view from one side to another rather than directly toward or away from the camera.
- Page 7 How to use Two-Way Audio...
- Page 8 Our new XT2 camera has two-way audio. Here is a guide to help use this new feature. First, tap on the Live View button for any of your Blink XT2 cameras. This button is in the bottom left corner of the camera photo.
- Page 9 To use two-way audio you must press and hold on this button. Once you press the button wait 1- 2 seconds, then begin speaking. Your voice will come out through the speaker on the bottom of your XT2 camera!
- Page 10 When you’re done speaking, we recommend taking your finger off the Talk button instead of holding it for the entire conversation. After 5 minutes, your Live View will stop and you’ll have to re-initiate another Live View session.
Need help?
Do you have a question about the XT2 and is the answer not in the manual?
Questions and answers