Table of Contents
Advertisement
Advertisement
Table of Contents

Related Manuals for Alesis AI-3


Summary of Contents for Alesis AI-3
- Page 1 ALESIS AI-3 Reference Manual...
-
Page 2: How To Use This Manual
Introduction Thank you for purchasing the Alesis AI-3 20-bit Analog-Optical Interface. To take full advantage of the AI-3’s functions, and to enjoy long and trouble free use, please read this user’s manual carefully. How To Use This Manual This manual is divided into the following sections describing the various features of the AI-3. -
Page 4: Safety Symbols Used In This Product
The wide blade or the third prong are provided for your safety. When the provided plug does not fit into your outlet, consult an electrician for replacement of the obsolete outlet. AI-3 Reference Manual Introduction AFETY... - Page 5 Do not operate for a long period of time at a high volume level or at a level that is uncomfortable. If you experience any hearing loss or ringing in the ears, you should consult an audiologist. AI-3 Reference Manual...
-
Page 6: Instructions De Sécurité Importantes (French)
Dans toute installation, veillez de ne rien endommager à cause de câbles qui tirent sur des appareils et leur support. 13. Débranchez l’appareil lors d’un orage ou lorsqu’il n’est pas utilisé pendant longtemps. AI-3 Reference Manual Introduction... - Page 7 Ne l’utilisez pas pendant longtemps à un niveau sonore élevé ou à un niveau non confortable. Si vous remarquez une perte de l’ouïe ou un bourdonnement dans les oreilles, consultez un spécialiste. AI-3 Reference Manual...
-
Page 8: Beim Benutzen Dieses Produktes Beachten Sie Bitte Die Folgenden Sicherheitshinweise: (German)
Betreiben Sie es nicht über längere Zeit mit hoher Lautstärke oder einem Pegel, der Ihnen unangenehm is. Wenn Sie ein Nachlassen des Gehörs oder ein Klingeln in den Ohren feststellen, sollten Sie einen Ohrenarzt aufsuchen. AI-3 Reference Manual Introduction... -
Page 9: Ce Declaration Of Conformity
1633 26th Street Santa Monica, CA 90404 AI-3 Analog-Optical Converter EN 55103:1997 Class B (All tests were performed with fully-shielded cabling) EN 60065 Sound Technology plc 17 Letchworth Point, Letchworth, Hertfordshire, SG6 1 ND, England Phone: +44.1462.480000 Fax: +44.1462.480800 AI-3 Reference Manual... -
Page 10: Table Of Contents
Recording with ADAT/EDIT... 18 Recording with ADAT/EDIT and an ADAT ... 18 Adding Analog Inputs to a Digital Mixer ... 19 Using the AI-3 as a Digital Snake ... 20 4: Troubleshooting ... 21 Troubleshooting Index... 21 Maintenance/Service ... 21 Cleaning... - Page 11 Contents AI-3 Reference Manual...
-
Page 12: 1: Connections
Alesis, please take the time to do so now. Analog Connections The AI-3 has eight analog inputs and outputs. These are designed for line level (not mic level) signals, such as those from a mixing console or recorder. -
Page 13: Balanced Vs. Unbalanced
Operating Level” switch on the front panel. Digital Connections The AI-3 has an ADAT Optical Digital Input and Output on its rear panel. These digital connectors cannot accept a S/PDIF Optical Digital signal (from a DAT, CD or DVD player, for example) without first being converted to the ADAT Optical format. -
Page 14: Powering Up
Are the volume controls of the amplifier or mixer turned down? Insert the end of the IEC power cable into the [POWER] input on the rear panel of the AI-3 and plug the other end into a wall jack. Flip the Power switch to the up position. -
Page 15: Avoiding Ground Loops
In some cases, a “star grounding” scheme must be used, with the mixer at the center of the star providing the shield ground on telescoping shields, which do NOT connect to the chassis ground of other equipment in the system. AI-3 Reference Manual... -
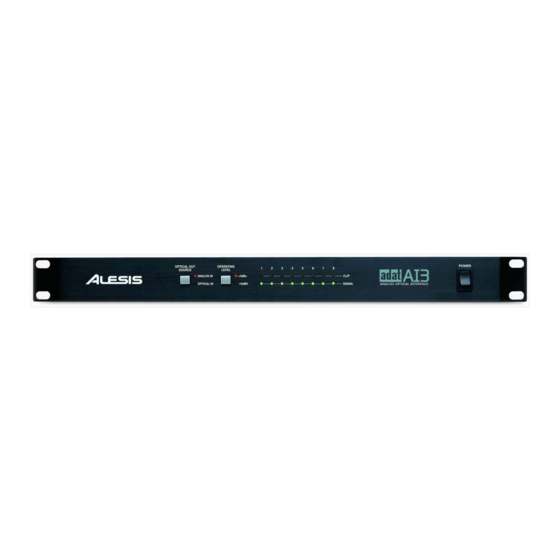
Page 16: 2: Front Panel Controls
Input meters read CLIP may be distorted. Power switch. The Power switch turns the unit on. This is the most important control on the front panel of the AI-3 – the wrong setting of this switch negates any other advice given in this manual. -
Page 17: The Optical Out Source Switch
Optical Out Source: Analog In ANALOG IN Analog In is the typical mode for the AI-3 to be used in. The eight analog inputs are sent to the ADAT Optical Digital Out, and the ADAT Optical Digital In is sent to the eight analog outputs. -
Page 18: Digital Clock
How does this affect the AI-3? The easiest way to use an AI-3 in a digital studio is to make sure that the digital input is always connected. When digital clock is coming into the AI-3’s digital input, it automatically slaves to this clock source. -
Page 19: Recording With Adat/Edit
In this setup, when you press Play on the ADAT/EDIT software, the audio will play through the AI-3 into the mixer. When you plug a microphone into the mixer, you can route it to the Group Outputs to send it through the AI-3 into the PCR card to be recorded in ADAT/EDIT. -
Page 20: Adding Analog Inputs To A Digital Mixer
ADAT’s Digital In. Next, the Digital Out of the ADAT is connected to the Digital In of the AI-3, and the Digital Out of the AI-3 is connected to the Digital In of the computer’s PCR card. In this system, you can record into the computer by playing audio into the AI-3’s analog inputs, and monitor through the ADAT’s analog... -
Page 21: Using The Ai-3 As A Digital Snake
20-bit digital signals and routed up to 33 feet (10 meters) away to another AI-3 or ADAT optical device. (See page 12 for more information about optical cables.) The advantages to this system are: •... -
Page 22: 4: Troubleshooting
Maintenance/Service Cleaning Disconnect the AC cord, then use a damp cloth to clean the AI-3’s metal and plastic surfaces. For heavy dirt, use a non-abrasive household cleaner such as Formula 409 or Fantastik. DO NOT SPRAY THE CLEANER DIRECTLY ONTO THE FRONT OF THE UNIT AS IT MAY DESTROY THE LUBRICANTS USED IN THE SWITCHES AND CONTROLS! Spray onto a cloth, then use cloth to clean the unit. -
Page 23: Obtaining Repair Service At Alesis
Alesis Service Center, you do not need an RO number. Just bring the unit and a copy of your sales receipt to the service center – Alesis will take care of the rest. Unless you are sending the unit to Alesis for repair, you do not need an RO number. -
Page 24: Analog Output
Signal to Noise (A-wtg.): Dynamic Range (-60dBfs, 1kHz): THD+Noise (-0.5dBfs, 1kHz): Front Panel Buttons Indicators AI-3 Reference Manual 1/4" balanced -10 dBV or +4dBu, front- panel adjustable +10 dBV 1M /channel stereo, 500k /channel mono 20 bit Sigma-Delta, 128 times oversampling 20Hz to 20 kHz, (+0.05dB/-0.10dB balanced,... -
Page 25: Rear Panel
1/4" 3-conductor 1/4" 3-conductor EIAJ fiber optical jack, ADAT Optical digital format EIAJ fiber optical jack, ADAT Optical digital format IEC jack 90V-250V AC, 50/60Hz 19” x 1.75” x 6” (483mm x 45mm x 153mm) 4.5lbs. (2kg.) AI-3 Reference Manual...
Need help?
Do you have a question about the AI-3 and is the answer not in the manual?
Questions and answers