
Related Manuals for LEGRAND bticino MyHOME Smarther SXG8002


Summary of Contents for LEGRAND bticino MyHOME Smarther SXG8002
- Page 1 Smarther SXG/SXM/SXW8002 – XW/SXW8002W – XW/XM/XG8002 0 490 38 – 0 490 39 – 0 490 40 User and installation manual www.homesystems-legrandgroup.com...
- Page 2 Smarther User and installation manual...
-
Page 3: Table Of Contents
Smarther User and installation manual Contents Your Smarther, use it now! Heat your home immediately (Boost) Set the temperature Installation Flush-mounted installation (SXG8002 / SXM8002 / SXW8002) With 503E boxes With 500 boxes With 502PB boxes Wall-mounted installation SXW8002W Front view Symbols on the display Rear view SXG8002 / SXM8002 / SXW8002... - Page 4 Smarther User and installation manual Settings Manage my home Home parameters Room settings Smarther settings Valve settings Parameters Schedules Create a new program Duplicate a program Rename a program Change a time interval Activate a program Delete a program Copy-paste the days Set point Example of creation of a new program from an existing one Thermal comfort...
-
Page 5: Your Smarther, Use It Now
Smarther User and installation manual Your Smarther, use it now! Heat your home immediately (Boost) You can switch your system on quickly with the BOOST function ACTIVATION FROM DEVICE FROM APP 1. Touch to activate the function 2. Select the switching-on period from 30/60/90 minutes 3. -
Page 6: Set The Temperature
Smarther User and installation manual Set the temperature ACTIVATION FROM DEVICE FROM APP 1. From the Smarther scroll to display the temperature setting page or, from the App, touch the icon 2. From the Smarther touch the keys to increase or decrease the temperature, or from the App touch to increase or decrease the temperature. -
Page 7: Installation
Smarther User and installation manual Installation Flush-mounted installation (SXG8002 / SXM8002 / SXW8002) Recommended height, unless different regulations are specified With 503E boxes... -
Page 8: With 500 Boxes
Smarther User and installation manual With 500 boxes With 502PB boxes Caution: avoid tightening the screws too much, in order to prevent any base distortion that may compromise the correct installation of the device. The front must be tightly fixed to the base and the fastening clip should lock into place. Once the installation has been done, wait for 2 hours before checking the read temperature. -
Page 9: Wall-Mounted Installation Sxw8002W
Smarther User and installation manual Wall-mounted installation SXW8002W Recommended height, unless different regulations are specified. Caution: avoid fastening the base on irregular surfaces and excessive screw tightening, in order to prevent any base distortion that may compromise the correct installation of the device. The front must be tightly fixed to the base and the fastening clip should lock into place. -
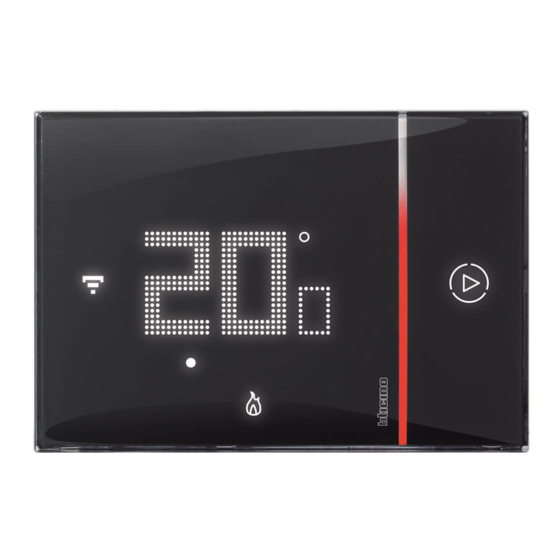
Page 10: Front View
Smarther User and installation manual Front view Note: the , , , icons are only on when the device is on. If the device is in stand by the icons will be off 1. Touch screen display 2. Temperature/humidity display 3. -
Page 11: Symbols On The Display
Smarther User and installation manual Symbols on the display Icon Meaning SYSTEM IN HEATING MODE: The Smarther is set with a default temperature of 7 °C winter. You can set this condition from the App or manually, Smarther "OFF" increasing or decreasing the temperature to the default values. -
Page 12: Rear View
Smarther User and installation manual Rear view SXG8002 / SXM8002 / SXW8002 BTICINO V.le Borri, 231 21100 (VA) ITALY 110 - 240 V 50/60 Hz 2 W max. 5(2) A 1. Connection clamps (see diagrams) Wiring diagrams System only for heating with clean contact (e.g. boiler activation) BTICINO V.le Borri, 231 21100 (VA) ITALY... -
Page 13: Sxw8002W
Smarther User and installation manual Heating and cooling with floor system BTICINO V.le Borri, 231 21100 (VA) ITALY 110 - 240 V 50/60 Hz 110 – 240 Vac, 50/60 HZ 2 W max. TO THE HEATING AND COOLING SYSTEM 5(2) A WITH FLOOR SYSTEM Heating and cooling with different systems 110 –... -
Page 14: Wiring Diagrams
Smarther User and installation manual Wiring diagrams System only for heating with clean contact (e.g. boiler activation) 110 – 240 Vac, 50/60 HZ TO THE HEATING SYSTEM (CLEAN CONTACT) (ON/OFF) System only for heating with load to be controlled to the mains voltage (e.g. 230Vac solenoid valve or other loads, contact output 5(2) A) 110 –... -
Page 15: Technical Data
Smarther User and installation manual Technical data Power supply 110 – 240 Vac , 50/60Hz Absorption 2 W max Maximum cable section 1 x 1,5mm2 Contact output 5(2) A Operating temperature 5 – 40 °C 5 – 30 °C heating; increase of 0,5 °C Setpoint temperature 5 –... -
Page 16: Operation
Smarther User and installation manual Operation In basic mode the Smarther allows you to adjust the temperature manually and switch the system on for a limited time (Boost mode). The advanced functions are available through the Home + Control App, which can be downloaded free from the Stores (for iOS devices from App Store, for Android devices from Play Store). - Page 17 Smarther User and installation manual Functions available and differences between newly installed Smarther and Smarther connected with App Functions Smarther just installed Smarther connected with the App (not connected) By Smarther By App Settings – Heating/cooling switch (default: heating) – Enable touch interface (default: enabled) –...
-
Page 18: Basic Functions
Smarther User and installation manual Basic functions Boost functions The Boost forces the switching on of the system for a limited time (30, 60 or 90 minutes) independent of the measured and programmed temperature. Once the time set has elapsed, Smarther will resume operation according to the previous program. 1. - Page 19 Smarther User and installation manual The display shows the measured temperature; the LED gradually switches off while the set time passes by. 3. To end the setting early touch the ; symbol; Smarther will continue operation according to the previous program.
-
Page 20: Set The Temperature
Smarther User and installation manual Set the temperature The temperature level that can be locally set refers only to the manual mode operation. 1. Touch the display 2. Scroll on the display to go to the next page 3. The current setting is displayed, change the setting with the keys... - Page 21 Smarther User and installation manual Once the setting is complete wait for a few seconds. The display will show the measured temperature...
- Page 22 Smarther User and installation manual Note: when the thermal (7 °C) protection temperatures are set, the display will show the switching-off symbol...
-
Page 23: Room Humidity Display
Smarther User and installation manual Room humidity display Smarther contains a sensor that detects the humidity percentage in the room; follow the procedure described below to display the measured value. 1. Touch the display 2. Scroll twice on the display to go to the dedicated page The measured humidity percentage is visible for a few seconds, then the measured temperature display will appear again. -
Page 24: Control The Smarther With Home + Control App
Smarther User and installation manual Control the Smarther with Home + Control app Introduction You can program the Smarther with the free Home + Control App. To do this you must: 1. Download the App from the Stores 2. Register and create an account 3. -
Page 25: Download The Home + Control App
Smarther User and installation manual Download the Home + Control app In order to remotely control your Smart system, first of all download the app from the Stores (for iOS® devices from App Store, for Android® devices from Play Store) 1. -
Page 26: Account Registration
Smarther User and installation manual Account registration You must first register to be able to use the Home + Control App and thus use the Smarther advanced functions. After opening the app follow the registration instructions: 1. Touch to register and create an account otherwise use your credentials if you are already registered 2. -
Page 27: Preliminary Operations For The Use Of A Smartphone With Ios Operating System
Mac, and Siri are trademarks of Apple Inc., registered in the U.S. and other countries. HomePod, tvOSi zijn geregistreerde handelsmerken van Apple Inc. App Touch to enable the forwarding of news and promotions regarding Legrand group products iPadOS, Multi-Touch, and tvOS are trademarks of Apple Inc. App Store, iCloud, and iTunes Store are in de V.S. - Page 28 Smarther User and installation manual – on the protective film of the Smarther Download HOME + CONTROL Download HOME + CONTROL App HOMEKIT CODE 1 2 3 4 5 6 7 8 – on the back of the Smarther HOMEKIT CODE 1 2 3 4 5 6 7 8...
-
Page 29: Associate The Smarther
Smarther User and installation manual Associate the Smarther At this point the system will show you a tutorial to help you associate to your Smarther. Note: before starting the association with the system, establish the connection with the home Wi-Fi A Touch if you have been invited to manage the home by a user 1. -
Page 30: If You Use A Smartphone With Android Operating System
Smarther User and installation manual if you use a smartphone with Android operating system 3. Touch to start the configuration 4. Touch to enable the device location 5. Touch to allow Home + Control to access the Smartphone position A Opens the FAQ to help in the resolution of the problem 6. - Page 31 Smarther User and installation manual 7. Press to continue 8. The Smarther shows the blue Wi-Fi symbol. Touch it to continue the configuration A Indicates that you are trying to complete the association using an incorrect App...
- Page 32 Smarther User and installation manual 9. Touch to confirm the suggested home Wi-Fi network, otherwise touch (A) to select a different 10. Enter the home Wi-Fi password 11. Touch to continue 12. Select the Smarther 13. Touch if this is the first Smarther installation 14.
- Page 33 Smarther User and installation manual 15. Enter a name for the home 16. Touch to create a new Home + Control home 17. Touch to create a new room 18. Select the type of room where the Smarther has been installed 19.
-
Page 34: If You Use A Smartphone With Ios Operating System
Smarther User and installation manual If you use a smartphone with iOS operating system 3. Touch to start the configuration 4. Select to complete a new installation A Touch if you have been invited to manage the home by a user 5. - Page 35 Smarther User and installation manual 6. Press to continue 7. The Smarther shows the blue Wi-Fi symbol. Touch it to continue the configuration A Indicates that you are trying to complete the association using an incorrect App...
- Page 36 Smarther User and installation manual 8. Enter a name for the home 9. Press to continue Prepare the HOMEKIT code (see Preliminary operations for the use of a smartphone with iOS operating system) 10. Press to scan the HOMEKIT code Download HOME + CONTROL App Download HOME + CONTROL App 11.
- Page 37 Smarther User and installation manual 12. If the code is not detected automatically, or if it cannot be scanned, touch to open the manual entry page 13. Touch the Smarther detected nearby 14. Touch to allow the Smarther to access the Wi-Fi network 15.
- Page 38 Smarther User and installation manual 17. Touch to select the scenarios where you want to include the Smarther 18. Touch to continue. 19. Touch to end the configuration of the HOMEKIT App 20. Touch if this is the first Smarther installation 21 Touch to confirm that this is the first installation 22.
- Page 39 Smarther User and installation manual 23. If necessary touch to rename the room 24. Touch to confirm 25. Customise the Smarther name 26. Touch to confirm 27. The Smarther is configured correctly; touch to create a program using the guided procedure (the same for both Android and iOS systems)
-
Page 40: Create A Program Using The Guided Procedure
Smarther User and installation manual Create a program using the guided procedure At this point, through questions you have to answer, the procedure proposes to create a program to adjust the temperature. It is possible to learn more about the program operation in the Schedules chapter 1. - Page 41 Smarther User and installation manual 9. Select if during the week you normally come back home for lunch or not. 10. Touch to confirm 11. Set the time interval time limits (when you get up and when you go to bed during the weekend) 12.
- Page 42 Smarther User and installation manual 17. Select a temperature that you consider comfortable when you are at home during the day. 18. Touch to continue. 19. Touch to end, the Home Page appears...
-
Page 43: Access Your Home Through Invitation
Smarther User and installation manual Access your home through invitation You can access the Smart system created by your installer, or one of your family members, following the steps shown below. Note: all the users have the same control, invitation and modification authorities. Download the app from the Stores –... -
Page 44: Forgotten Password
Smarther User and installation manual Forgotten password When you have forgotten the password: 1. Touch to open the login page 2. Touch to activate the password recovery procedure 3. Enter the email address, to which the system will send the link for changing the password 4. -
Page 45: Authentication
Smarther User and installation manual A message will confirm that the password has been changed successfully; open the App to insert the authentication data Authentication After registering with the portal, you can authenticate by entering email and password. A Touch to create a new account 1. -
Page 46: Home Page
Smarther User and installation manual Home Page After logging in, from this page you can manage the temperature inside your home, using the Smarther and/or the Netatmo valves. The elements displayed in the Home Page depend on your home setup, for example split into rooms, with a device for every room, or several devices in the same room, and therefore the temperature management controls available;... - Page 47 Smarther User and installation manual It opens a section where it is possible to change some settings regarding the individual rooms and devices, or the settings of Manage my home the whole home. It is also possible to set some Smarther parameters It opens the section, where it is possible to create and manage Schedules the programs...
-
Page 48: Control A Single Device
Smarther User and installation manual Control a single device It is possible to set the temperature and activate boost operation. The settings will only affect the device inside the room Set the temperature This function allows to set a temperature A visual and text indication will indicate the remaining time. - Page 49 Smarther User and installation manual Decreasing the temperature below 7.5 °C will cause the activation of the Frost guard function, which on a heating system only allows to keep a minimum safety temperature. 1. Touch until the indication of the set temperature falls below 7.5 °C The function is now set A Set mode indication 2.
-
Page 50: Set The Boost Function
Smarther User and installation manual Set the Boost function This function forces the switching on of the system (both heating and cooling) for a limited time (30, 60 or 90 minutes) independent of the measured or programmed temperature. Once the time set has elapsed, the Smarther will resume operation according to the previous program. -
Page 51: Control All The Devices In The Room
Smarther User and installation manual Control all the devices in the room Control all the devices in the room It is possible to set the temperature and activate boost operation. The settings will affect all the devices in the room, or select a program for the whole home. 1. -
Page 52: Control All The Home Devices
Smarther User and installation manual Control all the home devices Using the home page central button, it is possible to adjust the temperature of the home, sending commands that will affect all the devices. You can therefore activate the Frost guard Function , the "Absent" function or a program for all the home devices Absent Function This setting allows to enable the “Absent”... -
Page 53: Frost Guard Function
Smarther User and installation manual Frost guard Function This setting allows to enable the “Frost guard” function (temperature 7°C). The Frost guard function is very useful when going out for a medium-long period of time and it is necessary to keep a temperature that will prevent problems in the home system. 1. -
Page 54: Set A Program For All The Home Devices
Smarther User and installation manual Set a program for all the home devices 1. Touch to access the Schedules section 2. Touch to select a program among the ones available 3. Touch to confirm The selected program function is now active on all the home devices Schedules To create or manage new programs, see chapter. -
Page 55: Settings
Smarther User and installation manual Settings Manage my home In this section it is possible to change the settings of the individual rooms and devices, or the whole home. It is also possible to set some parameters of the devices inside the home. 1. - Page 56 Smarther User and installation manual Advanced settings In this section it is possible to set the geographical position of your home, the reference time zone, the energy source used for your home, the home type and its size. Location 1. Touch to set your home position 2.
- Page 57 Smarther User and installation manual Energy source 1. Touch to select the energy source to use for your home 2. Select the energy source among: – Electric boiler; – Gas; – Oil; – Heating pump; – Wood; Home type 1. Select the type of home in which you live 2.
-
Page 58: Room Settings
Smarther User and installation manual Home dimension 1. Enter your home dimension Room settings 1. Touch to access the room 2. Touch to open the room setting modification section A Change the room name Delete the room... - Page 59 Smarther User and installation manual Delete the room In this section, it is possible to delete a room. 1. Touch to delete the room 2. Touch to confirm Note: in order to remove a room, it will first be necessary to remove all the products installed inside the same.
-
Page 60: Smarther Settings
Smarther User and installation manual Smarther settings 1. Touch to access the room where the Smarther has been inserted 2. Touch to access the device management page A Display the Smarther available options Advanced C Display the device serial number D Display the firmware version Display the Wi-Fi signal Configure the Wi-Fi... - Page 61 Smarther User and installation manual Rename the product 1. Touch to rename the Smarther 2. Rename the Smarther with an identification name 3. Touch to confirm Move 1. Touch to move the Smarther into another room 2. Touch to select the room where you want to insert the Smarther 3.
- Page 62 Smarther User and installation manual Delete 1. Touch to remove the Smarther from your home 2. Touch to confirm...
- Page 63 Smarther User and installation manual Advanced 1. Touch to enter the advanced parameters section A Touch to select the heating algorithm Enable/disable the Smarther touch interface and the actual physical keys. If the function is disabled, it will no longer be possible to interact with the Smarther physical interface but only to display the information.
- Page 64 Smarther User and installation manual Advanced heating algorithm 1. Touch to select the algorithm to use based on the type of system: 2. Touch to select the advanced algorithm: the thermostat manages the temperature in advanced mode controlling the opening of the valves, using some parameters which depend on the type of system installed;...
- Page 65 Smarther User and installation manual Display brightness 1. Touch to select the display lighting operating logic After 10 seconds, the display switches off, goes to stand-by mode and performs the selected operating logic. 2. Select the mode among It switches off Depending on the room brightness, it adjusts the display and, in case of low brightness, adjusts it to minimum Depending on the room brightness, it adjusts the display and, in case of...
- Page 66 Smarther User and installation manual Configure the network In this section it is possible to set to which Wi-Fi network the Smarther is connected. This function is useful for example when replacing the router, or when you want to connect the Smarther to a network other than the one selected during the first installation.
- Page 67 Smarther User and installation manual 4. Press to continue 5. The Smarther shows the blue Wi-Fi symbol. Touch it to continue the configuration A Indicates that you are trying to complete the association using an incorrect App...
- Page 68 Smarther User and installation manual 6. Touch to confirm the suggested home Wi-Fi network, otherwise touch (A) to select a different 7. Enter the home Wi-Fi password 8. Touch to continue 9. Select the Smarther 10. The Smarther is configured correctly; touch to end the procedure...
-
Page 69: Valve Settings
Smarther User and installation manual Valve settings 1. Touch to access the room where the Netatmo thermostat valve has been inserted 2. Touch to access the device management page A Display the Netatmo thermostat valve available options Display the device serial number C Display the firmware version D Display the radio signal Display the battery level... - Page 70 Smarther User and installation manual Manage Valves 1. Touch to manage the device Rename the product Move Delete Rename the product 1. Touch to rename the Netatmo thermostat valve 2. Rename the Netatmo thermostat valve with an identification name 3. Touch to confirm...
- Page 71 Smarther User and installation manual Move 1. Touch to move the Netatmo thermostat valve into another room 2. Touch to select the room where you want to insert the Netatmo thermostat valve 3. Touch to confirm Delete 1. Touch to remove the Netatmo thermostat valve from your home 2.
-
Page 72: Parameters
Smarther User and installation manual Parameters Real time Depending on the position of the thermostat or the valve, it is possible to note differences between the temperature displayed on the thermostat and the temperature displayed, for example, on a thermometer; this function can be used to select the temperature displayed on the thermostat that best represents the room temperature. -
Page 73: Schedules
Smarther User and installation manual Schedules During the association of your Smarther with your Smartphone, through the answers to some questions regarding your living habits the tutorial has allowed you to create a program that manages the temperature inside the home based on your needs. The created program sets different temperatures based on time and week day;... -
Page 74: Duplicate A Program
Smarther User and installation manual Duplicate a program Via this function you can copy and if necessary modify an existing program 1. Touch to access the Programs section and create a new program* by duplication 2. Touch to select the program to copy 3. -
Page 75: Rename A Program
Smarther User and installation manual Rename a program This function allows to rename a program. 1. Touch to access the Programs section 2. Touch to display the program options 3. Touch to rename the program 4. Rename the program 5. Touch to confirm... -
Page 76: Change A Time Interval
Smarther User and installation manual Change a time interval 1. Touch to access the Programs section 2. Touch to select one of the available programs 3. Touch to select the time interval to modify 4. Touch to select the interval end date and time 5. - Page 77 Smarther User and installation manual 7. Touch to confirm the selected hours and minutes 8. Touch to confirm the modification...
-
Page 78: Activate A Program
Smarther User and installation manual Activate a program After creating the programs you must activate the one you want 1. Touch to open the Schedules menu 2. Select the program to activate 3. Touch to close the Schedules menu The program is now active... -
Page 79: Delete A Program
Smarther User and installation manual Delete a program This function gives the possibility of definitively removing an existing program. 1. Touch to access the Programs section 2. Touch to select on of the available programs 3. Select the program to delete Note: active programs cannot be deleted. -
Page 80: Copy-Paste The Days
Smarther User and installation manual Copy-paste the days This function gives the possibility of copying the profile created for a certain day to one or more days of the week. 1. Touch to enter the Programs section 2. Touch to display the available functions for the program 3. -
Page 81: Set Point
Smarther User and installation manual Set point It is possible to add or delete custom set points, for a better management of the programs on your Smarther, in addition to changing the default set point temperature. Add a set point This function gives the possibility of adding set points, customising the temperature and name based on personal needs. - Page 82 Smarther User and installation manual 9. Touch to create the customised set point 10. Touch to confirm Change a set point This function allows to change the temperature of an existing set point. E.g. 2°C increase of the comfort set point, which therefore goes from 19°C to 21°C 1.
- Page 83 Smarther User and installation manual 4. Touch to select the set point temperature 5. Scroll to select the desired temperature 6. Touch to confirm 7. Touch to confirm the modified set point 8. Touch to confirm the modification of the set point...
- Page 84 Smarther User and installation manual Delete a set point This function allows to delete the created set point. Note: set points cannot be changed by default (Comfort / Comfort + / Eco / Night). Note: only set points not appearing in a program can be deleted. Set points appearing in a program can only be deleted after being deleted from the programs for the individual days.
-
Page 85: Example Of Creation Of A New Program From An Existing One
Smarther User and installation manual Example of creation of a new program from an existing one It is possible to change a program defining the various parameters which make up the program (temperature levels, time intervals and days of application) specifically and in a totally free way. Let’s now see how we can change an existing program so that it includes the following settings: –... - Page 86 Smarther User and installation manual copy In order to create a new program meeting the previously described conditions, the existing program and then customise it: 1. Touch to access the Programs section 2. Touch to select the program to change 3.
- Page 87 Smarther User and installation manual 7. Select the interval start hour 8. Select the interval start minutes 9. Touch to confirm 10. Touch to select the interval end date and time 11. Select the interval end day 12. Select the interval end hour and minutes and confirm 13.
- Page 88 Smarther User and installation manual 2. From 14:00 on Wednesday to 18:00 on Wednesday set the temperature to the “Comfort” setpoint (19°C) 15. Select the day of the week when the maid will visit 16. Touch to enter the start and end times for the second interval 17.
- Page 89 Smarther User and installation manual 21. Select the temperature set point to use for the days and times just created 22. Touch to confirm 3. From 18:00 on Wednesday to 23:45 on Friday set the temperature to the “ECO” setpoint (16°C) 23.
- Page 90 Smarther User and installation manual 26. Touch to select the interval end date and time 27. Select the interval end day 28. Select the interval end hour and minutes and confirm 29. Select the temperature set point to use for the days and times just created 30.
-
Page 91: Thermal Comfort
Smarther User and installation manual Thermal comfort In this section it is possible to set the default time during which the manual temperature setting function will remain active. It is also possible to activate the self-adaptive forecast of the time required for reaching a certain temperature at a certain time. -
Page 92: Chart
Smarther User and installation manual Chart In this section it is possible to display the Smarther and Netatmo thermostat valve switching on and switching off charts. 1. Touch to access the graphic page A Day Time C Set-point D Select room and temperature/humidity... -
Page 93: Manage My Guests
Smarther User and installation manual Manage my guests In this section you can display the users who can interact with your Smarther, invite new ones or if necessary delete them (the user will not be deleted, just the possibility of interacting with this Smarther). -
Page 94: Invite A User
Smarther User and installation manual Invite a user 1. Touch to invite one or more people to control your home devices 2. Touch to add the contact using the address book of your smartphone, or enter the email address Note: the contact saved in the address book must contain the email address 3. -
Page 95: Add A Product To This Home
Smarther User and installation manual Add a product to this home In this section it is possible to add connected devices. This procedure is necessary for both adding a new device and replacing and existing one Note: the procedure below is only valid for adding or replacing a Smarther. In order to add or replace other connected devices, refer to the specific manual. -
Page 96: Add Valves To The Smarther Thermostat
Smarther User and installation manual Add valves to the Smarther thermostat In this section it is possible to add Netatmo thermostat valves installed in the home in combination with the Smarther thermostat. 1. Touch to open the Settings menu 2. Touch to add a product into the home 3. - Page 97 Smarther User and installation manual 7. Touch to install the Netatmo thermostat valve 8. Select the room where the Netatmo thermostat valve is located 9. Give the Netatmo thermostat valve a custom name and touch to continue 10. Install the valve on the radiator following the Netatmo manual and touch to confirm 11.
- Page 98 Smarther User and installation manual A A warning message appears if the calibration fails. The calibration can be performed in the valve settings section, or wait a few minutes for the automatic calibration. Measured temperature C Set temperature D Set the Boost function Set the Temperature...
-
Page 99: Install A New Home
Smarther User and installation manual Install a new home This function allows to install a new home associated with your account (e.g. Mountain home) 1. Touch to open the Settings menu 2. Touch to install a new home 3. Touch to select the brand of the product to install After installing a new home, it will be possible to select which home to display and control 4. -
Page 100: Quick Selections
Smarther User and installation manual Quick selections This section can be used to add to your smartphone Home page some preset quick selections to control your Smarther 1. Touch to enter the quick selections section 2. Touch to start the configuration of the quick selections 3. -
Page 101: Help
Smarther User and installation manual Help In this section it is possible to display FAQ (and their answers) regarding the use of the Home + Control app. 1. Touch to enter FAQ section 2. Touch to select the product for which you need help 3. -
Page 102: My Account
D Manage your communication authorisations and other aspects of your personal details Display contract terms and conditions regarding the Legrand apps that you are using partner apps Manage le to which your account is connected (e.g. Google Home etc.) Personal data This section may be used to change some data of the account currently managing the device, or to replace it with another registered Legrand account. - Page 103 3. The screen confirming the validation of your email address appears Email/account (change of the device management email/account) To change the access email address 1. Enter the login details (email and password) of the new registered Legrand account to be used to manage the device 2. Touch to confirm...
- Page 104 Smarther User and installation manual 3. Touch the link in the email received from the system 4. The screen confirming the validation of the email address appears Safety This section can be used to change the password of your account and to disconnect it from all devices. The disconnection of your account from all devices is useful in case one of your devices is lost or stolen.
- Page 105 Smarther User and installation manual Modify password 1. Touch to modify the password 2. Enter the current password 3. Touch to continue. 4. Enter the new password, which must meet the following requirements: – at least 8 characters; – at least one lower case letter (e.g. a); –...
- Page 106 Smarther User and installation manual Authorisation This section can be used to enable the reception of communications from Legrand and the sharing of the App usage data. 1. Touch to enable data sharing. Legal information Using this section you will be able to view terms and conditions of use and privacy information for each App to which your Legrand account is associated 1.
- Page 107 Smarther User and installation manual Partner apps In this section you can display all the third parties to whom you granted rights to operate on your connected devices. (E.g.: HOMEKIT, Google home etc.) 1. Touch to remove the access of sites or Apps to some of your account data A Display more information regarding the access to your system by partner Apps.
-
Page 108: Tell Us What You Think
Smarther User and installation manual Tell us what you think! This section can be used to rate the application. 1. Touch to open the Settings menu 2. Click to rate the App 3. Touch the stars to rate the App from 1 to 5. Logout In this section it is possible to log out from the Home + Control App 1. -
Page 109: Reset
Smarther User and installation manual Reset Resetting the Wi-Fi configuration and the HOMEKIT settings This action deletes the Wi-Fi configuration and the HOMEKIT settings 1. Keep pressed the reset pushbutton on the side of the Smarther A countdown will start (about 5 seconds) at the end of which you will hear a confirmation beep. - Page 110 Smarther User and installation manual 2. Release the reset pushbutton. The display of the Smarther switches off After a few seconds the Smarther comes back on. It is now possible to complete the association Associate your Smarther with Home + Control using the procedure described in the section...
-
Page 111: Reset To The Factory Settings
Smarther User and installation manual Reset to the factory settings This operation restores the Smarther factory settings and all programs and associations will be deleted 1. Keep pressed the reset pushbutton on the side of the Smarther A countdown will start (about 5 seconds) at the end of which you will hear a confirmation beep. - Page 112 Smarther User and installation manual 0.0 flashes on the Smarther display... … until a confirmation beep is heard. Note: in some cases the device reset can last up to one minute. 3. Release the reset pushbutton. The display of the Smarther switches off...
- Page 113 Smarther User and installation manual After a few seconds the Smarther comes back on. It is now possible to complete the association Associate your Smarther with Home + Control using the procedure described in the section...
-
Page 114: Manage Your Smarther With Third-Party Apps
Smarther User and installation manual Manage your Smarther with third-party apps Integration with third parties allows to take advantage of the voice control function, in addition to the already many functionalities of your Smarther: you can increase/decrease the Smarther temperature, set it manually or automatically; you can request the Smarther set temperature;... -
Page 115: Control Your Smarther With Homekit
Smarther User and installation manual Control your Smarther with HOMEKIT Thanks to third-party integration, you can also control your Smarther using the HOMEKIT app. The HOMEKIT app allows you to add some functions to your Smart system: – you can also increase/decrease the Smarther temperature with your voice, using the Siri® voice assistant –... - Page 116 registrato di Cisco negli Stati Uniti e in altri Paesi ed è utilizzato su licenza. Altri nomi di prodotti e y en otros países y se utiliza con licencia. Otr Android, Google, Google Play en het logo Google Play zijn ge Google, Google Play, Android, and related marks and logos are trademarks of Google LLC.
- Page 117 Smarther User and installation manual – on the protective film of the Smarther Download HOME + CONTROL App Download HOME + CONTROL App Frame the code on the Smarther: the code will be detected automatically...
- Page 118 Smarther User and installation manual If the code is not detected automatically, or if it cannot be scanned 3. Touch to open the manual entering page 4. Touch the Smarther detected nearby 5. Manually enter the HOMEKIT code Make sure that the smartphone is being charged and within the range of the Gateway. A Rename the Smarther for the heating function Rename the Smarther for the humidity detection function C Select the room/create a new one where to insert the Smarther within the HOMEKIT App...
- Page 119 Smarther User and installation manual 7. Touch to select the scenarios where you want to include the Smarther 8. Touch to continue. 9. Touch to end the configuration of the HOMEKIT App From the Home Page of the HOMEKIT app, it is possible to safely control the devices, organised into room and installed in your home.
- Page 120 Viale Borri, 231 87045 Limoges Cedex - France 21100 Varese www.legrand.com www.bticino.com Legrand SNC reserves at any time the right to modify the contents of this booklet and to communicate, in any form and modality, the changes brought to the same.
Need help?
Do you have a question about the bticino MyHOME Smarther SXG8002 and is the answer not in the manual?
Questions and answers