Table of Contents
Advertisement
Quick Links
Sheet #i-5201 Updated 8/20
StewMac
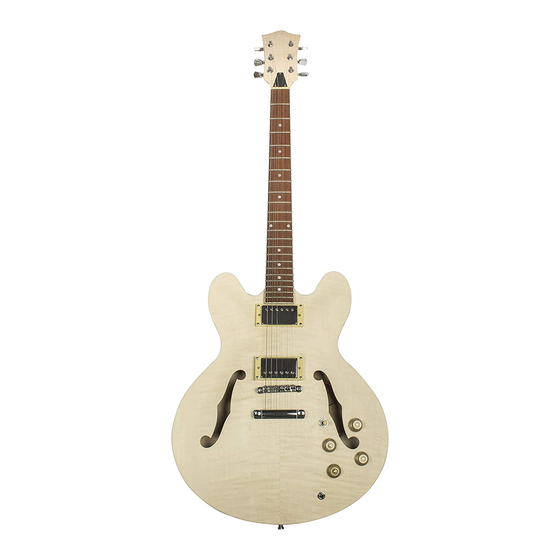
3 3 5 S E M I H O L LO W
G U I TA R K I T
Assembly Instructions
Welcome to guitar building! If you're a first-time builder,
this kit is a great way to start. You'll have fun and learn a lot.
This simple kit is an excellent entry into electric guitar
assembly. It can be built with basic tools. You'll learn to cut
the peghead shape, attach the neck, and set it up. After
you build it, we'll show you how to set it up to play tip-top.
*Exact parts and materials may vary.
Advertisement
Table of Contents

Related Manuals for StewMac I-5201


Summary of Contents for StewMac I-5201
- Page 1 Sheet #i-5201 Updated 8/20 StewMac 3 3 5 S E M I H O L LO W G U I TA R K I T Assembly Instructions Welcome to guitar building! If you’re a first-time builder, this kit is a great way to start. You’ll have fun and learn a lot.
-
Page 2: Table Of Contents
Final setup ......... . . 15 Tools and supplies These are the tools and supplies we recommend for assem- bling this kit. StewMac item numbers are included where applicable. Tools... -
Page 3: Parts List
Strap buttons, with washers and screws (2) Bridge with posts and bushings Generic strings for preliminary setup Tailpiece with posts and bushings (Also included: higher quality strings for actual use) Capacitors (2) Output jack 3-way toggle switch *Exact parts and materials may vary. stewmac.com... -
Page 4: Create Your Peghead Shape
Don’t rush: rough patches will disappear into a good final shape if you take your time. When you’re happy with your peghead shape, sand the cut edges smooth using 150-grit sandpaper followed by 220- grit, then 320-grit. stewmac.com... -
Page 5: Set The Neck
Then line it up with the bass side of the neck and check it to the bass side stud hole. stewmac.com... - Page 6 Once the neck is seated remove any excess glue squeeze out with a damp cloth. Watch for further squeeze out over the next 15-30 minutes. Let dry overnight. stewmac.com...
-
Page 7: Fretwork
Turning it right tightens the rod, pulling the neck back. For more information, see our Trade Secrets article “Don’t be nervous about adjusting that truss rod!” at stewmac.com. stewmac.com search: ts0033 stewmac.com... -
Page 8: Finishing
The grain filler can also be used to fill any gaps, chips, or other imperfections in the wood. For more information on grain filling, see our article “Using ColorTone Grain Filler” at stewmac.com. stewmac.com search: i-5035 Sand the body The figured laminated woods on the top, back, and sides are very thin and can easily be sanded. - Page 9 Allow the finish to cure for a week in a cool, dry room. Around 70° at 50% humidity is recommended. After the finish has dried for 1 week, go over the entire instrument lightly with Light Duty 3M Scotch-Brite Pads or 0000 steel wool for a nice satin appearance. stewmac.com...
- Page 10 Polishing the frets Using 400-grit, then 600-grit sandpaper wrapped around a foam block, run up and down the entire length of the fretboard. Polish the frets by going over each one with extra fine Scotch-Brite or 0000 steel wool. stewmac.com...
-
Page 11: Assemble Your Guitar
Install the tailpiece bushings. Pressing them in with a drill press is the preferred method but they can also be installed with gentle hammer taps using a block of wood between the bushing and hammer. Install the bridge bushings in the same fashion. stewmac.com... - Page 12 For more tips about modifying pickup rings to fit an arched top guitar, see our Trade Secrets video “Fitting a Les Paul ring”. stewmac.com search: ts0192 Once the rings are fitted drop the pickups into their cavities. Remember, the pickup with the wider pole spacing is the bridge pickup, the pickup with the tighter pole spacing is the neck pickup.
-
Page 13: Wire The Electronics
Solder up your circuit following the wiring diagram to the Toggle switch .022 F right. Bridge Bridge For help with soldering, see our Trade Secrets video “How to get a good clean solder joint!” at stewmac.com. stewmac.com search: ts0186 Output jack stewmac.com... - Page 14 For help with this technique, see our Trade Secrets article “Fishing a volume control out of a semi-hollowbody for soldering.” Once the switch, jack and pots are secured install the knobs. stewmac.com search: ts0094 stewmac.com...
-
Page 15: Final Setup
Take your time and check your work frequently. It is easy to go too far lowering the slots thus ruining the nut. Turn clockwise to pull the neck back, reducing relief. Go slow: a little does a lot! stewmac.com... - Page 16 If the note reads flat, the saddle needs to be adjusted forward towards the nut, shortening the length of the string. If the note reads sharp, the saddle needs to be adjusted back away from the nut, increasing the string length. stewmac.com...
- Page 17 Congratulations! Your guitar is ready to play. We hope this guitar will be the first of many that you have fun assembling and customizing. Be sure to get a gig bag or case, so it doesn’t get banged around! stewmac.com...
- Page 19 21 N. Shafer St • Athens, Ohio 45701 • USA USA & Canada call toll-free: 800-848-2273 9am-6pm weekdays Eastern time stewmac.com...
Need help?
Do you have a question about the I-5201 and is the answer not in the manual?
Questions and answers