Huawei SmartLogger3000 User Manual
Hide thumbs
Also See for SmartLogger3000:
- User manual (454 pages) ,
- Configuration manual (27 pages) ,
- Quick manual (21 pages)

Related Manuals for Huawei SmartLogger3000


Summary of Contents for Huawei SmartLogger3000
- Page 1 SmartLogger3000 User Manual Issue Date 2020-01-10 HUAWEI TECHNOLOGIES CO., LTD.
- Page 2 Notice The purchased products, services and features are stipulated by the contract made between Huawei and the customer. All or part of the products, services and features described in this document may not be within the purchase scope or the usage scope. Unless otherwise specified in the contract, all statements, information, and recommendations in this document are provided "AS IS"...
-
Page 3: About This Document
About This Document About This Document Purpose This document introduces the SmartLogger3000 (SmartLogger for short) and SmartModule1000 (SmartModule for short) in terms of installation, electrical connections, system operation and maintenance, and troubleshooting. Understand the SmartLogger and SmartModule features, functions, and safety precautions provided in this document before installing and operating the SmartLogger and SmartModule. - Page 4 Added the description about the SmartModule. Issue 02 (2019-12-18) Updated 6 WebUI Operations. Updated 9.1 Technical Specifications of the SmartLogger. Issue 01 (2019-09-24) This issue is used for first office application (FOA). Issue 03 (2020-01-10) Copyright © Huawei Technologies Co., Ltd.
-
Page 5: Table Of Contents
4.1 Connecting Cables to the SmartLogger ........................37 4.1.1 Preparing Cables ..............................37 4.1.2 Connecting a PE Cable ............................37 4.1.3 Connecting an RS485 Communications Cable ......................38 4.1.4 Connecting an MBUS Cable ............................ 40 Issue 03 (2020-01-10) Copyright © Huawei Technologies Co., Ltd. - Page 6 6.3.5 Setting MBUS Parameters ............................44 6.3.6 Setting SUN2000 Parameters ..........................44 6.3.6.1 Running Parameters .............................. 44 6.3.6.2 Tracking System ..............................44 6.3.6.3 Characteristic Curves ............................44 6.3.7 Setting PID Module Parameters..........................44 Issue 03 (2020-01-10) Copyright © Huawei Technologies Co., Ltd.
- Page 7 8.2 How Do I Set FTP Parameters? ..........................55 8.3 How Do I Set Email Parameters? ..........................57 8.4 How Do I Change the SSID and Password of the Built-in WLAN? ................57 Issue 03 (2020-01-10) Copyright © Huawei Technologies Co., Ltd.
- Page 8 9.1 Technical Specifications of the SmartLogger ......................57 9.2 Technical Specifications of the SmartModule ......................62 A Product User Lists ........................64 B Domain Name List of Management Systems ............... 66 C Acronyms and Abbreviations ....................67 Issue 03 (2020-01-10) Copyright © Huawei Technologies Co., Ltd.
-
Page 9: Safety Information
The "NOTICE", "CAUTION", "WARNING", and "DANGER" statements in this document do not cover all the safety instructions. They are only supplements to the safety instructions. Huawei will not be liable for any consequence caused by the violation of general safety requirements or design, production, and usage safety standards. -
Page 10: Personnel Requirements
Use tools correctly to avoid hurting people or damaging the equipment. 1.2 Personnel Requirements Personnel who plan to install or maintain Huawei equipment must receive thorough training, understand all necessary safety precautions, and be able to correctly perform all operations. -
Page 11: Electrical Safety
This prevents damage to the insulation layer of the cables. Bind cables of the same type together. When routing cables of different types, ensure that they are at least 30 mm away from each other. Issue 03 (2020-01-10) Copyright © Huawei Technologies Co., Ltd. -
Page 12: Installation Environment Requirements
Do not climb higher than the fourth rung of the ladder from the top. Ensure that your body's center of gravity does not shift outside the legs of the ladder. Issue 03 (2020-01-10) Copyright © Huawei Technologies Co., Ltd. -
Page 13: Commissioning
If the equipment is faulty, contact your dealer. The equipment can be powered on only after all faults are rectified. Failing to do so may escalate faults or damage the equipment. Issue 03 (2020-01-10) Copyright © Huawei Technologies Co., Ltd. -
Page 14: Product Overview
This document covers the following SmartLogger models: SmartLogger3000A01CN SmartLogger3000B01CN SmartLogger3000B03CN SmartLogger3000A01EU SmartLogger3000A03EU SmartLogger3000B02EU SmartLogger3000A01NH SmartLogger3000B00NH SmartLogger3000A01KR SmartLogger3000A01AU SmartLogger3000A00GL Figure 2-1 Model Issue 03 (2020-01-10) Copyright © Huawei Technologies Co., Ltd. - Page 15 CN: China EU: Europe NH: Japan KR: South Korea AU: Australia GL: Global Model Identification You can view the SmartLogger model and communication mode on the nameplate. Issue 03 (2020-01-10) Copyright © Huawei Technologies Co., Ltd.
-
Page 16: Networking
Local operations on the SmartLogger using the mobile phone app through the built-in WLAN RS485 networking, which enables the SmartLogger to connect to: − Huawei devices such as solar inverters and PID modules Issue 03 (2020-01-10) Copyright © Huawei Technologies Co., Ltd. - Page 17 − Power meters that use the DL/T645 protocol − Devices that use the IEC103 protocol MBUS networking, which enables the SmartLogger to connect to Huawei solar inverters and PID-PVBOXs that support MBUS communication Connection to management systems: −...
- Page 18 A maximum of 15 SmartLoggers can be connected to form a fiber ring network. Each SmartLogger can connect to devices such as solar inverters, EMIs, and power meters. Multiple fiber ring networks can be connected to the management system through an Ethernet switch. Issue 03 (2020-01-10) Copyright © Huawei Technologies Co., Ltd.
- Page 19 12 km (with the 100M optical module) or 10 km (with the 1000M optical module). The maximum communication distance is 100 m when an Ethernet cable is used for connection. The SmartLogger supports the following wireless networks: 4G/3G/2G networking and LTE dedicated networking. Issue 03 (2020-01-10) Copyright © Huawei Technologies Co., Ltd.
- Page 20 SmartLogger3000 User Manual 2 Product Overview Figure 2-5 4G networking Issue 03 (2020-01-10) Copyright © Huawei Technologies Co., Ltd.
- Page 21 The WAN port of the SmartLogger connects to the customer-premises equipment (CPE) through the power over Ethernet (PoE) module and PoE SPD. The IP addresses of the SmartLogger and CPE must be on the same network segment. Issue 03 (2020-01-10) Copyright © Huawei Technologies Co., Ltd.
-
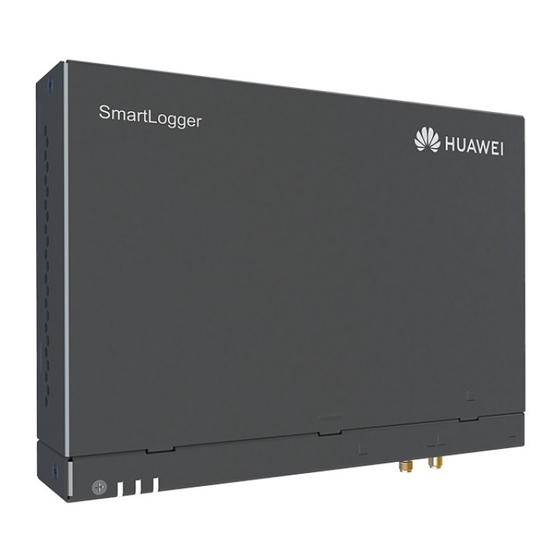
Page 22: Appearance
Status Description Running The SmartLogger is not powered Green off indicator (RUN) Blinking green slowly (on for 1s The communication with the and then off for 1s) management system is normal. Issue 03 (2020-01-10) Copyright © Huawei Technologies Co., Ltd. - Page 23 If an alarm and local maintenance happen concurrently, the alarm/maintenance indicator shows the local maintenance state first. After local maintenance ends, the indicator shows the alarm state. Communications Ports GE ports: Ethernet ports, including one WAN port and one LAN port Issue 03 (2020-01-10) Copyright © Huawei Technologies Co., Ltd.
- Page 24 DI ports: digital input ports, which are used to connect to DI power grid scheduling commands or alarm signals. Appearance DI Port Description Can connect to four passive dry Issue 03 (2020-01-10) Copyright © Huawei Technologies Co., Ltd.
- Page 25 DO Port Description The NC/COM is a normally closed contact. The NO/COM is a normally open contact. USB port: supports USB2.0 for connecting to a USB flash drive. Issue 03 (2020-01-10) Copyright © Huawei Technologies Co., Ltd.
- Page 26 0.1 A. The port is used to drive the coil of the intermediate relay in the export limitation or audible and visual alarm scenario. Select the intermediate relay with a free-wheeling diode in the coil. Otherwise, the device may be damaged. Issue 03 (2020-01-10) Copyright © Huawei Technologies Co., Ltd.
- Page 27 Within 3 minutes after the SmartLogger is powered button for more on, hold down the RST button for more than 60s to than 60s. restart the SmartLogger and restore factory settings. Dimensions Figure 2-8 Dimensions Issue 03 (2020-01-10) Copyright © Huawei Technologies Co., Ltd.
-
Page 28: Smartmodule
A: version A Feature ID 01: SmartLogger scenario Model Identification You can view the SmartModule model on the nameplate. Figure 2-10 Nameplate (1) Trademark, product model, and power (2) Communications mode rating Issue 03 (2020-01-10) Copyright © Huawei Technologies Co., Ltd. -
Page 29: Networking
The SmartModule applies to PV power systems. It supports the following: RS485 networking, which enables the SmartModule to connect to: − Huawei devices such as solar inverters and PID modules Third-party solar inverters, EMIs, transformer stations, and power meters that use − the Modbus-RTU protocol −... -
Page 30: Appearance
Blinking green slowly (on for 1s The communication with the and then off for 1s) SmartLogger is normal. Blinking green fast (on for 0.125s The communication with the and then off for 0.125s) SmartLogger is interrupted. Issue 03 (2020-01-10) Copyright © Huawei Technologies Co., Ltd. - Page 31 DI ports: digital input ports, which are used to connect to DI power grid scheduling commands or alarm signals. Appearance DI Port Description Can connect to four passive dry contact signals. Issue 03 (2020-01-10) Copyright © Huawei Technologies Co., Ltd.
- Page 32 – for a PT temperature sensor COM ports: RS485 communications port, supporting three independent RS485 channels and the access of devices that comply with the Modbus-RTU, IEC103, or DL/T645 protocol. Issue 03 (2020-01-10) Copyright © Huawei Technologies Co., Ltd.
- Page 33 Select the intermediate relay with a free-wheeling diode in the coil. Otherwise, the device may be damaged. Appearance Output Power Port Description 12 V output Power supply– power port Power supply+ Issue 03 (2020-01-10) Copyright © Huawei Technologies Co., Ltd.
- Page 34 Within 3 minutes after the SmartModule is powered button for more on after power-off, hold down the RST button for than 60s. more than 60s to restart the SmartModule and restore factory settings. Dimensions Figure 2-13 Dimensions Issue 03 (2020-01-10) Copyright © Huawei Technologies Co., Ltd.
-
Page 35: Device Installation
Check the quantity of deliverables against the Packing List in the packing case. If any component is missing or damaged, contact your dealer. 3.2 Tools Type Tool Hammer drill Diagonal pliers Wire stripper Crimping tool Installation RJ45 crimping tool Flat-head Torque screwdriver Rubber mallet screwdriver Issue 03 (2020-01-10) Copyright © Huawei Technologies Co., Ltd. - Page 36 Type Tool Utility knife Cable cutter Vacuum cleaner Marker Measuring tape Cable tie Heat gun Multimeter Heat shrink tubing Bubble or digital level Safety shoes Safety gloves Safety goggles Anti-dust respirator Issue 03 (2020-01-10) Copyright © Huawei Technologies Co., Ltd.
-
Page 37: Installation Requirements
SmartLogger3000 User Manual 3 Device Installation 3.3 Installation Requirements Figure 3-1 Installation position 3.4 Installing the SmartLogger The SmartLogger can be wall-mounted or guide rail-mounted. Wall-mounted installation Issue 03 (2020-01-10) Copyright © Huawei Technologies Co., Ltd. - Page 38 Prepare a 35 mm standard guide rail by yourself. Ensure that the guide rail: Has sufficient length for securing the SmartLogger. The recommended effective length is 230 mm or greater. Has been secured before you install the SmartLogger. Issue 03 (2020-01-10) Copyright © Huawei Technologies Co., Ltd.
-
Page 39: Installing The Smartlogger And Smartmodule
Avoid drilling holes into the water pipes and power cables buried in the wall. Step 1 Combine the SmartLogger and SmartModule. If the SmartLogger and SmartModule have been combined before delivery, skip this step. Issue 03 (2020-01-10) Copyright © Huawei Technologies Co., Ltd. - Page 40 Prepare a 35 mm standard guide rail by yourself. Ensure that the guide rail: Has sufficient length for securing the SmartLogger and SmartModule. The recommended effective length is 360 mm or greater. Issue 03 (2020-01-10) Copyright © Huawei Technologies Co., Ltd.
- Page 41 If the SmartLogger and SmartModule have been combined before delivery, you only need to remove the mounting ears and guide rail clamps in the middle. You do not need to use a connecting plate to connect the SmartLogger and SmartModule. Issue 03 (2020-01-10) Copyright © Huawei Technologies Co., Ltd.
-
Page 42: Installing A Power Adapter
3.6 Installing a Power Adapter A power adapter can be installed on a wall or flat surface. If the SmartLogger requires a power adapter for power supply, install a power adapter. Issue 03 (2020-01-10) Copyright © Huawei Technologies Co., Ltd. - Page 43 Keep the AC power cable port upward. Avoid drilling holes into the water pipes and power cables buried in the wall. Figure 3-9 Wall-mounted Installation (Mode 1) Figure 3-10 Wall-mounted Installation (Mode 2) Issue 03 (2020-01-10) Copyright © Huawei Technologies Co., Ltd.
- Page 44 Ensure that the power adapter indicator faces upward or outward. Step 2 Plan the cable route of the power adapter to ensure that the SIM card can be installed properly. Figure 3-11 Flat surface-mounted installation ----End Issue 03 (2020-01-10) Copyright © Huawei Technologies Co., Ltd.
-
Page 45: Cable Connections
RJ45 connectors. (Optional) 24 V Two-core cable with a cross-sectional area of 0.2–1.5 mm or 24–16 AWG input power cable 4.1.2 Connecting a PE Cable Procedure Step 1 Connect a PE cable. Issue 03 (2020-01-10) Copyright © Huawei Technologies Co., Ltd. -
Page 46: Connecting An Rs485 Communications Cable
COM port. Ensure that RS485+ is connected to COM+ of the SmartLogger and RS485– is connected to the COM– of the SmartLogger. Procedure Step 1 Connect an RS485 communications cable. Issue 03 (2020-01-10) Copyright © Huawei Technologies Co., Ltd. - Page 47 COM1, COM2, and COM3 RS485A, RS485 differential signal+ – RS485B, RS485 differential signal– Step 2 If devices need to be cascaded, cascade the devices and then connect them to the SmartLogger. Issue 03 (2020-01-10) Copyright © Huawei Technologies Co., Ltd.
-
Page 48: Connecting An Mbus Cable
The rated power of the PV system connected to the MBUS port on the SmartLogger must be greater than 75 kW. Issue 03 (2020-01-10) Copyright © Huawei Technologies Co., Ltd. - Page 49 Figure 4-4 MBUS networking Procedure Step 1 Connect an MBUS cable. Figure 4-5 Connecting an MBUS Cable (1) Low-voltage busbar of the transformer station (2) Fuse (3) Knife fuse switch (4) MCB Issue 03 (2020-01-10) Copyright © Huawei Technologies Co., Ltd.
-
Page 50: Connecting A Di Signal Cable
10 m. Procedure Step 1 Connect a DI signal cable. Figure 4-6 Connecting a DI signal cable Port Silk Screen Description Can connect to four passive dry contact signals. ----End Issue 03 (2020-01-10) Copyright © Huawei Technologies Co., Ltd. -
Page 51: Connecting The Output Power Cable
The SmartLogger can receive AI signals from EMIs over AI ports. It is recommended that the signal transmission distance be less than or equal to 10 m. Procedure Step 1 Connect the AI signal cable. Issue 03 (2020-01-10) Copyright © Huawei Technologies Co., Ltd. -
Page 52: Connecting The Do Signal Cable
NO/COM is a normally open contact. It is recommended that the signal transmission distance be less than or equal to 10 m. Procedure Step 1 Connect the DO signal cable. Issue 03 (2020-01-10) Copyright © Huawei Technologies Co., Ltd. -
Page 53: Connecting The Ethernet Cable
Procedure Step 1 Connect the Ethernet cable. When crimping the network cable, ensure that the shielding layer of the cable is securely connected to the metal shell of the RJ45 connectors. Issue 03 (2020-01-10) Copyright © Huawei Technologies Co., Ltd. -
Page 54: Connecting Fiber Jumpers
When inserting an optical module into the SFP2 port, verify that the side with a label faces downward. Step 2 Connect the fiber jumpers delivered with the optical module to the ports of the optical module. Issue 03 (2020-01-10) Copyright © Huawei Technologies Co., Ltd. -
Page 55: Installing A Sim Card And A 4G Antenna
The solar inverter logs and I-V Power meter 3 MB x Number of power meters curve diagnosis data can be exported monthly. The solar 3 MB x Number of EMIs inverters can be upgraded monthly. Issue 03 (2020-01-10) Copyright © Huawei Technologies Co., Ltd. -
Page 56: Connecting The 24 V Input Power Cable
Scenario 2: The SmartLogger connects to the power supply through the 12 V input power port, and the 24 V input power port functions as the 12 V output power port to supply power to devices. Procedure Step 1 Connect the input power cable. Issue 03 (2020-01-10) Copyright © Huawei Technologies Co., Ltd. -
Page 57: Connecting Cables To The Smartmodule
For details about the cables and cable connection operations, see the documents delivered with the PT100/PT1000. (Optional) 24 V Two-core cable with a cross-sectional area of 0.2–1.5 mm or 24–16 AWG power input cable Issue 03 (2020-01-10) Copyright © Huawei Technologies Co., Ltd. -
Page 58: Connecting The Pe Cable
Procedure Step 1 Connect the Ethernet cable. When crimping the network cable, ensure that the shielding layer of the cable is securely connected to the metal shell of the RJ45 connectors. Issue 03 (2020-01-10) Copyright © Huawei Technologies Co., Ltd. -
Page 59: Connecting The 12 V Power Input Cable
V power input port of the SmartLogger functions as the 12 V power output port to supply power to the SmartModule. Procedure Step 1 Connect the 12 V power input cable. Figure 4-16 Connecting the 12 V power input cable Issue 03 (2020-01-10) Copyright © Huawei Technologies Co., Ltd. -
Page 60: Connecting The Rs485 Communications Cable
COM1, COM2, and COM3 RS485A, RS485 differential signal+ – RS485B, RS485 differential signal– Step 2 If devices need to be cascaded, cascade the devices and then connect them to the SmartModule. Issue 03 (2020-01-10) Copyright © Huawei Technologies Co., Ltd. -
Page 61: Connecting The Di Signal Cable
It can only receive passive dry contact signals. It is recommended that the signal transmission distance be less than or equal to 10 m. Procedure Step 1 Connect the DI signal cable. Issue 03 (2020-01-10) Copyright © Huawei Technologies Co., Ltd. -
Page 62: Connecting The Output Power Cable
12 V power output port. It is recommended that the transmission distance be less than or equal to 10 m. Procedure Step 1 Connect the power output cable. Issue 03 (2020-01-10) Copyright © Huawei Technologies Co., Ltd. -
Page 63: Connecting The Ai Signal Cable
The SmartModule can receive AI signals from EMIs over AI ports. It is recommended that the signal transmission distance be less than or equal to 10 m. Procedure Step 1 Connect the AI signal cable. Issue 03 (2020-01-10) Copyright © Huawei Technologies Co., Ltd. -
Page 64: Connecting The Pt Signal Cable
The SmartModule provides two PT ports, which can be used to connect to three-wire or two-wire PT100/PT1000 temperature sensors. When a PT port needs to be connected to a two-wire PT100/PT1000, use a short-circuit cable to short-circuit GND and – of the port. Issue 03 (2020-01-10) Copyright © Huawei Technologies Co., Ltd. - Page 65 Procedure Step 1 Connect the PT signal cable. Figure 4-22 Connection to a three-wire PT100/PT1000 (1) PT100/PT1000 temperature sensor Figure 4-23 Connection to a two-wire PT100/PT1000 (1) PT100/PT1000 temperature sensor ----End Issue 03 (2020-01-10) Copyright © Huawei Technologies Co., Ltd.
-
Page 66: Connecting The 24 V Power Input Cable
24 V power input cable functions as the 12 V power output port to supply power to a device. Procedure Step 1 Connect the power input cable. Figure 4-24 Connecting the power input cable ----End Issue 03 (2020-01-10) Copyright © Huawei Technologies Co., Ltd. -
Page 67: System Operation
The rated input voltage of the power adapter is 100–240 V AC, and the rated input frequency is 50/60 Hz. Select an AC socket that matches the power adapter. Issue 03 (2020-01-10) Copyright © Huawei Technologies Co., Ltd. - Page 68 DC power supply. Step 2 When MBUS is used for communication, turn on all the upstream switches of the MBUS port. ----End Issue 03 (2020-01-10) Copyright © Huawei Technologies Co., Ltd.
-
Page 69: Webui Operations
SmartLogger3000 User Manual 6 WebUI Operations WebUI Operations 6.1 Introduction to WebUI Issue 03 (2020-01-10) Copyright © Huawei Technologies Co., Ltd. -
Page 70: Webui Layout
After choosing a second-level menu, choose a third-level menu to access the query or setting page. There are no third-level menus under certain second-level menus. Details page Displays details of the queried information or parameter setting. Issue 03 (2020-01-10) Copyright © Huawei Technologies Co., Ltd. -
Page 71: Icon Description
The solar inverter is in icon. On-grid state. The device such as the EMI, power meter, slave SmartLogger, or MBUS is in Online state. The PID is in Running state. Issue 03 (2020-01-10) Copyright © Huawei Technologies Co., Ltd. -
Page 72: Webui Menus
Historical energy yield: The data can be stored for 25 years on a yearly basis. Performance Data Queries or exports performance data. Device Running Queries or exports device running Info. information. Issue 03 (2020-01-10) Copyright © Huawei Technologies Co., Ltd. - Page 73 Sets running parameters. About Queries communication information. Power Meter Running Info. Queries the running information. Performance Data Queries or exports performance data. Running Param. Sets the running parameters of the DL/T645 power meter. Issue 03 (2020-01-10) Copyright © Huawei Technologies Co., Ltd.
- Page 74 Sets the save period of performance data. Comm. Param. Wireless Network Sets parameters for the built-in WLAN. Sets mobile data (4G/3G/2G) parameters. Wired Network Sets wired network parameters. RS485 Sets RS485 parameters. Issue 03 (2020-01-10) Copyright © Huawei Technologies Co., Ltd.
- Page 75 Sets the IEC104 data push period. Enables or disables AI1 SPD alarm detection. Enables or disables STS overtemperature protection. Sets the reset control port of the external router. Issue 03 (2020-01-10) Copyright © Huawei Technologies Co., Ltd.
- Page 76 Recollects historical performance data and energy yield of devices. Adjust total energy Adjusts the total energy yield. yield The third-level menu varies with the device model and grid code. The displayed menu prevails. Issue 03 (2020-01-10) Copyright © Huawei Technologies Co., Ltd.
-
Page 77: Device Commissioning
LAN port is automatically switched to 192.168.3.10, and the default gateway is 192.168.3.1. If the connection port is a LAN port, the network configuration of the PC needs to be adjusted accordingly. Issue 03 (2020-01-10) Copyright © Huawei Technologies Co., Ltd. - Page 78 WebUI. It is recommended that users use their own certificates. If the certificate is not replaced, the security risk warning will be displayed during each login. Issue 03 (2020-01-10) Copyright © Huawei Technologies Co., Ltd.
- Page 79 Figure 6-3 Security risk warning Specify Language, User Name, and Password, and click Log In. Figure 6-4 Login page Parameter Description Language Set this parameter as required. User Name Select admin. Issue 03 (2020-01-10) Copyright © Huawei Technologies Co., Ltd.
-
Page 80: Commissioning Using Deployment Wizard
Context The SmartLogger supports the deployment wizard for setting basic SmartLogger parameters, connecting Huawei devices, power meters, and EMIs, configuring Huawei NMS, configuring third-party NMS, and interworking with third-party devices. After the SmartModule communicates with the SmartLogger properly, the SmartLogger automatically identifies the SmartModule. -
Page 81: Parameter Settings
Set user parameters and click Submit. Figure 6-6 Setting user parameters Date&Time Parameter Description Local time zone Select a time zone based on the region where the PV plant is located. Issue 03 (2020-01-10) Copyright © Huawei Technologies Co., Ltd. - Page 82 The value can be EUR, GBP, USD, CNY, or JPY. Electricity price/kWh Set this parameter to the local electricity price, which is used to calculate the converted revenue of the energy yield. Issue 03 (2020-01-10) Copyright © Huawei Technologies Co., Ltd.
-
Page 83: Setting Parameters For Connecting To The Management System
Figure 6-7 Setting mobile data parameters Parameter Description Monthly traffic package Set this parameter based on the SIM card traffic package. Network mode Set this parameter based on the SIM card network mode. Issue 03 (2020-01-10) Copyright © Huawei Technologies Co., Ltd. - Page 84 FTP server). Secondary DNS server In normal cases, you can ignore this parameter. If the primary DNS server cannot resolve the domain name, the secondary DNS server is used. Issue 03 (2020-01-10) Copyright © Huawei Technologies Co., Ltd.
- Page 85 6 WebUI Operations Step 2 Set management system parameters. Method 1: When the SmartLogger connects to a Huawei or third-party management system using the encrypted Modbus TCP protocol, set management system parameters and click Submit. Figure 6-9 Setting management system parameters...
- Page 86 (non-secure protocol). Users are advised to take measures at the PV plant level to reduce security risks, or use Huawei management system to mitigate the risks. To use this function, set this parameter to Enable(Limited) or Enable(Unlimited).
- Page 87 (non-secure protocol). Users are advised to take measures at the PV plant level to reduce security risks, or use Huawei management system to mitigate the risks. To use this function, set this parameter to Enable(Limited) or Enable(Unlimited).
-
Page 88: Setting Rs485 Communications Parameters
Set RS485 parameters and click Submit. Figure 6-12 Setting RS485 parameters When the SmartModule is connected to the SmartLogger, the device name of the SmartModule is Module(M1), and the corresponding port is M1.COM. Issue 03 (2020-01-10) Copyright © Huawei Technologies Co., Ltd. - Page 89 Specifies whether the night silent mode is Night silent enabled. Enter time Specifies the time for entering the night silent mode. Specifies the time for exiting the night silent Exit time mode. Issue 03 (2020-01-10) Copyright © Huawei Technologies Co., Ltd.
-
Page 90: Setting Parameters For The Slave Smartlogger
SmartLogger is unique, you are advised to select Comm. Address. In other cases, you must select Logical address. Set this parameter to the communications address of the slave SmartLogger address SmartLogger. Issue 03 (2020-01-10) Copyright © Huawei Technologies Co., Ltd. -
Page 91: Setting Mbus Parameters
SmartLogger. ----End 6.3.5 Setting MBUS Parameters Procedure Step 1 Set access parameters. Set parameters for the built-in MBUS and click Submit. Figure 6-15 Setting parameters for the built-in MBUS Issue 03 (2020-01-10) Copyright © Huawei Technologies Co., Ltd. - Page 92 Parameter Description Device type Set this parameter to MBUS. Port number Set this parameter to the serial number of the COM port connected to the MBUS. Step 2 Set networking parameters. Issue 03 (2020-01-10) Copyright © Huawei Technologies Co., Ltd.
- Page 93 Maintain the solar inverter SN list. You can click Synchronize to synchronize the transformer substation number and winding number of the MBUS to the solar inverters in the SN list. ----End Issue 03 (2020-01-10) Copyright © Huawei Technologies Co., Ltd.
-
Page 94: Setting Sun2000 Parameters
Set this parameter to the communication address of the solar inverter. Step 2 Set running parameters and click Submit. Before setting the running parameters of the solar inverter, ensure that the DC side of the solar inverter is energized. Issue 03 (2020-01-10) Copyright © Huawei Technologies Co., Ltd. -
Page 95: Running Parameters
Grid reconnection frequency upper limit, the inverter is not allowed to reconnect to the grid. Issue 03 (2020-01-10) Copyright © Huawei Technologies Co., Ltd. - Page 96 Level-N OF protection time (ms) Specifies the level-N grid overfrequency protection duration. Level-N UF protection (Hz) Specifies the level-N grid underfrequency protection threshold. Level-N UF protection time (ms) Specifies the level-N grid underfrequency protection duration. Issue 03 (2020-01-10) Copyright © Huawei Technologies Co., Ltd.
- Page 97 60 minutes if the input power of PV modules drops drastically due to shading. − If this parameter is set to CPV 2, the inverter can quickly restart in 10 minutes if the input power of PV modules drops drastically due to shading. Issue 03 (2020-01-10) Copyright © Huawei Technologies Co., Ltd.
- Page 98 If this parameter is set to Enable, the inverter shuts down after receiving OVGR linked shutdown the OVGR signal. If this parameter is set to Disable, the inverter does not shut down after receiving the OVGR signal. Issue 03 (2020-01-10) Copyright © Huawei Technologies Co., Ltd.
- Page 99 String detection starting power Specifies the threshold for starting PV string exception detection. The false percentage (%) alarms caused by fixed shadow shading can be controlled by changing this parameter. Issue 03 (2020-01-10) Copyright © Huawei Technologies Co., Ltd.
- Page 100 LVRT undervoltage protection Specifies whether to shield the undervoltage protection function during shield LVRT. VRT grid voltage protect shield Specifies whether to shield the undervoltage protection function during LVRT or HVRT. Issue 03 (2020-01-10) Copyright © Huawei Technologies Co., Ltd.
- Page 101 Schedule instruction valid Specifies the time for maintaining the scheduling instruction. duration (s) When this parameter is set to 0, the scheduling instruction takes effect permanently. Issue 03 (2020-01-10) Copyright © Huawei Technologies Co., Ltd.
- Page 102 If this parameter is set to Enable, the active power of the inverter will be derated according to a certain slope when the grid frequency exceeds the frequency that triggers overfrequency derating. Issue 03 (2020-01-10) Copyright © Huawei Technologies Co., Ltd.
- Page 103 Frequency sensitive mode droop to help stabilize the power grid frequency. In this case, set this parameter to Enable Frequency sensitive mode droop Specifies the droop of the active power output. Issue 03 (2020-01-10) Copyright © Huawei Technologies Co., Ltd.
- Page 104 Parameter Description PV String Access Detection is set to Disable by default. After solar inverters PV String Access Detection are connected to the power grid, set PV String Access Detection to Enable. Issue 03 (2020-01-10) Copyright © Huawei Technologies Co., Ltd.
-
Page 105: Tracking System
2. Configure this characteristic curve based on the power grid standard. 1. Set Voltage Rise Suppression to Enable. [Voltage Rise Suppression]P-U curve 2. Configure this characteristic curve based on the power grid standard. Issue 03 (2020-01-10) Copyright © Huawei Technologies Co., Ltd. -
Page 106: Setting Pid Module Parameters
COM port connected to the PID. Address Set this parameter to the communications address of the PID. Step 2 Set running parameters and click Submit. Figure 6-21 Setting running parameters ----End Issue 03 (2020-01-10) Copyright © Huawei Technologies Co., Ltd. -
Page 107: Pid Module Running Parameters
Select PV/PE if the PID module is required to use voltage output from the negative PV terminal. This mode is applicable only to Huawei SUN8000. In the SUN2000 scenario, Automatic indicates the N/PE offset mode. - Page 108 NOTE When designing a PV plant, the design institute or user should ask the PV module vendor about the direction of voltage compensation for resisting the PID effect. Issue 03 (2020-01-10) Copyright © Huawei Technologies Co., Ltd.
- Page 109 PV+ and ground is equal to or less than 0 V.) Clear data Clears the active alarms and historical alarms stored on the PID module. You can select Clear data to clear active alarms and historical alarms for the PID module. Issue 03 (2020-01-10) Copyright © Huawei Technologies Co., Ltd.
-
Page 110: Pid-Pvbox Running Parameters
It is recommended that Output voltage (manual) be set to a value greater than 250 V. 6.3.8 Setting Power Meter Parameters 6.3.8.1 Setting DL/T645 Power Meter Parameters Procedure Step 1 Set access parameters and click Add Devices. Issue 03 (2020-01-10) Copyright © Huawei Technologies Co., Ltd. - Page 111 Number of lead bytes Retain the default value unless otherwise specified. Voltage change ratio Set this parameter to 1 when the power meter uploads a Issue 03 (2020-01-10) Copyright © Huawei Technologies Co., Ltd.
-
Page 112: Setting Modbus-Rtu Power Meter Parameters
Set this parameter to Read holding register 03H or Read holding register 04H based on the protocol adopted by the vendor. Read mode The value can be Multiple read or Single read. Issue 03 (2020-01-10) Copyright © Huawei Technologies Co., Ltd. - Page 113 Set this parameter to Modbus-RTU. Port number Set this parameter to the serial number of the COM port connected to the power meter. Address Set this parameter to the communication address of the power meter. Issue 03 (2020-01-10) Copyright © Huawei Technologies Co., Ltd.
-
Page 114: Setting Emi Parameters
Set this parameter to the serial number of the COM port Port number connected to the EMI. Address Set this parameter to the communication address of the EMI. Step 2 Set running parameters and click Submit. Figure 6-27 Setting running parameters Issue 03 (2020-01-10) Copyright © Huawei Technologies Co., Ltd. - Page 115 Start address If Read mode is set to Multiple read, set the start address for reading. End address If Read mode is set to Multiple read, set the end address for reading. Issue 03 (2020-01-10) Copyright © Huawei Technologies Co., Ltd.
- Page 116 If the EMI can collect a signal, set Signal address for the signal to the Signal Name, Signal corresponding register address. If the EMI cannot collect a signal, set address, Gain, Offset, and Signal address for the signal to 65535. Unit. ----End Issue 03 (2020-01-10) Copyright © Huawei Technologies Co., Ltd.
-
Page 117: Setting Ai Emi Parameters
Connection mode Set this parameter to AI. Address Set this parameter to the communication address of the EMI. Step 2 Set running parameters and click Submit. Figure 6-29 Setting running parameters Issue 03 (2020-01-10) Copyright © Huawei Technologies Co., Ltd. -
Page 118: Setting Sts Parameters
----End 6.3.10 Setting STS Parameters Procedure Step 1 Set access parameters and click Add Devices. Figure 6-30 Setting access parameters Parameter Description Device Type Set this parameter to STS. Issue 03 (2020-01-10) Copyright © Huawei Technologies Co., Ltd. - Page 119 Sets the standby signals for Set this parameter as required. teleindication, telemetering, and teleadjust. About Queries communication information. Step 3 Choose Settings > Other Parameters and set STS overtemperature protection as required. ----End Issue 03 (2020-01-10) Copyright © Huawei Technologies Co., Ltd.
-
Page 120: Setting Iec103 Device Parameters
If Data forwarding is set to Disable, the SmartLogger does not transmit information about unconnected devices to the management system. ----End Issue 03 (2020-01-10) Copyright © Huawei Technologies Co., Ltd. - Page 121 The protocol information points vary depending on vendors. Therefore, you need to obtain a protocol information file in .cfg format from Huawei and import the file into the SmartLogger for successfully connecting to a custom device.
-
Page 122: Setting Parameters For A Custom Device
6.3.12 Setting Parameters for a Custom Device Context The SmartLogger can connect to third-party devices supporting the Modbus-RTU protocol, such as the transformer substation and EMI. The protocol information points vary depending Issue 03 (2020-01-10) Copyright © Huawei Technologies Co., Ltd. - Page 123 Custom Device 1. Port number Set this parameter to the number of the COM port connected to the custom device. Address Set this parameter to the communications address of the custom device. Issue 03 (2020-01-10) Copyright © Huawei Technologies Co., Ltd.
-
Page 124: Setting Iec104 Device Parameters
SmartLogger for connecting to a third-party device. The supported device types are IEC104 device 1 to IEC104 device 5. The corresponding configuration file names are iec104_equip_custom_1.cfg to iec104_equip_custom_5.cfg. Multiple devices of the same type can be connected. Issue 03 (2020-01-10) Copyright © Huawei Technologies Co., Ltd. - Page 125 Set this parameter to the common address of the IEC104 device. Address Set this parameter to the communications address of the IEC104 device. Step 3 Set device monitoring parameters and click Submit. Issue 03 (2020-01-10) Copyright © Huawei Technologies Co., Ltd.
-
Page 126: Power Grid Scheduling
According to standard requirements, the SmartLogger can reliably adjust power for the connected solar inverters in real time to ensure that the PV plant can respond to requirements of the power grid company in a timely manner. Issue 03 (2020-01-10) Copyright © Huawei Technologies Co., Ltd. -
Page 127: Setting Active Power Control
Figure 6-42 Active power control ----End No Limit Parameter Description Active power control Set this parameter to No limit for the solar inverter to run at mode full load. DI Active Scheduling Issue 03 (2020-01-10) Copyright © Huawei Technologies Co., Ltd. - Page 128 For example, if you add 00:00:00 and 12:00:00 on the WebUI and the current system current is 14:30:00, the solar inverter will run with the maximum power specified for 12:00:00. Issue 03 (2020-01-10) Copyright © Huawei Technologies Co., Ltd.
- Page 129 Strategy 2: The customized function is provided for a specific power plant. Set Overshoot, Adjustment period, and Adjustment deadband based on the scheduling requirements of the power plant. Grid connection with limited power (kW) Issue 03 (2020-01-10) Copyright © Huawei Technologies Co., Ltd.
- Page 130 Specifies whether the DO port is allowed to control limit switch-off. Switch-off control port Set this parameter to the DO port that controls switch-off. Switch-on control port Set this parameter to the DO port that controls switch-on. Issue 03 (2020-01-10) Copyright © Huawei Technologies Co., Ltd.
- Page 131 0% to 100% or from 100% to 0%. PV plant ID Set this parameter to the PV plant ID. Remote output Set this parameter to the IP address or domain control server name of the server. Issue 03 (2020-01-10) Copyright © Huawei Technologies Co., Ltd.
-
Page 132: Setting Reactive Power Control
Step 1 Choose Monitoring > SUN2000 > Running Param. > Power Adjustment. On the displayed page, check that Remote power schedule is set to Enable. Step 2 Set the parameters for reactive power control and click Submit. Figure 6-43 Reactive power control ----End Issue 03 (2020-01-10) Copyright © Huawei Technologies Co., Ltd. - Page 133 Abnormal Reactive Schedule alarm is raised. Table 6-4 SmartLogger+SmartModule scenario Parameter Description Reactive power control Set this parameter to DI reactive scheduling. mode Issue 03 (2020-01-10) Copyright © Huawei Technologies Co., Ltd.
- Page 134 Power factor fix control. Start time If the solar inverter is required to run with a specified power Issue 03 (2020-01-10) Copyright © Huawei Technologies Co., Ltd.
- Page 135 When configuring the curve, ensure that the U/Un(%) value of a point is greater than the U/Un(%) value of the previous point. Otherwise, the message indicating invalid input will be displayed. Issue 03 (2020-01-10) Copyright © Huawei Technologies Co., Ltd.
- Page 136 The final value should be in the form of Q/S. Parameter Description Reactive power control Set this parameter to Q-U hysteresis curve(CEI0-16). mode Issue 03 (2020-01-10) Copyright © Huawei Technologies Co., Ltd.
- Page 137 PV plant and delivers the data to all solar inverters connected to the SmartLogger. Power Factor Closed-Loop Control (Old Policy) Before setting this parameter, ensure that the power meter is correctly connected to the SmartLogger. Issue 03 (2020-01-10) Copyright © Huawei Technologies Co., Ltd.
- Page 138 The target value should be larger than the appraisal value of the PV plant power factor. Adjustment period Specifies the interval for sending adjustment commands by the SmartLogger. Issue 03 (2020-01-10) Copyright © Huawei Technologies Co., Ltd.
-
Page 139: Setting Export Limitation Parameters
Scenario without a circuit breaker: The countercurrent feeding into the power grid can be eliminated by sending a command from the SmartLogger to lower the solar inverter output power. Figure 6-44 Network diagram (without a circuit breaker) Issue 03 (2020-01-10) Copyright © Huawei Technologies Co., Ltd. - Page 140 SmartLogger power-off after the DO switches off the circuit breaker. Procedure Step 1 Set parameters as prompted. For details, click Help on the page. Click Previous and Next as required. Issue 03 (2020-01-10) Copyright © Huawei Technologies Co., Ltd.
-
Page 141: Setting Parameters For Smart Reactive Power Compensation
Maintenance > License Management page. Procedure Step 1 Set parameters as prompted. For details, click Help on the page. Figure 6-47 Setting parameters for smart reactive power compensation Issue 03 (2020-01-10) Copyright © Huawei Technologies Co., Ltd. -
Page 142: Setting Drm Parameters
When S0 is turned off, the inverters are connected to the power grid. When S5 is turned on, the inverters When two or DRM5 do not output active power. more DRM Issue 03 (2020-01-10) Copyright © Huawei Technologies Co., Ltd. - Page 143 If the current of the AI port is within the setting range, Startup current range inverters are turned on. Otherwise, inverters are turned off. Power Control Set DI parameters based on the DRM requirements. Issue 03 (2020-01-10) Copyright © Huawei Technologies Co., Ltd.
-
Page 144: Setting Remote Shutdown
Figure 6-50 Networking When setting this function, ensure that the user-defined DI port is not occupied. Otherwise, the setting will fail. Procedure Step 1 Set remote shutdown parameters. Figure 6-51 Remote shutdown Issue 03 (2020-01-10) Copyright © Huawei Technologies Co., Ltd. - Page 145 Specifies whether to enable shutdown over OVGR. If this parameter is set to Enable, the Cubicle alarm enabling Abnormal Cubicle alarm is raised when the dry contact signal is effective and the Cubicle is abnormal. ----End Issue 03 (2020-01-10) Copyright © Huawei Technologies Co., Ltd.
-
Page 146: Device Maintenance
AC socket. connected to the AC socket. 4. The power adapter is faulty. 4. Replace the power adapter. 5. The SmartLogger is faulty. 5. Contact the dealer or Huawei technical support. Issue 03 (2020-01-10) Copyright © Huawei Technologies Co., Ltd. - Page 147 3. Manually add the devices that cannot be detected automatically, such as the EMI and power meter. 4. Contact the dealer or Huawei technical support. 1. The solar inverter and SmartLogger 1. Check whether the solar inverter and do not support MBUS.
- Page 148 5. Power on the SmartLogger and its connected device. 6. Check the RS485 communications parameter settings. 7. Contact the dealer or Huawei technical support. 1. The SIM card is not inserted or it is in 1. Insert or replace the SIM card.
-
Page 149: Alarm List
DI signal received by the Cubicle detected an SmartLogger is consistent with the dry exception at the contact status. If yes, restart the solar grid connection inverter. point. Issue 03 (2020-01-10) Copyright © Huawei Technologies Co., Ltd. - Page 150 If so, reconnect controller is the cable securely. faulty. 2. Check whether the 24 V power supply in the smart array controller is faulty. Replace the faulty power module. Issue 03 (2020-01-10) Copyright © Huawei Technologies Co., Ltd.
- Page 151 System Digital time. System Signature Certifica Certificate to te to Expire Expire Manage Management Change the digital signature certificate 1122 Major ment System Digital immediately. System Signature Certifica Certificate Expired Expired Issue 03 (2020-01-10) Copyright © Huawei Technologies Co., Ltd.
- Page 152 Signature Center Certificate to Certifica Expire te to Expire 1128 Poverty Major Poverty Change the digital signature certificate Alleviati Alleviation immediately. Monitoring Monitori Center Digital Signature Center Certificate Certifica Expired Expired Issue 03 (2020-01-10) Copyright © Huawei Technologies Co., Ltd.
-
Page 153: Webui Maintenance Operations
7.4.1 Upgrading the Device Firmware Version Context You can upgrade the firmware of the SmartLogger, solar inverter, MBUS module, or PID module over the WebUI. Procedure Step 1 Perform an upgrade. Issue 03 (2020-01-10) Copyright © Huawei Technologies Co., Ltd. -
Page 154: Setting Security Parameters
Change the password for the current login user to log in to the WebUI. After this parameter is set, a user is automatically logged out Automatic logout time if the user does not perform any operation within the period specified by this parameter. Issue 03 (2020-01-10) Copyright © Huawei Technologies Co., Ltd. -
Page 155: Sending A System Maintenance Command
If this parameter is set to Disable, the digital signature of the upgrade package is not verified. 7.4.3 Sending a System Maintenance Command Figure 7-3 System maintenance Function Description Reset System Resets the SmartLogger, which will automatically shut down and restart. Issue 03 (2020-01-10) Copyright © Huawei Technologies Co., Ltd. -
Page 156: Exporting Device Logs
Logs can be exported for a maximum of five devices of the same type at a time. Step 3 Observe the progress bar and wait until the log export is complete. Step 4 After the export is successful, click Log archiving to save the logs. ----End Issue 03 (2020-01-10) Copyright © Huawei Technologies Co., Ltd. -
Page 157: Starting An Onsite Test
3. Perform a spot-check test onsite. The spot-check function is available 4. After the spot-check test is complete, click Stop only for a device Spot-Check. whose grid code is set to the Japanese standard. ----End Issue 03 (2020-01-10) Copyright © Huawei Technologies Co., Ltd. -
Page 158: Managing Licenses
Exports the license you want to apply for a license. application file. 2. Click Export License Appli File. 3. Purchase a license from Huawei and obtain the license file from Huawei technical support engineers. 1. Click Upload License. License loading... -
Page 159: Managing The Smartmodule
Step 3 Select the name of the device whose data is to be collected and click Collect Data. Step 4 Wait until all data is gathered. On the Monitoring page, query the collection result. ----End Issue 03 (2020-01-10) Copyright © Huawei Technologies Co., Ltd. -
Page 160: Adjusting The Total Energy Yield
Submit. ----End 7.5 Device Disposal If the service life of the SmartLogger expires, dispose of the SmartLogger according to the local disposal act for waste electric appliances. Issue 03 (2020-01-10) Copyright © Huawei Technologies Co., Ltd. -
Page 161: Faq
WLAN to provide functions such as alarm query, parameter settings, and routine maintenance. Mobile phone operating system: Android 4.0 or later Access the Huawei app store (https://appstore.huawei.com), search for SUN2000 or FusionSolar, and download the app installation package. Issue 03 (2020-01-10) Copyright © Huawei Technologies Co., Ltd. - Page 162 Step 1 Log in to the app. (Connecting the SmartLogger to the FusionSolar Hosting Cloud) Open the FusionSolar app, log in to intl.fusionsolar.huawei.com as installer account, and choose My > Device commissioning to connect to the WLAN hotspot of the SmartLogger.
-
Page 163: How Do I Set Ftp Parameters
Users are liable for any loss caused by the enabling of the FTP protocol (non-secure protocol). Users are advised to take measures at the PV plant level to reduce security risks, or use Huawei management system to mitigate the risks. Procedure Step 1 Set FTP parameters and click Submit. - Page 164 Fixed time: Reports data at a specified time. Fixed time specifies the time for reporting data. Issue 03 (2020-01-10) Copyright © Huawei Technologies Co., Ltd.
-
Page 165: How Do I Set Email Parameters
PV plant system in time. When using this function, ensure that the SmartLogger can connect to the configured email server and the Ethernet parameters and email parameters are correctly set for the SmartLogger. Issue 03 (2020-01-10) Copyright © Huawei Technologies Co., Ltd. - Page 166 Specifies whether to send energy yield data by email and the time for sending emails. Alarms Specifies whether to send alarms by email and the severity of the alarms to be sent. Issue 03 (2020-01-10) Copyright © Huawei Technologies Co., Ltd.
- Page 167 Enter the password correctly. 0xe002 Configure the domain/IP of the SMTP server correctly. Configure the addresses for Please provide SmartLogger 0xe003 Others sending and receiving emails running logs and contact Huawei correctly. Service Center. Issue 03 (2020-01-10) Copyright © Huawei Technologies Co., Ltd.
-
Page 168: How Do I Change The Ssid And Password Of The Built-In Wlan
The SmartLogger provides four DI ports, which support DI active scheduling, DI reactive scheduling, DRM, remote shutdown, and input of correlated alarms. For details about DI active scheduling, DI reactive scheduling, DRM and remote shutdown, 6.4 Power Grid Scheduling. Issue 03 (2020-01-10) Copyright © Huawei Technologies Co., Ltd. -
Page 169: How Do I Use Do Ports
Before setting the corresponding function, ensure that the DO port is not set for other purposes. Otherwise, the setting will fail. Issue 03 (2020-01-10) Copyright © Huawei Technologies Co., Ltd. - Page 170 Step 1 Choose Settings > Alarm Output and associate solar inverter alarms with the DO port. If the SmartLogger is restarted or powered off after the function is enabled, the DO port status may change and the alarm output may be abnormal. Issue 03 (2020-01-10) Copyright © Huawei Technologies Co., Ltd.
-
Page 171: How Do I Use The Usb Port
Offline Configuration deployment configuration deployment configuration file is imported through file has been saved in the Offline Configuration, the root directory of the USB SmartLogger automatically flash drive. completes the deployment configuration. Issue 03 (2020-01-10) Copyright © Huawei Technologies Co., Ltd. - Page 172 Step 1 Save the device upgrade package to the USB flash drive. Do not decompress the upgrade package. Step 2 Connect the USB flash drive to the USB port on the SmartLogger. Issue 03 (2020-01-10) Copyright © Huawei Technologies Co., Ltd.
-
Page 173: How Do I Change A Device Name
----End 8.9 How Do I Change the Communications Address? The SmartLogger allows you to change the communications addresses of Huawei devices on the Connect Device or Device List page. Changing the Communications Address on the Connect Device Page Step 1 Choose Maintenance >... -
Page 174: How Do I Export Inverter Parameters
If alarms are cleared for the SmartLogger, you must reset alarms on the management system. Otherwise, the management system cannot obtain the alarm information collected by the SmartLogger after the alarms are cleared. ----End Issue 03 (2020-01-10) Copyright © Huawei Technologies Co., Ltd. -
Page 175: How Do I Enable The Ai1 Port To Detect Spd Alarms
SmartLogger, an external 120–ohm resistor needs to be connected to the RS485 bus of the power meter. For details, see the user manual of the power meter. Netbiter CEWE Schneider PM1200 Issue 03 (2020-01-10) Copyright © Huawei Technologies Co., Ltd. - Page 176 Total irradiance, ambient temperature, wind direction, and wind speed WSx-UMB(external Total irradiance, ambient sensors) temperature, PV module temperature, wind direction, and wind speed Total irradiance and ambient Hukseflux SRx Hukseflux SRx temperature Issue 03 (2020-01-10) Copyright © Huawei Technologies Co., Ltd.
-
Page 177: How Do I Check The Sim Card Status
Choose Over View > Mobile Data to view the SIM card status. Table 8-3 SIM card status Parameter Status Description 4G module Card absent No SIM card is detected. Insert a SIM card. Issue 03 (2020-01-10) Copyright © Huawei Technologies Co., Ltd. - Page 178 The used traffic exceeds the monthly traffic package. Traffic is used up. Top up the SIM card account immediately. No package Choose Settings > Wireless Network and configured configure a monthly traffic package. Issue 03 (2020-01-10) Copyright © Huawei Technologies Co., Ltd.
-
Page 179: Technical Specifications
Power adapter AC input: 100–240 V, 50/60 Hz DC output: 12 V, 2 A DC power supply 24 V, 0.8 A Power consumption Typical: 9 W; maximum: 15 W Issue 03 (2020-01-10) Copyright © Huawei Technologies Co., Ltd. - Page 180 NO or NC contacts; supports 12 V, 0.5 A signal voltage 4 PCS; AI1: supports 0–10 V voltage (passive); Analog input (AI) port AI2–AI4: support 4–20 mA or 0–20 mA input current (passive) Issue 03 (2020-01-10) Copyright © Huawei Technologies Co., Ltd.
- Page 181 LTE TDD: B41 WCDMA: B1, B6, B8, B19 The SmartLogger3000A01KR supports networks of SK Telecom. The following frequency bands are supported: LTE FDD: B1, B3, B5, B7 WCDMA: B1 Issue 03 (2020-01-10) Copyright © Huawei Technologies Co., Ltd.
- Page 182 2300–2400 MHz LTE Band 41 2555–2655 MHz Output Power of the 4G Module (SmartLogger3000A01EU and SmartLogger3000A03EU) Frequency Band Standard Value Remarks (Unit: (Unit: dBm) GSM 900 GMSK (1Tx Slot) ± 2 Issue 03 (2020-01-10) Copyright © Huawei Technologies Co., Ltd.
- Page 183 2.4 GHz: 1 x 100 mW Maximum throughput 2.4 GHz: 65 Mbit/s Single/Dual band mode Single MIMO 2.4 GHz frequency band: 1T1R Maximum number of online users Polarization mode Linear Directivity Multi-dimensional Issue 03 (2020-01-10) Copyright © Huawei Technologies Co., Ltd.
-
Page 184: Technical Specifications Of The Smartmodule
Installed on a wall or guide rail Maximum operating altitude 4000 m Pollution level Level 2 Corrosion level Class B Ports Parameter Specifications Ethernet electrical port (GE) 4 PCS; 10M/100M/1000M auto-negotiation Issue 03 (2020-01-10) Copyright © Huawei Technologies Co., Ltd. - Page 185 Two PCS; supports the access of signals from a 3-wire or 2-wire PT100/PT1000 temperature sensor Analog input (AI) port 4 PCS; AI1: supports 0–10 V voltage (passive); AI2–AI4: support 4–20 mA or 0–20 mA input current (passive) Issue 03 (2020-01-10) Copyright © Huawei Technologies Co., Ltd.
-
Page 186: A Product User Lists
SmoduleAdmin /EzFp+2%r6@IxSCv authentication by the SmartLogger Table A-3 Operating system user list User Name Initial Password enspire Changeme root Changeme prorunacc No initial password No initial password daemon No initial password Issue 03 (2020-01-10) Copyright © Huawei Technologies Co., Ltd. - Page 187 SmartLogger3000 User Manual A Product User Lists User Name Initial Password nobody No initial password sshd No initial password Issue 03 (2020-01-10) Copyright © Huawei Technologies Co., Ltd.
-
Page 188: B Domain Name List Of Management Systems
Public IP address Partner management system re-ene.kyuden.co.jp Public IP address Remote output control server of Kyushu Electric Power Company re-ene.yonden.co.jp Public IP address Remote output control server of Shikoku Electric Power Company Issue 03 (2020-01-10) Copyright © Huawei Technologies Co., Ltd. -
Page 189: C Acronyms And Abbreviations
C Acronyms and Abbreviations Acronyms and Abbreviations Alternating Current Analog Input Analog Output Application Communication Customer Premises Equipment Direct Current Digital Input Digital Output Environmental Monitoring Instrument Ethernet Gigabit Ethernet Ground Issue 03 (2020-01-10) Copyright © Huawei Technologies Co., Ltd. - Page 190 Normally Closed Normally Open Power over Ethernet Reset Rapid Spanning Tree Protocol RSTP Small Form-factor Pluggable Spanning Tree Protocol Universal Serial Bus Wide Area Network WEEE Waste Electrical and Electronic Equipment Issue 03 (2020-01-10) Copyright © Huawei Technologies Co., Ltd.
Need help?
Do you have a question about the SmartLogger3000 and is the answer not in the manual?
Questions and answers