Table of Contents
Advertisement
Quick Links
Advertisement
Table of Contents

Related Manuals for laguna Quadtec I PXI12


Summary of Contents for laguna Quadtec I PXI12
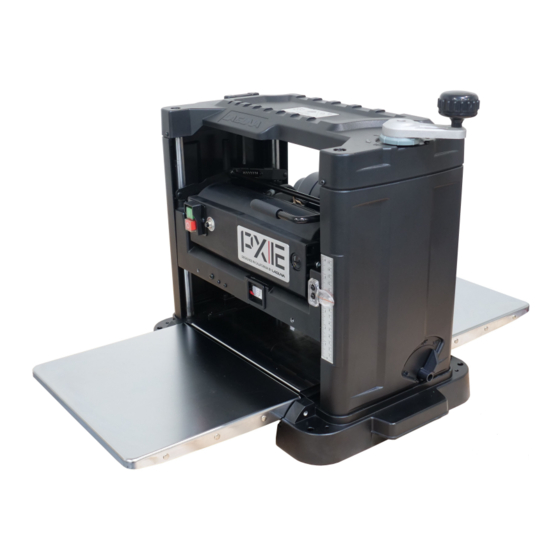
- Page 1 PX|12 Quadtec:I Planer Owner's Manual MPLANPX12-0130 3/10/2021...
- Page 2 For immediate service on any Laguna Tools products: +1 (949) 474-1200 customerservice@lagunatools.com Laguna Tools, Inc. LAGUNA® and the LAGUNA Logo® are the registered trademarks of Laguna Tools, Inc. All rights reserved. 04/01/2019 LAGUNA AMERICAN HEADQUARTERS Texas: 744 Refuge Way Suite 200, Grand Prairie, Texas 75050, U.S.A. Phone: +1-800-332-4094 Huntington Beach: 7291 Heil Ave Huntington Beach, CA 92647, U.S.A.
-
Page 3: Table Of Contents
CONTENTS PX|12 Quadtec:I Planer Safety ............4 Electrical Safety ..........8 Specifications ..........12 Machine Overview ......... 13 Setup ............16 Placement & Unboxing ......16 Inventory List .......... 18 Assembling ..........18 Operation ............. 21 Maintenance ..........23 Troubleshooting ..........26 Wiring ............ -
Page 4: Safety
PX|12 Quadtec:I Planer \ Safety Safety Read and understand all warnings and operation instructions before using any tool or equipment. Always follow basic safety precautions to reduce the risk of personal injury. Improper operation, maintenance or modification of tools or equipment could result in serious injury and property damage. There are certain applications for which tools and equipment are designed. - Page 5 PX|12 Quadtec:I Planer \ Safety PROP 65 WARNING SOME DUST CREATED BY POWER SANDING, SAWING, GRINDING, DRILLING, AND OTHER CONSTRUCTION ACTIVITIES CONTAINS CHEMICALS KNOWN TO THE STATE OF CALIFORNIA TO CAUSE CANCER, BIRTH DEFECTS OR OTHER REPRODUCTIVE HARM. SOME EXAMPLES OF THESE CHEMICALS ARE: ·...
- Page 6 PX|12 Quadtec:I Planer \ Safety WEARING PROPER APPAREL. Do not wear clothing, apparel or jewelry that can become entangled in moving parts. Always tie back or cover long hair. Wear non-slip footwear to reduce risk of slipping and losing control or accidentally contacting cutting tool or moving parts.
- Page 7 PX|12 Quadtec:I Planer \ Safety 3. SUPPORTING THE WORK ONLY MAKE CUTS IF THE WORK PIECE IS STABLE AND NEVER ATTEMPT TO CUT UNSTABLE PLANKS, OR INJURY MAY OCCUR. 4. CUTTING DEPTH NEVER EXCEED THE MAXIMUM CUTTING DEPTH AS STATED IN THE SPECIFICATION FOR YOUR MACHINE. IT IS FAR BETTER TO TAKE SEVERAL SMALL CUTS RATHER THAN LARGE CUTS.
-
Page 8: Electrical Safety
PX|12 Quadtec:I Planer \ Electrical Safety Electrical Safety WARNING! · RUNNING ON A DIFFERENT VOLTAGE THAN STATED BELOW WILL DAMAGE THE MACHINE. NEVER RUN THE MACHINE IN WET OR DAMP CONDITIONS. · ELECTROCUTION, FIRE, SHOCK, OR EQUIPMENT DAMAGE MAY OCCUR IF MACHINE IS NOT PROPERLY GROUNDED AND CONNECTED TO POWER SUPPLY. - Page 9 PX|12 Quadtec:I Planer \ Electrical Safety Grounding Methods DANGER! THIS MACHINE MUST BE GROUNDED WHILE IN USE TO PROTECT THE OPERATOR FROM ELECTRIC SHOCK. IN ALL CASES, MAKE CERTAIN THAT THE RECEPTACLE IN QUESTION IS PROPERLY GROUNDED. IF YOU ARE NOT SURE, HAVE A QUALIFIED ELECTRICIAN CHECK THE RECEPTACLE.
- Page 10 PX|12 Quadtec:I Planer \ Electrical Safety Check with a qualified electrician or service personnel if the grounding instructions are not completely understood, or if in doubt as to whether the tool is properly grounded. Use only 3-wire extension cords that have 3-prong grounding plugs and 3 pole receptacles that accept the tool's plug.
- Page 11 PX|12 Quadtec:I Planer \ Electrical Safety Extension Cords Use proper extension cords. Make sure your extension cord is in good condition and is a 3- wire extension cord which has a 3-prong grounding type plug and matching receptacle which will accept the machine’s plug.
-
Page 12: Specifications
PX|12 Quadtec:I Planer \ Specifications Specifications PX|12 Quadtec:I Planer MPLANPX12-0130 BED SIZE 12-1/2 X 10-1/4" PULL-OUT EXTENSION 11-1/4" FLIP DOWN EXTENSIONS X 2 WHEELS BUILT-IN MAX. DEPHT OF CUT 3/32" MAX. STOCK THICKNESS 6" MIN. STOCK THICKNESS 5/32" MIN. STOCK LENGTH 5"... -
Page 13: Machine Overview
PX|12 Quadtec:I Planer \ Machine Overview Machine Overview PX|12 Quadtec:I Planer Table Guides The Guides act as a stop to reduce the chance of stock from sliding past the edge of the cutterhead or table. Feed Speed The feed speed is 26 FPM (feet per minute). Control Panel - ON/OFF Switch;... - Page 14 PX|12 Quadtec:I Planer \ Machine Overview Thickness Gauge The top of the planer is a thickness gauge. Material thickness can be quickly identified by placing it on edge into the various gauges and reading the corresponding measurement (Fig. 8). Stock Removal Gauge The Stock Removal Gauge on the front of the planer (Fig.
- Page 15 PX|12 Quadtec:I Planer \ Machine Overview Depth Stop The depth stop is located on the side of the planer (Fig. 10). It has four settings. Rotate dial to desired thickness. When lowering carriage to preset thickness resistance will be felt when at desired setting. DO NOT use force to lower carriage when resistance is felt as damage to the carriage and lift mechanism will result.
-
Page 16: Setup
ALL SHIPPING DAMAGE MUST BE NOTED UPON DELIVERY AND SIGNED BY THE OWNER AND THE DELIVERY DRIVER. IF YOU FIND ANY DAMAGED ITEMS IN YOUR PACKAGE, YOU MUST CONTACT LAGUNA TOOLS TO FILE A COMPLAINT. IN ORDER TO RETURN DAMAGED GOODS UNDER THE LIMITED WARRANTY TO LAGUNA TOOLS, INC., YOU MUST HAVE THE ORIGINAL PACKAGING. - Page 17 PX|12 Quadtec:I Planer \ Setup Placement & Unboxing 5. Locate it close to a power source and dust collection. 6. Allow an area for the storage of blanks, finished products and tools. Unboxing WARNING! · THE MACHINE WEIGHS 72 LBS (32KG). ENSURE THAT YOU HAVE ENOUGH PEOPLE TO DO THE JOB SAFELY. ·...
-
Page 18: Inventory List
PX|12 Quadtec:I Planer \ Setup Inventory List Inventory List The following depicts items shipped with your machine. Before assembling, ensure that you have received all parts shown below. Machine parts should arrive sealed in plastic bags. Remove parts from plastic bags before laying them out to inventory them. - Page 19 PX|12 Quadtec:I Planer \ Setup Assembling Figure 3: Thickness Adjustment Handle 2. Clean all rust protected surfaces with a commercial de-greaser. DO NOT use acetone, gasoline, lacquer thinner or any type of cleaner that could damage paint. Coat cleaned surfaces with WD-40® or 20W machine oil.
- Page 20 PX|12 Quadtec:I Planer \ Setup Assembling DANGER! IN ALL CASES, MAKE CERTAIN THE RECEPTACLE IN QUESTION IS PROPERLY GROUNDED. IF YOU ARE NOT SURE, HAVE A QUALIFIED ELECTRICIAN CHECK THE RECEPTACLE. Motor Specifications The typical main motor is 2 HP and is typically wired for 110 Volt, Single Phase, 60 HZ, AC current. Confirm your motor electrical configuration before connecting power! Before connecting the machine to the power source, make sure the switch is in the "OFF"...
-
Page 21: Operation
PX|12 Quadtec:I Planer \ Setup Assembling 7. Repeat Step 5 until the planer removes the entire top surface of the calibrating board. NOTICE! Drawing pencil marks across the width of the top of the calibrating board in several locations can make it easier to determine when the entire surface has been planned. - Page 22 PX|12 Quadtec:I Planer \ Operation 2. Establish the proper depth of cut (typically less than 1/16”), using the Thickness Adjustment handle and referencing the Thickness Scale or the Material Removal Scale. NOTICE! One revolution of the Thickness Adjustment Handle equals 1/16”, half a turn equals 1/32”, etc. 3.
-
Page 23: Maintenance
PX|12 Quadtec:I Planer \ Maintenance Maintenance General Keep your machine clean. At the end of each day, clean the machine. Wood contains moisture, and if sawdust or wood chips are not removed they will cause rust. In general, we recommend that you only use a Teflon-based lubricant on the planer. Regular oil attracts dust and dirt. - Page 24 PX|12 Quadtec:I Planer \ Maintenance Figure 14: Cutterhead Figure 15: Auto Lock 1. The knife inserts on the 12” Planer are four-sided. When dull, remove each knife, rotate it 90° for a fresh edge, and re-install it. No further adjustment is necessary. Use a Torx wrench (T20) to remove the knife insert screw.
- Page 25 PX|12 Quadtec:I Planer \ Maintenance Figure 16: Under view of planer showing chain configuration. The chain tension for carriage adjustment was established at the factory. When the chain stretches from normal use it may require tensioning. Excessive play in the thickness adjustment handle indicates a potentially loose chain.
-
Page 26: Troubleshooting
PX|12 Quadtec:I Planer \ Troubleshooting Troubleshooting Symptom Possible Cause Possible Solution Machine will not 1. Fuse blown or circuit breaker tripped 1. Replace fuse or reset circuit breaker start 2. Cord damaged 2. Have cord replaced 3. Not connected to power source 3. -
Page 27: Wiring
PX|12 Quadtec:I Planer \ Wiring Wiring WARNING REVIEW ELECTRICAL SAFETY PRIOR TO ANY WIRING PROCEDURES. -
Page 28: Replacement Parts Diagram
PX|12 Quadtec:I Planer \ Replacement Parts Diagram Replacement Parts Diagram Cutterhead & Drivetrain... - Page 29 PX|12 Quadtec:I Planer \ Replacement Parts Diagram Table & Lift...
- Page 30 PX|12 Quadtec:I Planer \ Replacement Parts Diagram Motor...
-
Page 31: Replacement Parts Table
PX|12 Quadtec:I Planer \ Replacement Parts Table Replacement Parts Table REF NO PART NUMBER DESCRIPTION SPECIFICATION 924830-000 HANDLE ASSY. 090354-148 HANDLE 250260-615 KNOB 250262-615 KNOB COVER 251421-675 SCALE RING 250662-615 6200 360302-901 HANDLE SHAFT 000302-103 ROUND HEAD PHILLIP SCREW M4-0.7X10 049103-104 T TYPE SCREW M6-1.0X12... - Page 32 PX|12 Quadtec:I Planer \ Replacement Parts Table REF NO PART NUMBER DESCRIPTION SPECIFICATION 170736-902 LEFT MOUNTING PLATE 380257-901 SPROCKET 150004-000 SPROCKET 010006-000 RETAINING RING STW-15 000302-102 ROUND HEAD PHILLIPS SCREW M4-0.7X8 250114-615 DUST PORT 250133-615 CONNECTOR 000002-111 HEX SCREW M6-1.0X20 008005-100 HEX NUT M6-1.0(10BX5H)
- Page 33 PX|12 Quadtec:I Planer \ Replacement Parts Table REF NO PART NUMBER DESCRIPTION SPECIFICATION 006001-001 FLAT WASHER 4.3-10X1.0 017002-000 BALL Ø6 280052-000 SPRING 000104-107 CAP SCREW M8-1.25X15 361376-902 LEAD SCREW 000103-102 CAP SCREW M6-1.0X10 270005-000 FIX PLATE 360307-000 COLUMN 251402-000 RIGHT SIDE COVER 090353-147 BASE 001902-101...
-
Page 34: Warranty
This machine is covered by a warranty and the purchasing dealer can answer any questions you may have. Additionally, you can contact Laguna: +1 (949) 474-1200 customerservice@lagunatools.com. Every product sold is warranted to be free of manufacturers’ defective workmanship, parts, and materials. - Page 35 PX|12 Quadtec:I Planer \ Warranty...
- Page 36 Minnesota: 5250 West 74th St, Edina, MN 55439, U.S.A Phone: +1-949-474-1200 DAKE CORPORATION 724 Robbins Road, Grand Haven, MI 49417, United States +1-800-937-3253 LAGUNA EUROPE Walker Rd, Bardon Hill, Coalville LE67 1TU, United Kingdom. Phone: +44-1530-516921 © 2021 Laguna Tools...
Need help?
Do you have a question about the Quadtec I PXI12 and is the answer not in the manual?
Questions and answers