
Related Manuals for Toshiba BV410D-GS02-QM-S


Summary of Contents for Toshiba BV410D-GS02-QM-S
- Page 1 Barcode Printer Owner’s Manual BV410D-GS02-QM-S BV410D-TS02-QM-S BV420D-GS02-QM-S BV420D-TS02-QM-S BV410D BV420D...
-
Page 2: Notes To Users
Neuss, Germany, phone +49-(0)-2131-1245-0. For a copy of the related CE Declaration of Conformity, please contact your dealer or Toshiba Tec Corporation. This is a Class A product. In a domestic environment, this product may cause radio interference in which case the user may be required to take adequate measures. - Page 3 This product is designed for commercial usage and is not consumer product. NOTES: This manual may not be copied in whole or in part without prior written permission of Toshiba Tec Corporation. The contents of this manual may be changed without notification.
- Page 4 Importer (For EU, EFTA) Toshiba Tec Germany Imaging Systems GmbH Carl-Schurz-Str. 7, 41460 Neuss, Germany Importer (For Turkey) BOER BILISIM SANAYI VE TICARET ANONIM SIRKETI BCP Yukari Dudullu, Tavukcuyolu Cad. Demirturk Sok No: 8A 34775, Umraniye-Istanbul, Turkey Manufacturer: Toshiba Tec Corporation...
-
Page 5: Precautions For The Handling Of Wireless Communication Devices
Standards below are certified under the operation with the provided antenna. Do not use this product with other antennas. Europe - EU Declaration of Conformity Hereby, Toshiba Tec Corporation, declares that the BV410D/BV420D series are in compliance with the essential requirements and other relevant provisions of Directive 2014/53/EU. USA-Federal Communications Commission (FCC) -
Page 6: Approved Countries/Regions For Use For The Devices
à des appareils mobiles (antennes sont supérieures à 20 cm à partir du corps d’une personne). Approved Countries/Regions for Use for the Devices This equipment is approved to the radio standard by the specific countries/regions. Please ask Toshiba Tec authorized dealers or service technicians. -
Page 7: Safety Precautions
Do not attempt to effect repairs or modifications to this equipment. If a fault occurs that cannot be rectified using the procedures described in this manual, turn off the power, unplug the machine, and then contact your authorized Toshiba Tec Corporation representative for assistance. Meanings of Each Symbol... - Page 8 In these cases, immediately turn off the power switch and disconnect the power cable plug from the outlet. Then, contact your authorized Toshiba Tec Corporation representative for assistance. If foreign objects (metal fragments, water, liquids) enter the machine, turn Disconnect the plug.
-
Page 9: Caution
Request Regarding Maintenance Utilize our maintenance services. After purchasing the machine, contact your authorized Toshiba Tec Corporation representative for assistance once a year to have the inside of the machine cleaned. Dust will build up inside the machine and may cause a fire or a malfunction. -
Page 10: Table Of Contents
CONTENTS Notes to Users............................1 Precautions for the handling of Wireless Communication Devices ............. 4 Regulatory Information .............................. 4 Approved Countries/Regions for Use for the Devices ....................5 Precaution for Use ..............................5 Safety Precautions ..........................6 Safety Summary ................................6 Meanings of Each Symbol ............................ - Page 11 14. Troubleshooting ..........................38 Troubleshooting ................................ 38 Status lamp ................................39 Removing jammed media ............................41 15. Printer Specifications........................42 Printer ..................................42 Options ..................................44 16. Media Specifications ........................45 Media ..................................45 10 CONTENTS...
-
Page 12: Product Overview
Unpack the printer. Check that there are no scratches on the printer or any other damage to it. Toshiba Tec Corporation shall have no liability for any damage or anything similar sustained during transportation. Keep the carton and internal packing materials for future transportation of the printer. -
Page 13: When Purchasing The Power Cable
When purchasing the power cable In some countries, the power cable is not provided with this printer. If this is the case, purchase an approved power cable that meets the following standards or contact your authorized Toshiba Tec Corporation representative. Country/... - Page 14 Power cable instructions 1. For use with 100 – 125 Vac mains power supply, select a power cable rated Min. 125V, 10A. 2. For use with 200 – 240 Vac mains power supply, select a power cable rated Min. 250V, 10A. 3.
-
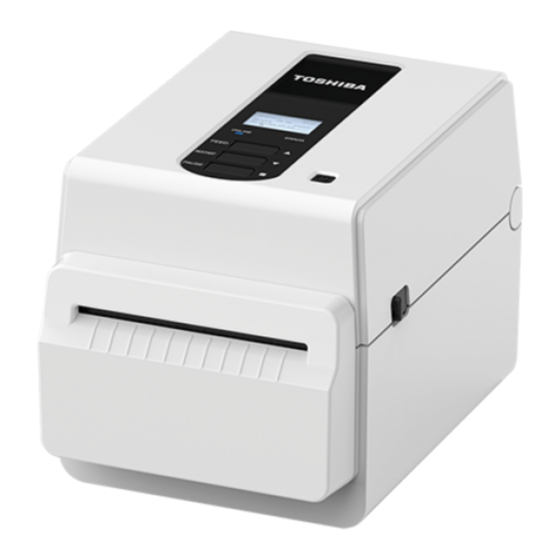
Page 15: Description Of Components
2. Description of Components The name of the components in this section is used in the following chapters. Front and rear views MECHANICAL HAZARD To avoid injury, be careful not to trap your fingers in the paper slot while opening or closing the top cover. -
Page 16: Interior
Interior HOT SURFACE You may get burned. Do not touch the print head or around it immediately after printing. The print head will become very hot during printing. [ 11 ] [ 1 ] [ 2 ] [ 2 ] [ 10 ] [ 9 ] [ 3 ]... -
Page 17: Accessories
3. Accessories [ 1 ] [ 2 ] [ 3 ] [ 4 ] Part Name Part Name Owner’s Manual USB cable CD-ROM AC adapter 16 3. Accessories... -
Page 18: Operation Panel Functions
4. Operation Panel Functions The buttons on the operation panel are used to operate and set the printer. BV410D [ 1 ] ERROR ONLINE [ 2 ] [ 3 ] FEED [ 4 ] RESTART [ 5 ] PAUSE [ 6 ] Name Function/Usage... - Page 19 <Icons displayed on the LCD> BV400D-T V1.0 ONLINE PRINTED 000000 IP : 192. XXX. XXX. XXX [ 1 ] [ 2 ] [ 5 ] [ 3 ] [ 4 ] Name Icon Function/Usage Wireless LAN Indicates when the optional Wireless LAN is installed. The intensity of the Wireless LAN is indicated by 4 levels.
-
Page 20: Bv420D
BV420D [ 1 ] POWER ONLINE ERROR [ 3 ] [ 2 ] [ 4 ] FEED PAUSE [ 5 ] Name Function/Usage POWER lamp Lights when the power is turned on. Lights when the printer is in the online mode. ONLINE lamp ... -
Page 21: Printer Setup
Before working on the inside of the printer or cleaning it, be sure to turn off the power of the printer and remove the AC adapter from it. For best results and a longer printer life, use only Toshiba Tec Corporation recommended media. (Refer to the Supply Manual.) ... -
Page 22: Setup Procedure Of The Printer
- USB cable: V2.0 (Hi-Speed) The use of a Windows driver will enable printing from Windows applications. The printer can also be controlled with its own programming commands. For details, contact your Toshiba Tec representative. Unpack the printer and its accessories from the carton. -
Page 23: Connecting The Cables
6. Connecting the Cables This chapter explains on how to connect the communication cables to the printer from a host computer or other devices. Three types of cables can be used in this printer. Be sure to connect the serial cable while the printer and the host computer are turned off. ... -
Page 24: Connecting The Ac Adapter And Power Cable
7. Connecting the AC Adapter and Power Cable Plug the power cable [1] into the AC adapter [2]. [ 2 ] [ 1 ] If a power cord is not provided with this printer, please purchase the correct one referring to P.12 “When purchasing the power cable”. -
Page 25: Turning The Printer On And Off
8. Turning the Printer On and Off Press the [POWER] button of the printer to turn it on or off. Do not plug in or unplug the power cable when you are turning the printer on or off as this may cause a fire, an electric shock or damage to the printer. -
Page 26: Opening And Closing The Top Cover
9. Opening and Closing the Top Cover To open the top cover While pulling the lock release part [1], open the top cover [2]. [ 1 ] [ 2 ] [ 1 ] To close the top cover Close the top cover. -
Page 27: Loading The Media
This chapter explains how to load the media in the printer. This printer is intended for printing the media roll (label roll and tag roll) and fanfold paper. Use Toshiba Tec Corporation approved media. Do not touch the print head or around it immediately after printing. - Page 28 Printing can be performed with both an outside wound [1] and an inside wound [2] media roll. (Refer to the figure below.) Place the media roll so that its printing surface comes upward. [ 1 ] [ 2 ] Place the media roll.
- Page 29 Cut the edge of the media with scissors. [ 1 ] [ 1 ] [ 2 ] [ 3 ] [ 2 ] [ 3 ] [1] Feed gap sensor [2] Platen roller [3] Black mark sensor Load the media. Pass the media through the media guides [1] and pull it until it reaches the front of the printer.
-
Page 30: Loading The Fanfold Paper
Loading the fanfold paper Set the fanfold paper while its printing surface comes upward. Place the stack of fanfold paper parallel to the paper slot. Check that the interface cable and the power cable do not interfere with the feeding of the fanfold paper. Place the stack of fanfold paper [1] at the rear side of the printer and insert its leading edge into the paper slot [2]. -
Page 31: Adjusting The Media Sensors
11. Adjusting the Media Sensors The two types of media sensors are equipped in this printer as below. Feed gap sensor (transmissive): Detects the length between the labels. Black mark sensor (reflective): Detects the black marks printed on the back side of the media. ... -
Page 32: Print Mode
12. Print mode There are four print modes available for this printer. Batch mode In the batch mode, the media is continuously printed and fed until the number of prints specified in the issue command has been printed. To separate the printed media from the printer in the batch mode, tear the media off at the media outlet with your hands. -
Page 33: Cut Mode (Option)
Pass through the backing paper [3] between the strip feed roller [4] and the peel-off bar [5]. [ 3 ] [ 5 ] [ 4 ] Close the peel-off module [2] while slightly pulling the media toward you so that its backing paper [1] is not loosened. -
Page 34: External Media Stand (Option)
Do not squeeze the media too much with the media guides. Otherwise, the media will bend and this may cause jamming or misfeeding. Close the top cover. For details, refer to P.25 “9. Opening and Closing the Top Cover”. ... - Page 35 Open the top cover. For details, refer to P.25 “9. Opening and Closing the Top Cover”. Pass the media through the media guides [1] and pull it until it reaches the front of the printer. [ 1 ] [ 1 ] Do not squeeze the media too much with the media guides.
-
Page 36: Maintenance
13. Maintenance This chapter explains the routine maintenance procedures. To ensure the continuous high quality operation of your printer, regularly perform the maintenance routines or every time when the media is changed. When the printer is intensively used (high throughout), perform the maintenance on a daily basis. When the printer is not intensively used, perform these maintenance on a weekly basis. -
Page 37: Platen Roller
Platen roller Turn the power off and open the top cover. Wipe the platen roller with a soft cloth slightly moistened with absolute (pure) ethyl alcohol. Peel-off module (Option) Turn the power off and open the peel-off module. Clean the surface of the roller [1], the edges [2] of the peel-off module cover and the ribs [3] of the backing paper transport guide with a dry soft cloth. -
Page 38: How To Store And Handle The Media
How to store and handle the media Be sure to carefully review and understand the Supply Manual. Use only media which meets the specified requirements. Use of non-specified media may shorten the head life and result in problems concerning barcode readability or print quality. -
Page 39: Troubleshooting
14. Troubleshooting If a problem cannot be solved by taking the actions described in this chapter, do not attempt to repair the printer. Turn off and unplug the printer. Then contact an authorized Toshiba Tec representative for assistance. Troubleshooting... -
Page 40: Status Lamp
The media is not cut cleanly. The cutter blade has reached the Turn off the printer and ask your Toshiba Tec (When the optional cutter end of its useful life. representative to replace the cutter module. - Page 41 LCD message Printer status ONLINE ERROR EXCESS HEAD TEMP The print head is too hot. MEMORY WRITE An error has occurred during writing into the flash ROM. ERR. FORMAT ERROR An error has occurred during initialization of the flash ROM. Saving has failed due to the flash ROM having insufficient blank space.
-
Page 42: Removing Jammed Media
Printer status POWER ONLINE ERROR 11. An improper command such as a print command has been received while the firmware is being upgraded in the download mode. 12. When any abnormal operations as below are performed, a system error occurs. (a) Command fetch from an odd address. -
Page 43: Printer Specifications
15. Printer Specifications This chapter describes the printer specifications. Printer The following table shows the printer specifications. Item BV410D-GS02-QM-S / BV420D-GS02-QM-S Supply voltage DC +24V, 2.5A (External AC adapter) Power consumption During a print job 60 W During standby 4.4 W (without options) - Page 44 Item BV410D-TS02-QM-S / BV420D-TS02-QM-S Supply voltage DC +24V, 2.5A (External AC adapter) Power consumption During a print job 60 W During standby 4.4 W (without options) Operating temperature range 5°C to 40°C (41°F to 104°F) Storage temperature range -20°C to 60°C (-4°F to 140°F) Relative humidity 25% to 85% RH (no condensation) Humidity for storage...
-
Page 45: Options
Options The following options are available from your nearest Toshiba Tec Corporation representative or Toshiba Tec Corporation Head Quarters. <BV410D> Option Name Type Description Cutter module (White) BV214-F-QM-S A cutter module that fully cuts (separates) the printed media. BV214-P-QM-S A cutter module that partial cuts (dose not fully separate) the printed media. -
Page 46: Media Specifications
This chapter describes the media specifications. Media Make sure that the media to be used is approved by Toshiba Tec Corporation. The warranties do not apply to problems caused by using media that is not approved by Toshiba Tec Corporation. - Page 47 25.4, 38.1, 42 or 76.2 (1.0, 1.5, 1.65 or 3.0) (See Note 2 and 3.) 1. To ensure print quality and print head life, use only Toshiba Tec Corporation approved media. 2. When using a media roll with 76.2 mm (3") inner core diameter, the optional External media stand is required.
- Page 48 Barcode Printer Owner’s Manual BV410D-GS02-QM-S BV410D-TS02-QM-S BV420D-GS02-QM-S BV420D-TS02-QM-S 1-11-1, OSAKI, SHINAGAWA-KU, TOKYO, 141-8562, JAPAN PRINTED IN INDONESIA EO0133138 © 2020 Toshiba Tec Corporation All rights reserved Ver02...
Need help?
Do you have a question about the BV410D-GS02-QM-S and is the answer not in the manual?
Questions and answers