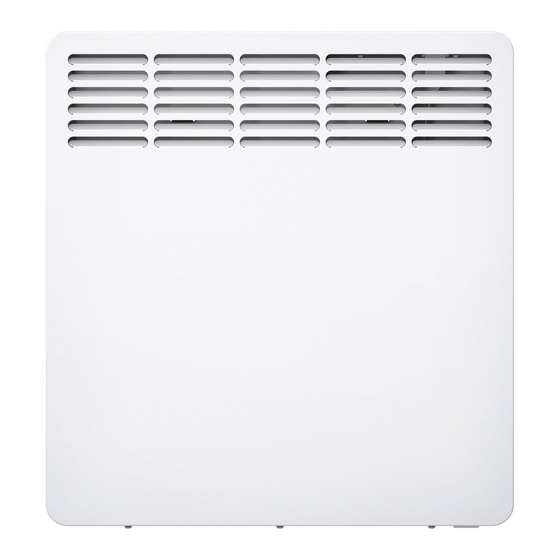
STIEBEL ELTRON CNS 100 Trend Operation And Installation
Wall mounted convector heater
Hide thumbs
Also See for CNS 100 Trend:
- Operation and installation manual (80 pages) ,
- Operation and installation (76 pages) ,
- Manual, operation and installation (16 pages)
Subscribe to Our Youtube Channel
Summary of Contents for STIEBEL ELTRON CNS 100 Trend
- Page 1 OPERATION AND INSTALLATION Wall mounted convector heater » CNS 100 Trend » CNS 150 Trend » CNS 200 Trend...
-
Page 2: Table Of Contents
CONTENTS | SpECial iNfOrmaTiON SpECial iNfOrmaTiON SPECIAL INFORMATION OPERATION General information ��������������������������������������� 16 Safety instructions ���������������������������������������������� 16 - Keep children under the age of 3 away from Other symbols in this documentation ���������������������� 16 the appliance if constant supervision cannot Information on the appliance �������������������������������� 16 be guaranteed. -
Page 3: Operation
OpEraTiON General information - The power cable must only be replaced (for Other symbols in this documentation example if damaged) by a qualified contrac- Note tor authorised by the manufacturer, using an General information is identified by the adjacent symbol. original spare part. -
Page 4: General Safety Instructions
OpEraTiON appliance description General safety instructions CAUTION Burns Parts of the appliance can get very hot and may cause WARNING Injury burns. Particular caution is advised when children or - Keep children under the age of 3 away from the vulnerable persons are present. appliance if constant supervision cannot be guar- anteed. -
Page 5: Programming Unit
OpEraTiON Operation Programming unit Symbol Description Window open detection: The programming unit is located at the top right of the appliance. To avoid unnecessary energy consumption while venting, the appliance automatically switches to frost protection mode for one hour when a window is open. The "window open detection" sym- bol flashes. -
Page 6: Settings
OpEraTiON Settings Settings As soon as the "Editable parameter" symbol appears, you can change the setting of the menu item with "+" and "–". Press "OK" to save the setting. Standard display To exit the standard menu, briefly press "Menu". The standard display appears. - Page 7 OpEraTiON Settings f Press the "OK" button. Note Comfort phase "3-01" has been configured. The following applies to all time programs (Pro1, Pro2, f To configure a further comfort phase, use "+" and "–" in time Pro3): program Pro3 to select display "3---". Proceed as describe If the end time is later than 23:59 h, the end time will above.
-
Page 8: Cleaning, Care And Maintenance
OpEraTiON | iNSTallaTiON Cleaning, care and maintenance Cleaning, care and maintenance problem Cause remedy "Err" or "E..." is dis- Internal fault detected. Notify the qualified con- played. tractor. The appliance contains no user serviceable parts. If you cannot remedy the fault, contact your qualified contractor. Material losses To facilitate and speed up your request, provide the number from - Never spray cleaning spray into the air slot. -
Page 9: Installing The Wall Mounting Bracket
iNSTallaTiON installation 10. Installation f Unhook the wall mounting bracket from the appliance. f Place the centred wall mounting bracket horizontally on the floor. Mark holes 1 and 2. 10.1 Minimum clearances f Lift up the wall mounting bracket so that its lower holes match up with the markings you have just made on the in- stallation wall. -
Page 10: Removing The Appliance
iNSTallaTiON Commissioning 10.4 Removing the appliance f Undo and remove the locking screw from the wall mounting bracket. f To release the appliance, push down the springs at the top of the wall mounting bracket. f Tilt the appliance away from the wall and lift it off the bottom tabs on the wall mounting bracket. -
Page 11: Specification
| ENVirONmENT aND rECYCliNG Specification 14. Specification 14.1 Dimensions and connections CNS 100 Trend CNS 150 Trend CNS 200 Trend Appliance Width Wall mounting bracket Horizontal hole spacing Entry electrical cables 14.2 Data table CNS 100 Trend CNS 150 Trend... - Page 12 9. The contact details for you to make your warranty claim are: Who gives the warranty Name: Stiebel Eltron (Aust) Pty Ltd 1. The warranty is given by Stiebel Eltron (Aust) Pty Ltd (A.B.N. Address: 294 Salmon Street 82 066 271 083), 6 Prohasky Street, Port Melbourne, Victoria, 3207...
- Page 13 18. The Stiebel Eltron warranty for the unit is in addition to any rights and remedies you may have under the Australian Consumer Law.
- Page 14 NOTES | CNS Trend www.stiebel-eltron.com...
- Page 15 NOTES www.stiebel-eltron.com CNS Trend |...
- Page 16 Deutschland Verkauf Tel. 05531 702-110 | Fax 05531 702-95108 | info-center@stiebel-eltron.de STIEBEL ELTRON GmbH & Co. KG Kundendienst Tel. 05531 702-111 | Fax 05531 702-95890 | kundendienst@stiebel-eltron.de Dr.-Stiebel-Straße 33 | 37603 Holzminden Ersatzteilverkauf Tel. 05531 702-120 | Fax 05531 702-95335 | ersatzteile@stiebel-eltron.de Tel.


Need help?
Do you have a question about the CNS 100 Trend and is the answer not in the manual?
Questions and answers