
Subscribe to Our Youtube Channel
Related Manuals for Black Stone 1899


Summary of Contents for Black Stone 1899
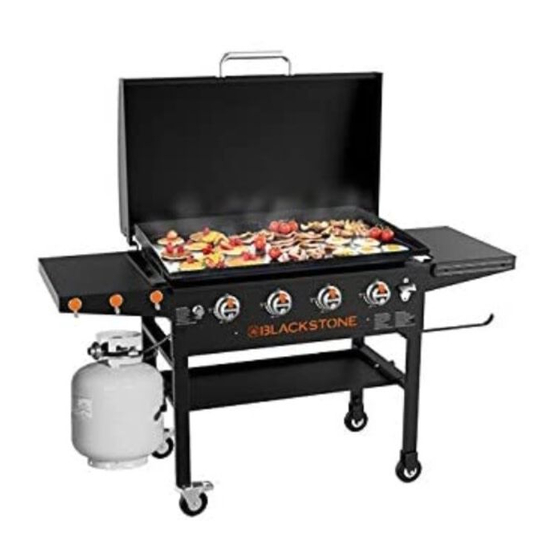
- Page 1 MODEL 1899 36" GRIDDLE COOKING STATION Parts & Assembly North Atlantic Imports LLC | 1073 West 1700 North Logan, UT 84321 | Blackstoneproducts.com...
- Page 2 36” Griddle Cooking Station | Parts & Assembly SAFE T Y ALERT KE Y Before proceeding, make certain that you read and understand the Read and follow all of the notices Owner’s Manual included with found throughout the manual. your griddle. Hazardous fire or explosion may result if instructions are ignored.
- Page 3 & Washers (2 pieces) Propane tank holder (1 piece) Locking caster wheels (2 pieces) 14. Small Thumbscrews (2 pieces) 15. Hardware Pack (1 piece) MODEL:#1899 MODEL:#1899 MODEL:#1899 1. M6x12 bolt (13 pieces) 2. Knobs (4 pieces) 3. M6x70 bolt (1 piece) 4.
- Page 4 36” Griddle Cooking Station | Parts & Assembly WA R N I N G ASSEMBLY INSTRUCTIONS The manufacturer has made every effort to eliminate any sharp Please read all instructions thoroughly before proceeding. Make sure all edges. However, you should the plastic packing material is removed before assembling handle all components with care to avoid accidental injury.
- Page 5 36” Griddle Cooking Station | Parts & Assembly STEP 0 2 Place the bottom shelf and secure it with one (1) large thumbscrew to between the two legs on the left. Use one (1) small thumbscrew to attach the shelf and the propane tank holder in between the two lockable castor wheels on the right.
- Page 6 36” Griddle Cooking Station | Parts & Assembly STEP 05 Attach two (2) side shelf brackets to the right side of the griddle unit with four (4) M6X12 bolts. Then repeat this step on the left side of the griddle unit with four (4) M6X12 screws.
- Page 7 36” Griddle Cooking Station | Parts & Assembly STEP 0 8 Attach the handle to the griddle hood with two (2) grommets and two (2) M6x16 screws. Place the grease cup on the back of the griddle body in the center of the back panel.
- Page 8 North Atlantic Imports LLC | 1073 West 1700 North Logan, UT 84321 | Blackstoneproducts.com...
- Page 9 MODÈLE 1899 STATION DE PATIO GRIDDLE DE 36" Pièces et assemblage North Atlantic Imports LLC | 1073 West 1700 North Logan, UT 84321 | Blackstoneproducts.com...
- Page 10 Station de patio 36" | Pièces et assemblage CLÉ D'ALERTE DE Avant de continuer, assurez-vous de lire et de comprendre le mode SÉCURITÉ d'emploi fourni avec votre gril. Lisez et suivez tous les conseils qui Le non-respect des instructions se trouvent dans ce manuel. peut provoquer un incendie ou une explosion.
- Page 11 (1 pièce) et support de réservoir Roues pivotantes verrouillables de propane (1 pièce) (2 pièces) 14. Petite vis à molette (2 pièces) 15. Pack matériel (1 pièce) MODEL:#1899 MODEL:#1899 MODEL:#1899 1. Boulon M6x12 (13 pièces) 2. Boutons (4 pièces) 3. Boulon M6x70 (1 pièce) 4.
- Page 12 Station de patio 36” | Pièces et assemblage AT T E N T I O N INSTRUCTIONS DE MONTAGE Le fabricant a tout mis en œuvre pour éliminer les bords Veuillez lire attentivement toutes les instructions avant de continuer. tranchants. Cependant, vous Assurez-vous que tout le matériel d’emballage en plastique est enlevé...
- Page 13 Station de patio 36” | Pièces et assemblage É TAPE 0 2 Placez la tablette inférieure et fixez-la avec une (1) grande vis à molette située entre les deux pieds à gauche. Utilisez une (1) petite vis à oreilles pour fixer la tablette et le support du réservoir de propane entre les deux roues pivotantes verrouillables sur la droite.
- Page 14 Station de patio 36” | Pièces et assemblage É TAPE 05 Fixez deux (2) supports de tablette latérale sur le côté droit de la plaque de cuisson avec quatre (4) boulons M6X12. Répétez ensuite cette étape sur le côté gauche de la plaque chauffante avec quatre (4) vis M6X12. É...
- Page 15 Station de patio 36” | Pièces et assemblage É TAPE 0 8 Fixez la poignée à la plaque chauffante à l’aide de deux (2) œillets et de deux (2) vis M6x16. Placez le récipient à graisse au dos du corps de la plaque chauffante au centre du panneau arrière.
- Page 16 North Atlantic Imports LLC | 1073 West 1700 North Logan, UT 84321 | Blackstoneproducts.com...
- Page 17 MODELO 1899 36" PLANCHA ESTACIÓN DE COCINA Piezas y ensamblaje North Atlantic Imports LLC | 1073 West 1700 North Logan, UT 84321 | Blackstoneproducts.com...
- Page 18 36” Plancha Estación De Cocina | Piezas y montaje LL AVE DE ALERTA DE Antes de continuar, asegúrese de leer y comprender el Manual SEGURIDAD del propietario incluido con su plancha. Lea y siga todos los avisos que se encuentran en el manual. Se pueden producir incendios o explosiones peligrosas si se ignoran las instrucciones.
- Page 19 (1 pieza) y soporte de tanque de Ruedas giratorias de bloqueo propano (1 pieza) (2 piezas) 14. Tornillo pequeño (2 piezas) 15. Paquete de hardware (1 pieza) MODEL:#1899 MODEL:#1899 MODEL:#1899 1. Perno M6x12 (13 piezas) 2. Perillas (4 piezas) 3. Perno M6x70 (1 pieza) 4.
- Page 20 36” Plancha Estación De Cocina | Piezas y montaje A D V E R T E N C I A INSTRUCCIONES DE MONTAJE El fabricante ha hecho todo lo posible para eliminar los bordes Lea atentamente todas las instrucciones antes de continuar. Asegúrese afilados.
- Page 21 36” Plancha Estación De Cocina | Piezas y montaje PA SO 0 2 Coloque el estante inferior y asegúrelo con un (1) tornillo grande entre las dos patas a la izquierda. Use un (1) tornillo pequeño para fijar el estante y el soporte del tanque de propano entre las dos ruedas giratorias de la derecha.
- Page 22 36” Plancha Estación De Cocina | Piezas y montaje PA SO 0 5 Fije dos (2) soportes de repisa laterales al lado derecho de la unidad de la unidad de plancha con cuatro (4) pernos M6X12. Luego repita este paso en el lado izquierdo de la unidad de plancha con cuatro (4) tornillos M6X12.
- Page 23 36” Plancha Estación De Cocina | Piezas y montaje PA SO 08 Fije la manija a la campana de la plancha con dos (2) ojales y dos (2) tornillos M6x16. Coloque la taza de grasa en la parte posterior del cuerpo de la plancha en el centro del panel posterior.
- Page 24 North Atlantic Imports LLC | 1073 West 1700 North Logan, UT 84321 | Blackstoneproducts.com...
Need help?
Do you have a question about the 1899 and is the answer not in the manual?
Questions and answers