Table of Contents
Advertisement
Quick Links
Advertisement
Table of Contents

Related Manuals for Leckey Horizon


Summary of Contents for Leckey Horizon
- Page 1 Horizon User Manual Supporting English Children...
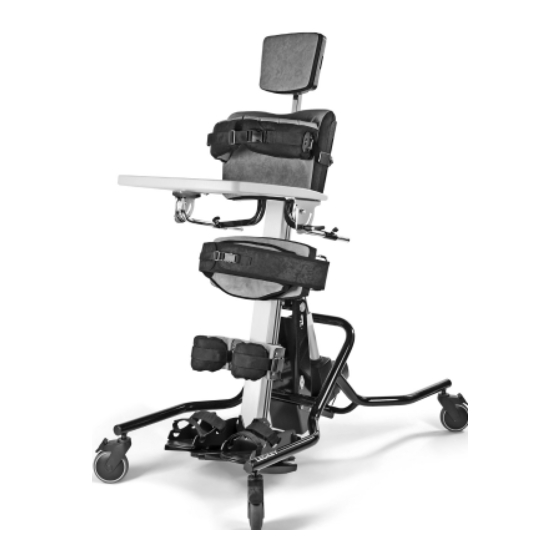
- Page 2 Horizon Stander User Manual p2 The Leckey Horizon Stander has been designed to offer the option of Supine and Prone Standing in one whilst providing an unrivalled level of positional support. This manual shows you how you can quickly and easily make use of all of the functions.
- Page 3 Horizon Stander User Manual p3 CONTENTS Intended use Declaration of conformity Terms of warranty Product history record Product training record Safety information How to unpack and assemble Clinical setup for postural management Product conversion Frequent adjustments for daily use Cleaning & care information...
-
Page 4: Section 01: Intended Use
(3 years for electrical) is provided on all Leckey INTENDED USE manufactured products and components. The Leckey Horizon Stander is for use in prone and supine standing but may also SECTION 04: be used for upright standing. The Leckey PRODUCT HISTORY... -
Page 5: Section 06: Safety Information
Horizon Stander User Manual p5 SECTION 06: clips are fully engaged. SAFETY INFORMATION 8. Although the stander is fitted with castors it is not a mobility device. Always ensure that the castor brakes 1. Always read instructions fully before be locked at all times when the use. frame is in use, being adjusted or even just stored. -
Page 6: Section 07: How To Unpack And Assemble
Congratulations on purchasing your Leckey Horizon Stander. Your Leckey 15. Clean the product regularly. Do not Horizon Stander will be boxed on a pallet. use abrasive cleaners. Carry out You should first cut the straps and maintenance checks on a regular... - Page 7 Horizon Stander User Manual p7 Setting the Angle power. While charging, the charger LED Whether used in supine or prone the will remain orange and will turn to green frame angle can be easily adjusted with when fully charged. When charged...
- Page 8 Horizon Stander User Manual p8 7.1 HOW TO ATTACH Always use caution when THE TRAY IN PRONE making this adjustment, as STANDING fingers could become trapped in the receiving tube while positioning. The tray is attached to and removed from the frame by sliding the square metal tube into the top of the main 7.2 HOW TO ATTACH...
- Page 9 Horizon Stander User Manual p9 7.4 ATTACHING bottom of the sandal. Fasten using the four screws , provided. To remove or THE SANDALS replace the attachment bolt, reverse this process. Place the sandal so that the attachment bolt goes through the slot in the footplate.
- Page 10 Whitmyer Pro-Series standing the Leckey Interface Frame range of headsupports can also be (LIF) can be used with Horizon Stander. attached to the frame as detailed above. The LIF is attached to and removed from the frame by the metal brackets located After use, the locking lever may need to below the chest pad.
-
Page 11: Section 08: Clinical Setup For Postural Management
Horizon Stander User Manual p11 SECTION 08: CLINICAL SETUP FOR POSTURAL MANAGEMENT The clinical setup of the product should be completed by a technically and clinically competent person who has been trained in the use of the product. Leckey recommend a written record is 7.8 HOW TO ATTACH... - Page 12 Horizon Stander User Manual p12 Never adjust the height of the Always check the pads are chest pad when the user is secure before placing the user in the product as the user’s in the product. weight may collapse the height of the frame causing injury to the user or carer.
- Page 13 Horizon Stander User Manual p13 Always use caution when making this adjustment, as fingers could become trapped in the slot while positioning. 8.5 ADJUSTING THE FLIP-UP FOOTPLATES The footplate is hinged at the front which allows the sandals to be adjusted more easily and can facilitate transfer from a seating position to prone standing.
- Page 14 Horizon Stander User Manual p14 8.6 ADJUSTING THE 3D FOOTPLATES Loosen the three screws at the bottom of the ball and socket joint . Swivel and adjust footplate to required position and tighten screws. The footplate can also be adjusted to...
- Page 15 Leckey label is sewn onto the one that attaches to the hip pad. Always make sure the safety buckle is engaged...
- Page 16 Horizon Stander User Manual p16 supports are secured around the user by tightening the safety strap into position. Fasten the safety strap immediately. Check the laterals are secure before placing the user in the product. As if they are loose the user may be at risk of...
- Page 17 Horizon Stander User Manual p17 8.12 ACTIVITY TRAY To adjust the height loosen the four knobs set the tray to the required ADJUSTMENT – PRONE position and then retighten the knobs securely. To lock the tray and set its height, push...
- Page 18 Horizon Stander User Manual p18 8.13 HEAD SUPPORT Always use caution when ADJUSTMENT - SUPINE making this adjustment, as fingers could become trapped The head support can be adjusted in in the slot while positioning. depth, height and angle. To height adjust, unlock the lever at the top of...
-
Page 19: Section 09: Product Conversion
Horizon Stander User Manual p19 9.2 PRONE TO SUPINE To convert the Leckey Horizon Stander to the supine version, simply remove the prone tray. Attach the required head support as defined above. Remove the prone pelvic band and attach the supine version. Finally loosen the sandals and turn through 180 degrees and you are ready for supine standing. -
Page 20: Charging The Battery
Horizon Stander User Manual p20 10.1 TRANSFERRING THE 10.2 CHARGING USER INTO AND OUT OF THE BATTERY THE STANDER Before transferring the child into the Before the product is used for the first stander carry out the daily product time it is recommended to charge the... -
Page 21: Setting The Angle
Horizon Stander User Manual p21 If the battery is low in power an audible bleep will sound and ‘battery low’ will be Ensure that the product indicated on the handset and control box and user are away from , indicating that it needs to be charged. - Page 22 Horizon Stander User Manual p22 10.6 THE FRONT KNEE SUPPORTS The knee brackets come as standard with knee supports; these should always be used when the user is in supine, but can also be used for prone standing to give additional support and security. To...
- Page 23 Horizon Stander User Manual p23 Always check with your therapist as to the correct tensioning of the straps for your child as the kneecap is a sensitive area and too much force could cause injury. 10.7 ACTIVITY TRAY ADJUSTMENT – SUPINE The Tray is attached to and removed...
- Page 24 Horizon Stander User Manual p24 check if it locks the tube securely. Repeat the process as necessary. The tray angle can be adjusted by loosening the ratchet handle on either side of the tray, set the tray to the required angle and tighten the plastic handles again securely.
-
Page 25: Section 11: Cleaning & Care
Horizon Stander User Manual p25 3. The Leckey Horizon Stander is manufactured from nylon coated metal, ABS plastic and plywood. When cleaning the frame we would recommend that you use warm water and a non-abrasive detergent. 4. When any parts of or accessories are... -
Page 26: Section 12: Daily Inspection
Horizon Stander User Manual p26 particles and wipe with a damp cloth 7. Body fluids should be removed for general cleaning. promptly with cold water and then cleaned as above. 3. Microfibre cloths are extremely effective without soap, which is 8. Water and oil based stains may be helpful as soap can clog your fabric. -
Page 27: Section 13: Re-Issuing Leckey Products
If in any doubt to the continued safe use Leckey recommend that a written record of your Leckey product or if any parts is maintained of all product inspections should fail, please cease using the carried out during the reissue of the product and contact our customer product. -
Page 28: Section 14: Technical Information
Horizon Stander User Manual p28 SECTION 14: TECHNICAL INFORMATION Colour key: For product sizes insert size 1, 2 or 3 in GB = Green / Black place of #. (Available size 1 and 2 only) BB = Blue / Black (Available size 1, 2 and 3) PB = Pink / Black... -
Page 29: Section 14: Technical Data
Horizon Stander User Manual p29 SECTION 14: TECHNICAL DATA Product Accessory Codes Length 1135 44.7 1280 50.4 1280 50.4 Width (without tray) 22.8 25.2 25.2 Height in Horizontal Position 30.7 31.7 31.7 Weight of Product 44kg 97lbs 50kg 110.6Lbs 59kg... -
Page 30: Section 15: Customer - James Leckey Specifications For Linak Products Supplied
Horizon Stander User Manual p30 SECTION 15: CUSTOMER – JAMES LECKEY SPECIFICATIONS FOR LINAK PRODUCTS SUPPLIED LINAK Actuator 343200-0020004X Rated IP54 LINAK Battery Charger - CH01 Duty Cycle: 2/18 – 2 minutes continuous use followed by 18 min not in use. - Page 31 Horizon Stander User Manual p31 NOTES...
- Page 32 Leckey, 19c Ballinderry Road Lisburn, BT28 2SA (+44) 28 9260 0750 Northern Ireland hello@leckey.com leckey.com...
Need help?
Do you have a question about the Horizon and is the answer not in the manual?
Questions and answers