Table of Contents
Advertisement
Advertisement
Table of Contents
Troubleshooting

Related Manuals for Bexen REANIBEX 300

Summary of Contents for Bexen REANIBEX 300
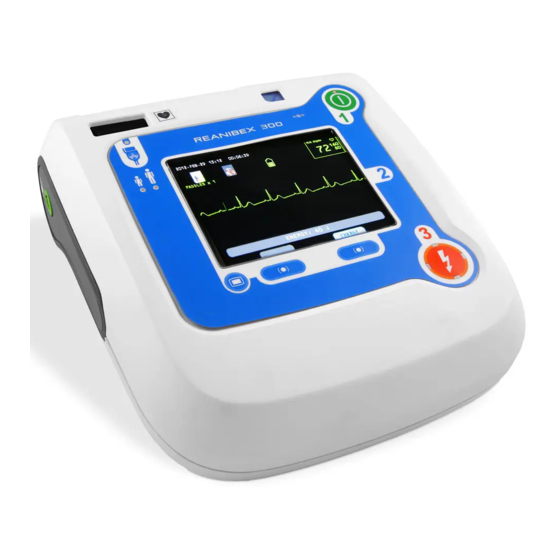
- Page 1 AED/Manual Defibrillator REANIBEX 300 USER MANUAL DIH 0300 B – REV: C / 2014.FEB...
- Page 3 REANIBEX 300 USER GUIDE Review Date Approved by Signature Gorka Landaburu February 2014 R&D Manager...
- Page 4 Blank page...
- Page 5 If the information in this User Guide does not correspond to the operation of the device, please contact an authorised representative of OSATU S. Coop. REANIBEX 300 This is a product of: OSATU S.Coop Edificio Zearrekobuelta Subida de Areitio Nº...
- Page 6 Blank page...
- Page 7 Desfibrilador Manual/AED Defibrillator Manual/AED Marca / Trade mark: BEXEN CARDIO Modelo / Model no.: REANIBEX 300 Clasificación / Classification: Clase IIb Organismo notificado / Notified body: UL International (UK) Ltd (CE-0843) Nosotros, los abajo firmantes, declaramos que el equipo antes especificado...
- Page 8 Blank page...
-
Page 9: Table Of Contents
ECG MODE. NON-DIAGNOSTIC ECG MONITORING (OPTIONAL) ..........34 INTENDED USE ........................34 WARNINGS AND PRECAUTIONS ................... 34 PREPARATION FOR ECG MODE ................... 35 NO DIAGNOSTIC MONITORING PROCEDURE ..............37 TROUBLESHOOTING ......................37 AUTO-TRAINING ..........................38 DIH 0300 B – USER GUIDE REANIBEX 300... - Page 10 BATTERY MAINTENANCE ...................... 61 10.6 SERVICE AND REPAIR ......................62 10.7 PRODUCT RECYCLING INFORMATION ................63 10.8 WARRANTY ..........................63 10.9 ACCESSORIES ........................64 TROUBLESHOOTING ........................65 11.1 GENERAL PROBLEMS ......................65 DIH 0300 B – USER GUIDE REANIBEX 300...
- Page 11 AUTOMATED DEFIBRILLATION PROBLEMS ................ 70 SYMBOLS ............................. 71 SCREEN MESSAGES ........................75 SPECIFICATIONS AND CHARACTERISTICS ................77 DEFIBRILLATION WAVE ......................82 RHYTHM DETECTION SYSTEM ....................84 ELECTROMAGNETIC COMPATIBILITY GUIDE ............... 85 ACCESSORIES ........................... 88 DIH 0300 B – USER GUIDE REANIBEX 300...
- Page 12 TABLE OF CONTENTS DIH 0300 B – USER GUIDE REANIBEX 300...
- Page 13 Figure 32: Changing the CONFIGURATION mode access password ............48 Figure 33: Equipment information screen ....................49 Figure 34: Screen with the information to transfer to the USB memory ............. 52 Figure 35: Hardware Test screen ....................... 53 DIH 0300 B – USER GUIDE REANIBEX 300...
- Page 14 TABLE OF ILLUSTRATIONS Figure 36: Confirmation request during the Hardware Test............... 54 Figure 37: Defibrillation wave ........................82 DIH 0300 B – USER GUIDE REANIBEX 300...
-
Page 15: Introduction
This guide contains the instructions necessary for safe and appropriate use of the equipment, as well as information on its configuration and maintenance. The guide includes the information and procedures for all the features of the REANIBEX 300. The device you have purchased may not have all the features contained in this manual. -
Page 16: Intended Use
In AED mode, the REANIBEX 300 can also be configured to record the audio generated during the incident. -
Page 17: Safety Considerations
SAFETY CONSIDERATIONS HAZARD EXPLOSION HAZARD . Possible explosion hazard if the REANIBEX 300 is used in the presence of mixtures with concentrations of oxygen over 25% or flammable anaesthetic products. WARNING Improper use of the device can cause injuries. Follow the instructions in the User Guide to ensure proper use. - Page 18 SHOCK OR FIRE HAZARD • Never use the REANIBEX 300 over stagnant water. Do not submerge the equipment or any part of it in water or any other liquid. Do not spill liquid on the equipment or any of its accessories. If the equipment gets wet, dry it with a towel.
- Page 19 REANIBEX 300. • Avoid using the REANIBEX 300 placed next to or on other equipment. If the equipment must be used next to or on other equipment, make sure that the equipment works properly before using it on a patient.
- Page 20 WARNING The REANIBEX 300 does not have the capacity to reject the pulses of internal pacemakers in all cases. The equipment may detect pulses from internal pacemakers as QRS complexes and therefore indicate an incorrect heart rate.
- Page 21 WARNING In AED mode, place the disposable multifunction electrodes as indicated in the electrode packaging. WARNING To guarantee patient safety, do not place the REANIBEX 300 in a position from where it can fall on the patient. WARNING • Periodical checks must be performed to ensure that the REANIBEX 300 and its accessories are operating properly.
-
Page 22: Description Of The Equipment
2 DESCRIPTION OF THE EQUIPMENT DESCRIPTION OF THE EQUIPMENT This section provides general information on the use of the REANIBEX 300 and explains the various operating modes, screenshots, controls and indicators. Certain functionalities or options that are described in this section may not be included in your REANIBEX 300, depending upon the configuration of the equipment. -
Page 23: Back View
MICROPHONE. If allowed by the configuration of the equipment, the microphone is used to record external audio during performance of the REANIBEX 300 in Automated Defibrillator Mode. ADULT/PAEDIATRIC INDICATOR. Depending on the type of patient configured in the equipment, the corresponding LED will light up under the adult/paediatric icon. -
Page 24: Side Views
This is where the battery is connected. 2.1.3 SIDE VIEWS Figures 3 and 4 show the side views of the REANIBEX 300. The ECG connector can be seen on the left side for ECG mode. A 3-lead patient cable can be connected to the ECG connector. -
Page 25: Screen
BIOLOGICAL PARAMETER: The biological parameter or vital sign of the patient is found at the top right of the display screen. The parameter available is: Heart rate – the REANIBEX 300 acquires and shows heart rate values between 30 and 300 bpm for adult patients and between 30 and 350 bpm for paediatric patients. - Page 26 Only the ECG signal of either the patient cable in ECG Mode (only lead II) or disposable electrodes is displayed. The waveform monitored on this channel is the one used to obtain Heart Rate and for the analysis in the Automated Defibrillator mode. DIH 0300 B – USER GUIDE REANIBEX 300...
-
Page 27: Programmable Buttons
Their meaning changes according to the operating mode (For further information, please refer to Section 2.2.1 PROGRAMMABLE BUTTONS). The REANIBEX 300 has the ability to configure the screen on HIGH CONTRAST mode. To access this option, press the softkeys... -
Page 28: Menu Options
MENU OPTIONS Certain parameters can be set up while working with the various operating modes of the REANIBEX 300. The MENU button on the user interface can be used to access these options. The meaning of the programmable buttons are located under the display varies according to the operating mode in use. -
Page 29: Status Indicator
2 DESCRIPTION OF THE EQUIPMENT STATUS INDICATOR This indicator is located on the top right of the REANIBEX 300. It constantly displays the general status of the equipment, even when it is switched off, and shows the following icons: The equipment is ready for use; i.e., all the operating modes are operative and there is a battery with enough power to use the equipment. -
Page 30: Battery Duration
Only use batteries supplied by OSATU S. Coop, or its authorised distributors. Using another type of battery may mean that the device does not operate correctly. WARNING Follow the local, regional or national regulations in your country to recycle the REANIBEX 300 batteries or send them to OSATU S. Coop. WARNING Storing batteries at temperatures over 30ºC significantly reduces battery life. -
Page 31: Electrodes And Cables
2 DESCRIPTION OF THE EQUIPMENT ELECTRODES AND CABLES The REANIBEX 300 can use disposable multifunction electrodes for both ECG monitoring and defibrillation. The references of the electrodes approved by the manufacturer are listed in section “A.7 ACCESORIES”. The 3-lead patient cable can be used to monitor the ECG signal. The equipment automatically detects the cable that is connected so the various leads can be viewed. -
Page 32: Installation Of The Equipment
3 INSTALLATION OF THE EQUIPMENT INSTALLATION OF THE EQUIPMENT Before using the REANIBEX 300, make sure that the equipment is ready for use. To do so, perform the following checks: Check that the equipment is in perfect condition. Check that neither the equipment nor its accessories or cables show any signs of damage and that they are in good operating condition. -
Page 33: Connecting The Therapy Cable
Connect the electrode cable to the connector of the REANIBEX 300 as shown in the following figure: 1. Align the disposable electrode cable connector with the multifunction connector input. -
Page 34: Installing The Battery
3 INSTALLATION OF THE EQUIPMENT INSTALLING THE BATTERY The REANIBEX 300 can run on a battery. To install the battery: 1. Align the battery with the battery compartment, according to battery design. 2. Place the battery according to its design, as shown in figure 14. -
Page 35: Connecting The Usb Memory To The Equipment
USB memory. On the other hand, if the USB memory is removed with the equipment switched on, the information transferred to the USB memory may be corrupted. DIH 0300 B – USER GUIDE REANIBEX 300... -
Page 36: Automated External Defibrillation
4 AUTOMATED EXTERNAL DEFIBRILLATION AUTOMATED EXTERNAL DEFIBRILLATION INTENDED USE This section describes the basic functions of the REANIBEX 300 when it is working in Automated Defibrillator (AED) mode, as well as the messages that appear during equipment operation to guide the user. -
Page 37: Warnings And Precautions
2. Prepare the patient’s skin for the application of the electrode pads: Leave the patient’s chest bare. Remove chest hair from the patient if required. Do not scrape or cut the patient’s skin. Do not place electrode pads on injured skin. DIH 0300 B – USER GUIDE REANIBEX 300... -
Page 38: Automated External Defibrillation Procedure
4. Place the electrode pads on the patient’s chest following the instructions in the electrode packaging. 5. Connect the electrode cable to the REANIBEX 300 if it has not been connected previously, as described in Section “3.2 CONNECTING THE THERAPY CABLE”. -
Page 39: Figure 20: Cpr Time Display In Automated Defibrillator Mode
“SHOCK ADVISED”. Once the equipment detects a patient rhythm that requires defibrillation, rhythm analysis is stopped and the energy is charged. The REANIBEX 300 automatically charges the energy at the first of the three levels established in the configuration. While the charge is taking place, the display shows a progress bar and a sound is emitted that increases in pitch as the charge progresses. -
Page 40: Troubleshooting
Depending on the configuration of the equipment (number of consecutive shocks), a new analysis cycle will start after the REANIBEX 300 delivers the shock. This will occur until the number of shocks established in the “Consecutive Shocks” parameter is performed. However, if the number of consecutive shocks has been set to 1, the equipment will enter into CPR time. -
Page 41: Manual Defibrillation (Optional)
5 MANUAL DEFIBRILLATION MANUAL DEFIBRILLATION (OPTIONAL) INTENDED USE This section describes the basic functions of the REANIBEX 300 when it is working in Manual Defibrillator mode. Defibrillation therapy is the definitive method for suppressing a series of potentially fatal arrhythmias. In Manual Defibrillator mode, the REANIBEX 300 administers therapy by delivering a short biphasic truncated exponential pulse to the heart muscle. -
Page 42: Warnings And Precautions
• The patient cable leads can impede proper placement of the defibrillation electrode pads. Before performing defibrillation, remove and disconnect all the elements that may interfere with the procedure. DIH 0300 B – USER GUIDE REANIBEX 300... -
Page 43: Preparing For Manual Defibrillation
POSSIBLE DAMAGE TO OTHER EQUIPMENT. Before using the defibrillator, disconnect the patient from all the equipments that are not protected against defibrillation. WARNING POSSIBLE INCORRECT ENERGY DELIVERY. In Manual Defibrillator mode, the REANIBEX 300 automatically adjusts the energy when using paediatric disposable multifunction electrodes. PREPARING FOR MANUAL DEFIBRILLATION The following sections describe how to prepare the skin, the various therapy electrodes available and how to place them. -
Page 44: Figure 22: Placing The Electrode Pads In The Antero-Lateral Position (Adult And Paediatric)
Dry the patient’s skin thoroughly with a towel or gauze to eliminate skin oil and cells and improve electrode adherence. 3. Connect the disposable electrodes to the REANIBEX 300 multifunction connector (MFC) as described in Section “3.2 CONNECTING THE THERAPY CABLE”. -
Page 45: Asynchronous Manual Defibrillation Procedure
LEDs of the SHOCK button will light up. If the shock button is not pressed within 60 seconds after charge completion, the REANIBEX 300 will automatically disarm and the message “DISARMING…” will appear on the screen. DIH 0300 B – USER GUIDE REANIBEX 300... - Page 46 NOTE: To disarm the defibrillator, press the programmable “DISARM” button located on the screen. NOTE: The REANIBEX 300 will disarm automatically under the following circumstances: If the energy is not delivered to the patient in less than 60 seconds after completion of the energy charge.
-
Page 47: Troubleshooting
AED mode. TROUBLESHOOTING If the REANIBEX 300 does not work as expected during manual defibrillation, refer to Section “11.3 MANUAL DEFIBRILLATION PROBLEMS”. DIH 0300 B – USER GUIDE REANIBEX 300... -
Page 48: Ecg Mode. Non-Diagnostic Ecg Monitoring (Optional)
ECG MODE. NON-DIAGNOSTIC ECG MONITORING (OPTIONAL) INTENDED USE This section describes the basic functions of the REANIBEX 300 when it is working in ECG mode. The REANIBEX 300 can be used to monitor in non-diagnostic way an electrocardiogram (ECG). The ECG is a record of the electrical activity of the heart. -
Page 49: Preparation For Ecg Mode
To prepare for ECG mode, follow the steps below, according to the selected ECG source. MONITORING USING THE PATIENT CABLE 1. Connect the patient cable to the REANIBEX 300 connector as described in Section “3.1 CONNECTING THE ECG CABLE”. 2. Make sure that the packaging of the monitoring electrode pads is perfectly sealed and that the expiry date has not passed. -
Page 50: Figure 24: Placing The Monitoring Electrode Pads
Placing the LL/F (Red/Green) - On the bottom left area of the abdomen. The REANIBEX 300 detects if any of the leads that are part of the patient cable is loose or improperly connected. When this happens, at the top of the screen will display the icon and two beeps will be issued periodically. -
Page 51: Diagnostic Monitoring Procedure
ELECTRODES, select an analysis of the signal, control the charging and discharging or pass to AED mode. TROUBLESHOOTING If the REANIBEX does not work as expected during no diagnostic ECG monitoring, refer to Section “11.2 ECG MODE PROBLEMS”. DIH 0300 B – USER GUIDE REANIBEX 300... -
Page 52: Auto-Training
Automatic External Defibrillator (AED). The option helps to familiarise the user with the use of the REANIBEX 300 in an emergency situation. It enables the simulation of 8 training scenarios or situations that will help users to learn the techniques for the use of an AED in an emergency situation. -
Page 53: Auto-Training Configuration
The training battery has to be installed into the equipment. The REANIBEX 300 will display the screen of the training configuration mode. Described below are all the parameters that can be configured for the training option... - Page 54 Electrodes problem simulation during 20 seconds Defibrilable Rythm Defibrilable Rythm Non Defibrilable Rythm Defibrilable Rythm Non Defibrilable Rythm Low battery indication Non Defibrilable Rythm 10 user configurable analysis cycles 10 user configurable analysis cycles DIH 0300 B – USER GUIDE REANIBEX 300...
-
Page 55: Configuration
If there is defibrillation electrodes connected to the equipment when it is switched on, it will switch on normally even if the MENU button is pressed. The REANIBEX 300 will display the main screen of the configuration mode: Figure 25: Configuration mode access screen... -
Page 56: Configurable Parameters
The following parameters can be changed: MANUAL DEFIBRILLATOR PARAMETER DESCRIPTION OPTIONS Audio Messages This establishes whether to emit voice prompts in YES / (NO) addition to screen messages when working in Manual Defibrillator mode. DIH 0300 B – USER GUIDE REANIBEX 300... - Page 57 CPR 1 Time. Adult shock energy 1 The first level of the energy protocol 150 J, 175 J, (200 J), 250 J, 300 J and 360 J DIH 0300 B – USER GUIDE REANIBEX 300...
-
Page 58: Figure 28: General Options Modification Screen
Automatic Test Time This establishes the exact time for the equipment 00:00 to perform the automatic test. Default switch This is used to select the default switch on mode. (AED) / Manual mode DIH 0300 B – USER GUIDE REANIBEX 300... -
Page 59: Setting Date And Time
The equipment clock is used as the reference for the events that occur during an episode. In other words, each episode will have two interrelated reference times: one will use the real time clock as reference and the other will use the moment the equipment was switched on. DIH 0300 B – USER GUIDE REANIBEX 300... -
Page 60: Configuration Management
Take the following steps to change the IDENTIFIER of the equipment: 1. Switch on the REANIBEX 300 in Configuration mode. 2. Enter the Configuration mode access password. 3. Use the programmable buttons to access the “CONFIGURATION MANAGEMENT” menu option 4. -
Page 61: Default Settings
5. When the confirmation request screen appears, press the programmable button load the default settings. 6. While the default factory settings are being restored, the REANIBEX 300 will display the message “Restoring default settings... ”. 7. If the configuration is loaded successfully, the REANIBEX 300 will display the following message for a few seconds: “Default settings restored”. -
Page 62: Configuration Password
EQUIPMENT INFORMATION 8.5.1 EQUIPMENT INFORMATION The REANIBEX 300 has an option to view a series of data associated with the equipment. To view this information: 1. Switch on the REANIBEX 300 in Configuration mode. 2. Use the programmable buttons to access the “EQUIPMENT INFORMATION” option... -
Page 63: Latest Test Results
4. After viewing the equipment information, exit this menu option using the key 8.5.2 LATEST TEST RESULTS The REANIBEX 300 has the option of viewing the date, time and results of the last Auto Tests performed by the equipment. To view this information: 1. -
Page 64: Latest Episode Results
6. After viewing this information, exit this option by using the key 8.5.3 LATEST EPISODE RESULTS The REANIBEX 300 has the option of viewing a list of the last episodes, to a maximum of 10. To view this information: 1. Switch on the REANIBEX 300 in Configuration mode. -
Page 65: Usb Transfer
4. When the confirmation request screen appears, press the programmable button delete all the episodes. 5. While the internal memory is being deleted, the REANIBEX 300 will display the following message: “Deleting episodes... “. 6. If the episodes are deleted successfully, the REANIBEX 300 will display the following message for a few seconds: “Episodes deleted”. -
Page 66: Transfer To A Pc Via A Usb Cable
When switched and during operation with the patient, the equipment performs various automatic tests and checks to ensure that all the parts of the equipment work properly. Manual tests are a complement to the checks performed by the equipment automatically. DIH 0300 B – USER GUIDE REANIBEX 300... -
Page 67: Hardware Test
Auto Tests. It also performs an Auto Test on the battery each time it detects a new battery. WARNING Make sure that the REANIBEX 300 is not connected to a patient when tests are performed in the Configuration mode. 8.7.1 HARDWARE TEST... -
Page 68: Accessories Test
8.7.2 ACCESSORIES TEST This option is used to check whether the REANIBEX 300 is capable of correctly detecting the type of patient and electrode cables that are connected to it. When this option is accessed, a screen appears indicating the type of electrodes that are connected (adult or paediatric), the type of patient cable (3 leads) and its status. -
Page 69: Auto- Tests
8.7.4 AUTO- TESTS The automatic tests performed by the REANIBEX 300 will only take place between the time set for the Auto Test in the configuration and the following hour, as well as in ambient temperature conditions of between 0 and 50ºC, An Auto Test will not be performed if: The equipment is in operation. -
Page 70: Data Management
DATA MANAGEMENT DESCRIPTION The REANIBEX 300 can store the last 10 episodes of the equipment in its internal memory. An episode consists of the continuous ECG signal and its associated events (lead change, alarms, etc.) from the time the equipment is switched on or until the battery runs down. In addition, the biological parameter (heart rate) is stored regularly. - Page 71 The timer for the Cardio-Pulmonary Resuscitation START CPR TIME time starts ASYSTOLE A possible asystole has been detected The analysis cannot be performed in Automated ANALYSIS NOT POSSIBLE Defibrillator mode DIH 0300 B – USER GUIDE REANIBEX 300...
-
Page 72: Maintenance
Auto Tests performed by the equipment. The following steps are recommended to inspect the equipment, the accessories and the cables: On a daily basis, make sure that the REANIBEX 300 is clean and that neither the equipment nor its accessories are visibly damaged. -
Page 73: Check List
10.3.1 GENERAL PRECAUTION • The REANIBEX 300 and its accessories must not be sterilised or submerged in liquids unless stated otherwise in the instructions supplied with the accessories. • Do not use abrasive cleaning agents or strong solvents such as bleach, bleach-based solvents, acetone or ketone-based cleaning agents. -
Page 74: Ecg Cable
ƒ Hydrogen peroxide ƒ Soapy water 10.3.2 ECG CABLE The ECG cable of the REANIBEX 300 cannot be sterilised. It must be cleaned with a moist soft cloth and: Soapy water Common cleaning products Hydrogen peroxide Quaternary ammonium compounds Isopropyl or ethyl alcohol (dissolved to 70% in water) -
Page 75: Battery Maintenance
Do not puncture, crush, damage or disassemble the batteries. Do not apply reverse polarity to the batteries or expose them to high temperatures. When handling the batteries, be careful not to cause a short circuit in the terminals, as this could cause a fire. DIH 0300 B – USER GUIDE REANIBEX 300... -
Page 76: Service And Repair
While it is in operation and when it is switched off (during Auto Tests), the REANIBEX 300 checks battery capacity and provides the corresponding information (in the status indicator and on the screen, when the equipment is switched on) if the battery is low. -
Page 77: Product Recycling Information
WARNING HAZARD OF ELECTRICAL SHOCK HAZARD. Do not open the REANIBEX 300 or disassemble any of its parts. The equipment must only be repaired by Authorised Technical Service personnel. PRODUCT RECYCLING INFORMATION 10.7... -
Page 78: Accessories
10 MAINTENANCE ACCESSORIES 10.9 The list of all the accessories that can be used with the REANIBEX 300 is included in Section “A.7 ACCESSORIES”. DIH 0300 B – USER GUIDE REANIBEX 300... -
Page 79: Troubleshooting
11 TROUBLESHOOTING 11 TROUBLESHOOTING The REANIBEX 300 uses several methods to indicate that an error or problem has been detected. These are detected during the periodic Auto Tests run by the equipment when the equipment is switched off, when it is switched on, during equipment operation or by user intervention. - Page 80 One or more equipment controls Fault in the user interface • Access the Configuration mode do not work and carry out a User Interface Test. • If the error persists, contact the Authorised Technical Service. DIH 0300 B – USER GUIDE REANIBEX 300...
-
Page 81: Ecg Mode Problems
• Perform patient monitoring as interferences that distort possible from signal. equipment causing interferences. patient cable • If another patient cable is defective. available, replace the current one; otherwise, contact Authorised Technical Service. DIH 0300 B – USER GUIDE REANIBEX 300... - Page 82 “SELECT Monitor mode and a key in the Defibrillator or AED mode to DEFIBRILLATOR MODE”. MANUAL perform defibrillation or take no DEFIBRILLATOR mode steps to continue in Monitor been pressed. mode. DIH 0300 B – USER GUIDE REANIBEX 300...
-
Page 83: Manual Defibrillation Problems
When energy level An error has been detected in • Contact Authorised selected, message the defibrillation module. Technical Service “DEFIBRILLATOR MODE ERROR” appears on the screen. DIH 0300 B – USER GUIDE REANIBEX 300... -
Page 84: Automated Defibrillation Problems
When the AED mode is selected An error has been detected in • Contact Authorised and the message “AED MODE the semi-automatic defibrillation Technical Service ERROR” appears on the screen. module. DIH 0300 B – USER GUIDE REANIBEX 300... -
Page 85: Symbols
A.1 SYMBOLS A.1 SYMBOLS This annex provides information on the symbols used both in this manual and in the REANIBEX 300 equipment, its accessories and packaging. SYMBOL DESCRIPTION EQUIPMENT OR USER INTERFACE On/Off button on the front panel SHOCK button on the front panel... - Page 86 Read instructions attached PRECAUTION Do not attempt to open the equipment Do not expose the equipment to inflammable agents or to an oxygen-rich environment. In the event of a warning, consult qualified personnel. DIH 0300 B – USER GUIDE REANIBEX 300...
- Page 87 Li-ion battery classified as Class 9 with UN transport certification LiSO battery classified as Class 9 with UN transport certification Recyclable material Heavy metal substances. Dispose these properly Recyclable material Heavy metal substances. Dispose these properly DIH 0300 B – USER GUIDE REANIBEX 300...
- Page 88 Protect from water Pressure range (altitude) recommended for storage: from 52.2 KPa to 76.0 KPa. Recommended storage temperature: -20ºC to 60ºC Relative humidity range recommended for storage: between 25% and 80% Recycle this item DIH 0300 B – USER GUIDE REANIBEX 300...
-
Page 89: Screen Messages
PRESS CHARGE The shock button has been pressed without previously charging the energy. CHARGING The REANIBEX 300 is charging the selected energy. CHARGE INTERRUPTED This operation has been interrupted during the energy charging process. DISARMING ... - Page 90 A.2 SCREEN MESSAGES MESSAGE DESCRIPTION ERROR: XXX An error has been detected in equipment operation. DIH 0300 B – USER GUIDE REANIBEX 300...
-
Page 91: Specifications And Characteristics
Please refer to the instructions for use of the electric scalpel to minimise risk of burns in the event of a defect in the equipment. The simultaneous use of the REANIBEX 300 with an external pacemaker or other electric stimulators connected to the patient does not represent a safety hazard. - Page 92 Less than 10 seconds from initial start-up with a new, fully charged Li-ion battery pack. Less than 15 seconds with a new, fully charged Li- ion battery pack, empty after delivering 15 shocks at DIH 0300 B – USER GUIDE REANIBEX 300...
- Page 93 Less than 26 seconds with a new, fully charged LiSO2 battery pack. Less than 26 seconds with a new, fully charged LiSO2 battery pack, empty after delivering 15 shocks at 360 J and 25ºC. DIH 0300 B – USER GUIDE REANIBEX 300...
- Page 94 0ºC to 40ºC with the Li-ion battery pack installed 0ºC to 50ºC with the LiSO battery pack installed Storage temperature -20ºC to 60ºC except batteries and disposable multifunction electrodes Relative humidity 10 to 95% DIH 0300 B – USER GUIDE REANIBEX 300...
- Page 95 LiSO battery: 500 g Li-ion battery: 500 g Dimensions 100 mm height x 290 mm length x 245 mm width NOTE: For further information, consult the Technical Manual of the REANIBEX 300. DIH 0300 B – USER GUIDE REANIBEX 300...
-
Page 96: Defibrillation Wave
A.4 DEFIBRILLATION WAVE A.4 DEFIBRILLATION WAVE For defibrillation, the REANIBEX 300 includes a BIPHASIC TRUNCATED EXPONENTIAL WAVEFORM: Figure 36: Defibrillation wave The wave switchover time between Phase 1 and Phase 2 is 600 μs. In addition, the negative voltage (V2) coincides with the positive voltage (V1) on change of polarity. - Page 97 Defibrillation using biphasic waveforms is currently proving to be more effective than conventional monophasic waveforms because it requires less energy. In addition, this waveform causes less displacement of the ECG ST segment, leading to a lower incidence of cardiac dysfunctions after defibrillation. DIH 0300 B – USER GUIDE REANIBEX 300...
-
Page 98: Rhythm Detection System
The REANIBEX 300 Rhythm Detection System is an ECG signal analysis system that automatically discriminates between shockable and non-shockable rhythms. In Automated Defibrillator mode, when the VT/VF alarm is activated, the REANIBEX 300 analyses the ECG signal of the patient to determine whether it is necessary to deliver a shock. The Rhythm Detection System recommends a shock if it detects one of the following rhythms: Ventricular fibrillation with peak-valley amplitude of at least 0.2 mV... -
Page 99: Electromagnetic Compatibility Guide
ELECTROMAGNETIC EMISSIONS (EMC) The REANIBEX 300 is intended to be used in electromagnetic environments such as those described in the following tables. The client or user of the REANIBEX 300 must ensure that the equipment is used in these environments. - Page 100 ELECTROMAGNETIC IMMUNITY The REANIBEX 300 is intended to be used in electromagnetic environments such as those described in the following tables. The client or user of the REANIBEX 300 must ensure that the equipment is used in these environments. Test level...
- Page 101 RECOMMENDED DISTANCES BETWEEN MOBILE AND PORTABLE RF COMMUNICATION EQUIPMENT AND THE REANIBEX 300 The REANIBEX 300 is intended for use in settings where RF interferences are controlled. The client or user of the REANIBEX 300 can help to prevent electromagnetic interference by maintaining a minimum...
-
Page 102: Accessories
A.7 ACCESORIES A.7 ACCESSORIES This annex provides information about the accessories available for the REANIBEX 300. To submit an order, please contact OSATU S. Coop. or one of its authorised distributors. DESCRIPTION REFERENCE ELECTRODES Disposable multifunction electrode pads for adults...
Need help?
Do you have a question about the REANIBEX 300 and is the answer not in the manual?
Questions and answers