
Related Manuals for Aqua One Oakstyle 300


Summary of Contents for Aqua One Oakstyle 300
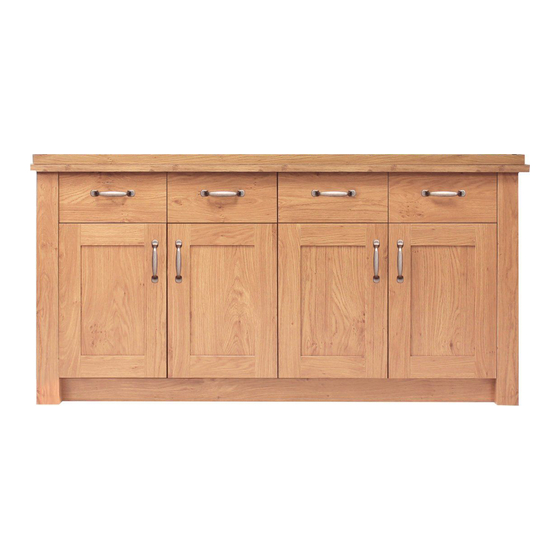
- Page 1 Assembly Instructions Please keep for future reference Oakstyle 300 Version 1 : 06/08/2018 Important - Please read these instructions fully before starting assembly ALR3483...
- Page 2 Safety and Care Advice Important - Please read these instructions fully before starting assembly • Warning: This unit is heavy. • Make sure you have enough • We do not Please lift with care. space to layout the parts before recommend the starting.
- Page 3 Panels Please check you have all the panels listed below 1 Left Drawer 2 Right Drawer 3 Centre Drawer Front Front Front (DF-00011548) (DF-00011549) (DF-00014069) (34.2 x 16.2cm) (34.2 x 16.2cm) (34.2 x 16.2cm) 4 Left Drawer 5 Right Drawer 6 Drawer Back 7 Drawer Base (W303-124)
- Page 4 Fittings Please check you have all the fittings listed below Knock-in Peg (F171GY) Large Metal Dowel x 26 (F901) Small Locking Cam Nut (F900) Wooden Dowel x 30 (F22) 10mm Locking cam nut 12mm Locking Cam Nut x 22 (F607) (F900) 40mm Screw 45mm Screw...
- Page 5 Step 1 Shallow I.D. hole Prepare the Left and Right Drawer Fronts Screw 2 Metal Dowels into the Left and Right Drawer Fronts. Note: Tighten the Metal Dowels up fully against the panels. Stick 2 Door Buffers into the corners of each Drawer Front, as shown.
- Page 6 Step 4 Fit the Drawer Bases Slide the Drawer Bases down the grooves in the Drawer Sides and down into the groove in the Left and Right Drawer Fronts. Step 5 Fit the Drawer Backs Fit the Drawer Backs between the Drawer Sides.
- Page 7 Step 8 Prepare the 2 Fascias Left Fascia - holes nearest this side Check that the holes are 10mm in the same place as the diagrams, as one will be the Left Fascia and one will be the Right Fascia. Tap a Wooden Dowel into each of the 2 Fascias.
- Page 8 Step 10 Fit the Left Fascia to the Left Side Push the Left Side down onto the Left Fascia. Dowel this end Use a screwdriver to tighten the 3 Locking Cam Nuts fitted to the Left Side. Note: Turn the Locking Cam Nuts as far as they will go - more than 1/2 a turn.
- Page 9 Step 12 Prepare the Right Side Tap 2 Wooden Dowels into the Right Side. Insert 3 10mm Locking Cam Nuts into the side of the Right Side. Insert 2 12mm Locking Cam Nuts into the end of the Right Side. Push 3 of the Quickfit Dowels as far as they will go into the Right Side.
- Page 10 Step 14 Finish preparing the Right Side Place a runner on the Right Side as shown. Slide back the top of Runner and use the 2nd hole from the front to fit the first 9mm Screw. Slide the Runner back the other way and fit the second 9mm Screw into the corresponding hole in the...
- Page 11 Step 16 Fit the Base to the Right Side Push the Base onto the Right Side. Use a screwdriver to tighten the 2 Large Locking Cam Nuts fitted to the Base. Finished front edge Step 17 Prepare the 2 Plinths Insert 2 Locking Cam Nuts...
- Page 12 Step 19 Fit the Left Side Push the Left Side onto the Base and the Plinths. Use a screwdriver to tighten the 4 Large Locking Cam Nuts fitted to the Base and Plinths. Step 20 Raise the assembly To make assembly easier, place packaging pieces underneath the...
- Page 13 Step 21 Prepare the Centre Divider Finished Front Edge Turn the panel over Finished Front Edge Support this end of Step 22 the Divider using packaging, wood, Fit the Centre Divider books etc. to the Base Push the Centre Divider onto the Base and secure it with two 40mm Screws.
- Page 14 Step 23 Left Divider Prepare the Left Divider Finished Front Edge Finished Front Edge Finished Front Edge Support this end of Step 24 the Divider using packaging, wood, Fit the Left Divider books etc. Push the Left Divider onto the Base and secure it with two 40mm Screws.
- Page 15 Step 25 Prepare the Right Divider Finished Front Edge Place a Runner on the Right Divider as shown. Slide back the top of Runner and use the 2nd hole from the front to fit the first 9mm Screw. Slide the Runner Finished back the other way and Front Edge...
- Page 16 Step 27 Prepare the Top Fit the 4 Brackets from the Overbalance Protector Kits to the shallow mark-holes drilled into the Top using 1 of their Screws. Note: Only fit 1 of the Screws, the other 1 will be fitted later. Screw 14 Metal Dowels into the Top.
- Page 17 Step 29 Prepare the 2 Centre Drawer Fronts Stick a Door Buffer into the 4 corners of each Centre Drawer Front, as shown. Fit 4 Brackets to each Centre Drawer Front using the 13mm Screws. Step 30 Attach the Handles Attach a Handle to each of the 2 Centre Drawer Fronts Drawer Fronts...
- Page 18 Step 32 Prepare the 2 Backs Insert 2 Large Locking Cam Nuts into each Back. Step 33 Fit the 2 BackS Using 2 people lay the unit back down onto its front edges. Push the 2 Backs onto the Top. Use a screwdriver to tighten the 2 Large Locking...
- Page 19 Step 34 Fit 16 Plastic Nails Tap 2 Plastic Nails into the bottom edge of each of the 2 Sides. Tap 2 Plastic Nails into the bottom edge of each of the 2 Backs. Tap 4 Plastic Nails into the bottom edge of each of the 2 Plinths.
- Page 20 Step 35 This unit must be fixed to a wall using the 4 Overbalance Protector Kits provided Secure the unit to a wall Before fitting the unit to a wall, use a spirit level to check the top of the unit is level, front-to-back and side-to-side in the 3 positions shown.
- Page 21 Step 36 Fit the Shelves Insert 4 Shelf Studs for each Shelf, at the required height. N x 4 Lower the Shelves down onto the Shelf Studs. N x 4 The Shelf Studs you have left are required for fixing the Hood. See seperate instructions for fitting details.
- Page 22 Step 38 2 handle holes Prepare the 2 outer Doors Push fit 2 Hinges into each Door and secure them by tightening up 2 handle holes their 2 screws. Step 39 Fit the 2 Outer Doors Line up the 2 screws in the top Hinge with the 2 holes at the top of the Sides and push them in.
- Page 23 Step 40 Prepare the 2 inner Doors 2 handle holes 2 handle holes...
- Page 24 Step 41 Fit the Inner Doors Push the hooks on the Hinge Arm underneath the front of the Hinge Plate. Press the front of the Hinge Arm down onto the Hinge Plate until it ‘clicks’ into place. The Hinge Arm must be flat against the Hinge Plate prior to any adjustment.
- Page 25 Step 42 Fit the Handles Attach a Handle to each Door using two 19mm Screws. Step 43 Fit the Door Buffers Stick 2 Door Buffers onto each Door where they will hit the front edge of the Dividers.
- Page 26 Step 44 NOTE: This shows the Hinge and Plate fitted to the Outer Doors but the same Adjust the Doors if method is used for the Inner Doors needed Before adjusting the Doors, use a spirit level to check the Base (or Top) of the unit is level, front-to-back and side-to-side in the 3...
Need help?
Do you have a question about the Oakstyle 300 and is the answer not in the manual?
Questions and answers