Advertisement
Quick Links
Advertisement

Related Manuals for Panasonic VDR-D100


Summary of Contents for Panasonic VDR-D100
- Page 1 Panasonic DVD/DVC Camera Seminar VDR-D100/200/300 and PV-GS29/39...
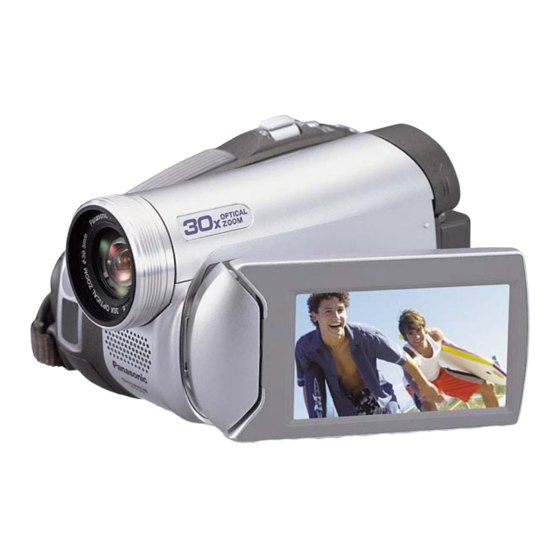
- Page 2 Features (VDR-D100~300) • DVD Multi DVD-RAM/R/-RW • DSC Feature (Disc & SD Card) • One Touch Navigation & Joystick • Built in Video Light (D105&D200 Only) • Multi Language OSD • High Zoom Ratio • USB2.0 HS Mode • Zoom Microphone •...
- Page 3 DVD Camera Comparison...
- Page 4 Recording/Playback Media (DVD Camera)
- Page 5 Discs that can not be used in this unit...
- Page 6 Camera Structure VDR-D100/200...
- Page 7 Camera Structure VDR-D300...
- Page 8 Camera Structure VDR-D300...
- Page 9 Extension Cables for VDR-D100-200 Also used for VDR-D300 Also used for VDR-D300 Also used for VDR-D300 Adjustment procedure for the DVD and the DVC Cameras is the same...
- Page 10 Extension Cables for VDR-D300 Also used for Also used for VDR-D100/200 VDR-D100/200 Also used for VDR-D100/200...
- Page 11 Light box, Charts, etc for all DVD Cameras Adjustment procedure for the DVD and the DVC Cameras is the same...
- Page 12 Adjustment Necessary After Board Replacement...
- Page 13 Reset “PUSH THE RESET SWITCH”, press If the unit displays the reset switch to restart the unit. NOTE: The unit turns off automatically if the Reset Button Reset switch is not pressed within 1 minute.
-
Page 14: Service Mode
Service Mode To Enter: Turn the Power SW ON. Press “DELETE”, “RECORD” and Push the “JOYSTICK” to the left together for 3 seconds without a Disk or SD Card inserted. To Exit: Unplug the AC Cord. - Page 15 Service Mode Use the joystick to select items in page 1/2. (Page 2/2 is not used) Item 1: Factory settings (Reset) Item 2: DVD Drive information Item 3: Reset the total power-on time Item 4: Item 5: Camera information To select YES...
- Page 16 DVD Drive/Camera information Item 2: DVD Drive information 1.DVD drive F/W Version For reference 2.Drive Serial No 3.BER 01234567 4.DVD ERR Code 04 03 00 5.LASER current/Temp For reference 6.Function 7.Region code [Hour Meter] Item 5: Camera information PWR: Total power on time Before Previous code EE : No use for service...
-
Page 17: List Of Error Codes
List of Error Codes DVD Drive information Camera Error Code 00 00 00 : No error 00 : No error 04 09 04 : Laser Error 51 : Zoom Motor Lock 04 09 03 : Spindle Servo Error 52 : Focus Motor Lock 04 53 00 : Eject Motor Lock 04 93 00 : Temperature Error 02 3A 02 : Tray open w/o Eject... - Page 18 How to Read The Error History When an error occurs, “PUSH THE RESET SWITCH” is displayed on the screen. The Service Mode can not be entered at this time. To read error code, perform the following. • Connect the PC to the unit. •...
- Page 19 Troubleshooting hint for DVD Error Code 00 XX XX: No error (X: any NO) DVD Drive Unit 04 09 04 : Laser Error 04 09 03 : Spindle Servo Error 04 93 00 : Temperature Error If any of these Error Codes appears, Replace the DVD Drive Unit 04 53 00 : Eject Motor Lock 02 3A 02 : Tray open w/o Eject Disc Cover Unit...
- Page 20 Troubleshooting hint for Camera Error Code 00 : No error 51 : Zoom Motor Lock Replace the Lens Assembly 52 : Focus Motor Lock...
- Page 21 Troubleshooting Hint If the unit displays “THE DISK IS INCOMPATIBLE” Check if flat cable on DVD Drive Unit is seated properly.
-
Page 22: Service Position
Service Position Staring at the light from the laser may cause eyesight loss. For safety, be sure to remove any power supply (AC adaptor or battery) from the DVD video Camera before beginning to work on the camera. - Page 23 How to Eject the DVD Tray Manually Remove the 6 Screws, and remove the Top Cover Unit. 2. Slide the Lock Lever to open the Disc Cover.
- Page 24 Service Position VDR-D100/200...
- Page 25 Service Position II This unit will work without DVD Drive (U). The unit will be in SD mode (EE) automatically and you can check Main CBA while monitoring LCD Monitor or AV out picture. NOTE: No other mode will be operative.
- Page 26 Auto Ground-directional Standby (AGS) (VDR-D300 only) • This function prevents unnecessary recording when you forget to pause recording and walk with the unit tilted upside down while recording continues. • If the unit continues to be tilted upside down from the normal horizontal position while recording on a disc, it is automatically set to...
- Page 27 To turn the AGS function on/off Rotate the mode dial to select . Press the MENU button, then select SETUP. Scroll down to and select press the joystick. Note: The AGS function may activate and cause the unit to pause the recording if you are recording a subject right above or right below you.
- Page 28 Update Procedure for ARM FW...
- Page 29 Update Procedure for ARM FW • Install USB Driver and Re- boot the PC. • Click "SETUP EXE" and follow the procedure. • Make sure there’s no disc inside the Camera. • Make sure the power switch is set to the “OFF” position.
- Page 30 Update Procedure for FW Press and hold "MENU" Button and the JOYSTICK to the left at the same time and then turn Power SW ON and wait for a few seconds. (ARM F/W update mode) Confirm that Power LED is on and LCD Panel is off. Note: If the LCD is still on, turn the power off and repeat steps 1 and 2.
- Page 31 Update Procedure for FW 3. Connect DVD-CAM to PC with USB cable. 4. Click "FW_UPDATE.exe". Confirm that the Port indicated is COM3 or higher. These versions are an example of file names. 6. Click "Update File Open".
- Page 32 Update Procedure for FW Select "Mpeg2Movie" and click "Open". "Mpeg2Movie" is an example of file name. It will use a name of F/W version. Confirm that "FILE DATA OK" is indicated. Click "Update Start".
- Page 33 Update Procedure for FW Confirm that "FILE DATA OK" changed to "00000000". Click "OK" after "F/W UPDATE COMPLETE!!" is indicated. This normally takes approximately five minutes.
- Page 34 Update Procedure for FW Click "END" to finish. Disconnect the USB Cable. Disconnect the DC Cord before turning the Power SW off.
- Page 35 Update Procedure for DVD Drive F/W • PC with WindowsXP • No Disc inserted in Camera • Connect to DC Cord (AC Adaptor)
- Page 36 Update Procedure for DVD Drive F/W Set the Mode Dial to "DISC PLAYBACK MODE". 2. Turns Power SW ON. If PC is requested to re-boot, 3. Connect DVD-CAM to the PC with please do it according to the USB cable. information from PC.
- Page 37 Update Procedure for DVD Drive F/W • 5. Click "DWL2WIN" (double click). • 6. Click "DownLoad" icon.
- Page 38 Update Procedure for DVD Drive F/W 7. Select "FRS35" and click "Open". "FRS35" is an example of file name. These versions are an example of file names. 8. Click "OK" after "Download complete" is indicated. It normally takes approximately one minute for downloading. 9.
- Page 39 Service Mode (Version Check) Make sure that the USB Cable is disconnected.
- Page 40 Service Mode (F/W Version Check) 1. Turn the Power SW ON. Mode Dial Wheel 2. Set the Mode Dial to "DISC PLAYBACK MODE". 3. Go into the Service Mode by Pressing and holding the "TRASH" and “RECORD" buttons and the "JOYSTCK to the LEFT"...
- Page 41 Service Mode (F/W Version Check) 4. Verify the ARM Version and Drive Version. ARM = 043B Drive = RS35 These versions are an example of file names. DRIVE...
-
Page 42: Troubleshooting
Troubleshooting... - Page 43 VDR-D100/105/200 IC/Connectors Location Foil Side...
- Page 44 VDR-D100/105/200 IC/Connectors Location Component Side...
- Page 45 VDR-D300 IC/Connectors Location...
- Page 46 VDR-D300 IC/Connectors Location...
- Page 47 VDR-D300 IC/Connectors Location...
- Page 48 VDR-D300 IC/Connectors Location...
- Page 49 System Control (VDR-D100/105/200)
- Page 50 Standby Circuit (VDR-D100/105/200) 2.8V...
- Page 51 Power Supply Components Location...
- Page 52 Power ON (VDR-D100/105/200)
- Page 53 Power ON (VDR-D100/105/200)
- Page 54 Overall Diagram (VDR-D300)
- Page 55 Camera Video 1 (VDR-D300)
- Page 56 Video Signal Process (VDR-D300)
- Page 57 Digital Signal Process (VDR-D300)
- Page 58 Audio Video Processor (VDR-D300)
- Page 59 DVC Camera DVC Camera...
-
Page 60: Service Menu
Service Menu PV-GS39 Service Menu Automatic diagnosis code will be displayed. (Service Menu) To enter the Service Menu Push the [PHOTO SHOT], [JOYSTICK CONTROL LEFT] and [RECORDING START/STOP] simultaneously for 3 seconds (with no SD Card inserted). Note: If a Tape or SD Card is inserted, the above operation will not work. To select the Item: Press the [JOYSTICK CONTROL UP/DOWN] to select item [3]. - Page 61 Service Menu To enter the Service Menu Push the PHOTO SHOT, JOYSTICK CONTROL LEFT and RECORDING START/STOP simultaneously for 3 seconds. (With no tape or SD Card inserted)
- Page 62 Service Menu Only perform items 3 in the Service Menu.
- Page 63 Service Menu Press the JOYSTICK CONTROL UP/DOWN to select item [3]. Press the JOYSTICK CONTROL RIGHT display YES/NO screen. Press the JOYSTICK CONTROL UP/DOWN to select YES. Press the JOYSTICK CONTROL CENTER.
- Page 64 Service Menu...
-
Page 65: Service Fixture And Tools
Service Fixture and Tools... -
Page 66: Disassembly Flowchart
Disassembly Flowchart... - Page 67 Disassembly Flowchart...
- Page 68 Bottom Case Unit Removal (Ref # 7) Remove Screws 3(433), - 3(537), - 2(519)
- Page 69 Top Unit Removal (Ref # 50) Remove Screws:3(433), - 1(519) Pull the Top Unit toward the front...
- Page 70 Right Side Assembly Removal Remove 3(433) Screws. Unplug the push-on connector B1. Release the lock from the “Flip-up” connector FP8.
- Page 71 Right Side Assembly Removal...
- Page 72 Removal of Battery Case Unit & Rear Unit 1) Open the Cassette Cover and remove the 2 Screws (540). 2) Disconnect the F.P.C.s from Connectors FP10 and P1001.
- Page 73 Removal of Front Case Unit 1) Remove the 3 Screws 2(433), 1(519). 2) Disconnect the Front F.P.C. from Connector FP6.
-
Page 74: Com Mode
Com Mode • Remove Tape and SD Card • Install the USB-SERIAL driver. (Execute the “Setup.exe" file in "ComMass" folder). • To enter the PC connection (COM) mode, push the PHOTO SHOT, RECORDING START/STOP JOYSTICK CONTROL UP simultaneously for 3 seconds without connecting the USB Cable... - Page 75 PC-EVR Adjustment Program Set-up Turn on the PC and install the PC- EVR Adjustment Program into the 2. Execute the "kdv2006.exe" file by double clicking to start up the PC- EVR Adjustment Program. The main 5. When the communication is complete, the menu will be displayed.
- Page 76 PC-EVR Adjustment Program Set-up When saving EEPROM data is complete, the menu will appear. To perform each adjustment, display the adjustment menu by selecting from "Camera Adjust," "Vcr Adjust," "LCD Adjust" or "EVF Adjust" and select each adjustment item. Note: The adjusted data is stored in the •...
- Page 77 Main PCB (Foil Side) PV-GS29, 36, 39, 59...
- Page 78 Overall Block Diagram PV-GS29, 36, 39, 59...
- Page 79 Overall Block Diagram PV-GS29, 36, 39, 59...
- Page 80 Overall Block Diagram PV-GS29, 36, 39, 59...
- Page 81 System Control Block PV-GS29, 36, 39, 59 CAUTION: Save the EEPROM data using PC-EVR Adjustment Program before service and adjustment in order to to avoid accidental data loss, etc.
- Page 82 STB Block PV-GS29, 36, 39, 59...
- Page 83 TP20 (+Batt.) Test Point Location...
- Page 84 Power On Block PV-GS29, 36, 39, 59...
- Page 85 TP15 (Power On (L)) Test Point Location...
- Page 86 Video Signal Process PV-GS29, 36, 39, 59...
- Page 87 Video Signal Output Test Point Location MAIN PCB (Foil Side)
- Page 88 PLAY/REC. Signal (PV-GS29, 36, 39, 59 )
- Page 89 PLAY Signal TP (PV-GS29, 36, 39, 59 ) MAIN PCB (Foil Side)
- Page 90 The End...
Need help?
Do you have a question about the VDR-D100 and is the answer not in the manual?
Questions and answers