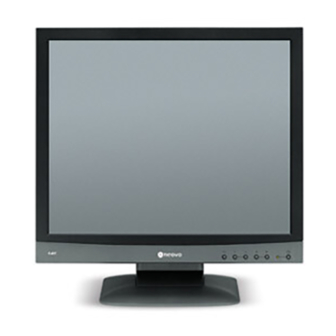
AG Neovo F-417 User Manual
Tft lcd display
Hide thumbs
Also See for F-417:
- Test report (79 pages) ,
- Manualul utilizatorului (19 pages) ,
- Specifications (2 pages)
Table of Contents
Advertisement
Advertisement
Table of Contents

Related Manuals for AG Neovo F-417


Summary of Contents for AG Neovo F-417
-
Page 2: Table Of Contents
Table of Content PRECAUTIONS ... 2 ... 2 NSTALLATION ... 2 OWER CONNECTION ... 2 SING THE ... 3 AINTENANCE RANSPORTING THE MONITOR GETTING STARTED ... 4 ... 4 ACKAGE CONTENTS NSTALLING AND EMOVING THE DENTIFYING PARTS AND CONTROLS ... 7 ETUP CUSTOMIZING YOUR MONITOR ... -
Page 3: Precautions
Installation • Do not cover or block the ventilation ports on the rear of the monitor. • Do not install the monitor close to heat sources such as radiators or air ducts, or in a location exposed to direct sunlight, excessive dust, mechanical vibration, or shock. -
Page 4: Maintenance
Maintenance • Clean the cabinet and controls with a soft cloth lightly moistened with a mild detergent solution. Do not use any abrasive materials or solvents such as alcohol or benzene. • Do not rub, touch, or tap the surface of the screen with sharp or abrasive items such as pens or screwdrivers, as the screen may scratch. -
Page 5: Getting Started
Package contents Before beginning, ensure that the carton contains the following items: • Monitor • Base • Power cord • CD-ROM containing Windows • Quick Guide Getting Started ® information file... -
Page 6: Installing And Removing The Base
Installing and Removing the Base To attach the base to the monitor, do the following: When you open the packing carton, remove the LCD monitor base, and place it on a desk or table. Then attach the LCD monitor to the base. Note: Make sure that the monitor’s base pegs and the base stand are firmly locked together. -
Page 7: Identifying Parts And Controls
Identifying parts and controls The center front panel of the monitor carries the control array. The controls are, from left to right: AUTO button Automatically adjusts the picture and performance. The AUTO function should be used the first time you use the monitor and after changing the resolution and/or refresh rate of the input signal. -
Page 8: Setup
Setup Follow these directions to correctly set up your monitor. Remove all packing materials and wrapping from the monitor Place the monitor in its desired location. Ensure that there is space around the monitor, especially the rear area. With the computer turned off, connect the signal cable to the VGA port on your PC. - Page 9 Note: The monitor is compliant with VESA FPMPMI standards and can be wall- or arm-mounted. Before wall-mounting or arm-mounting, please disassemble the monitor stand first. Unscrew screws of the hinge bracket Remove the stand from LCD monitor The rear of this LCD display has four integrated 4 mm, 0.7 pitches threaded nuts, as well as four 5 mm access holes in the plastic covering as illustrated below.
-
Page 10: Customizing Your Monitor
The On Screen Display (OSD) system provides a full range of customizable tools to optimize your display. Important: While full customization is available, we strongly recommend using the AUTO settings, which are preset to fully optimize your monitor’s performance. Simply presses the AUTO button to engage the AUTO settings. -
Page 11: Selecting A Language
OSD Transparency • This function let's you set the transparency of the OSD menu. The transparency is adjustable from 0 to 3. 4 scales are available. • Use the UP and DOWN desired. Phase & Clock • To fine tune picture performance to compensate for drifts in the computer signal, select the pertinent item from the menu. -
Page 12: Selecting A Color Temperature Setting
Selecting a Color Temperature setting The following conditions are recommended for the available settings: Setting 9300K 6500K USER Auto Color Select the desired setting from the menu. Selecting a User-Defined Color Balance Setting. You can fine-tune the red/green/blue picture settings according to your preference or specific application. -
Page 13: Troubleshooting
This LCD Monitor has pre-adjusted using factory standard VGA timings. Due to the output timing differences among various VGA cards in the market, users may initially experience an unstable or unclear display whenever a new display mode or new VGA card is selected. -
Page 14: Lcd Panel Display Technical Features And Specifications
LCD Panel Display Technical Features and Panel Screen Size Pixel Format Monitor Display Colors Frequency Input Signal Max. Pixel Clock Compatibility Analog Connector Power Tilt Tilt Angle Dimensions (W x H x D) Weight Safety Regulations VESA Power Consumption Specifications 17"... -
Page 15: Interface Frequency
Interface Frequency The following frequency range is the working period. If the entered mode between below period but not match the frequency of supported timing, display optimization not be assured. If the entered mode is out of the working period, the display will be blanking (just show “out of range”) then go to power saving. -
Page 16: Regulations
FCC compliance This device complies with Part 15 of the FCC Rules. Operation is subject to the following two conditions: (1) this device may not cause harmful interference, and (2) this device must accept any interference received, including interference that may cause undesired operation. -
Page 17: Information For Users Applicable In European Union Countries
Information for users applicable in European Union countries The symbol on the product or its packaging signifies that this product has to be disposed separately from ordinary household wastes at its end of life. Please kindly be aware that this is your responsibility to dispose electronic equipment at recycling centers so as to help conserve natural resources. -
Page 18: Tco'99
TCO'99 Congratulations! You have just purchased a TCO'99 approved and labeled product! Your choice has provided you with a product developed for professional use. Your purchase has also contributed to reducing the burden on the environment and also to the further development of environmentally adapted electronics products. - Page 19 accumulative processes. Flame retardants have been found in human blood and researchers fear that disturbances in foetus development may occur. The relevant TCO'99 demand requires that plastic components weighing more than 25 grams must not contain flame retardants with organically bound bromine or chlorine. Flame retardants are allowed in the printed circuit boards since no substitutes are available.
Need help?
Do you have a question about the F-417 and is the answer not in the manual?
Questions and answers