
Related Manuals for Petsafe laurelview dog kennel


Summary of Contents for Petsafe laurelview dog kennel
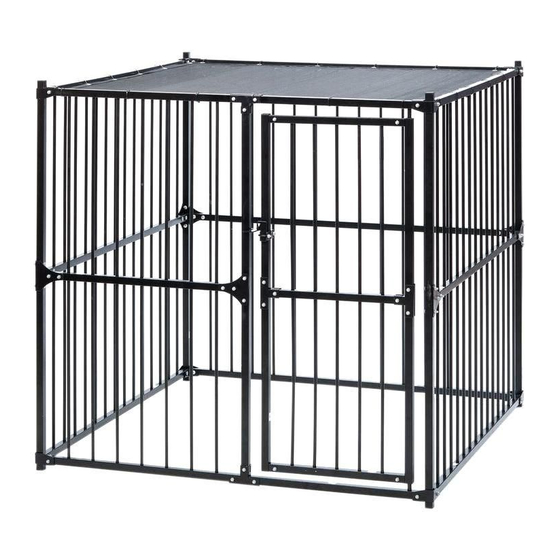
- Page 1 Model Number HBK11-13659 5'(W) x 5'(L) x 5'(H) laurelview dog kennel assembly instructions Please read tHis eNtire guide Before asseMBly...
- Page 2 • If your area is subject to heavy snow, it is recommended that you remove the SunBlock Top ™ during the winter months. Heavy snow can collapse the kennel resulting in damage and injury. • Kennel anchors are strongly recommended. PetSafe Anchor Kit sold separately. ®...
-
Page 3: Table Of Contents
— essentials that influence memories for a lifetime. If you have any questions about our products or training your pet, please visit our website at www.petsafe.net or contact our Customer Care Center at 1-800-732-2677. -
Page 4: Components
Gate Clamp Flat Brace (8 pcs.) Cable Ties Gate Latch (2 pcs.) (25 pcs.) Tools Needed • Hammer • Adjustable Wrench or 5/16 inch wrench • Pliers • Tape Measure Approximate assembly time: 40 minutes Kennel installation help: www.petsafe.net/fence 1-888-632-4453... -
Page 5: Build Up Gate
Mount the clamps, and fix the bolts. There are 10 bolts and nuts on your finished gate. Make sure all bolts toward the same direction. During installation of the gate in Steps 3-10, bolts should face the outside of the kennel. Gate Clamp www.petsafe.net... -
Page 6: Build Up Kennel
Build up the Kennel Step Gather (Quantity): • (2) Tube A • (1) Tube C • (1) Corner Clamp • (2) ” bolt and nut Make tube C stand up, and mount tube A to the bracket on tube C. Then mount the Corner Clamp. - Page 7 Mount tube D to the bracket on tube A and tube B. Then mount the Flat Brace. Do not fasten them until you complete the kennel. Some adjustment may be necessary during your work. Nuts should face outside the kennel. Flat Brace www.petsafe.net...
- Page 8 Gather (Quantity): • (1) Tube E • (1) Tube F • (1) Tube G Mount tube E to the brackets on tube C and tube D. Then mount tube F to the bracket on tube C, then insert tube G to the bracket on tube E.
- Page 9 Gather (Quantity): • (49) Fence Tube Insert all 49 Fence Tubes. Gather (Quantity): • (1) Gate, assembled in Step 1. 10. Insert the gate. Nuts should face outside the kennel. www.petsafe.net...
- Page 10 Gather (Quantity): • (1) Tube M • (3) Tube H 11. Mount tube M. Make sure each fence tube gets into the right hole. Then mount tube H. Gather (Quantity): • (4) Corner Clamp • (2) Gate Clamp • (11) ”...
-
Page 11: Install The Sunblock Top
Using the remaining cable ties, loosely attach the sides of the Sunblock to the sides of the kennel. Hand ™ tighten all cable ties equally until Sunblock Top fits snug over kennel. ™ Using wire cutters, cut off excess stems of cable ties. www.petsafe.net... -
Page 12: Getting Your Dog Comfortable In His Kennel
NOT rely solely upon the PetSafe Laurelview to contain your pet. Radio Systems ®... -
Page 13: Terms Of Use And Limitation Of Liability
Monday - Friday 8 AM - 8 PM / Saturday 9 AM – 5 PM Australia - Tel: 1800 786 608 Monday - Friday 8:30 AM - 5 PM New Zealand - Tel: 0800 543 054 Monday - Friday 10:30 AM - 7 PM www.petsafe.net... -
Page 14: Warranty
This Product has the benefit of a limited manufacturer’s warranty. Complete details of the warranty applicable to this Product and its terms can be found at www.petsafe.net. Australia/New Zealand - In compliance with the Australian Consumer Law, Warranties Against Defects, effective... - Page 15 www.petsafe.net...
- Page 16 Radio Systems Corporation ® 10427 PetSafe Way Knoxville, TN 37932 1-888-632-4453 www.petsafe.net 400-1654/1 ©Copyright 2013, Radio Systems Corpoation...
Need help?
Do you have a question about the laurelview dog kennel and is the answer not in the manual?
Questions and answers