Table of Contents
Advertisement
EDAN Agile PLM Electronic Signature Information
--Signatures related to this document and performed in EDAN Agile PLM.
文件名称:FTS-3维修手册_英文
文件编号:01.54.456401
版本:1.3
产品型号:FTS-3
项目编码:2213A000
签批信息:
作者 : 欧阳 飞燕 (ouyangfeiyan)
2016-10-31 10:22:16
审核人 : 刘 小倩 (liuxiaoqian)
2016-11-01 16:30:18
审核人 : 罗 崇 (luochong)
2016-11-02 13:16:33
批准人 : 王 力维 (wangliwei)
2016-11-08 15:49:36
批准人 : 冀 伟 (jiwei)
2016-11-04 09:34:50
版权©深圳市理邦精密仪器股份有限公司
Advertisement
Table of Contents

Related Manuals for EDAN FTS-3


Summary of Contents for EDAN FTS-3
- Page 1 EDAN Agile PLM Electronic Signature Information --Signatures related to this document and performed in EDAN Agile PLM. 文件名称:FTS-3维修手册_英文 文件编号:01.54.456401 版本:1.3 产品型号:FTS-3 项目编码:2213A000 签批信息: 作者 : 欧阳 飞燕 (ouyangfeiyan) 2016-10-31 10:22:16 审核人 : 刘 小倩 (liuxiaoqian) 2016-11-01 16:30:18 审核人 : 罗 崇 (luochong) 2016-11-02 13:16:33 批准人...
- Page 3 Edan Instruments, Inc. (hereinafter called EDAN) can not be held liable. EDAN owns the copyrights of this manual. Without prior written consent of EDAN, any materials contained in this manual shall not be photocopied, reproduced or translated into other languages.
- Page 4 injury or death. CAUTION A CAUTION label advises against actions or situations that could damage equipment, produce inaccurate data, or invalidate a procedure. NOTE A NOTE provides useful information regarding a function or a procedure.
-
Page 5: Table Of Contents
3.4.1 Installing the Base Station on a Flat Surface ..............9 3.4.2 Mounting the Base Station on a Wall ................9 3.4.3 Installing FTS-3 on a Roll Stand/Trolley ..............11 3.5 Connecting Power Cable ..................... 12 Chapter 4 Functional Checks ..................... 13 Chapter 5 System Configuration .................... - Page 6 10.1 Tools Required ........................28 10.2 Blown Fuses ........................28 10.3 Disassembling the Base Station ..................29 10.4 Disassembling the Upper assembly ................... 33 10.4.1 Replacing the Charging Interface Board ..............33 10.4.2 Replacing the Indicative Light Board ................. 34 10.5 Disassembling the Lower assembly ..................
-
Page 7: Chapter 1 Warranty And Service
Limitation of Warranty Direct, indirect or final damage and delay caused by the following situations for which EDAN is not responsible may void the warranty: Groupware is dismounted, stretched or redebugged. - Page 8 After receiving the RMA form from the service department, the customer sends defective parts to EDAN in advance. We will analyze the problems and discuss with the customer about either repairing or replacing the part(s). Once the maintenance fee is invoiced and paid, we will make sure to dispatch good part(s) to the confirmed address.
- Page 9 FTS-3 Fetal Telemetry System Service Manual Warranty and Service do not hesitate to contact us. EDAN Instruments, Inc. TEL: +86-755-26898321, 26899221 FAX: +86-755-26882223, 26898330 E-mail: support@edan.com.cn - 3 -...
-
Page 10: Chapter 2 Overview
WARNING When performing a service procedure, follow the instructions exactly as presented in this manual. Failure to do so might damage FTS-3, invalidate the product warranty or lead to serious personal injury. 2.2 General Information FTS-3 fetal telemetry system (hereinafter called FTS-3) is designed to comply with the international safety requirements IEC/EN 60601-1 for medical electrical equipment. - Page 11 They should be familiar with the contents of this user manual before operation. 2 FTS-3 is not intended for use in intensive care units (ICU), operating rooms or for home use. 3 Do not switch on the base station until all cables have been properly connected and verified.
- Page 12 16 Only connect accessories supplied or recommended by the manufacturer to the device. 17 Do not apply FTS-3 during electro-surgery or MRI; otherwise it might result in harming the patient or the operator. 18 Electromagnetic Interference - Ensure that the environment in which the monitor or FTS-3 is installed is not subject to any source of strong electromagnetic interference, such as CT, radio transmitters, mobile phone base stations, etc.
-
Page 13: Definitions And Symbols
11 The recommended charging temperature for the battery is between 0° C ~ +40° . Please do not exceed the temperature range. 12 Batteries have life cycles. If the time that FTS-3 using battery becomes much shorter than usual, the battery life is at an end. Please contact the manufacturer to replace the battery with a new one of the same specification as the one provided or recommended by the manufacturer. -
Page 14: Chapter 3 Installation
Continuous running equipment NOTE: 1. Ensure FTS-3 is not subject to any source of strong electromagnetic interference, such as CT, radio transmitters, mobile phones base stations, etc. 2. Do not install FTS-3 in a flammable atmosphere where concentrations of flammable... -
Page 15: Electrical Requirements
3.4.1 Installing the Base Station on a Flat Surface Place FTS-3 on a flat surface. Make sure the surface does not vibrate, and is free of corrosive medicine and dust. Keep it distant from the metal or shielded material and devices with strong radiation. - Page 16 FTS-3 Fetal Telemetry System Service Manual Installation FTS-3 can be used with F3 wall mounting component (02.04.118143) which you can order. Base station and transducer F3 wall mounting component Figure 2- 1 2. Order a outer wall mounting board (01.52.107983), a wall mounting board (01.52.01983) and a connecting board (01.52.107984).
-
Page 17: Installing Fts-3 On A Roll Stand/Trolley
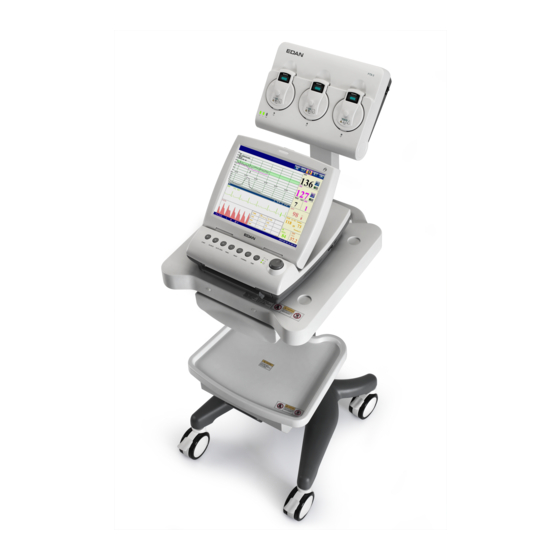
M3*20 pan head cap screw Press riveting SUS304hook Figure 2- 3 3.4.3 Installing FTS-3 on a Roll Stand/Trolley FTS-3 can also be used with MT-803. 1. Stick the Velcro fixing tape on the bottom of the base station. Figure 2- 4... -
Page 18: Connecting Power Cable
2. Fix the base station on the middle tray and ensure that it will not fall off when crossing the steps. Figure 2- 5 FTS-3 on a Trolley (Sketch Map) 3.5 Connecting Power Cable Make sure the AC power supply of the system complies with the following specification: 100V-240V~, 50Hz/60Hz. -
Page 19: Chapter 4 Functional Checks
FTS-3 Fetal Telemetry System Service Manual Functional Checks Chapter 4 Functional Checks This section describes the procedure of a complete functional test to support recommended preventive-maintenance schedules. You are not required to open the device case for functional checks. WARNING Only qualified service personnel should perform a full functional check procedure. -
Page 20: Chapter 5 System Configuration
Chapter 5 System Configuration The end users can not change the system configurations. As a service engineer, you need to change these configurations for them after FTS-3 is installed and checked properly. NOTE: Restart the base station after changing the settings. -
Page 21: Chapter 6 Maintenance
If any damage is detected, replace the damage part(s) or contact EDAN immediately. (2) Routine Inspection The overall check of FTS-3, including the safety check and functional check, should be performed by qualified personnel every 6 to 12 months, and each time after service. -
Page 22: Maintenance Of The Base Station
FTS-3 Fetal Telemetry System Service Manual Maintenance (3) Mechanical Inspection Make sure all exposed screws are tightly fixed. Check the external cables for splits, cracks or signs of twisting. Pay particular attention to the supply socket. Replace any cable that shows serious damage. -
Page 23: Chapter 7 Principle Introduction
Chapter 7 Principle Introduction 7.1 System Principle Block Diagram FTS-3 system consists of two US-T transducers, one TOCO-T or TOCO-E transducer and one base station. Place the transducers back into the docking slot for charging when they are not in use. - Page 24 FTS-3 Fetal Telemetry System Service Manual Principle Introduction Power +5V、+12V Control MCU: STM32F103VDT6 Work frequency: 64MHz RAM: 64K byte Flash: 384K byte Processor RF MCU: STM32L152RBT6 Work frequency: 20MHz RAM: 16K byte Flash: 128K byte Serial Port 5serial ports 1 standard USB HOST interface Watchdog Timer 1.6s...
-
Page 25: Indicative Light Board
FTS-3 Fetal Telemetry System Service Manual Principle Introduction 7.1.2 Indicative Light Board Indicative light board controls power light, AC light, battery charge light and transducer working status. Meanwhile, the board is in charge of transforming +12V into +5.5V for charging the transducer. -
Page 26: Charge Interface Board
FTS-3 Fetal Telemetry System Service Manual Principle Introduction (2) Indicative light ports to power module Pin No. Symbol DC12V CHARGE_LED POWER_UP POWER_RXD Figure 7- 4 (3) Indicative light board ports to charge interface board Pin No. Symbol 1,2,3,4 VCC 5,6,7,8 GND... -
Page 27: Power Module
FTS-3 Fetal Telemetry System Service Manual Principle Introduction Charge interface board ports to indicative light board Pin No. Symbol 1,2,3,4 VCC 5,6,7,8 GND 9,10 TRANS1_TX 11,12 TRANS1_RX 13,14 TRANS2_TX 15,16 TRANS2_RX 17,18 TRANS3_TX 19,20 TRANS3_RX Figure 7- 6 7.1.4 Power module Power module outputs +12V and +5V and is responsible for charging management. -
Page 28: Interface And Key
At the back of the base station, there is an interface and two keys. DB15 interface – Working channel key 7.2.1 DB15 Interface All the base stations are provided with DB15 interfaces. You can connect FTS-3 to F6/F9 series fetal/maternal monitor via DB15 interface. - 22 -... -
Page 29: Working Channel Key
FTS-3 Fetal Telemetry System Service Manual Principle Introduction Pin No. Symbol US1 Signal ECG_TXD ECG_RXD US2 Signal Figure 7- 8 EN Signal 7.2.2 Working Channel Key All the base stations are provided with working channel keys. You can adjust the working channel though the two keys. -
Page 30: Chapter 8 Troubleshooting
It can also help you to have more exact descriptions of the fault symptoms when calling for service. EDAN supports replacement of PCBs and major subassemblies for this product. Verify the malfunction of the PCBAs/Modules prior to disassembling with the method described in chapter 9 Modules’... -
Page 31: Chapter 9 Modules' Malfunction Verification
FTS-3 Fetal Telemetry System Service Manual Modules’ Malfunction Verification Chapter 9 Modules’ Malfunction Verification When a module is suspected of malfunction, verify it with the method described in this chapter. NOTE: For all the interfaces, the first pin is the one with a square solder pad. -
Page 32: Verifying Malfunction Of The Power Module
FTS-3 Fetal Telemetry System Service Manual Modules’ Malfunction Verification 4) Compare the measurement results with the reference results in the list. If any one of the results exceeds the reference range, the main board defection is confirmed. Replacement of the main board is recommended. -
Page 33: Verifying Malfunction Of The Indicative Light Board
FTS-3 Fetal Telemetry System Service Manual Modules’ Malfunction Verification 9.3 Verifying Malfunction of the Indicative Light Board To verify the indicative light board, 1) Open the base station using the procedures described in section 10.3. 2) Measure the voltage to earth of the following pin on the bottom interface board, using a multimeter. -
Page 34: Chapter 10 Disassembling Fts-3
FTS-3 Fetal Telemetry System Service Manual Disassembling FTS-3 Chapter 10 Disassembling FTS-3 WARNING 1 Only qualified service personnel should open the base station. 2 Switch off the base station and remove the AC power cable before disassembling the base station. -
Page 35: Disassembling The Base Station
FTS-3 Fetal Telemetry System Service Manual Disassembling FTS-3 Figure 10- 2 3) Use a screw driver or a pair of pliers to push the fuse up from the bottom of the container. Figure 10- 3 4) Take the fuse out and replace it with a new one that is supplied by the manufacturer or of the same specifications. - Page 36 Figure 10- 4 Perform the following steps to disassembly the base station: (1) Place FTS-3 upside down on a flat surface covered with cloth or another type of protecting pad. (2) Remove the screws of the battery compartment using a cross-head screw driver.
- Page 37 FTS-3 Fetal Telemetry System Service Manual Disassembling FTS-3 Figure 10- 6 (4) Remove the six screws with a cross-head screw driver. Figure 10- 7 (5) Hold and turn over the upper and lower assembly with the bottom of base station downwards.
- Page 38 FTS-3 Fetal Telemetry System Service Manual Disassembling FTS-3 Figure 10- 8 No. Part Upper Assembly Power connecting line to indicative light board Lower Assembly Main board connecting line to indicative light board (7) Disconnect the cables/wires to separate the two parts.
-
Page 39: Disassembling The Upper Assembly
FTS-3 Fetal Telemetry System Service Manual Disassembling FTS-3 10.4 Disassembling the Upper assembly 10.4.1 Replacing the Charging Interface Board To remove the charging interface board, (1) Separate the upper assembly and the lower assembly. (2) Turn on the connector swich with both index fingertips and remove the adhesive tape. -
Page 40: Replacing The Indicative Light Board
FTS-3 Fetal Telemetry System Service Manual Disassembling FTS-3 10.4.2 Replacing the Indicative Light Board To remove the indicative light board, (1) Separate the upper assembly and the lower assembly. (2) Turn on the connector swich with both index fingertips and remove the adhesive tape. - Page 41 FTS-3 Fetal Telemetry System Service Manual Disassembling FTS-3 Figure 10- 12 (3) Disconnect all the wires. (4) Remove four screws securing the power module. To install the power module, Install the power module, in a reverse procedure. Refer to the following illustration when connecting the wires.
-
Page 42: Replacing The Main Board
FTS-3 Fetal Telemetry System Service Manual Disassembling FTS-3 No. Connect to AC Power Interface Power Switch Indicative Light Board Base Station Battery Interface 10.5.2 Replacing the Main Board To remove the main board, (1) Separate the upper assembly and the lower assembly. -
Page 43: Replacing The Fan
FTS-3 Fetal Telemetry System Service Manual Disassembling FTS-3 Figure 10- 15 Connect to Indicative Light Board 10.5.3 Replacing the Fan To remove the fan, 1) Separate the upper assembly and the lower assembly. 2) Unplug the fan wires connector from the power cable bundle. -
Page 44: Chapter 11 Periodic Tests
11.2.1 FHR Performance Test This test checks the FHR performance. Required Equipment: Ultrasonic Doppler FHR Accuracy Tester System Connect the equipment, monitor and FTS-3 as shown below: F9 series Monitor Ultrasonic Doppler FHR Accuracy Tester Base Station... -
Page 45: Toco Performance Test
1) Connect the monitor and the FTS-3 base station as shown in figure 11-1. 2) Switch on the monitor and the FTS-3 system. Take one US transducer and apply some coupling gel on it. Place the vibrate transducer of the simulator on the US transducer, as shown below. -
Page 46: Ecg Performance Test
If a TOCO-T or TOCO-E transducer fails the test, repeat this test with another transducer. If the second one passes the test, defect of the first transducer is confirmed. Replace it with a good one. If the second transducer fails the test as well, check the monitor and FTS-3 system. 11.2.3 ECG Performance Test This test checks the MHR performance of the TOCO-E transducer. -
Page 47: Decg Performance Test
This test checks the DECG performance of the TOCO-E transducer. Required equipment: FLUKE PS320 simulator. 1) Connect the FTS-3 base station to the monitor and switch on them. Take the TOCO-E transducer from the base station and the transducer will switvh on. -
Page 48: Appendix 1 Renewal Parts
FTS-3 Fetal Telemetry System Service Manual Renewal Parts Appendix 1 Renewal Parts CAUTION Only connect the renewal parts supplied by EDAN to FTS-3. Part Number US-T Wireless Transducer (European Standard) 02.01.210821 TOCO-T Wireless Transducer (European Standard) 02.01.210823 TOCO-E Transducer (European Standard) 02.01.211642...
Need help?
Do you have a question about the FTS-3 and is the answer not in the manual?
Questions and answers